Maybe something different 2018 unlimited Kalahari addition

ZONE ZERO

Active member
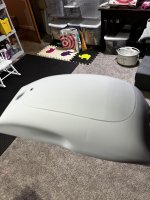
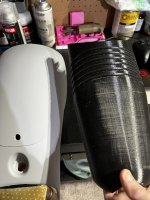
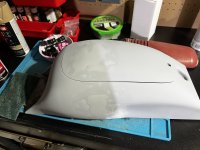
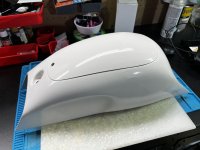
Well I’m not dead yet still making progress after some failed attempts these are damn close to being ready one is with a place for a factory jk wiper motor the other is with out , both would have factory type glass with defroster.
‘I’m open to suggestions the goal is factory look and quality and ease of installation .
 

Attachments

  • IMG_3554.jpeg
    IMG_3554.jpeg
    2 MB · Views: 9
  • IMG_3553.jpeg
    IMG_3553.jpeg
    1.8 MB · Views: 9
  • IMG_3552.jpeg
    IMG_3552.jpeg
    2.2 MB · Views: 8
  • IMG_3551.jpeg
    IMG_3551.jpeg
    2.4 MB · Views: 9

ZONE ZERO

Active member
Well it’s been about a year since I’ve posted up, but I have a bunch of progress on a few projects.
The jeeps going in tomorrow for 4.88s and a rear locker. They are also going to look at the feasibility of removing the factory cage and moving everything up and out of the way to give the interior more room.

The rear hatch is finished and on the jeep I need to do some minor tweaks and find some better gasket material for the window but it’s water tight, quiet and the best part, it’s completely 3d printed out of ABS/carbon fiber with M5 brass inserts to attach the brackets to the tailgate .
I finished it with high build primer and 3 light coats of bedliner. The brackets are just aluminum flat stock and L channel I’ll need to clean them up and finalize that part and add nutserts to the tail gate.

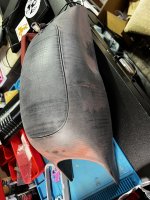
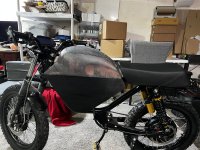
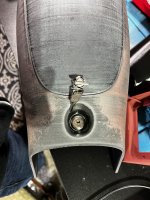
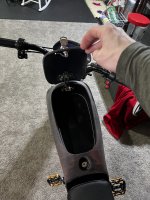
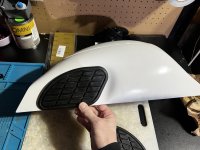
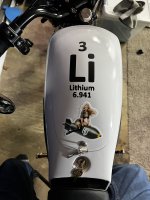
I also spent most of last winter working on an E-bike with a custom 3d printed “‘tank” aka storage compartment front fender and a charging cover that al magnetically attack to the frame.
 

Attachments

  • IMG_8527.jpeg
    IMG_8527.jpeg
    2.8 MB · Views: 17
  • IMG_8528.jpeg
    IMG_8528.jpeg
    2.3 MB · Views: 15
  • IMG_8530.jpeg
    IMG_8530.jpeg
    1.9 MB · Views: 14
  • IMG_8523.jpeg
    IMG_8523.jpeg
    1.4 MB · Views: 14
  • IMG_8520.jpeg
    IMG_8520.jpeg
    1.4 MB · Views: 15

ZONE ZERO

Active member
I had a lot of trouble with the T channel around the corners. and the window bond needs to be cleaned off the glass. If anyone knows a good way to get the T-channel to lay flat on a bend I’d appreciate the insight.
 

Attachments

  • IMG_8515.jpeg
    IMG_8515.jpeg
    3 MB · Views: 8
  • IMG_8428.jpeg
    IMG_8428.jpeg
    3.2 MB · Views: 9
  • IMG_8427.jpeg
    IMG_8427.jpeg
    2.9 MB · Views: 8
  • IMG_8420.jpeg
    IMG_8420.jpeg
    4.9 MB · Views: 8
  • IMG_8413.jpeg
    IMG_8413.jpeg
    2.8 MB · Views: 8
  • IMG_8099.jpeg
    IMG_8099.jpeg
    1.9 MB · Views: 8
  • IMG_8100.jpeg
    IMG_8100.jpeg
    2.2 MB · Views: 8

ZONE ZERO

Active member
This last part is the E-BIKE build. the big reason for this was I can’t pedal a bike anymore or for that matter go hiking due to an injury, so this gives me the opportunity to get out and enjoy myself with out having to deal with a motorcycle or dirt bike. I modled the tank/cubby after old British Nortan and triumph bikes.
 

Attachments

  • IMG_5673.jpeg
    IMG_5673.jpeg
    2.2 MB · Views: 6
  • IMG_5679.jpeg
    IMG_5679.jpeg
    2.2 MB · Views: 6
  • IMG_5674.jpeg
    IMG_5674.jpeg
    2.3 MB · Views: 6
  • IMG_5682.jpeg
    IMG_5682.jpeg
    1.9 MB · Views: 6
  • IMG_5775.jpeg
    IMG_5775.jpeg
    2.4 MB · Views: 6
  • IMG_5777.jpeg
    IMG_5777.jpeg
    1.8 MB · Views: 6
  • IMG_5821.jpeg
    IMG_5821.jpeg
    1.9 MB · Views: 6
  • IMG_5824.jpeg
    IMG_5824.jpeg
    1.3 MB · Views: 6
  • IMG_5951.jpeg
    IMG_5951.jpeg
    3 MB · Views: 6
  • IMG_6774.jpeg
    IMG_6774.jpeg
    1.8 MB · Views: 6

ZONE ZERO

Active member
Finished bike
 

Attachments

  • IMG_8191.jpeg
    IMG_8191.jpeg
    2.6 MB · Views: 7
  • IMG_8175.jpeg
    IMG_8175.jpeg
    3 MB · Views: 7
  • IMG_6556.jpeg
    IMG_6556.jpeg
    2.3 MB · Views: 6
  • IMG_6806.jpeg
    IMG_6806.jpeg
    2.5 MB · Views: 7

ZONE ZERO

Active member
This might interest some of you too , this box is meant for a Jeep JL but was easily modified to work on my hard top with some flat stock aluminum, 4 bolts and a drill bit. The empty weight is around 40lbs it has a removable table attached to the face, and when the doors opened and down it acts as a second table it’s also lockable.
the only thing I would recommend doing is adding better door gasket to the box I found during a rain storm on the highway water found it’s way inside .
 

Attachments

  • IMG_8185.jpeg
    IMG_8185.jpeg
    1.9 MB · Views: 15
  • IMG_8186.jpeg
    IMG_8186.jpeg
    1.9 MB · Views: 16
  • IMG_7742.jpeg
    IMG_7742.jpeg
    3.4 MB · Views: 17
  • IMG_7696.jpeg
    IMG_7696.jpeg
    3 MB · Views: 18
  • IMG_7695.jpeg
    IMG_7695.jpeg
    2.1 MB · Views: 16
  • IMG_7694.jpeg
    IMG_7694.jpeg
    1.9 MB · Views: 15
  • IMG_7693.jpeg
    IMG_7693.jpeg
    2.7 MB · Views: 16

ZONE ZERO

Active member
I LOVE that rear barn door. If I could, that would be the only upgrade I would make to my Africa Jeep.

Great work!

-Dan
Thanks, it means a lot .
teaching myself fusion 360 and using poly cam was a huge undertaking.

so all in not considering my time.
the hatch cost around $ 8.50 to print
total cost was just about $145.00 because for the tinted window.

i need to find someone with a factory JK and JL so I can scan and make hatches for those models Too.
 

jscherb

Expedition Leader
i need to find someone with a factory JK and JL so I can scan and make hatches for those models Too.

One thing to be aware of when doing a barn door for the JL and the later model JK hardtops - the factory liftgate/opening is wider than the tailgate.

On the Smittybilt top and the early JK hardtops, the liftgate is the same width as the tailgate so there are no real complications in making a barn door for those models.

On the later JKs and JLs, because the hatch is wider than the tailgate, part of the hatch is outboard of the tailgate hinge pin. What this means is that the part that's outboard of the hinge pin swings inward as the tailgate swings outward, the result of which is that the combined tailgate/barn door upper won't open with the factory hinges.

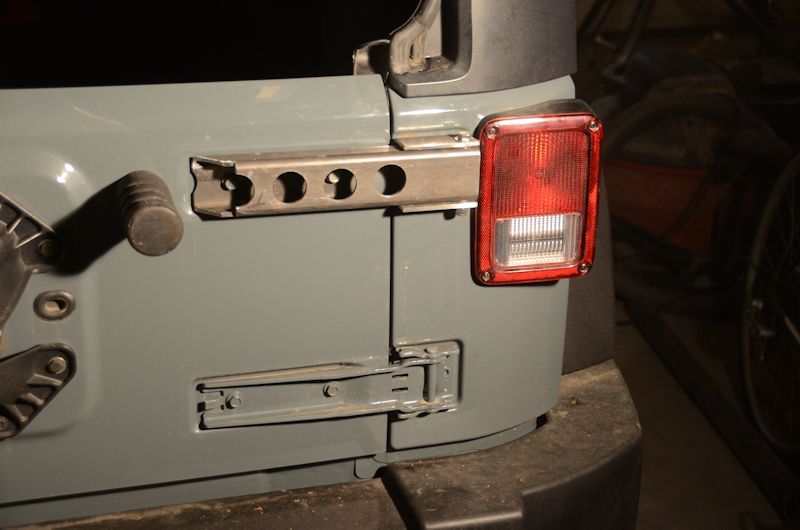
The molds I made for my barn door are capable of making early JK or wider late JK barn doors and for the later model barn doors I designed "wide swing" hinges that place the hinge pin at the far end of the liftgate opening. In this photo, the upper hinge is a wide swing hinge, the lower is factory, you can see the different location of the hinge pin in the upper hinge:

TomHinges2_zps8b97c6ca.jpg


The photo above was taken to illustrate the difference between the factory and the wide swing hinges; the tailgate won't function properly with hinges with two different hinge pin locations - both hinges need to be the same ;).

The JK wide swing hinges are a fairly simple variation of the HD JK hinges I designed for MORryde, so if there was ever a need to make wide swing hinges available probably MORryde could be convinced to manufacture them.

On the JL, wide swing hinges are a little more complicated because the tail light housing is where the hinge pin would need to be, so the JL would required a more complex hinge design to place the hinge pin in the proper location.

Though you might want to know this before going to the trouble of designing barn doors for the later models :)

I LOVE that rear barn door. If I could, that would be the only upgrade I would make to my Africa Jeep.

Great work!

-Dan
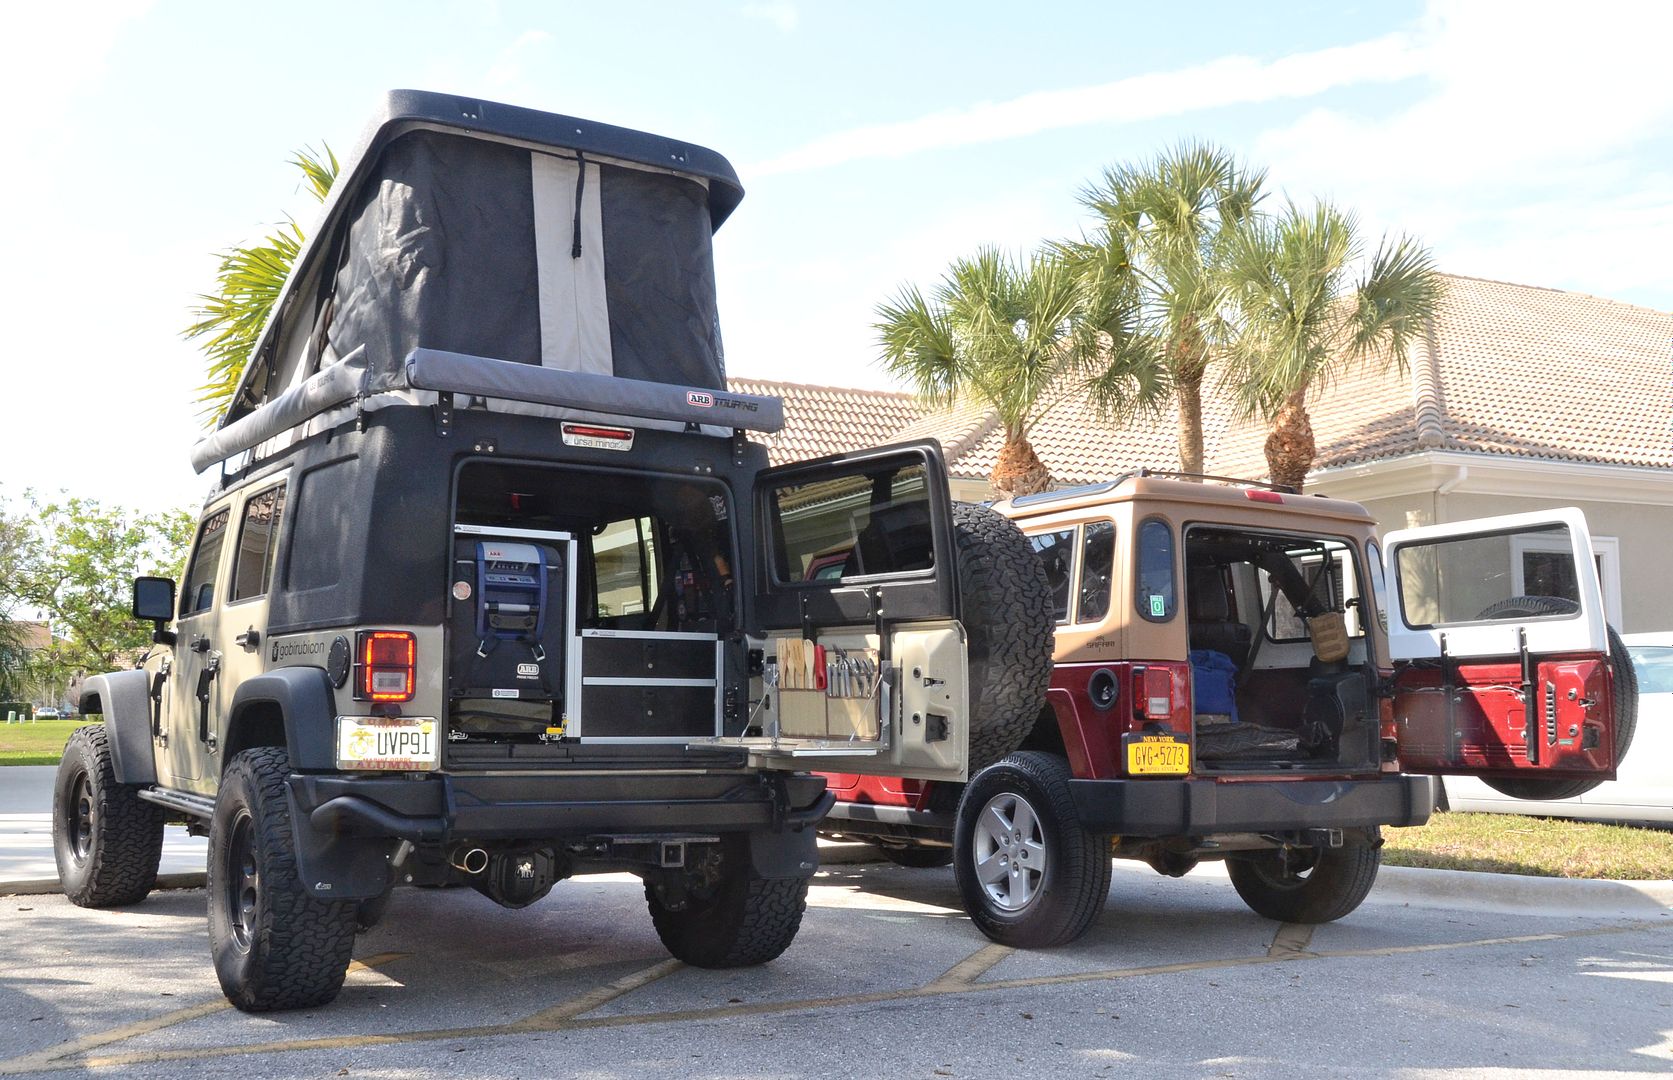
The good news is that the Ursa Minor JK top uses the early model narrow liftgate, so the factory hinges woth fine with a barn door on that top.

DonnyFinal1_zpsjablnjkj.jpg


ZONE ZERO

Active member
One thing to be aware of when doing a barn door for the JL and the later model JK hardtops - the factory liftgate/opening is wider than the tailgate.

On the Smittybilt top and the early JK hardtops, the liftgate is the same width as the tailgate so there are no real complications in making a barn door for those models.

On the later JKs and JLs, because the hatch is wider than the tailgate, part of the hatch is outboard of the tailgate hinge pin. What this means is that the part that's outboard of the hinge pin swings inward as the tailgate swings outward, the result of which is that the combined tailgate/barn door upper won't open with the factory hinges.

The molds I made for my barn door are capable of making early JK or wider late JK barn doors and for the later model barn doors I designed "wide swing" hinges that place the hinge pin at the far end of the liftgate opening. In this photo, the upper hinge is a wide swing hinge, the lower is factory, you can see the different location of the hinge pin in the upper hinge:

TomHinges2_zps8b97c6ca.jpg


The photo above was taken to illustrate the difference between the factory and the wide swing hinges; the tailgate won't function properly with hinges with two different hinge pin locations - both hinges need to be the same ;).

The JK wide swing hinges are a fairly simple variation of the HD JK hinges I designed for MORryde, so if there was ever a need to make wide swing hinges available probably MORryde could be convinced to manufacture them.

On the JL, wide swing hinges are a little more complicated because the tail light housing is where the hinge pin would need to be, so the JL would required a more complex hinge design to place the hinge pin in the proper location.

Though you might want to know this before going to the trouble of designing barn doors for the later models :)


The good news is that the Ursa Minor JK top uses the early model narrow liftgate, so the factory hinges woth fine with a barn door on that top.

DonnyFinal1_zpsjablnjkj.jpg


I remember that from talking to you and doing some measurements at the dealership, I actually have your hinges on my tailgate and love them. They should have come from jeep like that in the first place.

you can do some pretty wild things with additive manufacturing you just can’t accomplish in other ways.
I’m working on some other projects, but i agree the simplest way around the problem is changing the hinges.

next up is a full rear door, to match a hard top we’re working on .
my wife and I get stoped a lot by people asking about the Jeep or even what is it, where did it come from.

I’ll be the first to admit if I had gone with my original plan and made this out of fiberglass or even sheet metal I would have been done in a few weeks.
I modified, destroyed, reprinted probably 10-15 different designs, then realized “keep it simple” make it work and install easy and not look like it came from Amazon and I might be on to something.

Part of that was trying to get the biggest piece of glass I could to fit without taking away from the strength and shape .


these pictures were after a 3 day print, only To find out it did not seal around the opening of the hardtop
but we came up with a system to attach the pieces together like LEGOs then melt them in place so it essentially become one sold part.
 

Attachments

  • IMG_4987.jpeg
    IMG_4987.jpeg
    1.4 MB · Views: 11
  • IMG_4986.jpeg
    IMG_4986.jpeg
    995.2 KB · Views: 11

ZONE ZERO

Active member
Added some aux beam amber lights where the old hinges were attached they work well not sure how they will be for camp lights hopefully I’ll get 1 or 2 more trips in before snow flies
 

Attachments

  • IMG_8883.jpeg
    IMG_8883.jpeg
    718.2 KB · Views: 3
  • IMG_8893.jpeg
    IMG_8893.jpeg
    759 KB · Views: 1
  • IMG_8892.jpeg
    IMG_8892.jpeg
    991.7 KB · Views: 1

ZONE ZERO

Active member
oh one more thing does anyone know where to get quality replacement LED lights for an arb bumper this. Is the 3d set in less than 3 years that have completely rotted out
 

Attachments

  • IMG_8884.jpeg
    IMG_8884.jpeg
    2 MB · Views: 6
  • IMG_8886.jpeg
    IMG_8886.jpeg
    2 MB · Views: 6
  • IMG_8887.jpeg
    IMG_8887.jpeg
    2.3 MB · Views: 5

Forum statistics

Threads
188,176
Messages
2,903,366
Members
229,665
Latest member
SANelson
Top