Mercedes 1222A.. The beginning!

Geo.Lander

Well-known member
I've been in WA for over a year but don't actually plan to buy/build the truck in Oz, especially since the government is being stingy about visa extensions these days I assume due to COVID (everyone I know who applied for another year only got 3 months). So I'll go to Germany in a few months where there are a lot more options. The one I was looking at is here: https://suchen.mobile.de/fahrzeuge/details.html?id=310135078 Good looking truck. I had a German friend ask about the axle ratios for me but they never replied. If it has at least medium axle ratios I would seriously consider just shelling out the extra cash to fix the gearbox.

Looks like a really nice truck, pity about the 2nd gear. Do you know exactly which gearbox it has? Because on my truck the 1st is only used for heavy loads on very steep terrain.. I am always taking off in 2nd anyway. I have the G4/65 box btw..

My only advice is find out exactly which box it has and seek advice here and LN2 forum. But you of course already knew that. By they way the truck has been looked after I really not not worry about the KMs but ask for a tach readout and also a readout on the water pump hours...
 

palebluewanders

Active member
No idea about the gearbox. I would ask but they haven't even replied about the axle ratios, pshhh. Maybe I'll ask a German friend to call them this week.

Yeah I guess there must be many reports from people who've replaced gears! I'll have a look around.
 

Sitec

Adventurer
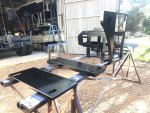
So, with all this time off and the weather on my side, I've managed to finish, sand, prime and paint half of the side skirt panels. Hot tip for anyone building their own truck like I am... Finish and prime each job! It's a pain in the ******** having to clean up and finish stuff that should have been done when I was fabricating it! :)

Re Assembly 2.jpg

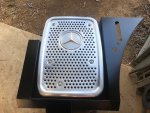
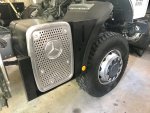
With the muffler painted and the cover polished it too looks a lot better!

Re Assembly 3.jpg
 

Sitec

Adventurer
With all this freshly painted stuff dry this morning, the only logical thing to do was to bolt it all on!! First up was the gas locker and panel work.

Re Assembly 4.jpg

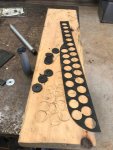
These panels are all held on by M8 bolts. To allow the panels to move under chassis twist, I am adding some thick rubber washers to each bolt. Here's the home made punch that makes them!

Rubber Washer MFR.jpg

And here they are in place.

Re Assembly 5.jpg
 

Sitec

Adventurer
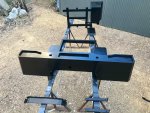
Another day of prep and paint had the tank cradle and rear bumper painted.

Re Assembly 7.jpg

And then refitted using the tractor...

Re Assembly 8.jpg

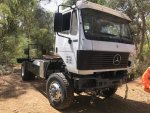
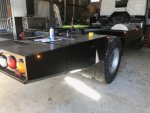
Here's how the truck looks as of this afternoon.

Re Assembly 10.jpg

Next job this week is to devise a way to secure 3 Jerry Cans into each rear lower locker. Once done, these can be primed, painted and refitted, which will complete the side skirts. I can then fit and wire all the rear and side lights, and the cab chassis can be driven to the paintshop. :)
 

Geo.Lander

Well-known member
Another day of prep and paint had the tank cradle and rear bumper painted.

View attachment 634828

And then refitted using the tractor...

View attachment 634829

Here's how the truck looks as of this afternoon.

View attachment 634830

Next job this week is to devise a way to secure 3 Jerry Cans into each rear lower locker. Once done, these can be primed, painted and refitted, which will complete the side skirts. I can then fit and wire all the rear and side lights, and the cab chassis can be driven to the paintshop. :)

Looking really nice! I really envy your climate, it is -14 here at the moment so the work we can do here without a heated garage is pretty limited.

Do you know if this later grill will fit an earlier 1120? The font of your drivers cab does look very different from ours, really like the look of that grill!
 

VerMonsterRV

Gotta Be Nuts
Looking really nice! I really envy your climate, it is -14 here at the moment so the work we can do here without a heated garage is pretty limited.

Do you know if this later grill will fit an earlier 1120? The font of your drivers cab does look very different from ours, really like the look of that grill!
I doubt it, Sitec's cab is wider than ours. The LN2's had a smaller cab than the other trucks.
 

Sitec

Adventurer
Our climate has its positives... but it also has its negatives... So far we are very lucky in that we are having a mild summer. Today has a very pleasant high of 26 deg. This time last year we were suffering with temps between 45 and 50 deg. You can't do anything in that heat!

Re the front grill, the cabs are different so I'm doubting they're interchangable...
 

Sitec

Adventurer
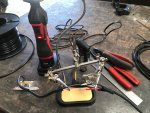
Having a very hot weekend did indeed stop the top coat being applied to the underslung lockers that sit behind the rear wheels. This however worked out in my favour, as it meant I could still easily access the inside of the rear bumper for wiring the lights. I had salvaged the rear lights from the coach body before stripping it, so those and the number plate lights have had a good clean and are looking like new. First up was to solder new wires to the lights with enough length to reach an internal junction box in the bumper. If anyone else is considering doing all their own wiring, I can recommend two pieces of kit... First is a cordless soldering iron (I went with the Milwaukee as I have everything else in red!). The second is a simple cable holding tool, which makes soldering soooo much easier!! Here's one of the many soldered joints using the magic tool!

Re Assembly 11.jpg

Here's one side of the bumper with the salvaged tail lights in their new home. I have a matching reverse light on order, and once it arrives, I'll be able to complete the rear bumper. :)

Re Assembly 12.jpg
 

Iain_U1250

Explorer
I also have the Milwaukee soldering iron, its great. I decided not to solder any connections on my truck, but to use crimp connectors, main reason is that a solder joint is rigid, and fatigue sets in at the end of the copper/solder part. I learnt this about 25 years ago from a very experience technician, he built a lot of MilSpec equipment, and used the proper Milspec connections, which are always floating, not rigid, and crimped not soldered. Car manufacturers don't solder their connections either from what I have seen.
 

joeblack5

Active member
For that kind solder connection it is better to twist the wires inline together. Then solder. It will be much stronger.
Also if you offsett the two connection then the insulation on the each joint is not at the same location . That makes the overall connection smaller in diameter, or better not much bigger then the original wire.
So it is easier to pull thru holes.
With offsetting the joint implies that one wire is shorter and the connecting one longer.. it is easy to slide shrink tube on the longer wire, then twist together, then solder and slide the shrink tube over the joint.

Anyhow, small stuff, ...with all the prep and paint it starts to look fancy.
 

Sitec

Adventurer
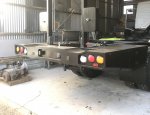
Hi all. More progress over the last week. I have all the rear lights etc fitted and now wired. The things you think will take 5 min seem to swallow hours. I'm happy with the result.

Re Assembly 13.jpg

Today was less productive in the shed. We did a whole lot of leaf raking and clearing/cleaning of our block in the morning (bush fire defence) until it got too hot.

Hot!.PNG

After lunch I headed out to the shed and continued with truck wiring. It was at least a little illuminating! ;)

Re Assembly 14.jpg

More of the same tomorrow! :)
 

Sitec

Adventurer
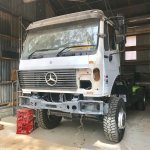
So, after a few weeks of no motivation (again... the joys of depression and IBS all thrown in together), I have all the rear wiring finished, and all the side skirts and lockers secure. It was time to turn the truck around so I can focus on the front.

Re Assembly 17.jpg

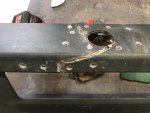
Next was to repair a crack from an incident in the donor trucks previous life. The crack was on the underside of the bumper and hardly visible but needs addressing. Here is the first of 2 internal plates cut and glued in place after veeing the crack out to allow the two halves to re align.

Chassis Mods 84.jpg

Here's the other side ready for filler.

Chassis Mods 85.jpg

I hope to get the bumper ready for paint tomorrow.
 

Forum statistics

Threads
188,201
Messages
2,903,720
Members
229,665
Latest member
SANelson

Members online

Top