Metal frame or 3/4" plywood box?

jwiereng

Active member
Please describe the rear roof corner. Appears to be a slight over hang, tucked up lip. Very nice looking. Is it just aesthetics? Or does it shed rain better?
 

IdaSHO

IDACAMPER
Thanks, nothing on this rig designed for (only) athletic reasons :)

Initially it was both a structural as well as moisture shedding design feature.
It supports the roof sheet, allowing the roof to continue beyond the back wall to help drainage.
The entire camper is designed to shed moisture off of the rear, complete with roof mounted drip rails.
Nothing from the roof drains down the side walls.

Since adding the rear wall AC unit and perforated metal cover, I've extended the roof a bit with some .090 aluminum.
Roof is also coated and overcoated with Gaco-roof, a silicone roof coating.

50003323317_feda74e98f_b.jpg


50003322657_62ebc490da_b.jpg
 

jwiereng

Active member
Btw,
Going oversize rod diameter to allow for the saw kerf wont result in a correct arc for the radius.

You’re correct. Technically it will be possible to get only one perfect quarter arc from a rod, due to kerf.

But that will be wasteful, so likely 4 quarters missing half the kerf on each of the straight sides would be good enough. After some sanding, and coating would probably look good enough.

That’s the joy of self build. Set your own goals and strive for them. The challenge can be to set reasonable goals in the first place. Good enough is good enough
 

Muddzy

New member
Assuming the corner will receive a few layers of glass (which I highly recommend)
you really are splitting hairs with any concerns about correct arc or saw kerf.

Getting it close will help, but finding perfection shouldn't be a concern.

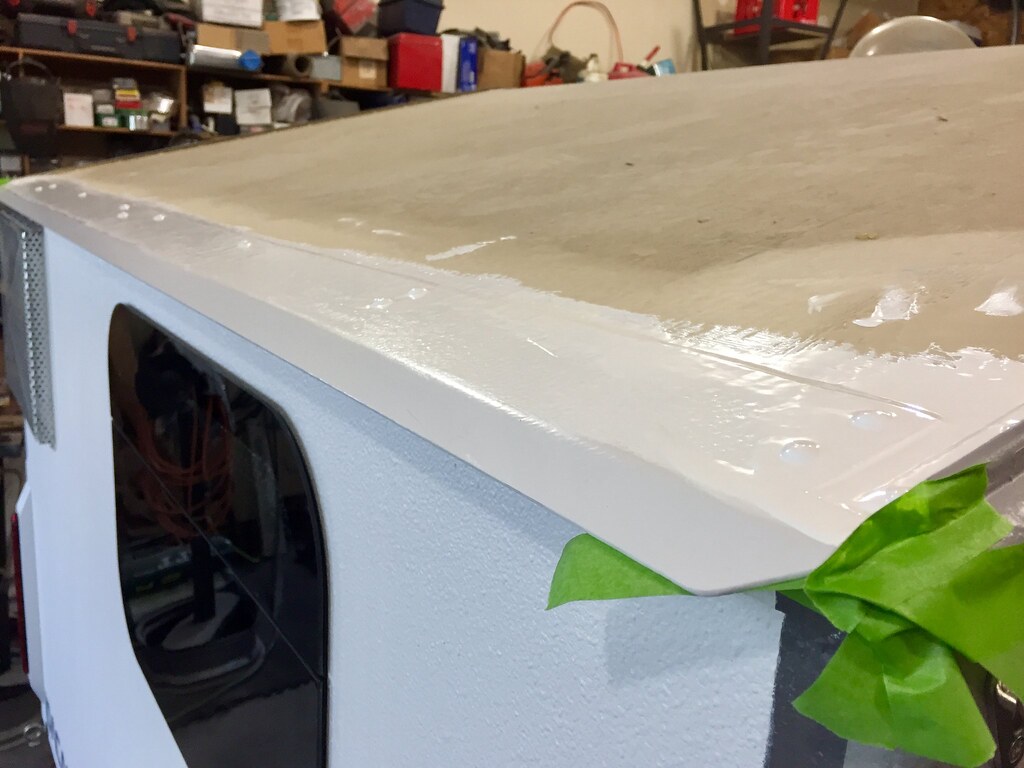
Speaking of glass, don't forget that when adding the glass (and epoxy), the radius will be enlarged.
With my custom camper, I was more than happy with a simple 3/4 radius router bit.
Once the epoxy and glass were added, sanded and smoothed, and paint applied, the radius is nearly 1"
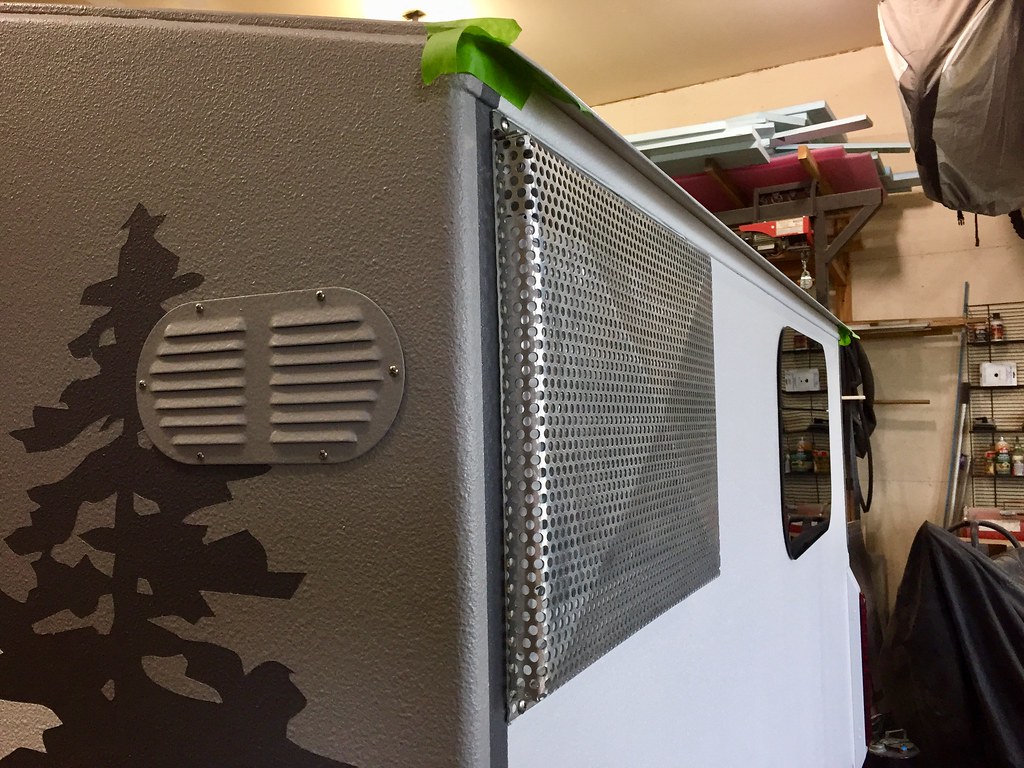
Now that is is Monstalined, it is even greater (y)


3/4 round over.... no glass

42334312550_23b22af971_c.jpg


saturated with epoxy, multiple layers of glass and epoxy, and painted...

44142885261_d28de91f04_o.jpg


Same, plus Monstaliner...

49982235062_2154733486_b.jpg
This looks great! Just to clarify, you epoxied, glassed several layers with epoxy, painted then monstalined?
 

IdaSHO

IDACAMPER
Using proper BS1088 ply, I was able to forgo a complete layer of glass.
All joints, including corners, received two layers of glass.

Then it was painted with nothing more than a rustoleum industrial alkyd.
Lived that way for years. A few years ago it was coated in monstaliner. (y)
 

Muddzy

New member
Using proper BS1088 ply, I was able to forgo a complete layer of glass.
All joints, including corners, received two layers of glass.

Then it was painted with nothing more than a rustoleum industrial alkyd.
Lived that way for years. A few years ago it was coated in monstaliner. (y)
Thanks for the quick reply and info. A few follow ups if you don't mind. Love the look of your work.

Am I correct to assume you glassed the corners/joints for structural reasons? Was that belt and suspenders or did you feel the glass was absolutely necessary? Would you skip the Alkyd paint and go strait to monstaliner?

I have access to free 1 1/8" x 4' x 12' T&G plywood. Would you glass that or spend the money for 3/4" BS1088 plywood so you can skip the glass layer? The design reason I'm considering these thicker and longer plywood sheets is that my current design concept uses 1 sheet on each side (I want to do a pop top for head room) and the sides can be a continuous piece since the sheets are 12 feet long. I plan to "skeleton" the sheets with angles, windows and doors so the sheets would be glorified framing. This also significantly cuts down on their weight. I'm much better with wood than metal and using this thick plywood eliminates the need to frame with 2 bys and worry about green lumber being straight or moving, not to mention it's much stronger. If I'm going to insulate in another phase I will add 1" foam on the inside and cover with an appropriate wall board.

Thanks again!
 

IdaSHO

IDACAMPER
Glass for all joints was 100% related to creating a monolithic skin.
As good as the plywood I used is, sealing raw cuts without glassing over them is fool-hearty.

This entire camper was essentially a working test mule. I didnt know just how bomb-proof the design was, so I went ubber cheap with the original paint setup.
It was less than a couple hundred dollars for the rustoleum. Though time has proven that the camper is incredibly sound.
Even with the cheap paint job and tens of thousands of miles, not a single crack in the paint via panel movement.

So I guess a better coating was in the cards the entire time, I just held my breath and watched the camper for any failures before committing.
Since doing so, I have zero doubts this camper will outlive me, by a long shot.


For your project, if you skeletonize the 1-1/8 ply, how would you go about skinning it if you didn't use ply? Just foam & glass?
If it were me, and I was committed to using the 1-1/8 Id definitely skeletonize the snot out of it, then skin it with a 4mm BS1088

Ours is framed in 1x2 VG fir, and skinned with 6mm BS1088 Okoume, and it is bomb proof.
If I were do do it again, Id likely go with a thinned skin.
 

Muddzy

New member
Glass for all joints was 100% related to creating a monolithic skin.
As good as the plywood I used is, sealing raw cuts without glassing over them is fool-hearty.

This entire camper was essentially a working test mule. I didnt know just how bomb-proof the design was, so I went ubber cheap with the original paint setup.
It was less than a couple hundred dollars for the rustoleum. Though time has proven that the camper is incredibly sound.
Even with the cheap paint job and tens of thousands of miles, not a single crack in the paint via panel movement.

So I guess a better coating was in the cards the entire time, I just held my breath and watched the camper for any failures before committing.
Since doing so, I have zero doubts this camper will outlive me, by a long shot.


For your project, if you skeletonize the 1-1/8 ply, how would you go about skinning it if you didn't use ply? Just foam & glass?
If it were me, and I was committed to using the 1-1/8 Id definitely skeletonize the snot out of it, then skin it with a 4mm BS1088

Ours is framed in 1x2 VG fir, and skinned with 6mm BS1088 Okoume, and it is bomb proof.
If I were do do it again, Id likely go with a thinned skin.
Thanks for your input! I've never epoxied anything, let alone glassed, and I wasn't sure why the entire box isn't glassed vs only the corners and joints. I wasn't sure how much strength the glass added vs making sure the joints were assembled correctly and didn't move. But I get that it would be foolish not to do it.

I'm not committed yet to using the 1 1/8" ply but I feel the need to explore it. I looked into buying structural foam panels (tough to find reasonably) or making sandwiched foam panels (Marine PW I haven't sourced yet) and it seems to me that it would be easier at this point to skeletonize the 1 1/8 PW and skin it with the 4mm BS1088 (or other durable material if I can't source the BS1088). I want to keep the cost down but not at the expense of shortcuts. Time is the biggest constraint right now since a May trip doesn't allow me to wait for materials and I want to have a structurally sound and waterproof shell by May.

Like you did, this is a working test mule for me since I want to experiment with the interior space (storage and/or living) so ultimately this might end up being a work/toy trailer, given to one of my kids or sold. But I might choose to keep and modify it. Either way I want it to be built right so it lasts like yours and stays waterproof.
 
Last edited:

1000arms

Well-known member
Thanks for your input! I've never epoxied anything, let alone glassed, and I wasn't sure why the entire box isn't glassed vs only the corners and joints. I wasn't sure how much strength the glass added vs making sure the joints were assembled correctly and didn't move. But I get that it would be foolish not to do it.

I'm not committed yet to using the 1 1/8" ply but I feel the need to explore it. I looked into buying structural foam panels (tough to find reasonably) or making sandwiched foam panels (Marine PW I haven't sourced yet) and it seems to me that it would be easier at this point to skeletonize the 1 1/8 PW and skin it with the 4mm BS1088 (or other durable material if I can't source the BS1088). I want to keep the cost down but not at the expense of shortcuts. Time is the biggest constraint right now since a May trip doesn't allow me to wait for materials and I want to have a structurally sound and waterproof shell by May.

Like you did, this is a working test mule for me since I want to experiment with the interior space (storage and/or living) so ultimately this might end up being a work/toy trailer, given to one of my kids or sold. But I might choose to keep and modify it. Either way I want it to be built right so it lasts like yours and stays waterproof.
If you are willing to share your general location, it might help with material suggestions.

If you are crunched for time (including material acquisition), you might consider building a camper with the free available materials, with a plan to modify or replace it once you have completed your May trip.

You might consider cutting 3/4" plywood in to "strips" and gluing them up to make your frame. 3 pieces of 3/4" plywood should give you a thickness about right to allow you to use 2" foam insulation. Skin it and paint it (or fiberglass it and then paint it).


I had good luck painting a homemade camper with Rustoleum metal paint. See:


You might find @Teardropper 's book useful:

"Building a Teardrop Trailer: Plans and Methods for Crafting an Heirloom Camper"


Muddzy

New member
If you are willing to share your general location, it might help with material suggestions.

If you are crunched for time (including material acquisition), you might consider building a camper with the free available materials, with a plan to modify or replace it once you have completed your May trip.

You might consider cutting 3/4" plywood in to "strips" and gluing them up to make your frame. 3 pieces of 3/4" plywood should give you a thickness about right to allow you to use 2" foam insulation. Skin it and paint it (or fiberglass it and then paint it).


I had good luck painting a homemade camper with Rustoleum metal paint. See:


You might find @Teardropper 's book useful:

"Building a Teardrop Trailer: Plans and Methods for Crafting an Heirloom Camper"

Great info and thanks for the reply! I'm in Central NJ near the PA border about a half hour north of Trenton. I plan to take this camper off-road on some fairly serious 4x4 trails. I rented a T@G Boondock XL and took it on a rocky 4x4 trail in Colorado and after only 5 miles I witnessed why true 4x4 campers, (def doens't include the Boondock models) are expensive. My short test wasn't long enough to determine if the T@G Boondock's shell would last thousands of 4x4 miles and stay waterproof.

Your link with your build example is perfect. So just stick framed skinned with ACX, sealed with caulk + rustoleum metal paint and no issues after 5 years of 4x4 use? very cool. I might end up doing epoxy and glass but great to know that if I run out of time then I as long as I build/seal it right I can just paint it for my May trip and bedliner it later.
 
Last edited:

1000arms

Well-known member
Great info and thanks for the reply! I'm in Central NJ near the PA border about a half hour north of Trenton. I plan to take this camper off-road on some fairly serious 4x4 trails. I rented a T@G Boondock XL and took it on a rocky 4x4 trail in Colorado and after only 5 miles I witnessed why true 4x4 campers, (def doens't include the Boondock models) are expensive. My short test wasn't long enough to determine if the T@G Boondock's shell would last thousands of 4x4 miles and stay waterproof.

Your link with your build example is perfect. So just stick framed skinned with ACX, sealed with caulk + rustoleum metal paint and no issues after 5 years of 4x4 use? very cool. I might end up doing epoxy and glass but great to know that if I run out of time then I as long as I build/seal it right I can just paint it for my May trip and bedliner it later.
You are welcome. :)

Just a heads-up, I had a limited-slip rear-end, an open front-diff, the ACX plywood was better quality then, and Rustoleum metal paint may have changed since then. That being written, no issues with it. :)

I suggest you measure out floor-space, build a cardboard full-size model to test various camper sizes/configurations, and plan your internal furniture/cabinets/... to support and strengthen the shell.

I built a strong trailer frame then, and would do so again today. Minimize twisting and racking of the camper box to keep the stresses off the seals.

I suggest you design your camper so everything has something solid to be glued to.

I would use PL Premium Construction Adhesive today, or epoxy, to glue everything together, and just use some brads or screws to hold things together while the glue sets. Keep in mind stitch-and-glue boatbuilding, that if built right, can handle incredible stresses.


I suggest you finish your camper in white to reflect as much sun as you can.

The GacoRoof @IdaSHO uses looks quite intriguing.


Check the teardrop trailer book I linked in another post. Use Amazon's "Look inside", and you might see something that gets you thinking. I don't have any desire to build a teardrop trailer, but, I think the book is worth suggesting. The author, @Teardropper, is a forum member.
 

Forum statistics

Threads
188,428
Messages
2,904,699
Members
230,359
Latest member
TNielson-18
Top