My 1998 100 Series Build Thread

bossman429

Adventurer
Drawers and bike rack

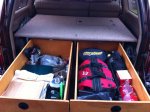
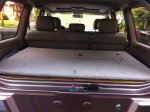
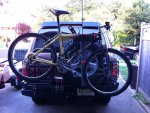
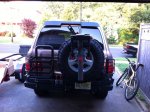
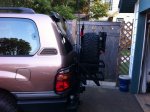
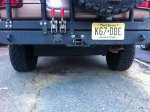
Here's some pics with the drawers in, packed with some gear,and a new bike rack I pick up. Had to modify the backing plate on the bike rack slight but it's in and secure and works and looks great. Sure it sticks out a mile when the bikes are on but there's really no other way.
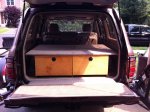
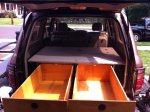
image.jpg
image.jpg
image.jpg
image.jpg
image.jpg
image.jpg
image.jpg
image.jpg

I'm not going to get to the sleeping platform before our trip to Nova Scotia, but other than that I'm very pleased with the build quality and construction and the amount of storage I have. The right drawer is filled with tools, recover gear, compressor, tarp, rags, etc.

The left is cooking and general camp gear. Sleeping mats stuffed in the left void, fold out camping chairs on the right. TP and paper towels in the right factory cubbies, quart of oil, brake fluid ps fluid and duct tape and lug wrench in the left cubby (bottle jack removed, it doesn't go high enough with the lift anyways)

When the sleeping platform is done, I should be able to fit the cooler, clothing bags and food under it, leaving a clean slate on the platform for whatever I want. (Dog kennel, fishing poles whatever)

Now. Enough work... Time to go play!
 

fireball

Explorer
Nice drawer system...I'm gathering ideas for my build now. Any advice based on experience with yours? I'll be building mine at 11" height to match the 2nd row seats folded down.
 
Wow, you are going to turn that rig into an RV. Seems it will be carrying and storing all the gears you will ever need.

Nice rig. Keep up the great job.
 

SmoothLC

Explorer
Very clean install - looks very functional.

Like the bike rack too - and just as you wrote, there really is no other way on these rigs.
 

bossman429

Adventurer
Thanks all for the replies

Fireball... My only advice is be patient and take your time. If you start feeling rushed to get it done. Take a break. It's amazing how much time and energy I spent on what I thought would be a relatively quick and easy project lol. Also get an idea of what you want to carry in your drawers and make sure it fits! Mine are the perfect depth for my gear but for some they may be too deep. Also realize the tailgate is not level with the truck floor... It has a slight tilt up so you need to leave a little extra space under the drawers so they don't hit the tailgate when sliding out
 

bossman429

Adventurer
Front runner sub tank

So finally, after half a year of having a sub tank sitting in my garage i was able to get it installed.

Luckily i borrowed a friends lift and it made it significantly easier.

A few things to note - The directions with the kit are useless, and the brackets and hardware they give you are all wrong. I ended up having to cut and re-weld one of the brackets the opposite direction.

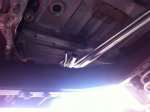
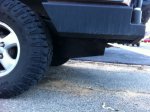
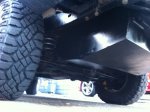
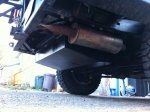
The tank is in and fit well. It does hang down lower than the frame but now lower than the axle. I'm sure it could hinder hardcore rock crawling but thats not what I'll be doing with this truck. Even so if you were careful and had a spotter, i'm sure you could take the right line to avoid doing any damage.

Of course - after it was all wired up i noticed the pump wasn't working. The wires leading into the pump were damaged and although it worked after i moved them a bit, i new this wasn't going to cut it. I ordered a better quality pump from Jegs and through that in. Its not working fine.

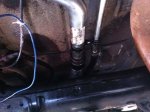
As for the filler neck... the one that comes with the front runner tank although practical, just doesn't fit right in the body. The angle is off and there is no way to make it fit correctly.
Also I'm not a fan of the cap it came with and it may cause an issue w/ inspections

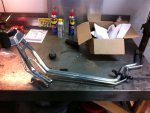
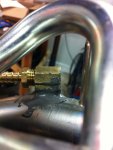
Soooo i ordered a OEM dual filler neck from Japan. Now the OEM set up doesn't have a transfer pump, instead the pick up switches from main to aux tank. So i drilled, threaded and the for good measure JB welded a brass fitting to accept the transfer pump line into the main fill line. And I get to use an OEM cap

IMG_2418.jpg
IMG_2421.jpg


The bad news is in order for me to install this filler neck, i have to get the truck back on a lift and completely un-install the tank. Good news is I have practice and it shouldn't take more than a hr once its on the lift.

I'll have more photos once I get the filler neck swapped
 

bossman429

Adventurer
So finally warmed up enough for me to hop under the truck and get this filler neck thing situated.

Had to drop the sub tank and remove basically everything I had just installed. Good thing is it went fast bc I knew exactly what I was doing. With everything out I used this an opportunity to clean the underside and do some backyard rust proofing (wipe everything down with WD-40).

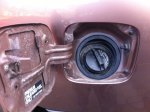
The new filler neck fits great. It was pricey at $300 but if I opioid do it again I would have just bought this from the beginning. It fits better, works better, looks nicer, and I can use the factory gas cap which will be a big help come re-inspection time and also keep any fumes from sneaking out....which the front runner one didn't do the best job of.

image.jpgimage.jpgimage.jpgimage.jpgimage.jpg

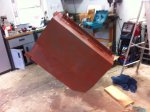
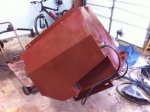
I also wasn't pleased with the paint job that came on the sub tank. Also the stainless steel they used to construct it must just barely be stainless, bc I was already starting to see some rust develop in certain areas (although it may have been the weld itself and the brackets that were welded to the tank)... So I hung it from the rafters in the garage and wiped it all down, sprayed it with some rust inhibitor and am giving it a fresh coat of black enamel paint. Hopefully it dries over night and it doesn't get too cold. Should be warm enough tomorrow to have it back up under the truck

image.jpgimage.jpg
 

bossman429

Adventurer
I found it from a guy in Seattle selling it. He had bought it to use as template for one he was fabbing up and didn't need it any more. They are pretty hard to come by so I snatched it up right away. I then sat in my garage for about 7 months waiting to get installed.

So I finally wrapped it up today.

Tank came out great. I coated it in engine enamel so it would be resistant to any chemicals/heat whatever. We'll see how it holds up.

A few notes. The filler neck is 1 3/8" while the sub tank line is 1.5". I used an adapter that came with the kit to splice the two different sizes of hose together. Also, the sub tank filler neck and vent lines had to be cut back a few inches. They are too close to the sub tank and not perfectly inline... So it was impossible to get such a short hose in there without kinking it, especially with the reducer. I found out 1 3/8" fuel hose is more rarer than rocking horse crap. Make sure you source some prior to digging into this!

I also made some 1/2" spacers for between the rear brackets and the tank mounting points. This gave me a tad more rear clearance and was more inline with where the tank "wanted" to sit.

I threw $100 in the sub tank (about 28 gallons) and it went in great. The filler neck is a vast improvement over the old. No leaks and the pump is operating properly. Took about 10 minutes to transfer a little over 1/4 tank.


Hard to see in the pictures because of the fading light but here's some pics:
image.jpgimage.jpgimage.jpgimage.jpgimage.jpg

It hangs exactly as low as my muffler in the far back, and no lower than the axle for sure. I wouldn't have minded if it was 10-15 gallons less and a bit higher but I don't think it will be an issue....just have to be aware if I ever get into some nasty stuff.

I'm not convinced the bottom is thick enough. For something as critical and as vulnerable as this I would have liked to seen it made with some heavy awg steel, but I haven't heard of anyone tearing there's open so. We will see.

Now I just need to take some long trips To no where and put it to use. Summer can't come soon enough!
 

bossman429

Adventurer
Ok so some updates.

I had an unfortunate incident down in North Carolina. Haven't exactly figured out why, but my engine got starved of oil while on a pretty steep incline, and decided it wanted to toast the bearings.

being 600 miles from home i had to leave it at a local dealership and fly home. Weighed my options and decided to have the Toyota Dealership install a new engine. Price tag was more than i wanted to spend but i figured having a dealership do it and using their engine would eventually pay off in the long run (either in terms of longevity or resale). So i have a brand new engine now in the truck.

Also - i decided to remove the aux fuel tank. I had anticipated needing it for a trip which never ended up happening. It hung a little low for my liking, and I can always carry water inside and two 5 gallon jerry cans in the holder on the rear bumper. That should be sufficient for any upcoming trips i can think of (especially since we'll be +1 in a few months with our first baby on the way so that trip across canada is going to have to wait lol).
(also sorry but the tank is already sold)

Lastly - i discovered some bubbles and flaking in the finish on my TJM bull bar. I contacted TJM and they agreed this was NOT normal wear and tear for the age of the bumper. The agreed to pay to have the bull bar re-finished by a local powder coater. That was more sensible than having new unit shipped out.

While it is an inconvenience, i have to say TJM stands behind their product and for that I am thankful and would buy from them again.
 

bossman429

Adventurer
It's a first for me and it's ironic bc the main reason I bought a 100 series is bc the engine goes for a damn long time

Regardless. I still love the truck and plan on using and keeping it for as long as I can use it..
 

Yuman Desert Rat

Expedition Leader
Just curious how much the newengine set you back with parts and labor. Are you going to sell the aux tank? If so I might have a buyer for you. Mine came with one and I LOVE it! Great rig, BTW!
(subscribed)
 

bossman429

Adventurer
Aux tank is sold.

More than I should have spent. Could have bought another running truck by the time it was done

Engine was 3700+ additional warranty

Labor was 2250

Doesn't include extras for new gaskets, pulleys, alternator, oil cooler etc
 

Forum statistics

Threads
189,765
Messages
2,920,547
Members
232,886
Latest member
AZXPLOR
Top