-
Get your tickets to THE BIG THING 2026!
You are using an out of date browser. It may not display this or other websites correctly.
You should upgrade or use an alternative browser.
You should upgrade or use an alternative browser.
NAS LR3 build with an overseas twist
- Thread starter Ray_G
- Start date
Ray_G
Explorer
Are you going to switch to a bigger tire now?
Nick-
I doubt it. I'm pretty happy with the 285/60 Terragrapplers for the time being. The 31.5" looks decent and doesn't suck away power nor make the truck to terribly aggressive looking, in my opinion. I always have the D1 running 255/85's if I want to have big, relatively speaking, MT's to roar around on. I'm considering switching over to the BFG KO2, potentially in 265/65 (32") next but I doubt I'll push as far as that tire in 285/65 (32.6"). No real need to be honest.
Hope you are enjoying the new ride!
r-
Ray
Ray_G
Explorer
Odds & ends (Brass Tee fitting & Micro Start)
Finally caught up on life for the most part and with the wife back in the U.S. I've made some ground on the LR3's small projects over the past few weekends. Have a few more shots to take when it gets dark but realized a couple of things in the build weren't really covered.
-Brass Tee replacement for the coolant bleed valve; a known issue and certainly reasonable to just stick with the plastic OEM version if that suits your needs. Before leaving the U.S. I'd had it on my list of things to do and when I found out I'd be heading to the desert I decided to drop the $$$ on a brass one which I did by ordering from Falconworks http://www.jewellamberoil.com/sales/index.php?main_page=product_info&cPath=65_67&products_id=278). Stock picture:
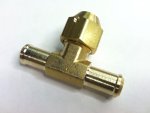
Potentially overkill and also potentially sourced elsewhere, regardless I had it thrown in on my first service out here as insurance given the truck's operating environment and I think it's a great idea for anyone to incorporate into the preventative maintenance of their truck.
-Micro Start XP-10; I may go to a 2nd battery setup at some point but up front I wanted to stick with the single stock battery since I knew I wouldn't be winching much and the main drain of the battery in terms of accessories was just the fridge. Since we weren't likely to be sitting for protracted periods here I am holding on the traxide order for the moment. That said I wanted some cheap insurance and with the size of portable power solutions getting ever smaller I decided to give the XP-10 from the folks at Antigravity Batteries a try (http://shop.antigravitybatteries.com/micro-start-xp-10/, note their price is $209 but you can get it much cheaper on Amazon). This fits into the same pouch on the right rear seat as the jumper cables. Ironically I brought it back from my spring trip to the U.S. (it couldn't come through the mail) and basically charged it and left it in the truck. I'd used it several times to troubleshoot 12v circuits during the build, especially as I ran all the wiring for the light bar or the 4k's but had never had need to use it myself. Last weekend I went to pickup a new join at the airport and when we got to the truck a family across from me had that stricken look of the battery being dead on their minivan-or rather the father had that look, the wife had the look of disdain that comes from such events. When asked if I had jumper cables I figured what the hell, lets try the XP-10 even though I hadn't recharged it since putting it in the truck in March. Hooked it up, turned it on-all while another male passenger in their crew looked at me like 'there is no way that little thing is going to work, this dude is crazy'. Instant turnover and start of the dead van. I have to say I'm impressed since it has sat for months, going through heating cycles when the truck is outside up to 130+ degrees, and it didn't even break a sweat starting it.
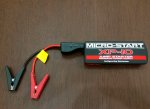
I would point out they have a quick detach harness you can hardwire into your battery if you don't want to pop the hood. That doesn't work with the XP-10, if you want that grab one of the earlier models. Its no 2nd battery, but for many it could be a good option for those that worry when off the beaten path that all the 12v accessories will make for a no-start when its time to leave camp.
More to follow in the next few days since I got my LED's installed in the upper tailgate and some other tidbits done too.
Finally caught up on life for the most part and with the wife back in the U.S. I've made some ground on the LR3's small projects over the past few weekends. Have a few more shots to take when it gets dark but realized a couple of things in the build weren't really covered.
-Brass Tee replacement for the coolant bleed valve; a known issue and certainly reasonable to just stick with the plastic OEM version if that suits your needs. Before leaving the U.S. I'd had it on my list of things to do and when I found out I'd be heading to the desert I decided to drop the $$$ on a brass one which I did by ordering from Falconworks http://www.jewellamberoil.com/sales/index.php?main_page=product_info&cPath=65_67&products_id=278). Stock picture:

Potentially overkill and also potentially sourced elsewhere, regardless I had it thrown in on my first service out here as insurance given the truck's operating environment and I think it's a great idea for anyone to incorporate into the preventative maintenance of their truck.
-Micro Start XP-10; I may go to a 2nd battery setup at some point but up front I wanted to stick with the single stock battery since I knew I wouldn't be winching much and the main drain of the battery in terms of accessories was just the fridge. Since we weren't likely to be sitting for protracted periods here I am holding on the traxide order for the moment. That said I wanted some cheap insurance and with the size of portable power solutions getting ever smaller I decided to give the XP-10 from the folks at Antigravity Batteries a try (http://shop.antigravitybatteries.com/micro-start-xp-10/, note their price is $209 but you can get it much cheaper on Amazon). This fits into the same pouch on the right rear seat as the jumper cables. Ironically I brought it back from my spring trip to the U.S. (it couldn't come through the mail) and basically charged it and left it in the truck. I'd used it several times to troubleshoot 12v circuits during the build, especially as I ran all the wiring for the light bar or the 4k's but had never had need to use it myself. Last weekend I went to pickup a new join at the airport and when we got to the truck a family across from me had that stricken look of the battery being dead on their minivan-or rather the father had that look, the wife had the look of disdain that comes from such events. When asked if I had jumper cables I figured what the hell, lets try the XP-10 even though I hadn't recharged it since putting it in the truck in March. Hooked it up, turned it on-all while another male passenger in their crew looked at me like 'there is no way that little thing is going to work, this dude is crazy'. Instant turnover and start of the dead van. I have to say I'm impressed since it has sat for months, going through heating cycles when the truck is outside up to 130+ degrees, and it didn't even break a sweat starting it.

I would point out they have a quick detach harness you can hardwire into your battery if you don't want to pop the hood. That doesn't work with the XP-10, if you want that grab one of the earlier models. Its no 2nd battery, but for many it could be a good option for those that worry when off the beaten path that all the 12v accessories will make for a no-start when its time to leave camp.
More to follow in the next few days since I got my LED's installed in the upper tailgate and some other tidbits done too.
Ray_G
Explorer
Blacking out the back
Following the adage that it is good to spend a little $ on the her everyonce in awhile lest she get resentful I'd had a few minor tweaks stacking up that I wouldn't call 'expo' mods but rather just aesthetic shifts that were easy to pull off and gives me something to do between major iterations (and don't give me heat strokes trying to accomplish). In this case I went ahead and matched the glossy black lettering on the front (the bonnet's LAND ROVER) with a gloss black 'DISCOVERY' on the back, I have the '3' too but it went on a little crooked and I didn't have any tape so I went without-and kinda like it. I also had thrown on a RRS black/silver LR oval on the tailgate too just for good measure.
The other change was when I'd grabbed a set of the smoke colored LED replacements for the lower bumper reflectors just, well, because and went ahead and wired those into the truck's marker circuit. If I was more adventurous I could have also hooked them into the brakes or the indicator/turn signals too but for now I was happy with getting them on and wired in.
Dumb little projects but they were easy enough and not expensive. Anytime spent working on the truck is good time.
In progress showing the smoke vs reflector
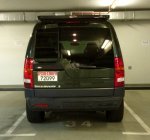
Finished up, daytime shot
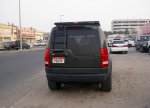
As it looks at night
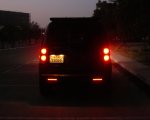
Following the adage that it is good to spend a little $ on the her everyonce in awhile lest she get resentful I'd had a few minor tweaks stacking up that I wouldn't call 'expo' mods but rather just aesthetic shifts that were easy to pull off and gives me something to do between major iterations (and don't give me heat strokes trying to accomplish). In this case I went ahead and matched the glossy black lettering on the front (the bonnet's LAND ROVER) with a gloss black 'DISCOVERY' on the back, I have the '3' too but it went on a little crooked and I didn't have any tape so I went without-and kinda like it. I also had thrown on a RRS black/silver LR oval on the tailgate too just for good measure.
The other change was when I'd grabbed a set of the smoke colored LED replacements for the lower bumper reflectors just, well, because and went ahead and wired those into the truck's marker circuit. If I was more adventurous I could have also hooked them into the brakes or the indicator/turn signals too but for now I was happy with getting them on and wired in.
Dumb little projects but they were easy enough and not expensive. Anytime spent working on the truck is good time.
In progress showing the smoke vs reflector

Finished up, daytime shot

As it looks at night

Ray_G
Explorer
Spark any codes when you wired them in? I like the look. I'll be smoking the tails and part of the headlights soon.
Nick-
Great question. I have found many times I do a lot of 12v work she'll throw codes on the next drive, yesterday was no different but I attribute that to a backup light going out as much as anything (which is why I haven't put up pics of the swapping in of LED white backup bulbs-they were bright but now only one works and I didn't have time to sort that last night). I also wired in upper tailgate LEDs, a 12v outlet, etc so there was a lot of turning the truck to on, testing a circuit, turning on lights, etc before the first time I took her out of the garage.
After clearing the codes with the IID tool all was well and I drove it around doing stuff for an hour or longer without them returning so I looked at it as the normal LR3 whining with no residual effects.
r-
Ray
Ray_G
Explorer
Upper tailgate LEDs (&12v outlet/voltmeter/usb sockets)
Sunday am UAE time 'major' update. I finally decided to jump into the aux wiring phase II after a long break from getting the lights, fridge, fuse panel, relay box all sorted. The main thing I wanted to do was get a little extra light into the area just behind the truck. On my D1 this was solved by installing a work light on the roof rack but as discussed earlier in this thread that is less feasible on the 3 b/c of the upper tailgate masking the light. Thus the tailgate became the mounting platform for some small LEDs with the desire to have some low-draw light that wasn't blinding (my wife hates the LED work light on the D1 b/c she says it is as bright as the sun).
I used lights like these: http://www.amazon.com/dp/B00BIFTY26...TF8&colid=17PDT556WS7HP&coliid=I1EHI14MM6XR0S
sourced locally. 4 total for the upper tailgate trim panel. I also used the time to install a 3 station 12v socket add on that included a standard plug, a voltmeter, and a USB station.
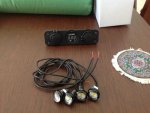
The panel on the tailgate just pops out so I opted to do much of the initial fitting/wiring inside at the kitchen/dining room table 'work benches' (always nice when you are living like a bachelor for a few weeks). Mounted:

Testing the wiring using the XP-10

The next morning it was down to the parking garage where install was mostly the usual fishing of wires and such. There's a good ground between the tailgate and the truck so it was just 12v positive that was sent down the passenger side to linkup with the switch I installed in the same area as the 12v outlet in the back. Always anxiety inducing to drill big holes in expensive trim:
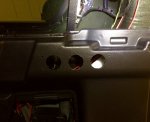
Some shots of both the 12v outlet and the switch (mounted to the flat portion of the trim just behind the 12v, it is very small).
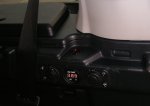
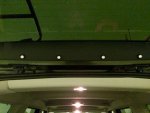
Shots of the LED's installed and tested in daylight:
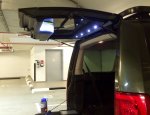
Night shots showing the cast off the back:

Looking at it more head on, clearly as a photographer I lack skill as this doesn't do the light justice.
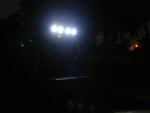
All told I'm pretty happy with the lighting, if I had to do it again I might do a total of 6 LEDs and mount two on the panel inside the truck just behind the tailgate pointing straight down to augment the anemic OE light that is there. That may come later. The switch was a PITA b/c of its size, i.e. it was so small that getting it hooked up was a lot of small work that could have been averted had I wanted a larger/more traditional switch, given the location the clearances between the switch and the 12v panel were a concern-and born out during install. The voltmeter has a very shallow depth and still the wiring between the switch and it were tight. I actually tapped into the same lead that the 12v outlet is using for the lights, operating off the reality that will rarely be using that panel to be honest so there is little likelihood of overload (and its all fused at the blue sea systems box anyway).
Sunday am UAE time 'major' update. I finally decided to jump into the aux wiring phase II after a long break from getting the lights, fridge, fuse panel, relay box all sorted. The main thing I wanted to do was get a little extra light into the area just behind the truck. On my D1 this was solved by installing a work light on the roof rack but as discussed earlier in this thread that is less feasible on the 3 b/c of the upper tailgate masking the light. Thus the tailgate became the mounting platform for some small LEDs with the desire to have some low-draw light that wasn't blinding (my wife hates the LED work light on the D1 b/c she says it is as bright as the sun).
I used lights like these: http://www.amazon.com/dp/B00BIFTY26...TF8&colid=17PDT556WS7HP&coliid=I1EHI14MM6XR0S
sourced locally. 4 total for the upper tailgate trim panel. I also used the time to install a 3 station 12v socket add on that included a standard plug, a voltmeter, and a USB station.

The panel on the tailgate just pops out so I opted to do much of the initial fitting/wiring inside at the kitchen/dining room table 'work benches' (always nice when you are living like a bachelor for a few weeks). Mounted:

Testing the wiring using the XP-10

The next morning it was down to the parking garage where install was mostly the usual fishing of wires and such. There's a good ground between the tailgate and the truck so it was just 12v positive that was sent down the passenger side to linkup with the switch I installed in the same area as the 12v outlet in the back. Always anxiety inducing to drill big holes in expensive trim:

Some shots of both the 12v outlet and the switch (mounted to the flat portion of the trim just behind the 12v, it is very small).


Shots of the LED's installed and tested in daylight:


Night shots showing the cast off the back:

Looking at it more head on, clearly as a photographer I lack skill as this doesn't do the light justice.

All told I'm pretty happy with the lighting, if I had to do it again I might do a total of 6 LEDs and mount two on the panel inside the truck just behind the tailgate pointing straight down to augment the anemic OE light that is there. That may come later. The switch was a PITA b/c of its size, i.e. it was so small that getting it hooked up was a lot of small work that could have been averted had I wanted a larger/more traditional switch, given the location the clearances between the switch and the 12v panel were a concern-and born out during install. The voltmeter has a very shallow depth and still the wiring between the switch and it were tight. I actually tapped into the same lead that the 12v outlet is using for the lights, operating off the reality that will rarely be using that panel to be honest so there is little likelihood of overload (and its all fused at the blue sea systems box anyway).
dblock22
New member
I'm enjoying this thread immensly. The labelled gear bags are cool
I agree! Well done, love the look you have given your LR!
Ray_G
Explorer
Cargo area fine tuning
I've been wrestling with how to optimize the rear cargo area's space without sacrificing the ability to use the 3rd row seats. In my D1 I built out the back completely and it is superb for the purpose of that truck but for the D3 the intent has always been to have more of a general purpose balance. So I did what I normally do, dwelled. A lot. I'd considered some type of half frame to facilitate better securing of the tool peli and the newly added recovery peli, but hadn't settled on anything past knowing I wanted to integrate some s-track into the back. Today I finally got around to playing with the stuff I got (I ordered the kit from Pit Posse, there are plenty of other options of course but I've had good experiences with their products in the past and they ship to DPO so there you have it).
After trimming it down to fit the side portions I went ahead and installed it using the bolts for the existing tie downs. In the long term I may figure out what the pitch of those bolts is and get some about .5" longer just for more security but they are quite long and appeared to go well into the floor even with the s-track over the tie downs.

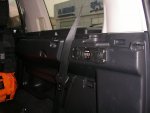
Knowing I didn't really want to frame out anything, but wanted to have the two pelis secured I explored around the cargo area a bit to try to find a way to get a better fore/aft tie down spot at the back end that would tie into the ratchet strap's routing from the s-track->recovery peli's handle->over the tool peli (it will make sense at the end of this thread with the end result picture). After looking at the rear of the truck with the seat back up I found a trusty LR 12mm bolt:
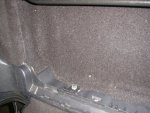 .
.
I installed a bolt plate on this which facilitated a loop of nylon tie down which is secure but doesn't turn into an obstacle:
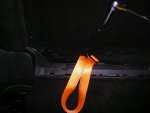
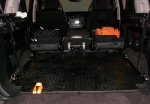
This provides more context, also shows that I went ahead and used the 2nd s-track on the passenger side since it became apparent that less was going to be more with this.
The two pelis in tandem, showing the loop that hooks into the ratchet strap which helps keep a good angle on the case.
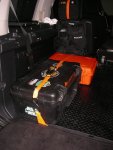
All of it just barely fits with the hatch closed, which is also a good way to ensure day to day it will remain in place.
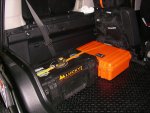
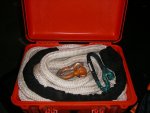
Forgot to add this in elsewhere so for good measure, over the return to CONUS we snagged a nice orange peli from the in-laws since it was in excess of their needs. Kudos that the wife led the charge on asking how much they wanted for it. After using it to mail glasses back to Abu Dhabi I removed the pint glass cut out foam and put a 20' two strap, a kinetic rope, and some shackles in there thus far. This compliments the tear away pouch that has a tree saver, snatch block, and more shackles. At some point I'll probably store a 2nd tree saver, perhaps a 2nd snatch block, and a winch extension somewhere else in the truck but for now this stuff + the maxtrax are a decent start. Debating the merit of a hi-lift on this truck given limited jacking points-but do love the Frontrunner hi lift mounts which is not a reason but a great self-justification.
More to follow in the next few weeks as I finalize some small 12v projects I've been working on over time.
I've been wrestling with how to optimize the rear cargo area's space without sacrificing the ability to use the 3rd row seats. In my D1 I built out the back completely and it is superb for the purpose of that truck but for the D3 the intent has always been to have more of a general purpose balance. So I did what I normally do, dwelled. A lot. I'd considered some type of half frame to facilitate better securing of the tool peli and the newly added recovery peli, but hadn't settled on anything past knowing I wanted to integrate some s-track into the back. Today I finally got around to playing with the stuff I got (I ordered the kit from Pit Posse, there are plenty of other options of course but I've had good experiences with their products in the past and they ship to DPO so there you have it).
After trimming it down to fit the side portions I went ahead and installed it using the bolts for the existing tie downs. In the long term I may figure out what the pitch of those bolts is and get some about .5" longer just for more security but they are quite long and appeared to go well into the floor even with the s-track over the tie downs.

Knowing I didn't really want to frame out anything, but wanted to have the two pelis secured I explored around the cargo area a bit to try to find a way to get a better fore/aft tie down spot at the back end that would tie into the ratchet strap's routing from the s-track->recovery peli's handle->over the tool peli (it will make sense at the end of this thread with the end result picture). After looking at the rear of the truck with the seat back up I found a trusty LR 12mm bolt:
 .
. I installed a bolt plate on this which facilitated a loop of nylon tie down which is secure but doesn't turn into an obstacle:

This provides more context, also shows that I went ahead and used the 2nd s-track on the passenger side since it became apparent that less was going to be more with this.

The two pelis in tandem, showing the loop that hooks into the ratchet strap which helps keep a good angle on the case.

All of it just barely fits with the hatch closed, which is also a good way to ensure day to day it will remain in place.

Forgot to add this in elsewhere so for good measure, over the return to CONUS we snagged a nice orange peli from the in-laws since it was in excess of their needs. Kudos that the wife led the charge on asking how much they wanted for it. After using it to mail glasses back to Abu Dhabi I removed the pint glass cut out foam and put a 20' two strap, a kinetic rope, and some shackles in there thus far. This compliments the tear away pouch that has a tree saver, snatch block, and more shackles. At some point I'll probably store a 2nd tree saver, perhaps a 2nd snatch block, and a winch extension somewhere else in the truck but for now this stuff + the maxtrax are a decent start. Debating the merit of a hi-lift on this truck given limited jacking points-but do love the Frontrunner hi lift mounts which is not a reason but a great self-justification.

More to follow in the next few weeks as I finalize some small 12v projects I've been working on over time.
Ray_G
Explorer
Playing with light (bulbs)
Time for some updates, with most of the big projects done or pending transshipment from other continents I've been playing with little projects instead.
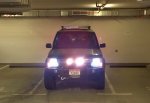
With the HID headlights providing great light, the fogs and the aux lights were as much aesthetic as anything but I went ahead and upgraded both's bulbs to give them a whiter appearance. The Hella's were also upgraded. Not the best pictures but you get a sense of the relative difference in light output.
Fogs (left lamp is the upgraded with Optilux H3's since these are aftermarket fogs vice the H11's in the stock bumper):
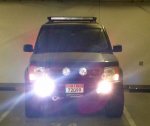
Hella 4k compacts (right lamp, using Silverstar H1's):
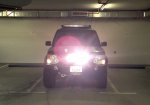
With headlights on, washing out some of the light with the camera
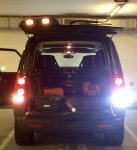
While I mostly did the front facing lighting just to match up tones of white a little better and honestly out of boredom, the reverse lighting was a legitimate needed upgrade. I didn't want to add on lighting like I did with my D1, so I decided to give some LED bulbs a shot and ordered these:
LED backup lights
The effect here is tangible and well worth the cost of the bulbs. The right side is dramatically brighter than the left and casts a great pattern for backing up at night.
Time for some updates, with most of the big projects done or pending transshipment from other continents I've been playing with little projects instead.
With the HID headlights providing great light, the fogs and the aux lights were as much aesthetic as anything but I went ahead and upgraded both's bulbs to give them a whiter appearance. The Hella's were also upgraded. Not the best pictures but you get a sense of the relative difference in light output.
Fogs (left lamp is the upgraded with Optilux H3's since these are aftermarket fogs vice the H11's in the stock bumper):

Hella 4k compacts (right lamp, using Silverstar H1's):

With headlights on, washing out some of the light with the camera

While I mostly did the front facing lighting just to match up tones of white a little better and honestly out of boredom, the reverse lighting was a legitimate needed upgrade. I didn't want to add on lighting like I did with my D1, so I decided to give some LED bulbs a shot and ordered these:
LED backup lights
The effect here is tangible and well worth the cost of the bulbs. The right side is dramatically brighter than the left and casts a great pattern for backing up at night.

Ray_G
Explorer
Ipod integration, bluetooth, Nav, and the dash ver 5.1A
Living with the HK stereo with none of the Nav, BT, iPod, and other bells & whistles continues to give me opportunity to play with various elements in and around the center console-if nothing else it gives me something to do and I have become exceptionally adept at removing and re-installing all the various elements that make up the radio, HVAC, and associated items.
Over the summer I decided I wanted to change the iPod classic's integration into a single wire and didn't want to use the dodgy AUX jack ergonomically placed behind the center console by some LR engineer that clearly has a dark sense of humor. Thus I set out to find solution(s). For the iPod integration I started with this Audiovox FM100Aplugging it in via RCA jacks using this Ipod->RCA cable. I don't tend to stream music over BT so the primary purpose was for the occasional hand's free call, really more for when she goes back to the U.S. then out here but I figured while the dash was torn apart let's tuck it all away so I grabbed this: Kinivo BT. In order to get better placement of my iPhone for either cueing of incoming calls, navigation, or other distractions I decided to move it off the panavise mount and modified the nav cubby's RAM ball with this: RAM 6.25x2 universal base. It all comes together to look like this:
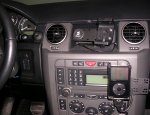
Garmin and iPhone side by side

Kinivo BT control unit within easy reach of the right hand coming off the steering wheel. You can also see the small switch used to power on the Audiovox integration (switch also provides power to the iPod's cable, thus both the stereo cut and iPod charging occur simultaneously).
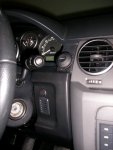
A shot of the panavise + iPod RAM holder & single cable. The panavise is actually two of their plates modified and mated together, I'm thinking the open space will end up holding the eventual VHF mic upon return to CONUS.
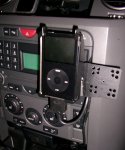
Overall the iPod integration is ok, I need to do some more tweaking to ensure the ground loop is working as intended, the RCA connections are isolated, etc-i.e. the sound quality is ok but not superb. Such is life. The BT unit functions as intended, I don't think I'd want to use it to stream music though it doesn't sound too bad but for the need to jiggle the AUX connection to ensure it is stereo vice mono. The RAM mount with the phone and Garmin side by side works well, and I am still a fan of the panavise and looking forward to the VHF install down the road.
Living with the HK stereo with none of the Nav, BT, iPod, and other bells & whistles continues to give me opportunity to play with various elements in and around the center console-if nothing else it gives me something to do and I have become exceptionally adept at removing and re-installing all the various elements that make up the radio, HVAC, and associated items.
Over the summer I decided I wanted to change the iPod classic's integration into a single wire and didn't want to use the dodgy AUX jack ergonomically placed behind the center console by some LR engineer that clearly has a dark sense of humor. Thus I set out to find solution(s). For the iPod integration I started with this Audiovox FM100Aplugging it in via RCA jacks using this Ipod->RCA cable. I don't tend to stream music over BT so the primary purpose was for the occasional hand's free call, really more for when she goes back to the U.S. then out here but I figured while the dash was torn apart let's tuck it all away so I grabbed this: Kinivo BT. In order to get better placement of my iPhone for either cueing of incoming calls, navigation, or other distractions I decided to move it off the panavise mount and modified the nav cubby's RAM ball with this: RAM 6.25x2 universal base. It all comes together to look like this:

Garmin and iPhone side by side

Kinivo BT control unit within easy reach of the right hand coming off the steering wheel. You can also see the small switch used to power on the Audiovox integration (switch also provides power to the iPod's cable, thus both the stereo cut and iPod charging occur simultaneously).

A shot of the panavise + iPod RAM holder & single cable. The panavise is actually two of their plates modified and mated together, I'm thinking the open space will end up holding the eventual VHF mic upon return to CONUS.

Overall the iPod integration is ok, I need to do some more tweaking to ensure the ground loop is working as intended, the RCA connections are isolated, etc-i.e. the sound quality is ok but not superb. Such is life. The BT unit functions as intended, I don't think I'd want to use it to stream music though it doesn't sound too bad but for the need to jiggle the AUX connection to ensure it is stereo vice mono. The RAM mount with the phone and Garmin side by side works well, and I am still a fan of the panavise and looking forward to the VHF install down the road.
I'm using that panavice mount for my HAM faceplate and mic. It was originally supposed to mount an iPad but I didn't like it there and it had too much flex so I ended up making a small plate to bolt to the panavice piece and hold my radio stuff. The radio itself is under the passenger seat and a remote speaker is near the steering column.


Similar threads
- Replies
- 2
- Views
- 2K
- Replies
- 0
- Views
- 1K
- Replies
- 7
- Views
- 1K
- Replies
- 9
- Views
- 2K
