Northern Teardrop Trailer X North 53 Overland - Semi-Custom Northern Teardrop Trailer Build - Alberta, Canada

JKMikey

Observer
Just read through all the posts. Looks great. Recently sold my Kakadu Camper and looking at picking up a Gnome Home and building something similar. Been doing lots of searching for the trailer tongue box you got building.

Would love to see your rig in person one day. I’m over in Sherwood Park
 
It's been a while since I posted and will be working on a large post and photos of our 21 day, 8400km journey through the US. But in the meantime, here is one trailer update.

As we did this project in phases with 2 different fabricators (1) Chassis, 2) Habitat plus myself as the final cabinet and detail installer), one item that was noticed 1 1/2 weeks before the trip was that the fender gap between the trailer wheels and fenders was not that much. As we trailer chassis was built first and then delivered to Northern Teardrop in BC, when the chassis was built, unfortunately the fender gap got set on an unloaded trailer. When we got the trailer back from Northern Teardrop, we never noticed that gap being too small.

Once the trailer was back in AB to be finished, I put the entire trailer up on all three 2000# jacks and levelled it for cabinets and roof rack install, etc. About 1 1/2 weeks before the final trip I finally let the down onto the wheels and that is when the final weight of the trailer compressed the Timbren suspension and had less than 1" of fender gap...not much.

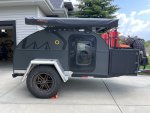
At that point there wasn't much we could do, so we went on our trip as we didn't have time to make changes. After 1 week, the welds on the rear lip on both sides broke (image 2). At that point, our trip continued and we observed that while broken, there was no concern of tire damage.

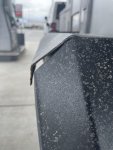
On our second last day from Nevada back to AB, we hit some large potholes on the highway and the shear force of 33" wheels, ripped the 1/8" plate steel on the passenger fender (image 1). I now knew that once I got home that I should take the trailer out until we get new fenders built and a proper fender gap set.

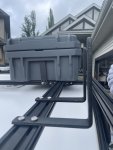
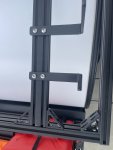
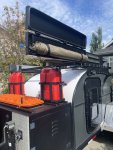
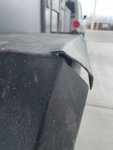
We have been back for 2 months now and finally got around to work with our friends to get new fenders built and installed. This time we opted to do checkerplate aluminum for the fenders. While not as nice as powder coated metal, we saw how much abuse those fenders were taking from the jeep and road and after 8400km, they were beat up. As such, no sense powder coating them or doing any Line-X, etc, it would all just get damaged.

Below are our new aluminum fenders, so happy with them (images 3 & 4).

This weekend I'm finally also getting the water port installed on the roof as well as reinstalling our Powertank 11lb propane tank mount on to the new fenders.


Travis_1.jpg
^ Image 1

Travis_2.jpg
^ Image 2

IMG_6386.jpg
^ Image3

IMG_6387.jpg
^ Image4
 
Last edited:
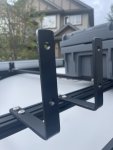
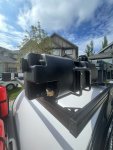
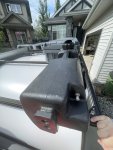
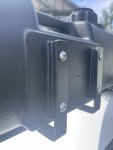
Finished installing the Waterport Day Trip 3.8gallon tank on the custom 80/20 roof rack. I had my welding friend bend me two pieces of 1/4" aluminum bar about 8" x 8".

Yesterday
I then set the "L" brackets and a "FULL" Waterport onto the 80/20 piece that was going to be installed between two other 80/20 pieces already on the rack. I did this to find the centre-point of the waterport to drill the two holes on the bottom of the "L" bracket to connect to the 80/20. Once I had this and then drilled the holes for the bracket to mount to the Waterport I gave each bracket a quick clean and sprayed them with Rust-o-leum black truckbed liner.

Today
I measured where I wanted the brackets and the Waterport to sit at the front driver's side of the roof rack and did test fit it. I set it so the logo faced away from me so as to quickly and easily be able to reach the controls and air compressor connection on the Waterport. Once the test fit was done, I got some blue Loctite and locking washers to connect the "L" brackets to the 80/20. Then connected the Waterport to the same brackets with the provided nuts and some more blue Loctite.

Photos below.

IMG_6429.jpg IMG_6430.jpg IMG_6431.jpg IMG_6432.jpg IMG_6434.jpg IMG_6433.jpg IMG_6435.jpg
 
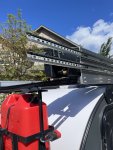
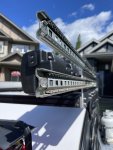
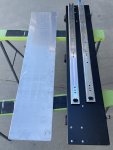
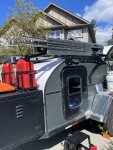
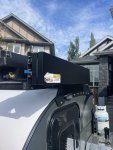
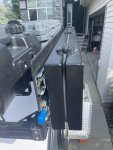
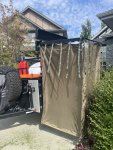
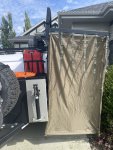
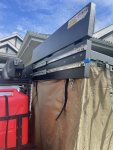
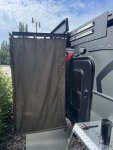
Finally got around to finishing the details and fabrication for the QuickPitch metal box ensuite. Whiel it was mounted to the trailer before our April trip, due to the side twist/torsion against the slide, it would tip and looked very unsupported. Despite using 250lb slides, slides are design to take force up and down for drawer weight with 1 slide per side, not support 25lbs of metal twisting it. So I had a 10" x 44" x 1/4" aluminum plate cut from Innovative Welding. With that, I drilled 14 holes in it to mount to the side of my 80/20 aluminum roof rack system. From there I used the 2nd slide, drilled out the locking mechanisms and then mounted both slides to the plan and both slides to the back of the box. I used neoprene bonded washers along with 1/4-20 x 1/2" button cap nuts and bolts and a locking washer to fasten the slides to the QuickPitch.

Below are some photos and here is a link to it in action: QuickPitch Quick-en-Suite Metal Box Unit custom slide
IMG_6663.jpg IMG_6664.jpg IMG_6662.jpg IMG_6665.jpg
 
Was going to head out this weekend, but stayed around. Glad I did as I was able to temporarily position and install the new Rhino-Rack Stow It Universal Mounts for the shovel. I will probably get an aluminum "L" bracket made so that I can spread the mounts apart and clear the MaxTrax a bit better. But for now at least the shovel is mounted.

https://www.youtube.com/shorts/VIHMsQT4kKE
 

Forum statistics

Threads
188,378
Messages
2,906,364
Members
230,117
Latest member
greatwhite24
Top