OBI Dweller Review and Discussion

rblitz

Member
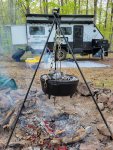
Just spent four days in a state forest here in the Mid-Atlantic. As it was our first trip in the D15, this was basically a dry-run to work out kinks and make sure we're set up for longer trips. We learned a lot about how the Dweller works and what we do and don't like and may want to modify.

Observations:
  • Highway travel at a standard 60 mph was fine. Had a few sway moments closer to 65. Will likely look into getting a WD hitch with sway control (or modify the one I already have.)
  • Off road handling was perfect; hit a lot of rough patches and bumps and had no issues.
  • The sink drain tube position sucks: hard to stow without it getting in the way of the slide out or dripping liquid into the utensil tray. I saw another post on a mod which I may need to copy.
  • There are a lot of sharp parts of metal on the rig that need to be filed down to be safe. There is a bur on the end of the kitchen slide rail that is as sharp as a surgical scalpel and got me pretty good.
  • Noticed that the shower door is warped. One corner is not flush to the opening.
  • The Truma is great; really quiet and kept us warm even down to 28 F. Water heater was fine too. Over four days we went through about 2/3 of a 20 gallon LP tank.
  • Battery life was unimpressive; had to top off at least once a day using my generator. But we had mostly cloudy weather and pretty significant tree coverage.
  • My grey water drain solution isn't perfect; in cold weather the pool hose I'm using is to rigid to unwind and direct into a receptacle.
  • Would love to come up with a solution to having the refrigerator power cord to retract or be held out of the way of the slide rails.
  • We could feel the fold point in the mattress as we slept. It wasn't bad (and the overall comfort of the mattress was good), but I'm wondering how long before it starts to become more noticeable with use.
20230423_183103a.jpg
 
Last edited:

WillySwan

Well-known member
Wait until you compare the install requirements of the A/C unit, to what OBi did. It is my single biggest complaint with the trailer. :(

Other than the clearance on the inlet side (75mm vs. the 200mm recommendation), everything on my installation seems to be done per the installation instructions. I might be missing something, if so, it is not obvious.
 

WillySwan

Well-known member
When we first got our Dweller, I did not really see the point of having the outside faucet on the front of the trailer. I now find it to be very handy and we use it often. A few days ago, however, I made a discovery - the hose threads on my Dweller’s faucet are not 3/4“ garden hose thread (GHT). An American garden hose will not thread onto the spigot. The threads are about the same diameter as US garden hose, but they are a much finer thread pitch. I’m not sure how often I will need to hook a hose to the Dweller faucet, but I want to have the option available.

A little research convinced me that the hose threads on the stock Dweller faucet are 3/4“ BSP (British Standard Pipe). This is the standard garden hose fitting used in Australia.

The first effort was to make “an adapter kit”. I purchased two adapters (3/4 BSP-to-3/4 NPT plus 3/4 NPT-to-3/4 GHT). The result worked but was ugly and hung below the lower frame rail. It did not look like a robust solution.

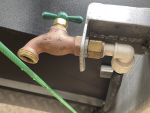
The second effort was to see what it would take to replace the faucet with a standard US hose bib. This was successful. When I pulled the factory faucet I found that the PEX fitting attached to the faucet is 1/2 IPS female thread. IPS (Iron Pipe Straight) is a straight thread that seals with a washer instead as opposed to NPT which is a taper thread that seals with the metal-to-metal wedging (plus teflon tape). 1/2 IPS and 1/2 NPT are the same base diameter and thread pitch. It is usually possible to seat a 1/2 IPS female fitting to 1/2 NPT male pipe so long as the end of the pipe is square and smooth. I purchased a standard garden hose bib with a 1/2 NPT male inlet. It seals fine. In order to lock the faucet in place in the Dweller faucet mount, I used a 1/2" IPS thread electric conduit lock nut, The pictures below show details:

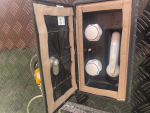
  • The Dweller PEX fitting with washer
  • The hose bib and conduit lock nut I used
  • The final installation
  • Faucet comparison
Everything is tight in place and leak proof. Now I can hook up a garden hose if needed and if the faucet were ever to freeze and break, it can be easily replaced. This is an easy modification that only takes a couple of crescent wrenches and about 15 minutes to complete.

Installation Procedure
  1. Disconnect PEX plumbing fitting and remove old faucet from Dweller frame bracket
  2. Insert new faucet in bracket.
  3. Install conduit lock-nut onto faucet from back side of bracket.
  4. Tighten lock-nut to fix faucet in place on bracket
  5. Reinstall PEX plumbing fitting. Do not over tighten.
  6. Leak test the fitting
Note: If the PEX fitting bottoms out against the lock nut and the fitting leaks (mine didn't), you can simply install another "shower washer" <LINK> in the fitting to take up additional space.

1682479312959.png1682479313153.png1682516661154.png1682479313055.png
 
Last edited:

rblitz

Member
When we first got our Dweller, I did not really see the point of having the outside faucet on the front of the trailer. I now find it to be very handy and we use it often. A few days ago, however, I made a discovery - the hose threads on my Dweller’s faucet are not 3/4“ garden hose thread (GHT). An American garden hose will not thread onto the spigot. The threads are about the same diameter as US garden hose, but they are a much finer thread pitch. I’m not sure how often I will need to hook a hose to the Dweller faucet, but I want to have the option available.

A little research convinced me that the hose threads on the stock Dweller faucet are 3/4“ BSP (British Standard Pipe). This is the standard garden hose fitting used in Australia.

The first effort was to make “an adapter kit”. I purchased two adapters (3/4 BSP-to-3/4 NPT plus 3/4 NPT to 3/4 GHT). The result worked but was ugly and hung below the lower frame rail. It did not look like a robust solution.

The second effort was to see what it would take to replace the faucet with a standard US hose bib. This was successful. When I pulled the factory faucet I found that the PEX fitting attached to the faucet is 1/2 IPS female thread. IPS (Iron Pipe Straight) is a straight thread that seals with a washer instead as opposed to NPT which is a taper thread that seals with the metal-to-metal wedging (plus teflon tape). 1/2 IPS and 1/2 NPT are the same base diameter and thread pitch. It is usually possible to seat a 1/2 IPS female fitting to 1/2 NPT male pipe so long as the end of the pipe is square and smooth. I purchased a standard garden hose bib with a 1/2 NPT male inlet. It seals fine. In order to lock the faucet in place in the Dweller faucet mount, I used a 1/2" IPS thread electric conduit lock nut, The pictures below show details:

  • The dweller PEX fitting with washer
  • The hose bib and conduit lock nut I used
  • The final installation
  • Faucet comparison
Everything is tight in place and leak proof. Now I can hook up a garden hose if needed and if the faucet were ever to freeze and break, it can be easily replaced. This is an easy modification that only takes a couple of crescent wrenches and about 15 minutes to complete.

View attachment 775567View attachment 775568View attachment 775569View attachment 775570
So THAT's why no matter how much I tightened the hose the damned thing still leaked!

Thanks WillySwan, you're keeping me busy.
 

freewayross

Adventurer
Clearance for 8'(~7'8" actual conservative estimate) Garage doors

Has anyone come up with a solution to get the trailer in the standard 8' garage doors? I'm looking to buy a D15 and would hate to park it out in Arizona sun.
  • One option is to put shorter wheels/rim combination (needs to clear the drum brakes), what off the shelf solution do we have out there for this?
  • Long shot, Has anyone tried retrofitting air bags in place of the coil springs? This will allow lowering the trailer to get it in through the door

Thanks
 

Obsessed2findARuggedHybid

Well-known member
Is there any way you could get your door a few inches higher? I called my door guy and he adjusted the door to 95" and I pulled 1/2 inch 1x4 trim off. How tall is dweller? 98"

You maybe able to pull wheels and drop brake hubs (assuming the hubs are the low point) on wheel dollies. Measure how high your brake hubs are off ground plus the may compress a bit.
 

freewayross

Adventurer
Is there any way you could get your door a few inches higher? I called my door guy and he adjusted the door to 95" and I pulled 1/2 inch 1x4 trim off. How tall is dweller? 98"

You maybe able to pull wheels and drop brake hubs (assuming the hubs are the low point) on wheel dollies. Measure how high your brake hubs are off ground plus the may compress a bit.

The lift door itself sits higher than the garage opening structure when pulled up.

So i actually tried this a few weeks ago (no pics :( ). But I was unsuccessful. I even let the tires down to about 10psi, and I was still 2 inches too tall (skylight over bed). Airbags are on my distant, but 100% planned to do list. For me personally, the benefits far out weigh any possible down sides.

Are there off the self DIY air suspension kit that will fit in the coil buckets? I've been searching on the internet but all i get are posts about people building the whole suspension systems from scratch
 

WillySwan

Well-known member
To my knowledge, nothing exists. I'll be designing and building from scratch.
An air spring modification will be great. I'll be really interested to see what you can come up with. I took a cursory look at this when I had the springs off and was adding the hockey pucks under my jounce bumpers this past winter. The biggest challenge I see is clearance. The coil spring rides within less than 1/2-inch of the trailing arm. I don't think convoluted air springs will work without seriously notching the trailing arm. The jounce bumpers will also need to be relocated.
 
Last edited:

WillySwan

Well-known member
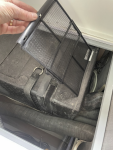
The biggest issue I am currently fighting is with the location of the HB9000 heat pump. It appears to be impossible to remove the washable air filter to clean it.
For anyone that has the same clearance issues with their HB9000 heat pump, it is possible to remove and reinstall the filter, but I would not recommend it. In order to remove and reinstall, I had to first rotate it 90 degrees then give it a serious "pretzel bend" in order to get it through the gap. Luckily it did not break.

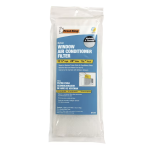
It's really not much of a filter. I think I am going to fashion an external filter that I will velcro into place using some window air conditioner washable filter material. Something like this Frost King NF305 material.

FYI, I did email OBI and ask them for advice. Their suggestion was, "You will either have to remove the side panel next to the bed or loosen the mounting for the HB9000 to give you enough clearance to pull the filter all the way out." .
Okay...


1682608406052.png

1682608634412.png
 

tjtx

Member
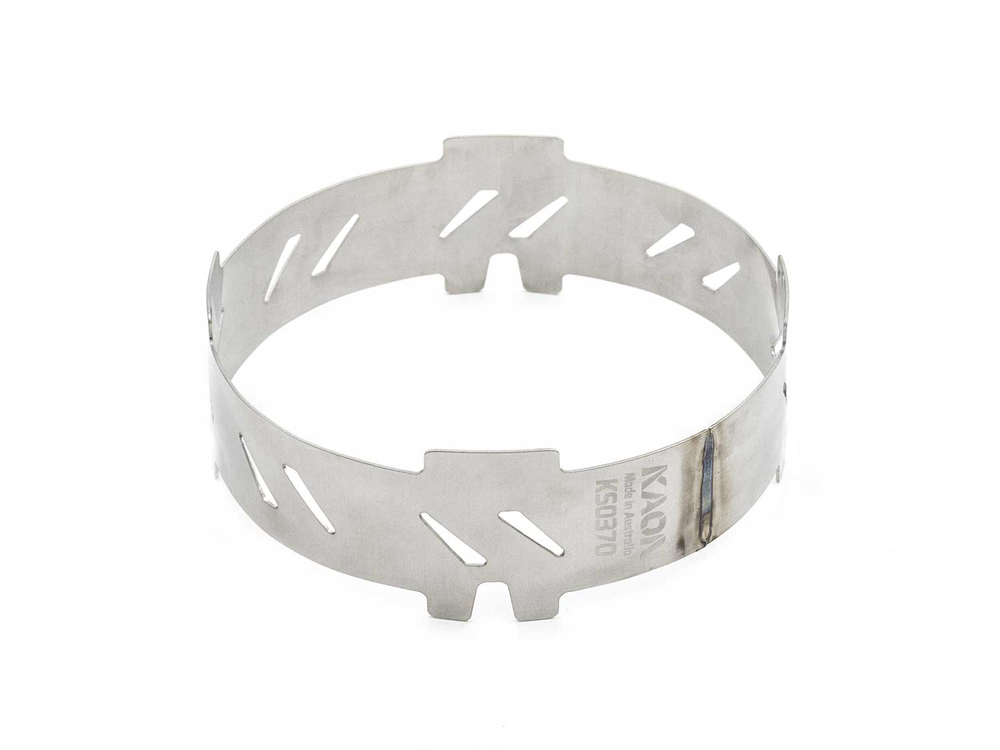
Straight from Australia today:


Gonna try them out, made for these domestic stoves, when we were down on the beach it was near impossible to keep the stove lit.


Not too bad once you realize it's like a 1:.65 exchange ratio rn.
 
Last edited:

rblitz

Member
Straight from Australia today:


Gonna try them out, made for these domestic stoves, when we were down on the beach it was near impossible to keep the stove lit.


Not too bad once you realize it's like a 1:.65 exchange ratio rn.
Had the same issue; please report back on performance. I see from their website that they are out of stock. You must've ordered the last one. :)
 

WillySwan

Well-known member
Dust Control Project Update - Sealing up the Dweller

1683243314320.png

It will be some time before I have a chance to check the results, but I am finished with Stage 1 of this project. There are two components to this stage:

Step 1) Sealing up the Dweller. Identifying and remediating items that are contributing to the dust intrusion
Step 2) Designing and installing an active positive pressure system that will pump in filtered air while traveling over gravel roads.

This post covers Step 1, what I did to try to seal up my Dweller so that a pressurization system can have a chance to be effective.

First check the gaskets. The gaskets on the major compartments appeared to all be working well. These are:
  • The entry door
  • The rear pop-out hatch.
  • Galley door
  • Refrigerator compartment door
  • The two driver’s side compartment doors. Note: The upper driver’s side compartment is isolated. The lower driver’s side compartment is vented to the refrigerator compartment and the refrigerator compartment is vented to the main cabin.
Even though all these door gaskets appear to be working, I took the time to re-adjust the latches and make sure they were all sealing tightly.

It appears that the main sources of dust intrusion on my Dweller were:
  1. The “Aussie propane vent” on the bottom of the entry door. Even with the upholstery cover, I was getting a significant amount of dust coming in through this vent.
    Solution: I sealed off the vent with duct tape. There is no need for this vent since we are required to have the propane alarm in the U.S.
    1683243314422.png1683243314509.png
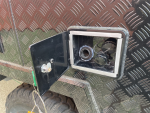
  2. The external shower access door. There is no seal on this door. Dust was coming in through this door and getting into the cabin through the shower hose opening behind the closet.
    Solution: I sealed this door with weather stripping.
    1683243314641.png1683243314729.png
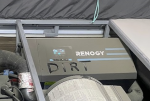
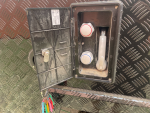
  3. The “city water” + rear tank fill access door. There is no seal on this door. Dust was coming in through this door and then around the rear tank fill hose and into the cabin behind the closet.
    Solution: I sealed the access door with weather stripping and I caulked around the rear tank fill hose.
    1683243314822.png
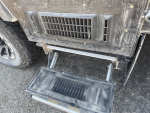
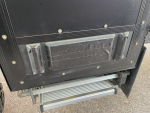
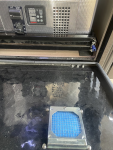
  4. The vent louver on the refrigerator access door. This vent has a filter, but it was not effective.
    Solution: I replaced the filter material with something that I think will be much more effective. I am also thinking that when pressurized, air will escape the cabin out this vent.
    1683243314928.png

    1683243314998.png

For dirty air to get sucked into the Dweller, there has to be places where the cabin air is being sucked out to cause the negative pressure. One of these areas might be the rear pop-out hatch. It is hard to determine where “clean air” is getting sucked out. Common sense tells me that the rear of the trailer is going to be a low pressure area when traveling at speed. Cabin air may be leaking around the pop-out hatch gasket.
Solution: I’m not sure if this is an issue. If it is an issue, I’m not sure what can be done about it. I am hoping that the pressurization system can "over power" any leakage that is happening here.

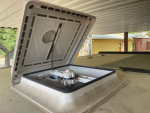
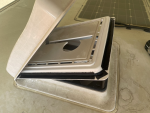
Another place where air is certainly escaping is out the bathroom vent lid. If you look at the lid on this vent, you will see that it is designed to have flow-through ventilation even when tightly closed. The lid is a 2-piece design. There are vent holes on both sides of the gasket. It is designed so that you can use the exhaust fan even with the lid completely closed. This lid is obviously on the roof-top slip-stream. Air has to be getting drawn out of this hatch via the venturi effect while driving down the road.
Solution: Seal up one set of vent holes. I disassembled the hatch and sealed the outer holes using “as seen on TV” Flex Tape sealant. It actually seems to be some good stuff. After installing the tape, I drilled a couple of small weep holes to allow any condensation that tries to collect there to drain.
1683243315073.png
1683243315136.png

In the next day or so, I will post an update on the pressurization portion of the project.
 

rblitz

Member
Dust Control Project Update - Sealing up the Dweller

View attachment 777126

It will be some time before I have a chance to check the results, but I am finished with Stage 1 of this project. There are two components to this stage:

Step 1) Sealing up the Dweller. Identifying and remediating items that are contributing to the dust intrusion
Step 2) Designing and installing an active positive pressure system that will pump in filtered air while traveling over gravel roads.

This post covers Step 1, what I did to try to seal up my Dweller so that a pressurization system can have a chance to be effective.

First check the gaskets. The gaskets on the major compartments appeared to all be working well. These are:
  • The entry door
  • The rear pop-out hatch.
  • Galley door
  • Refrigerator compartment door
  • The two driver’s side compartment doors. Note: The upper driver’s side compartment is isolated. The lower driver’s side compartment is vented to the refrigerator compartment and the refrigerator compartment is vented to the main cabin.
Even though all these door gaskets appear to be working, I took the time to re-adjust the latches and make sure they were all sealing tightly.

It appears that the main sources of dust intrusion on my Dweller were:
  1. The “Aussie propane vent” on the bottom of the entry door. Even with the upholstery cover, I was getting a significant amount of dust coming in through this vent.
    Solution: I sealed off the vent with duct tape. There is no need for this vent since we are required to have the propane alarm in the U.S.
    View attachment 777133View attachment 777132
  2. The external shower access door. There is no seal on this door. Dust was coming in through this door and getting into the cabin through the shower hose opening behind the closet.
    Solution: I sealed this door with weather stripping.
    View attachment 777134View attachment 777129
  3. The “city water” + rear tank fill access door. There is no seal on this door. Dust was coming in through this door and then around the rear tank fill hose and into the cabin behind the closet.
    Solution: I sealed the access door with weather stripping and I caulked around the rear tank fill hose.
    View attachment 777135
  4. The vent louver on the refrigerator access door. This vent has a filter, but it was not effective.
    Solution: I replaced the filter material with something that I think will be much more effective. I am also thinking that when pressurized, air will escape the cabin out this vent.
    View attachment 777131

    View attachment 777127

For dirty air to get sucked into the Dweller, there has to be places where the cabin air is being sucked out to cause the negative pressure. One of these areas might be the rear pop-out hatch. It is hard to determine where “clean air” is getting sucked out. Common sense tells me that the rear of the trailer is going to be a low pressure area when traveling at speed. Cabin air may be leaking around the pop-out hatch gasket.
Solution: I’m not sure if this is an issue. If it is an issue, I’m not sure what can be done about it. I am hoping that the pressurization system can "over power" any leakage that is happening here.

Another place where air is certainly escaping is out the bathroom vent lid. If you look at the lid on this vent, you will see that it is designed to have flow-through ventilation even when tightly closed. The lid is a 2-piece design. There are vent holes on both sides of the gasket. It is designed so that you can use the exhaust fan even with the lid completely closed. This lid is obviously on the roof-top slip-stream. Air has to be getting drawn out of this hatch via the venturi effect while driving down the road.
Solution: Seal up one set of vent holes. I disassembled the hatch and sealed the outer holes using “as seen on TV” Flex Tape sealant. It actually seems to be some good stuff. After installing the tape, I drilled a couple of small weep holes to allow any condensation that tries to collect there to drain.
View attachment 777130
View attachment 777128

In the next day or so, I will post an update on the pressurization portion of the project.
So that black tape around the fan housing...that was SO sticky I couldn't crank the lid open. I ran a light coating of lithium grease over it to drop the tackiness. It almost looks like it was put on as an afterthought. Any reason to leave it there?
 

lacresta

New member
Hi, I've read the bulk of the 46 pages of this thread. This is great information and very helpful!
It looks like the 13 and 15 both have the sway problem, is that correct? Dealer I'm speaking with said it's only the 15..
Is anyone pulling the 13 with a LC100? If so, any general feedback and how painful is the mileage?
thank you
 

Forum statistics

Threads
188,029
Messages
2,901,362
Members
229,411
Latest member
IvaBru
Top