Overland Sprinter Build

luthj

Engineer In Residence
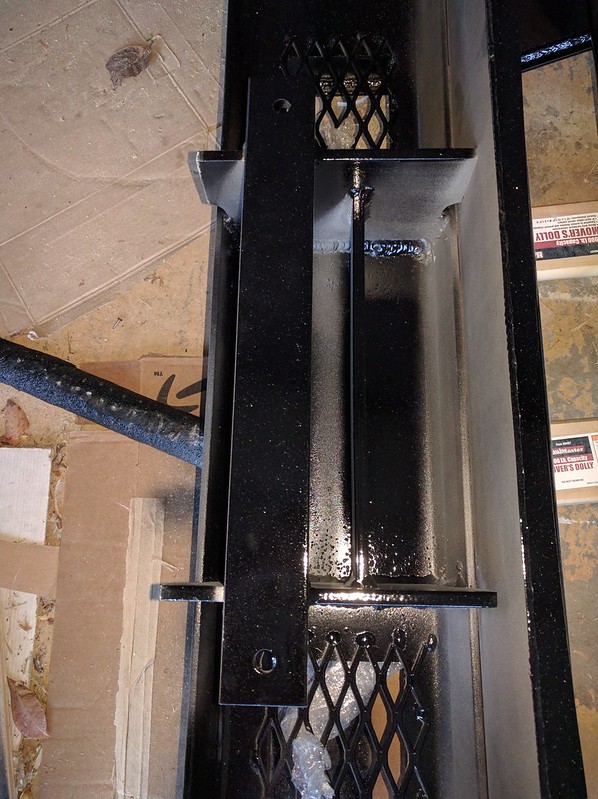
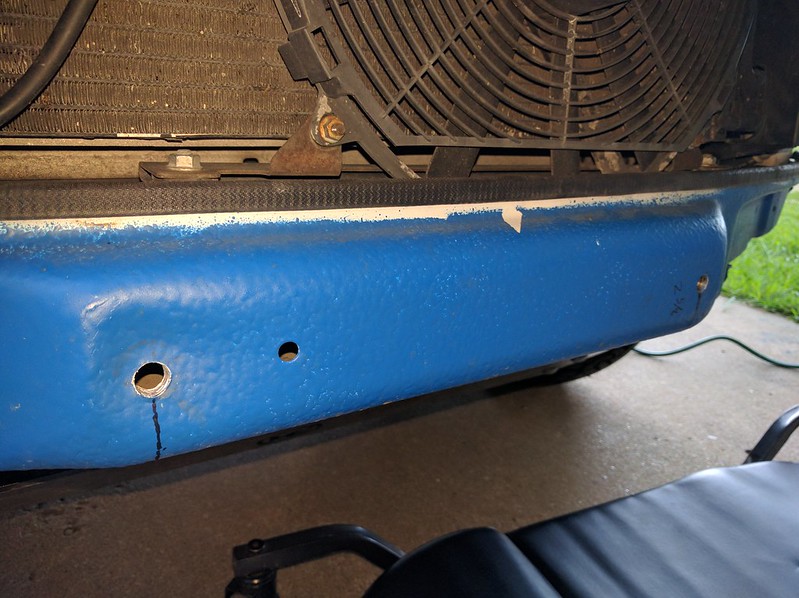
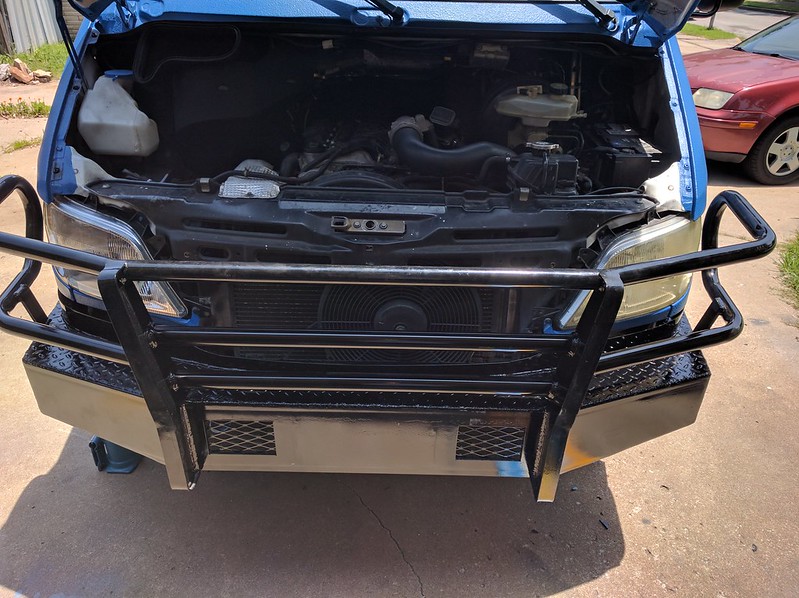
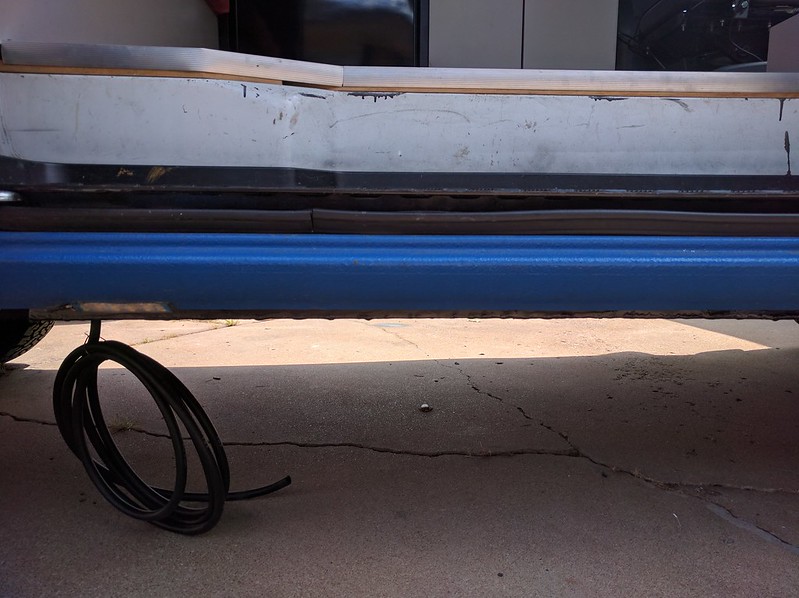
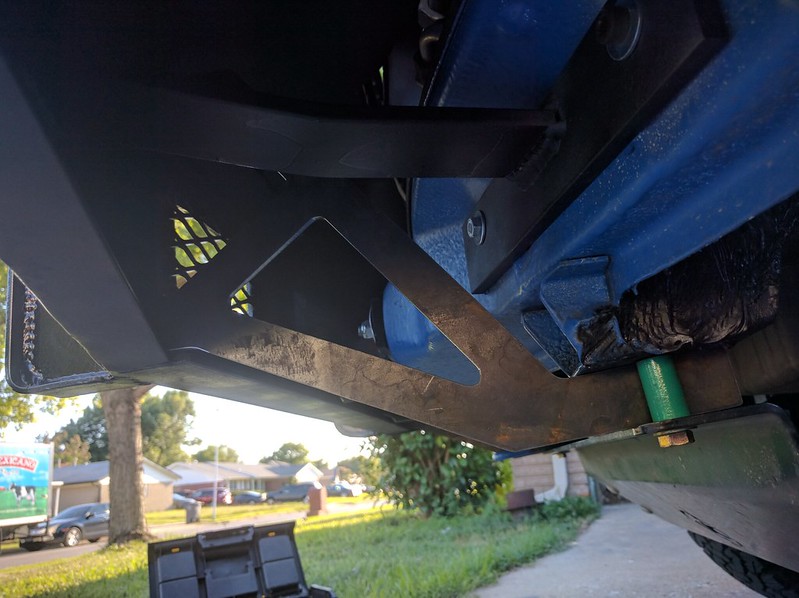
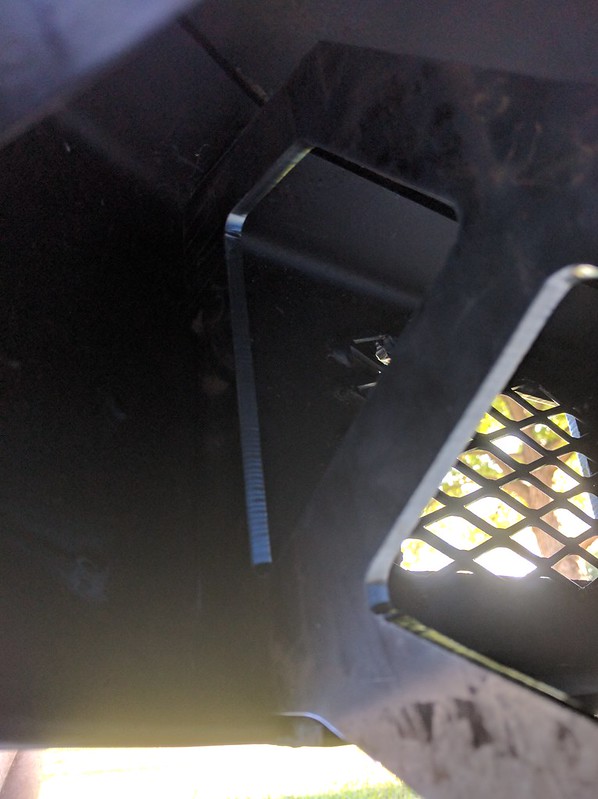
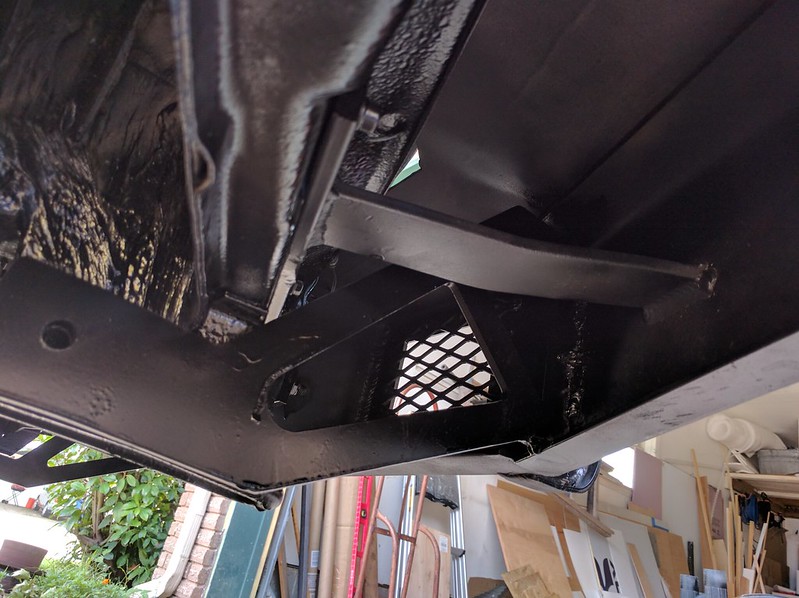
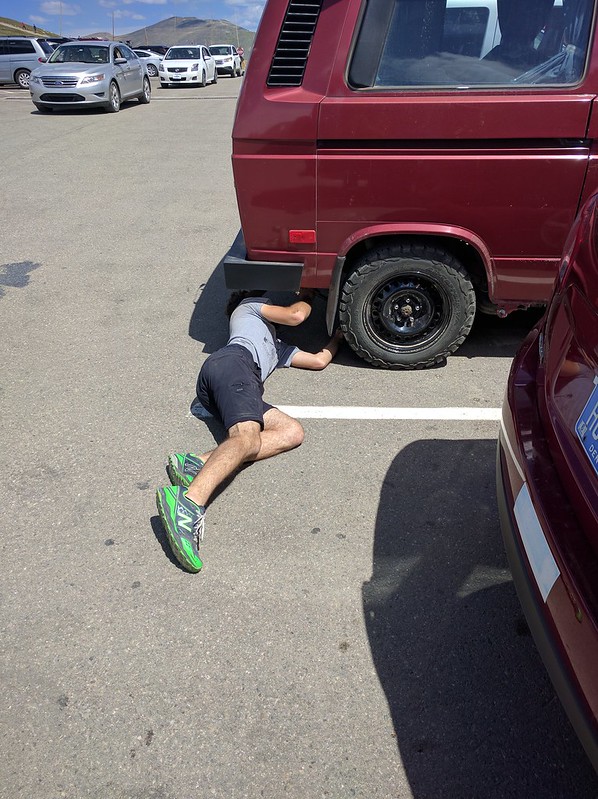
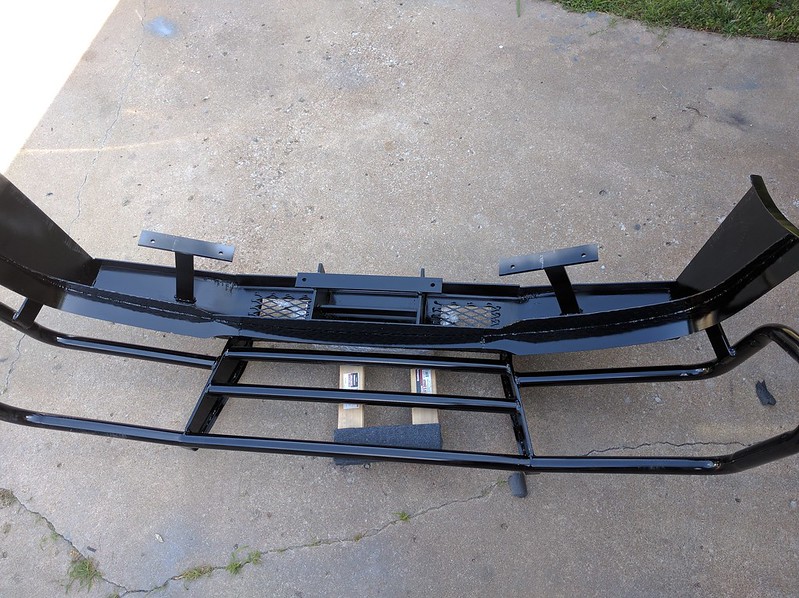
The bumper arrived a few days ago. Packaging was a bit Spartan, but it is a bumper… It's fairly beefy, but not overly so. I am not satisfied with the mounting provisions, so I will be making some brackets to attach it to the vans “frame” tubes.


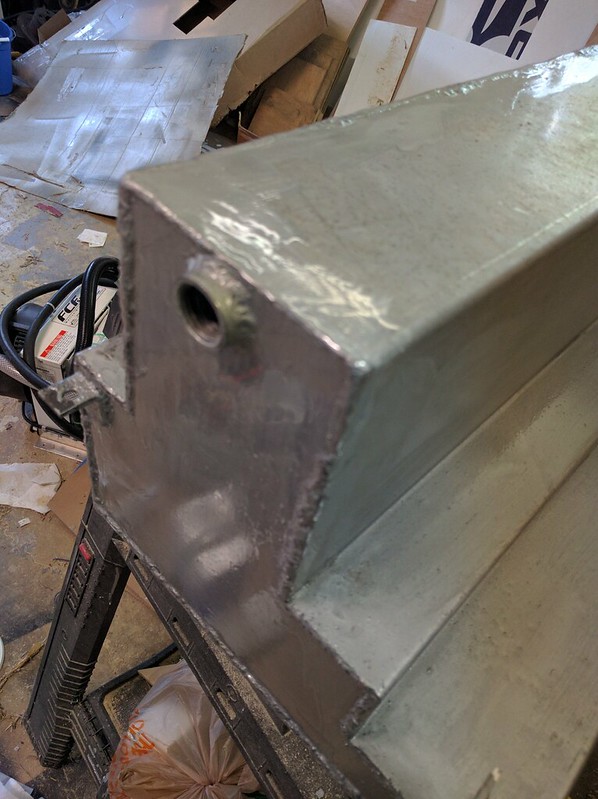
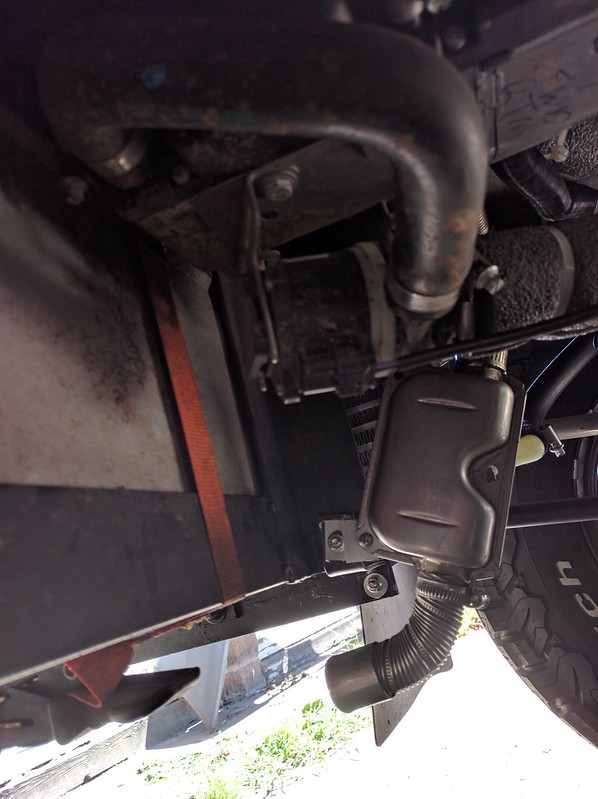
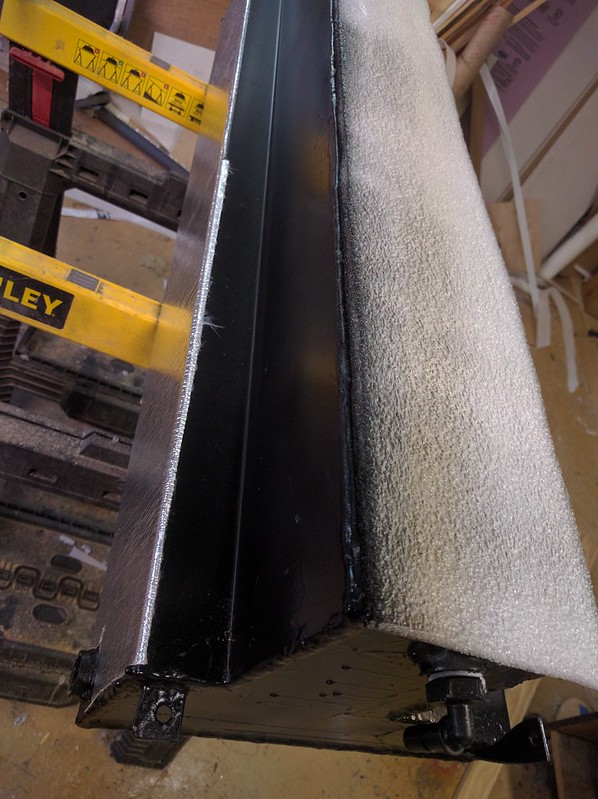
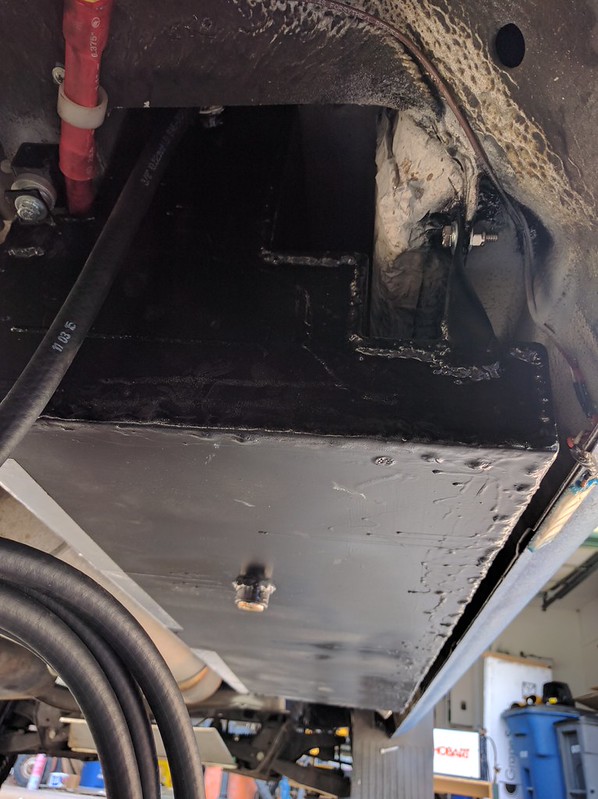
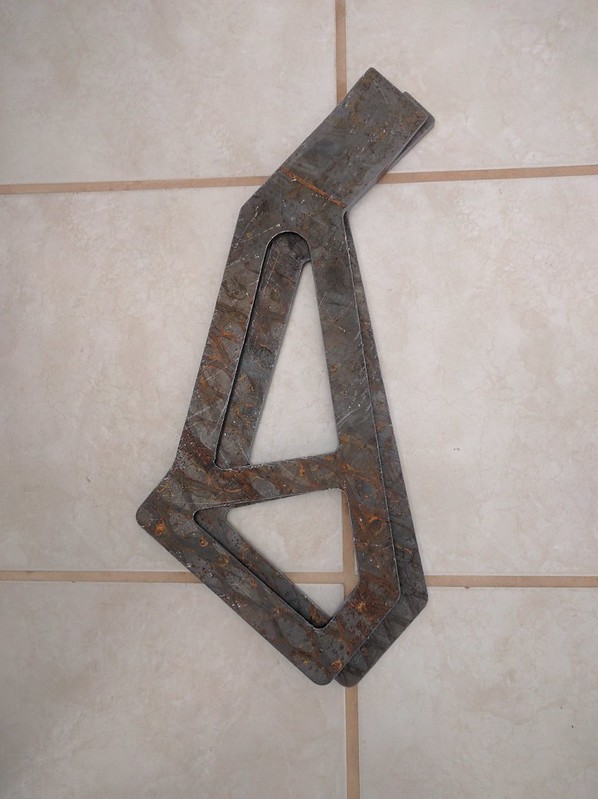
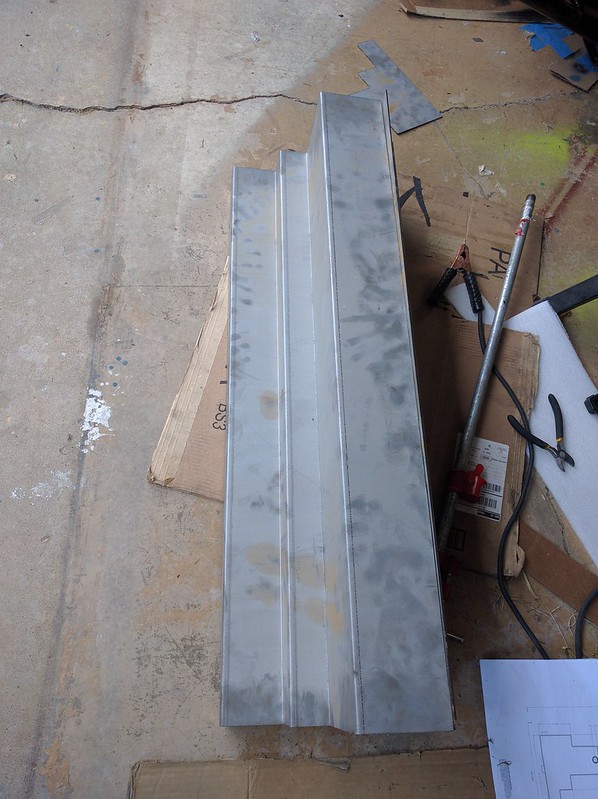
A friend of mine plasma cut and bent some steel sheet for me. It will become a fairly unusually shaped fuel tank. 16 gauge would have been ideal, but beggars cannot be choosers. So I will have a 10 gauge galvanized tank welded up soon. One of the bends is off a hair, so I will need to trim one edge before assembly. This may be a challenge with my limited tools.

The tank fits in the space under the sliding door and should be around 14 gallons. I could have gotten an 19 gallon tank to fit, but the alternator charging wire interferes, and it wasn't worth the cost to make a new one.


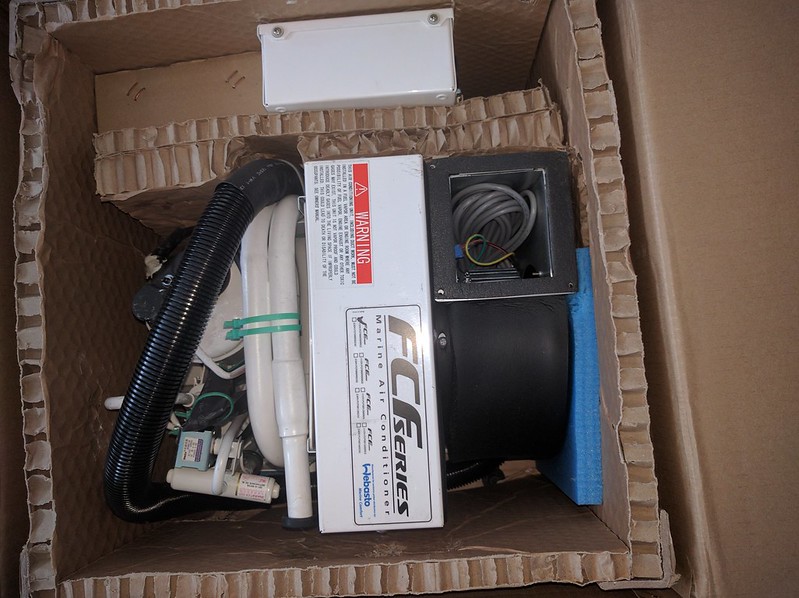
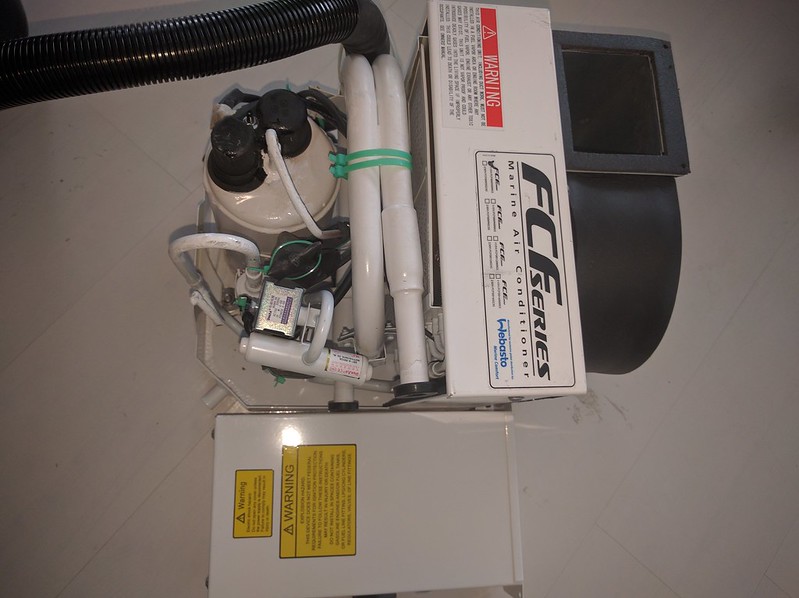
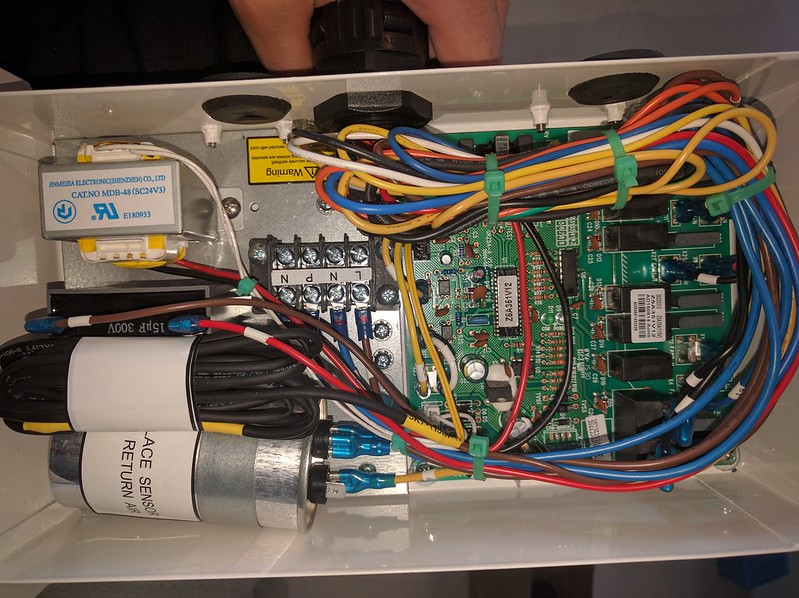
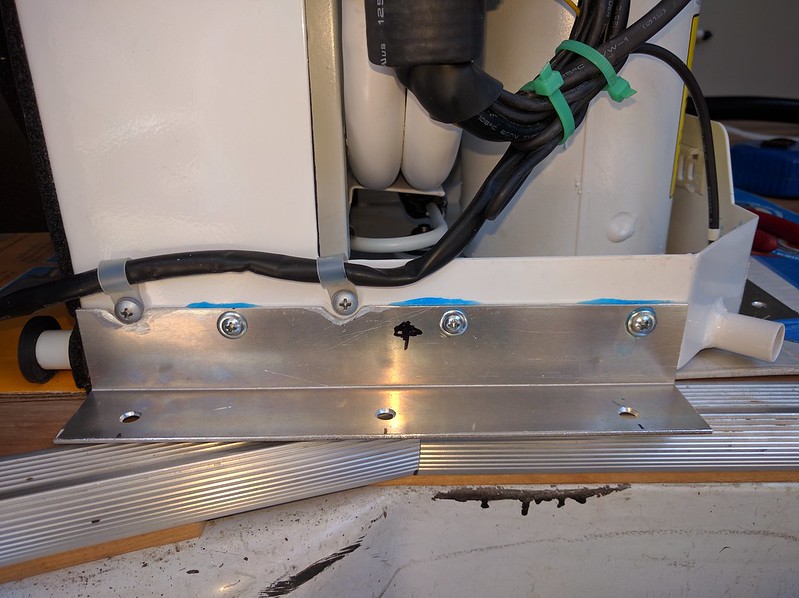
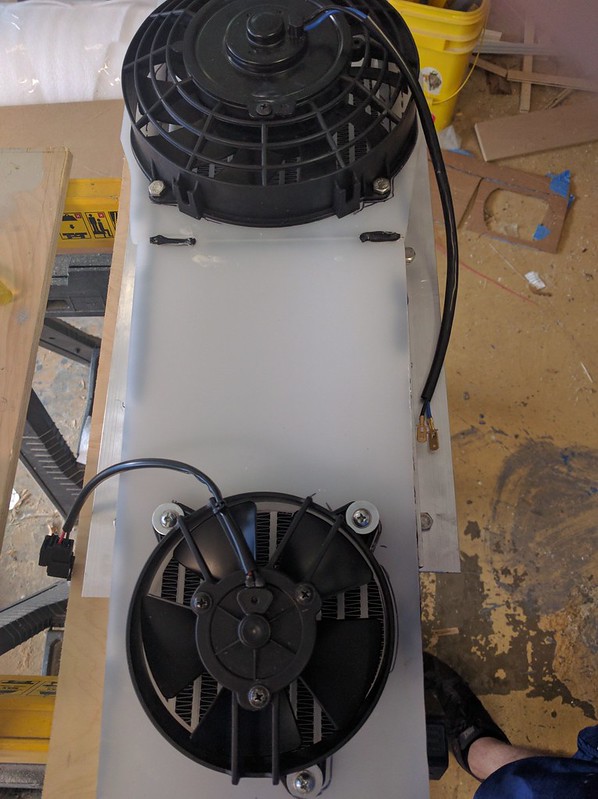
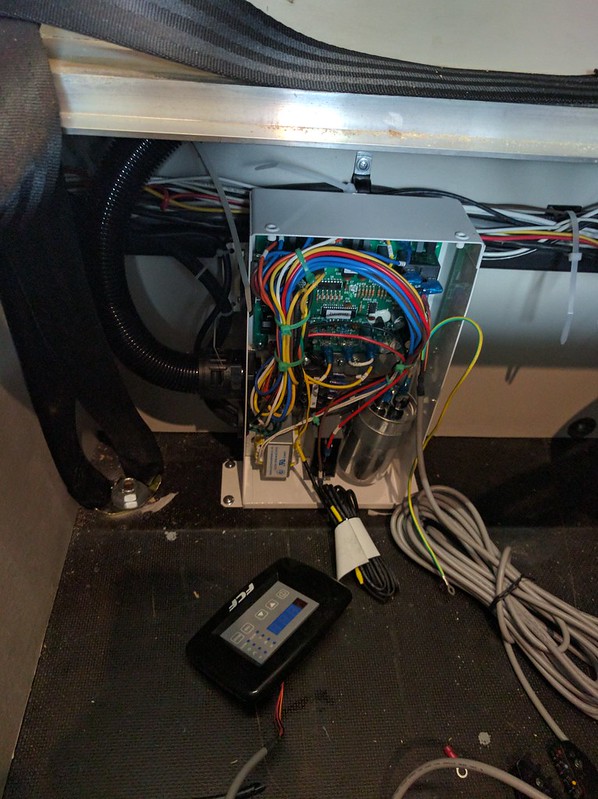
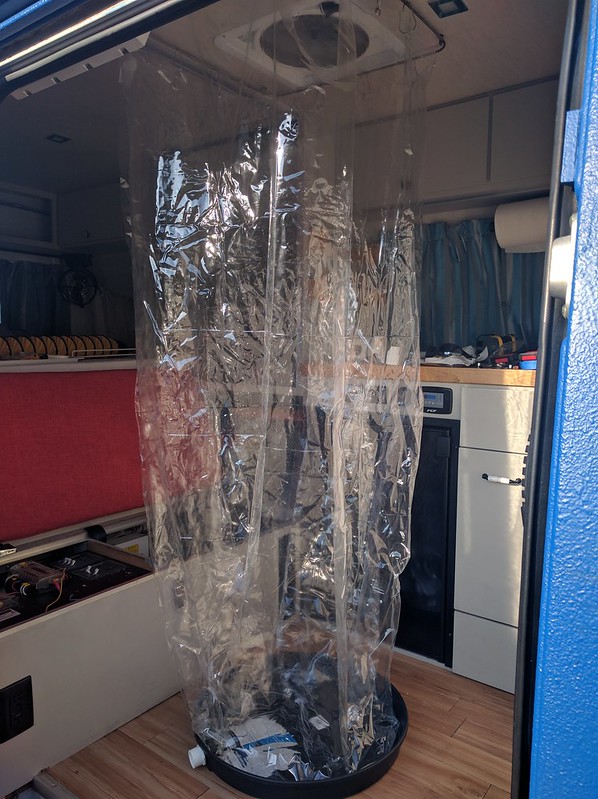
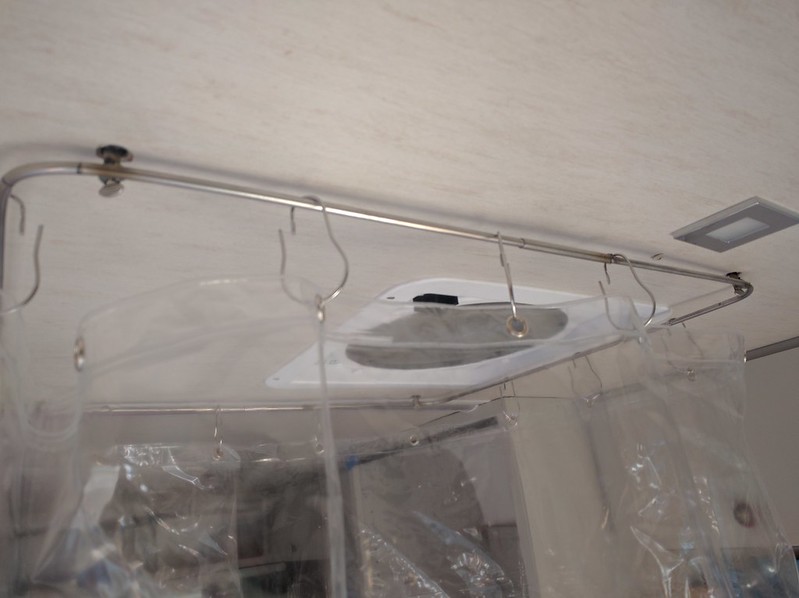
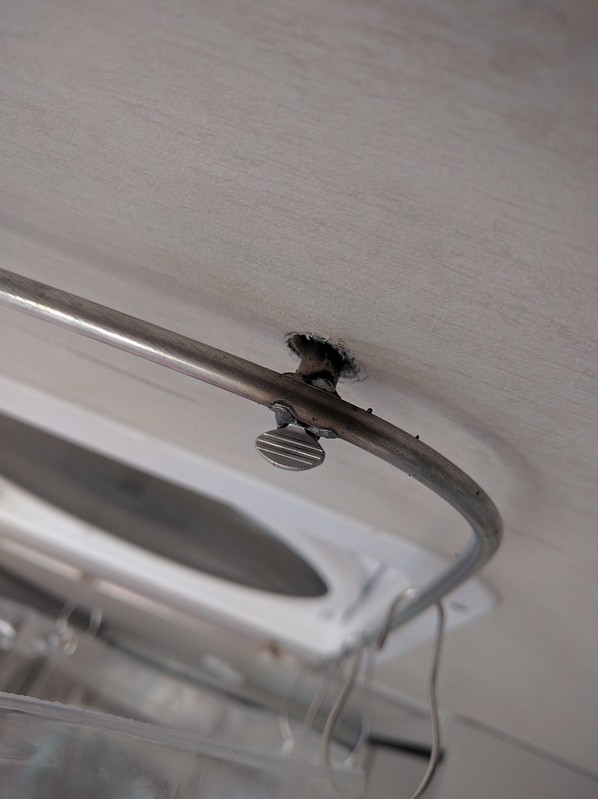
The AC unit should be arriving today. I will post some pictures of the install. I did some measuring and there are a number of places where I can fit a medium sized radiator under the van. Browsing the web shows plenty of air to water intercooler radiators for less than 200$. Some back of the envelope math indicates that a 2” thick double pass radiator with an area of 150+ square inches should be sufficient for the 2.2kW heat rejection requirements of the 5k BTU webasto unit.
 
Last edited:

luthj

Engineer In Residence
I am starting to accrue piles of parts and gear again…. Now I just need to find time to install it all. Working a day job is makes it tough to have van hobbies.

Here are some photos of the Websasto FCF 5000 AC unit. As you can see it’s quite compact. Construction quality seems to be good. A few loose zip ties, and a scratch here or there.


Here it is mounted. The factory supplied mounting brackets are not strong enough for an automotive application, so I added some larger brackets with through bolts for the floor.


I did some testing on the unit using a garden hose for water supply. The unit moves quite a bit of air. It was able to drop the ambient air 20 degrees (88F to 68F). Humidity was around 55%. The water stream was heated about 5F which a bit higher than my estimates. Power consumption was 4AAC (according to the inverter, not sure how accurate this is). DC power usage was about 55A on high. This is a bit higher than my initial estimates. Apparently the inverter is only 80-70% efficient at these low power levels. There will also be power draws from the yet to be installed water pump and radiator fan(s).


I installed a couple of grab handles to aid ingress/egress.


I took a good part of the day on Saturday to mount the bumper. It was not a simple bolt on job for 2 reasons. The first was due to the mounting holes not lining up. The second is that I want to strengthen the fairly weak stock mounting points. The factory mounting points for the bumper cover are just 2 rivnuts. (this bumper also uses the step mounts). I drilled out the center 2 rivnuts and installed ½” through bolts with backing plates.


The bumper has little or no resistance to twisting backwards. So I added a mounting bolt into the fender panel skirt on each side near the rear. This adds substantial rigidity, and hopefully will keep wildlife from rotating the bumper into the hood.

[

Here are some materials standing by for the next stage of changes. A water heater drain pan will be used for the interior shower and 2 cutting boards which will become a folding table.


luthj

Engineer In Residence
Getting in and out from under the van is gets old fast. I must have done it over 300 times in the last week.

The Aux fuel tank has been sealed. The POR15 tank sealant is tough stuff, and covers very well. I will pressure test the tank tomorrow, but I don’t expect any leaks. I lined the interior of the tank, and used the remainder to brush the outside of the seams, and all of the bottom.


The AC is 90% installed, and working well. I ended up adding a second fan. On high, the water loop was at ~30F above ambient. With both fans it tops out at ~15F above ambient. On medium ~10F above ambient was achieved. The fans are loud. A bit louder than the Sprinters Aux electric fan. They are not audible inside, but are noticeable outside. The bottom of my van is jam packed with gear, tanks etc. I was highly limited on the size and placement of a radiator (not in part due to my self-set clearance requirements). Ideally radiator(s) of about 0.75 square feet per 1k BTUs would be used. This would allow much lower speed fans, and less noise. Most excitingly, I can now air condition the inside of the van while working on it!


Here is the radiator mounted. It is on the driver’s side of the battery bank. It is a tight fit, and getting it installed without giving up ground clearance was a pain.


Here is the forward side of the radiator. You can see the pump mounted to the underside of the floor. I still need to relocated the Espar D5 exhaust as it interfered with the radiator.


The electrical is mostly finished. The pump and fans are controlled using a 110V relay driven by the AC units pump output. I might add a thermoswitch for the second fan. This way it will only run when needed.


I used some 4” PVC drain fittings for the short duct run. This was I can install a 60 degree fitting for directing the air flow. I also have a collapsible duct which I will use to route the air flow into the sleeping area.


Up next is probably the Aux fuel tank. I have a ½” blind tank fitting on order. The same goes for a fuel rated 12V solenoid valve. I also have a Carter vane pump on my workbench currently. It looks reversible, I will test it out at some point.

I have at least 10 side projects going concurrently right now. The result? My garage is a disaster zone. I actually had to do a mid-day cleanup because I couldn't see the floor. Sometimes I wonder how my wife puts up with me.
 

luthj

Engineer In Residence
Back at it again, must…complete…van… The madness is setting in, I need to get back on the road... it’s been too long.

The fix for the AC system was to install a larger pump. The one I used is a Bosch Mustang intercooler pump. The difference in size is hopefully a good indicator of its performance.


I ended up mounting it above the axel.


I got tired of trying to bleed the water loop of air. I made up a quick tank using some barbed fittings and 2” PVC end caps.


The unit works correctly now. After 3 hours no errors or safety shutdowns occurred. The cooling loops stays pretty steady at about 15F above ambient on the cold side and 20F above ambient on the hot side. Ideally I would install a larger radiator, but I just don’t have the space for it.

Here is a shot of the condensate drain. It takes about 30-45 minutes or so before the humidity bottoms out and the unit starts to cool in earnest.


The D5 exhaust interfered with the radiator mounting, so I shortened and rerouted the exhaust straight downward.


While I had the fridge out I also added a 120V outlet to the aft face of the galley. Jen wanted it for using a waffle maker or other kitchen appliance.


The auxiliary fuel tank is leak free. I pressure tested at about 1.5PSI and no bubbles. My welding has improved enough, that I could do the tank a second time and have a handful of leaks. In the meanwhile I have been accumulating hardware and fittings for the tank install.

I decided on the Carter P4070 for a transfer pump. It is rated at 72GHP and ~5psi. After some testing I can confirm that it is reversible. I am not sure if it will affect its longevity. However, given the limited usage it will see, I doubt it is a concern.


Because this type of pump will readily pass fuel when turned off, I needed a valve to prevent siphoning. I choose a 1/2NPT solenoid valve with Viton diaphragm. I will be using the vent fittings already on the tank for the return/vent. For the feed I am considering a stainless blind fitting. This one is designed for use with Webasto heaters and has a 1/4NPT port. Unlike the Espar pickup, this unit has a non-threaded section of the body and an O-ring which compresses to seal the area around the threads. I will be using sealant regardless though. I am still waiting on insulation for the tank, and a few fittings before starting the installation.


Jen has been working on installing a small TV for use in the sleeping area. It will be connected to a micro media PC which can also double as a windows workstation.


The pivot arm is poor quality, and the slop in the joints made the TV tilt. After some aggressive shimming and the application of some UHMW tape it sits fairly level.
 

luthj

Engineer In Residence
The Aux tank is installed and the plumbing mostly done. I put some high temp reflective insulation on the exhaust side and some foam on the top for chafe resistance.


Since the fuel outlet is not flush with the bottom, I needed a pickup tube to allow complete utilization of the tank. I heated a piece of PEX tubing and pressed it into the outlet fitting. I bonded it with fuel resistant epoxy.


A bit more heat and it was ready to install.


Here is some photos of the tank bolted up.


I also installed the bumper brackets. These were plasma cut from 0.25” steel. They will be bolted to the recovery points (where the skid plate attaches). I also discovered why the holes on the skid plate didn’t line up on the passenger side. The recovery point is pulled ½” to the driver’s side! Apparently the recovery hook is not designed for lateral loading!


I welded the brackets to the bumper in situ as there was enough clearance. I am waiting to finish the install as the harmonic balancer was separated enough that I could move it slightly by hand. I have ordered the parts/tools and will replace it next week probably. It’s a good timing as I was going to replace the idler pulleys and tensioner as preventative maintenance.


As desired, the brackets completely remove the pitching movement from the bumper. No amount of abuse from me will move the bumper more than a mm or two.

I noticed some staining near the edge of the flair. I thought at first that the monstaliner had failed. But it was the crappy OE paint again. It had failed around the sealant, allowing water penetration. I removed about 3 inches of sealant and paint, and resealed with sikaflex 252. Thankfully there was no penetration into the cabin.


DzlToy

Explorer
What was the reasoning behind choosing what seems to be a "chiller" for your air conditioning system, as opposed to a small AC or DC powered unit which does not require seawater (or in your case adding a radiator, tank and pump)? Weight? Cost? Efficiency? I have seen these on boats, but never adapted for vehicle use.

Obviously too late now, but FYI for future reference or anyone else who may be looking for alternative HVAC options.

Dirna Bergstrom has mini 12V and 24V cabin A/C units, as small as 3,000 BTU (8 amps/hour)

LG Inverter A/C model US-Q126B4A3 pulls less than 10 amps (110V). Output is 12,000 BTU.

Sub floor mounted HVAC: http://www.truma.com/int/en/air-conditioning/saphir-vario.php

Truma now has complete HVAC and water heating systems: Storage compartment AC units are also offered. https://www.truma.com/int/en/heating/overview-truma-combi-heaters.php

Eberspacher manufactures HVAC systems for electric cars, various sizes, BTU, voltages, etc.

Bergstrom/Kysor offers NITE battery power HVAC systems, with Webasto heaters as options.

http://www.restomodair.com/shopproducts/haymaker-ii-custom-air-conditioning-system/ - custom HVAC systems for many applications
 

luthj

Engineer In Residence
Thanks for the info. Those Truma units look very nice. I bet they are very pricey though.

My main reason for using the water cooled unit was due to space, availability and cost. The unit is physically very small which made fitment easy. There are some great DC split systems, but they are quite expensive usually $2500+. The AC split systems were too large for my installation, I just didn't have the room! The water cooled unit gave me a bit more flexibility as there are hundreds of different sized radiators available. I could also obtain the webasto marine unit in a few days (I am on a schedule!). Most of the other units I found had long lead times or had to be shipped from europe...

I would probably not use this unit again though. It really needs a larger radiator to get the water loop to within 5 degree of ambient. I just don't have the under body space for that. Though I will keep an eye out for a radiator that might fit so I can add more capacity.
 
Last edited:

luthj

Engineer In Residence
Fuel tank is plumbed in. I still need to run wire for the pump and valve. The plumbing is as follows.

A vent/return line was added using a blind bulkhead fitting on the right hand aft corner of the tank. This line connects near the top of the aux tank.


The fill/drain line is connected to the bottom of the aux tank. From there it runs to the aft end of the main tank where it connects to the pump and valve. The connection to the main tank is made on the main fuel return line after the fuel cooler coils and thermostat.


luthj

Engineer In Residence
The fuel transfer pump has been wired up. I installed a blanking plate on the center console and used a DPDT switch. Power comes from the 12V dash outlet circuit.


Jen has been slaving away sewing curtains. These are made using a multilayer insulating material that supposedly has very good R value. All of them have been treated with silicone water repellant. A variety of curtain tracks are being used, as well as some magnetic snaps and fiberglass rods.


The harmonic balancer on my van looked alright, but when I pulled on the outer ring, it moved visibly. So I ordered a replacement. Autohaus AZ had the best price on the Corteco replacement (supposedly OEM to Mercedes). Upon removal the original unit showed delamination on the back side. I estimate over 50% of the rubber was disbonded. The new part is rock solid.


One last upgrade to the van, that we could not resist, was Fox shocks. The guys over at Van Compass have put together a kit with replacement rears, and add-on fronts.

The rear shocks are an easy job, and no modifications are necessary. The fronts require drilling 3 holes per side, and attaching a bracket for the upper mount. The lower mount clamps to the sway bar. Some care needs to be taken when drilling the bolt holes as there is some equipment in the engine compartment which could be damaged.


After a few short trips, I can say the shocks have really firmed up the ride. Control is better, and body sway/rocking is much reduced. It basically drives like it did empty, despite all the conversion weight. Another bonus is that these shocks have external rebound adjustment, so additional damping can be added on road if needed.

Jen finished up work on the folding table. It came out quite nice.


luthj

Engineer In Residence
It has been a while since my last update. We took an impromptu shake down trip to Colorado, Arkansas, and Missouri over the last two weeks. Quite successful overall, but I am regretting returning to heat here. 110F with heat index today…

Prior to the trip we mounted 2 spice racks that Jen built. We used the same polyurethane as the table and countertops. They turned out good.


We packed just about everything for the trip. Still had lots of space left, I need to work more on organization aids for the under bed storage.


Great Plains, They can be boring after 10 hours.


One morning I noticed a few drips of oil under the van. Further investigation showed the skid plates and right front wheel well coated. I eventually traced the leak down to the lower trans cooler fitting.


I must have loosened it accidentally when I was moving the lines around in order to replace the harmonic balancer. It was only ¼ turn loose! But that was enough to cause 1/2 quart of loss over less than one thousand miles. I had a loose hose clamp on a coolant line which caused a few drips, easily remedied with a screwdriver.

Another discovery on this trip, is that the radiator fan clutch in inoperative. It does not lock up at any temperature, and it has much less resistance when hot. With some conservative driving the electric fan was sufficient thankfully. I replaced the original unit once we got back home. I managed to only cut a couple of knuckles.


Here are some photos from the trip.


Some days I miss my vanagon. If there was a 21st century version available in the USA, I would considering buying one. But for now, I am happy with my sprinter.


We gave the fox shocks a workout with a good number of back road miles. I am satisfied with the performance. I might need a bit more damping on the rears.
 

vulf

New member
Thanks for the detailed build thread, I really like what you've done with your van. I'm curious what your experience has been with 2wd. I think it's safe to say most people on this forum would prefer 4wd, but how has your van done without it for what you use it for? I'm about to pull the trigger on a 2wd van but I'm nervous about giving up 4x4 that I had with my truck.

Sent from my Nexus 6P using Tapatalk
 

luthj

Engineer In Residence
Thanks for the detailed build thread, I really like what you've done with your van. I'm curious what your experience has been with 2wd. I think it's safe to say most people on this forum would prefer 4wd, but how has your van done without it for what you use it for? I'm about to pull the trigger on a 2wd van but I'm nervous about giving up 4x4 that I had with my truck.

Sent from my Nexus 6P using Tapatalk

There is so much more to the capability of a vehicle than just 2WD/4WD. For our use, the biggest factors were:

  • Ground Clearance
  • Good sidewall height (air down operation)
  • Approach/departure angles

Wheel articulation plays a role when you go from road to trail, and even more so when the trail turns to crap. When you lift a drive wheel in a 2WD, forward motion tends to stop. Even with a locker you will have limited traction. Of course the level of gnarly required to lift a wheel is generally more than I want to put my sprinter through. Honestly dragging an expensive rig down really bad roads is stressful and hard work. Sometimes it's worth it, and sometimes you have no choice.

I have found 2WD to be sufficient for my needs. The reduced weight and complexity is a nice bonus. Now, there are places I simply don't go because I don't have 4WD. But these are few for us. The primary reasons I seem to avoid a trail/road/location tend to be the following.
  • Ground clearance insufficient
  • Too narrow, trees/obstacles too low


Now, I do avoid deep mud and sand. But I would likely avoid those with 4WD anyways. I am not a technical off-roader, so I avoid risking damage to my vehicle or freaking the wife out when possible. Digging my 8,500lb sprinter out of a mud hole is not my idea of fun. Regardless, I do carry MaxTrax, a shovel, and some other gear just in case.

Now there are good reasons to have 4WD. Deep sand, mud or snow for example. Driving through fresh snow to a ski hill? 4WD would be a consideration. Still, you would be amazed at where a well equipped 2WD (with skilled driver) can go. Add a set of chains for backup, install a locker if you need, and you have a fairly capable vehicle.
 

luthj

Engineer In Residence
A quick update on vaguely related to van stuff.

My Wife and I put in our 2 week notices, so we will be out of the office by the beginning of September. Finally! One more month behind this desk and I might have gone insane...

We have 30 days to move out of our house, sell the crap we don't want, and move everything else into storage. I have some offers on free storage locations, but of course they are 3-4 hours away, so we will need to rent/borrow a van/tuck. So we have A LOT of tasks to complete to make this happen.

I am still working on the van of course. I have a final batch of parts inbound, and the finishing touches on curtains, shower, window coverings, and storage compartments are coming together. Hopefully we get this mostly wrapped up before the time limit.

Our on our last trip we averaged over 18mpg. Most of the driving was under 75, 65-70 preferably. This is GPS mileage. If I stay around 60mph we get close to 20. Not bad for a 8550lb brick with junk all over the roof, a lift, and A/T tires :wings:.

Australia here we come!
 

luthj

Engineer In Residence
The list of van items continues to dwindle as we chip away at the final touches.

First up is the indoor shower. I used stainless rod and tubing to make a curtain rod that attaches to the roof. I set 4 10-24 rivnuts into 2 of the ceiling frame tubes. These receive captive thumb screws which attach the rod. The rod/frame splits into two halves for storage under the bench seat. I used ¼” OD rod and 0.27” ID tubing. The pan is a water heater drain pan. We have the option of draining it into the sink (by hand) or running a drain tube out the slider door.


With much cursing the solar panel assembly was removed from the roof. I added a third frame member and beefed up the mounts. The new panels use a slightly different frame extrusion, so I had to re-drill the mounting holes. Of note is that the new panels have a different solder patter on the cells, and they are about 1/8” less tall due to the altered frame profile.


After much thought and debate, I decided to bond ribs to the back side of the panels. The glass on these panels is fairly thin, and flexes quite a bit when loaded. I used aluminum U channel bonded with sikaflex 252. I made the adhesive layer 1/8” thick to reduce the risk of delamination due to thermal expansion mismatches.


I will also be making a few aerodynamic shrouds to reduce turbulence, and hopefully eliminate the buffeting of the roof vent, and wind loading of the panels.

In order to maximize cooling and AC performance, I replaced the missing air deflector on the passenger side. I am also going to add some shrouding to the bottom of the bumper and around the skid plate. This should ensure that more of the high pressure air at the front of the van flows through the cooling pack. The new fan clutch is noticeably louder when driving at low speeds, and coolant temperatures seems to be better controlled. I am seeing 180-195 on the freeway with 90F ambients, which is much improved.


Jen has made some really nice padded covers for the front seats, and she has nearly finished the interior curtains. We are still working on attachment methods for the slider and front curtains, as our first attempts were not secure enough.
 

Forum statistics

Threads
188,704
Messages
2,909,330
Members
230,892
Latest member
jesus m anderson
Top