Overland XJ Build. Not my first Rodeo.....(video included)

Overland History

Wanderluster
Have you looked at putting gold foil on the floor pan above the cat? I replaced mine with a test pipe because the engine was running hotter, and the floor was too hot to touch, even with a high flow Vibrant cat.

http://www.full-race.com/store/thermal-protection/gold-reflective-film.html

I have looked into it extensively. We used that on every single race car that we ran, specifically in the Transmission tunnel to try to keep heat off of the driver. It worked ok as far as I can recall, considering the extreme heat that most racecars can see.

I think in my application, it will work well, and I'm still trying to figure out of I can get a good deal on it through the race team. Let's face it, that stuff is expensive as hell for what little you get!

I'll post up once I have the heat deflection part figured out....


Way to go on your build! I thought I was old school with the drill priming but it WORKS!

Thank you! Nothing works better than the tried and true method. ;)
 

F40

Adventurer
I have looked into it extensively. We used that on every single race car that we ran, specifically in the Transmission tunnel to try to keep heat off of the driver. It worked ok as far as I can recall, considering the extreme heat that most racecars can see.

I think in my application, it will work well, and I'm still trying to figure out of I can get a good deal on it through the race team. Let's face it, that stuff is expensive as hell for what little you get!

I'll post up once I have the heat deflection part figured out....

Thankfully I have a vast selection of rems from the rolls we have here. I may be able to help you out. You don't think a 12x24" sheet is enough to cover the cat area? I plan on wrapping my fuel rail and lines when I replace my exhaust manifold. Thinking about coating the manifold, but I'm worried it'll speed up cracking.
 

Overland History

Wanderluster
Great progress. Im glad I don't have to re weld floors into mine. Looks like a headache.

Have you had your carpets up to see underneath? You never know whats lurking under there, considering they trap moisture! ;)


Thankfully I have a vast selection of rems from the rolls we have here. I may be able to help you out. You don't think a 12x24" sheet is enough to cover the cat area? I plan on wrapping my fuel rail and lines when I replace my exhaust manifold. Thinking about coating the manifold, but I'm worried it'll speed up cracking.

Considering how far the rust extends to the back of the Jeep, I'm going to need at least 6ft of the foil. I'd like to have it above the Cat, Muffler, as well as all the way back to the tail pipe. I do, however, have a few concerns. I'm worried about rocks/gravel/debris gouging it over the long run, causing it to fail. I'm also concerned about it peeling back when I pressure wash the bottom of the Jeep, which as many miles as I plan on logging on/offroad, would happen reasonably often. As many racecars that I've pressure washed the bottom of to remove chunks of tire rubber, I don't ever recall needing to pressure wash the trans tunnel out of necessity.

Wrapping the fuel lines isn't a bad idea, but I definitely don't think wrapping a stock exhaust manifold is a good idea. The metallurgy strength of the stock manifold isn't very good. Mine cracked on my '92 XJ, which I replaced with the Borla Header, which I highly recommend. I had it on my '92 XJ with the stock engine before I did the 4.7L stroker, and it made an excellent difference in power and seemed well built. That was 13 years ago, so I'm not sure if things have changed since then. ;)

Regardless, I'm sending you a message about the foil! ;)
 
Last edited:

thethePete

Explorer
Build is looking great.

A word against plumbing your driveline vents into your intake though; I wouldn't do it.... While it's unlikely you'll draw the fluid up into the intake, what will happen is you'll create negative pressure in all the components, which will help draw water in past seals when you hit it. The temperature differential in the rear axle is enough to do it on its own when it hits water and cools quickly, so placing the axles, etc, under vacuum is only going to exacerbate the issue. If anything, just run the vents up into the cabin, or the wiper cowl. If you get any deeper than that, you have bigger problems at hand than water intrusion into your driveline.
 

HercDriver

Adventurer
Have you had your carpets up to see underneath? You never know whats lurking under there, considering they trap moisture! ;)


Considering how far the rust extends to the back of the Jeep, I'm going to need at least 6ft of the foil. I'd like to have it above the Cat, Muffler, as well as all the way back to the tail pipe. I do, however, have a few concerns. I'm worried about rocks/gravel/debris gouging it over the long run, causing it to fail. I'm also concerned about it peeling back when I pressure wash the bottom of the Jeep, which as many miles as I plan on logging on/offroad, would happen reasonably often. As many racecars that I've pressure washed the bottom of to remove chunks of tire rubber, I don't ever recall needing to pressure wash the trans tunnel out of necessity.

Wrapping the fuel lines isn't a bad idea, but I definitely don't think wrapping a stock exhaust manifold is a good idea. The metallurgy strength of the stock manifold isn't very good. Mine cracked on my '92 XJ, which I replaced with the Borla Header, which I highly recommend. I had it on my '92 XJ with the stock engine before I did the 4.7L stroker, and it made an excellent difference in power and seemed well built. That was 13 years ago, so I'm not sure if things have changed since then. ;)

Regardless, I'm sending you a message about the foil! ;)

Yep! I monstalined the whole floor :)

v8fzfs.jpg


2ryouwo.jpg


30ibyol.jpg


2q8y047.jpg
 

Overland History

Wanderluster
This month has really gotten away from me, as I started Clinical Rotations in the Hospital. :coffee:

Anyways, with the XJ finally home, I received my rear brake parts and got the XJ back on the road! :D

image.jpg

image.jpg


I got the brakes bled properly and got her back on the road.

Her favorite watering hole...:rolleyes:

image.jpg


With the 4.10 gears in the rear end with 31in tires, it took a little bit of time to get used to the lower gears and shift points, but I love it! It feels very similar to my '92 XJ with 4.88's and 33's.

While it does feel slightly over-geared right now, that will all change once I add all of the weight of the f/r bumpers, and my sleep platform with everything mounted underneath.

The Lockrite locker in the rear is very manageable and quiet. As long as you keep your foot out of the gas when you're turning, it will stay unlocked and won't push you to the outside of the way you're turning.

Also, after resealing the entire engine, I've got absolutely no leaks from it or the cooling system! :D The engine is also considerably quieter after replacing the loose timing chain!


Moving along, since my wheels started to rust after painting them only 7months ago(my fault for not doing a clearcoat), I decided to paint them again.....

All of them had a similar amount of rust as this one....

image.jpg

image.jpg

Prior to painting, I used a wire brush attachment on the end of my drill to remove all of the rust, then a pre-paint cleaner to prep them.

This is the paint and clearcoat that I decided to use. I did 2 coats of paint and then 2 coats of clearcoat...

image.jpg

image.jpg

Managed to get my spare wheel shot with clearcoat before having the tire installed....

image.jpg


Taped up the rest of the tires and got to painting.....

image.jpg


My little buddy from next door came to supervise the process.... :D

image.jpg
 
Last edited:

Overland History

Wanderluster
Here's how they turned out. :D

image.jpg

image.jpg


Anyways, a few more goodies showed up for the build!

I bought the Dometic CDF-11 Console Freezer(10.5). It runs on 12v and draws very little power.

https://www.amazon.com/gp/aw/d/B005X97OHA/ref=yo_ii_img?ie=UTF8&psc=1


image.jpg

Buttwiper Beer in there for size perspective(it's all I had in the fridge) ;)

image.jpg

image.jpg


As you can see, a 6er of bottles fits in there with extra room to spare. The idea of the freezer is to freeze meats and parishables with a short shelf life to thaw for use when remote.

image.jpg


I'm going to mount it in between the front seats in front of the sleep platform.

image.jpg


Obviously I'll need to remove the entire console up to the shifter and also relocate my E-Brake setup, which leads me to my next recent acquirement....

This is a Foot Pedal parking brake assembly from a Jeep Comanche MJ that I managed to score for $20 after looking for one for months and months. They're seemingly unobtainium these days! :eek: 
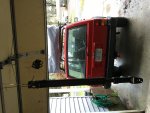
It needs a little bit of love, but I'm up to the task... :D

image.jpg
 
Last edited:

Overland History

Wanderluster
I'm planning on installing my 4.10 gears and Lockrite in my D30 front axle(with the help of a more experienced friend, as I haven't set up gears in 12years...) this coming Sunday, time permitting.

Something that I realized I need is a new carrier for the gears. (The carrier break is 3.73 and I'm going to 4.10's, so I can't use my original carrier with 3.55 gears)

image.jpg


I also decided to go with a new pinion yoke(U-bolt style instead of the stock strap style) as my original has over 200K miles on it and will likely leak at the seal if I re-use it. The original will become a spare...

image.jpg


Anyways, that's really all for now.

Next week I'm going to be cutting down the metal patch panels(rain permitting) and have them welded in. That will FINALLY allow me to get started on plumbing my on-board hot water camp shower, after which I can start to build the sleep platform. :D
 
Last edited:

Overland History

Wanderluster
Build is looking great.

A word against plumbing your driveline vents into your intake though; I wouldn't do it.... While it's unlikely you'll draw the fluid up into the intake, what will happen is you'll create negative pressure in all the components, which will help draw water in past seals when you hit it. The temperature differential in the rear axle is enough to do it on its own when it hits water and cools quickly, so placing the axles, etc, under vacuum is only going to exacerbate the issue. If anything, just run the vents up into the cabin, or the wiper cowl. If you get any deeper than that, you have bigger problems at hand than water intrusion into your driveline.

What you're saying makes sense and I appreciate the info! I haven't officially decided how I'm going to end up running the vent tubes for the axles, T-case and Trans. At this point, it's lower on the priority list and will probably be one of the last projects that I work on. You're right though, if I've got water more than halfway up my doors, I'm in big trouble!
 

HercDriver

Adventurer
That looks great!

Out of curiosity, how many quarts or gallons did it take you to achieve that much coverage?

I only used about 3/4 gallon of the herculiner. I still have 1/4 left. Ill probably put it in the door jams and rear bumper where stuff gets in and out.

Your build is coming along nicely!
 

Overland History

Wanderluster
Well, yet another month has gotten away from me between work and school, but here goes a fairly significant update on the XJ, which may take me a day or two to complete... ;)


I decided that since my front driveshaft could quite possibly have 200K miles on it, that it needed all new u-joints and a paint job, so that's what it got!

image.jpg

image.jpg

image.jpg

image.jpg


I also installed needle/flush zerks because I cannot stand u-joints that aren't serviceable, and normal nipple zerks will not fit into the body of the u-joint within the double cardan. I have the same needle/flush zerks in my rear driveshaft so that I don't have to change the tip on my grease gun every time that they need service.

The clearance difference is significant....

image.jpg


I installed them in a way so that they're on the same side of the double cardan and facing opposite so they're easily serviceable with consideration to clearance....

image.jpg


All put back together.....

image.jpg
 

Attachments

  • image.jpg
    image.jpg
    542.1 KB · Views: 59
Last edited:

Overland History

Wanderluster
Just incase anyone is wondering or has plans to change your zerks to the same ones I did, they're 1/4-28 thread and the best supplier that I found was this guy, whom is reasonably local to me....

image.jpg


I also decided to fabricate some brackets for my 52" LED Lightbar that I bought a while back to see how they'd turn out, and also if I even like the lightbar in the first place(which I'm still on the fence about). It was only $97 shipped, so I figured why the hell not? I don't necessarily like the look of them, but they are extremely effective!

I used some 1/8in steel plate, measured 5x, cut out a pattern that thought would work, added a little heat to bend the steel a little easier, and got to hammering on it.

image.jpg

image.jpg


The idea behind the brackets is so that the lightbar would sit low, just above and forward of the windshield and able to clamp to the stock gutter mounts....

image.jpg

image.jpg

image.jpg

image.jpg
 

Forum statistics

Threads
186,809
Messages
2,890,322
Members
227,012
Latest member
dalewelsh
Top