Overland XJ Build. Not my first Rodeo.....(video included)

Overland History

Wanderluster
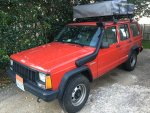
Jeep is coming along good. How is the rtt holding up. It looks like a camping lab tent from what I can tell. I have someone local selling one for $500 and I am debating on picking it up... I just worry about longevity of it since they went out of business.

The RTT is holding up good, and yes it is a Camping Lab. A page or 2 back I posted a couple of products that I bought to extend the life of the tent. I was told by the previous owner of mine that it was purchased new around 1998 and used 10-12 times.
 
Last edited:

Overland History

Wanderluster
I've been busy as hell with school around the holidays so I've neglected the thread a bit. There have been a few changes to the XJ though!

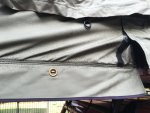
Back during camping on the night of Thanksgiving, the tent got wet from condensation and I didn't have time to dry it before putting it away. Well 2 weeks of rain went by and when we finally got a nice day here to be able to deploy the tent to let it dry properly, I found some black mold on the outside and inside.

image.jpg


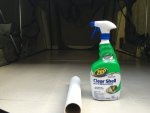
I used Zep Clear Shell Mold and Mildew Inhibitor on the inside base of the tent to get it nice and clean.

image.jpg


I tried Purple Power on the black mold areas on the fabric with no luck.

I was told by a good friend that RV Black Streak remover will take it right off. Yup, it worked! Found some of this at Walmart....

image.jpg
 

Overland History

Wanderluster
Well my 3in lift, 31in MT's and all applicable goodies are finally complete and I'm making time to install it all within the next week or so. :D

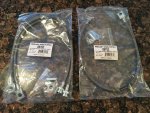
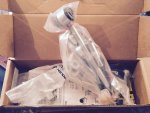
My extended steel braided brake lines came in...

image.jpg


Also bought some Sway Bar Quick Disconnects for 3-6in of lift....

image.jpg


Also a brand new Steering Stabilizer.......

image.jpg


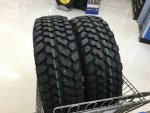
Lastly, since I bought the lift slightly used with 800miles on the lift and tires, and it only came with 3 tires, I picked up two brand new matching tires.....

image.jpg
 

Overland History

Wanderluster
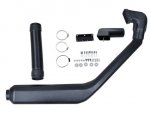
I also decided to take a chance and purchase a cheap ($80) Snorkel Kit on Amazon, and after some modification, I'm pretty happy with the results! :D

http://www.amazon.com/gp/aw/d/B00B9...ee+snorkel&dpPl=1&dpID=4169gq4+7hL&ref=plSrch

image.jpeg


Once I got the kit in, I realized it was not only incomplete, but poorly designed when it comes to how it attaches to the stock airbox. My intention for modifying it is to have it sealed air/water tight all the way up to the top of the Snorkel.

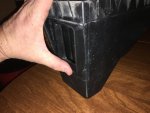
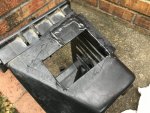
The original design was intended to point straight down from the stock airbox like so.....

image.jpg


I decided that was a largely crap design to have the intake come up from the bottom, especially considering there is enough room just in front of the ECU mounted on the fender next to the airbox to snake the tubing through which keeps it up and in the fender, completely protected by the fender liner.

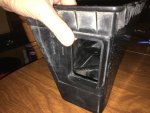
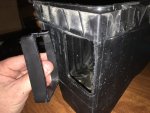
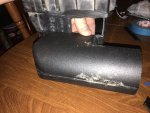
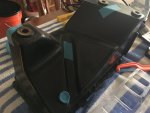
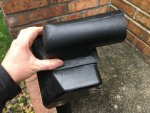
I decided to cut off the protrusion on the stock airbox to just behind the headlight, and turn the Snorkel connection 90* horizontal to point directly toward the fender......

image.jpg

image.jpg

image.jpg
 
Last edited:

Overland History

Wanderluster
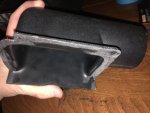
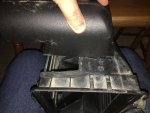
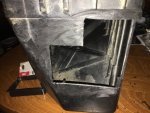
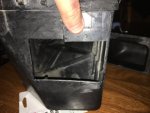
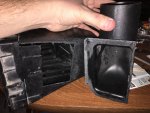
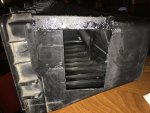
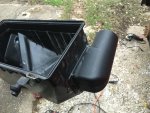
This is what the Snorkel to airbox 90* bend looks like from the inside...

image.jpg


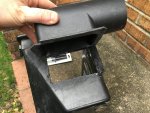
Since it will need to mount flat on the front of the airbox, I had to cut the lip off of the Snorkel to airbox 90* bend...

image.jpg


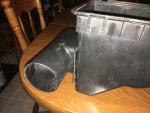
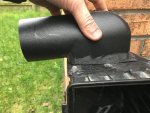
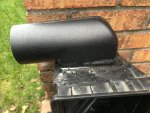
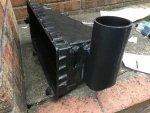
After some measuring, I realized that the new intake for the airbox will need to be mounted a lot lower to clear the ECU properly. This is the visual mock-up compared to where to original intake hole was in the airbox.....

image.jpg

image.jpg

image.jpg


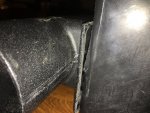
As you can see, there is some obvious space between the two pieces. I later use epoxy to seal it all up! :D

image.jpg
 
Last edited:

Overland History

Wanderluster
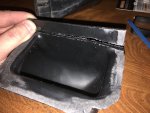
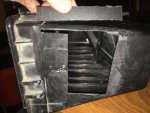
I cut a new hole in the airbox equivalent to the inside area of the Snorkel 90* bend...

image.jpg


I used the piece that I cut out to fill the original airbox hole. I used 90 second setting epoxy from Harbor Freight to set it in place.....

image.jpg

image.jpg


I also used the original lip of the 90* bend to cover up the rest of the gap to create a sealed area and also a flat mating surface.....

image.jpg

image.jpg


I roughed up all of the flat surface in order to make the epoxy stick better as well....
 

Overland History

Wanderluster
Also, there are drain holes at the bottom of the original airbox, so I taped all of those up and sealed them with epoxy from the top....

image.jpg


I used extra epoxy to make sure everything was sealed up very well and strong. As you can see, I roughed up the mating surfaces well to make sure the epoxy sticks....

image.jpg


One last mock-up, including an engine bay mockup to make sure everything clears....

image.jpg

image.jpg


I also mocked it up inside of the engine bay and realized that the outer edge of the 90* bend wouldn't clear the radiator support area. I decided to not only grind down the 90* bend for clearance, but also realized that it needed to make a slight turn backwards to face the hole that I cut in front of the ECU, and also be able to clear the hose clamp that needs to go on it!

image.jpg


As you can see this is where I cut it down to angle it backwards toward the cabin and started epoxying it to the airbox....

image.jpg
 
Last edited:

Overland History

Wanderluster
Here's how it turned out once I completely sealed it all the way around with epoxy. It's not pretty, but it's gonna be hidden in the engine bay and will withstand the heat just fine :D

image.jpg

image.jpg


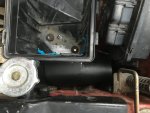
Looking straight down with the airbox mounted, you can see how crucial it is to measure for clearance. The ECU is at the right of the pic and you can see how the 90* bend just barely clears it. The radiator and cap is obviously to the left side....

image.jpg


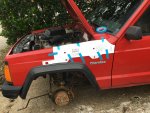
Moving on to the mounting of the actual Snorkel, it's EXTREMELY important to measure 5x and cut/drill once. The template that they give you is pretty inaccurate, but with some time and effort, can be done correctly....

image.jpg
 
Last edited:

ibanezer

Adventurer
I'm waiting to see the final result and some testing on this snorkel. This or a cowl intake may be one of my next modifications.
 

Overland History

Wanderluster
I got the rest of the pics uploaded to my laptop since my iPhone doesn't seem to want to upload pics to the forum, although I think the problem is on the forum side.

Anyways, as I said before, the template supplied with the Snorkel is poorly done, but its a good base to start with. Once I measured and figured out where my holes actually needed to be, I dimpled the area with a punch so that my drill bit wouldn't walk around on the paint, and got to drilling.....
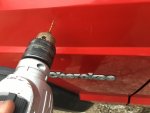
IMG_0090.jpg


It requires a 3" hole saw to be able to cut the hole for the Snorkel, HOWEVER, the hole will need to be wallowed out on the right side in order to fit the inner bend around and through the fender....

3" in hole saw...
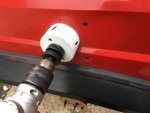
IMG_0092.jpg
IMG_0094.jpg


As you can see, this is the 90* bend on the Snorkel which you'll need to wallow out the hole in order to fit the bend...
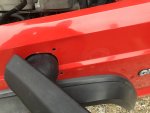

IMG_0096.JPG


Next up is the hole that I had to drill in front of the ECU/behind the driver's side headlight. I had to use a 4" hole saw to drill out this hole to clear the tube that runs behind the fender/above the fender liner to the airbox, and there really wasn't much room. I didn't remove the ECU, but I probably should have to make sure it wouldn't get damaged. The wiring that you see running into the hole on the right is for the headlight....
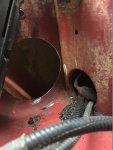
IMG_0097.jpg


One thing that's important to the install, is the 4in hole that I cut in front of the ECU was bare metal, which the Flexible air tube was bending around. I purchased some "Automotive Door Edge Guard" to wrap on the metal to keep the tube from chaffing.

View attachment 325701

View attachment 325703


I attempted to get it to bend enough to go around the 4in hole circumference, but it proved too tough. I ended up cutting it into 3 pieces and using epoxy at the ends of the cut areas to keep it in place....

View attachment 325705

View attachment 325706

View attachment 325707


Test fitting the Snorkel....
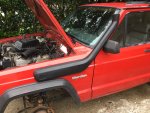
IMG_0095 (2).jpg


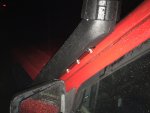
It got dark fairly quick and started to rain, so I'll explain the rest. This is how the Snorkel mounts on the A-pillar with a 45* bracket. One side of the bracket is for 4 rivets which you'll need to drill holes in the A-pillar to mount, and the other side of the bracket has 3 holes for 3 screws that go into the back of the Snorkel neck, as you can see in the following picture. I not only used a tiny brush to put paint on/into the holes I drilled in the A-pillar, but I also used RTV in them as well to try to prevent rust as long as possible. Once the Snorkel is securely mounted on the fender, then you can mount it on the A-pillar. Just make SURE that your mounting position clears your mirror and opening and closing the door! :Wow1:
IMG_0219.jpg


Anyways, here is the finished product. Overall I'm very happy with the way it came out. It makes a pretty cool wooshing sound under wide open throttle, but nothing obnoxious and I don't hear any annoying whistling sounds.

Verdict: Worth the money? Yes. The Snorkel material itself is pretty beefy and looks like it could take a light hit from a tree on a trail and be fine. Make sure you dedicate at least the majority of the day if you plan on doing the same modification to the kit(which I recommend) that I did. :D

IMG_0119.jpg
 
Last edited:

Kevin108

Explorer
That turned out great! 97-01s put the washer fluid bottle in the fender. That was why I ended up just doing a cowl snorkel.
 

VanIsle_Greg

I think I need a bigger truck!
That turned out great! 97-01s put the washer fluid bottle in the fender. That was why I ended up just doing a cowl snorkel.

Same here... would rather have the external snorkel however, my wife complains about the cowl snorkel all the time being too loud (I like it).

Looks great man. Sucks about the mildew/mould on your RTT. I have (er had) a portable garage that I used to open mine up in when it was damp to dry out. I pull out the mattress and drop a small space heater in it overnight. Dry as a bone the next AM. Portable garage got caught in a freak storm, flipped over and trashed my Jeep WK, so will have to find another alternative soon.
 

Overland History

Wanderluster
Thanks fellas!

I managed to get my 3in lift installed today and I'm going to get my 31in MT's installed sometime this week!

Here's a little preview of the lift with the 235/75r15s still on. I stopped to grab a quick bite and found my twin in the parking lot! :D

image.jpg
 

Forum statistics

Threads
188,516
Messages
2,906,122
Members
230,547
Latest member
FiscAnd
Top