PCO6's Trailer Build

PCO6

Adventurer
I’ve made a bit of progress in the last week or so. Picking up where I left off, I added a small extension to the rear bumper for it to line up with the running board.

picture.php


I then welded the slits I cut into the fenders shut. This really firmed them up.

picture.php


picture.php


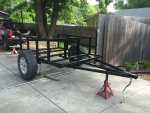
I installed the fender on the left side and this is where things currently stand.

picture.php


picture.php


I made a bracket for the propane tank and installed it on the front left running board. It’s based on a couple of turnbuckles which makes it easy to remove the cylinder when needed. I have yet to make the lock which will secure one turnbuckle to the other so they won’t turn. The rubber pad is to elevate the cylinder above the running board (easier on the paint).

picture.php


picture.php


I added spot lights to the rear running boards. These will run off of the trailer battery and will be used to light the camp site when needed. There is a large thumbscrew on the underside of the running board which allows me to rotate the light and retighten it.

picture.php


picture.php


Other lights are being installed as I go as is the wiring, switches, fuses, etc. Everything seems to require a bracket of some sort to be fabricated.

picture.php


This shot shows the start of the tongue box. There is a lot more to come in this area so stay tuned.

picture.php
 

calstar

Observer
Great looking build, tailgate is especially nice. Cant tell from the pics, what are the connectors for the alu to steel framing?

thanks, Brian
 

PCO6

Adventurer
Thanks Brian. The only body panel that I have fastened to the trailer so far is the tailgate skin. The rest of the panels are ready to attach but I am still working on various items and it's much simpler to do most of them before I attach the rest of the aluminum. The panels are currently just resting against the frame work.

I used 3/16" pop rivets for the tailgate aluminum. I will attach the front panel in the same way. For the side panels I will likely use 3/16" machine screws/nuts. I have access to both sides of the trailer structure along the sides. In some locations the fasteners will be visible from the inside of the trailer and I don't want to see the "back side" of pop rivets (better to see a nut). The added advantage will be that I will be able to take the sides off if I have to (repairs, replacement, etc.).

I will be using 1/8" thick by 2" wide foam rubber with an adhesive backing between the aluminum and the metal of the trailer. I built a utility trailer 3 or 4 years ago this way and I've had no problems with corrosion between the aluminum and the steel.
 

Johnny Yuma

New member
Wow! Nice Job! I am in the middle of my own build. Built my fenders yesterday and need to put them on. Safari rack comes later. I like how you did the LP storage. I'm thinking of the same.

2016-04-10 17.37.20.jpg

2016-04-13 19.27.04.jpg

2016-05-01 15.48.44.jpg

2016-05-22 09.25.41.jpg

2016-06-17 17.19.50.jpg
 

PCO6

Adventurer
Johnny Yuma - Looking good. Very similar proportions to mine. I've been making progress and an update to this thread is overdue.
 

PCO6

Adventurer
Thanks Dan. I have a big "pile". I need more projects! The reason this one is not going as quickly as I would like is that I'm doing a Jeep XJ at the same time (new floors front to back, cargo area floor, rockers, bumpers, etc.). I just returned from a camping trip without the trailer. I hope to use it this summer though.
 

PCO6

Adventurer
I took a bit of a break from this project but for a good reason, 3 of them actually. When I started this I had a Jeep TJ as a daily driver and a Jeep XJ as a project vehicle. That’s changed.

I decided to get rid of some cars and focus on Jeeps. I started looking for an LJ and ended up with a low mileage ’04 that needed a bit of work. I replaced the front fenders, addressed some rust issues underneath, installed seats out of a Hyundai Tiburon, modified the front bumper and added a winch, added half doors, painted the hard top and did a number of other body, interior and mechanical things. Nothing major, just time consuming.

picture.php


I then picked up an ’88 Comanche. It was in great original condition but I went over a lot of mechanical and especially electrical things. Being a Renix era Jeep it was wise to go over ground connections and add some, clean things up, etc. I’ve cleaned and coated a lot of the under carriage with POR15 and an enamel top coat.

picture.php


Finally, I bought a ’89 Cherokee. Not much has been needed to this one, basically the same as what I did to the Comanche. I bought one of these new in 1990 and always wanted to get another one. This a Limited with all of the options (… meaning lots of things to break down).

picture.php


These are my only vehicles and they along with the TJ all get driven weekly. Driving a couple of 30 year old vehicles during the winter seemed a bit nuts but it was fun. I have plans for all of them but want to get my trailer finished first ... so enough of this and on with that!
 
Last edited:

PCO6

Adventurer
After a bit of a break I started to build the lid. Once I figured out how I plan to use it the lid was pretty straight forward to build. I’ll be carrying kayaks and bikes vs. a roof top tent. I prefer a tent that I can stand up in.

I started by cutting and predrilling most of the parts.

picture.php


I then tacked them together using the trailer box as a jig.

picture.php


I decided to hinge it from the passenger’s side. I built the tailgate to hinge from the right side to match the tailgates of my TJ & LJ so it made sense to do the lid the same way.

picture.php


I wasted way too much time trying to find suitable hinges. I finally just grabbed some scraps of metal and played with them until I came up with something that worked. This is what I came up with.

picture.php


picture.php


I had to build the sides of the lid before I could weld the hinges on. I built the sides to also be part of the rack. The sides are 1/8” steel and run the length of the box. I started by lightly spraying them black and then taping them to get a general sense of how they would look. I planned to cut out the areas that are black.

picture.php


I did that by making a plywood buck of sorts. It acted as a bench and drilling surface. I screwed both sides of the rack (2 sheets) to the buck and started drilling with a hole saw. Doing both pieces together ensured both sides would be the same.

picture.php


picture.php


picture.php


I then separated the sides and cut out the rack openings with a grinder with a cutting disc.

picture.php


picture.php


Here’s what the buck looked like … before I threw it in my fire pit.

picture.php


There’s a lot more to do but the hinges are on and the lid is starting to take shape. (Note – the front & rear corners of the rack need to be cut off on an angle yet)

picture.php


picture.php


The hinges are welded on and it now lifts from the right side.

picture.php


picture.php


I used a pair of 12V actuators to lift the lid. I wasn’t to sure what the best angle would be so I drilled a lot of holes (way more than I’ll need) in the lift brackets before I welded them in. The lid goes up in about 3 or 4 seconds.

picture.php


picture.php


That’s about where the lid stands for now. I have some parts to finish welding and then I’ll add the deck (top) before I paint and seal it. I’ll then add the cross members for the kayaks. Lots to do yet!
 
Last edited:

PCO6

Adventurer
I also took it on its maiden voyage … all the way from my front yard to the back yard!

picture.php
 

PCO6

Adventurer
I finished off the kitchen table a few days ago. I started with 3 of these common small aluminum camp tables. I cut them up and reassembled them with some aluminum channel underneath as one 23” x 60” table. This thing is ridged and weighs next to nothing. It also stores straight up and down on its side in the trailer box so it takes up very little space. It also matches my Cabella’s sit down “dining” table.

picture.php


picture.php


I welded some angle brackets to the box frame to support the table. These brackets will also support the bike racks when I am traveling. The racks will come off to support the table when I’m camping.

picture.php


picture.php


Here's the table in place.

picture.php


… and the removable struts underneath that support it. They’re also adjustable so I can level the table. This table can easily take the weight of anything I’ll be putting on it (stove, BBQ, cooler, etc.).

picture.php
 

PCO6

Adventurer
I’ve made some progress on the “power box” (for lack of a better term). It actually serves a couple of purposes. I have about 16” of space tongue space in front of it so there’s plenty of room to strap down a cooler or something else on a temporary basis.

picture.php


I started by attaching a bracket to each side to hold a pair of water tanks. I cut down a rear hitch type carrier to make the brackets. I actually bought the carrier at Princess Auto to use for its intended purpose. It was badly made (twisted) though and I was going to return it. Instead for the price (cheap) I figured I’d cut it up and make something out of it.

picture.php


picture.php


I bolted them to the box and the water tanks fit perfectly. This pic also shows the external parts of the water pump. It’s a submersible 12V aquarium pump that provides surprising good pressure and flow. Almost as good as at home! I have both 10 litre and 20 litre tanks so there will be no shortage of water when I need it.

picture.php


I lined the box itself with ½” plywood. The floor is now lined with rubber sheet (see scrap piece).

picture.php


It’s not quite done but this shows the basics. In front are a Group 31 Marine/RV deep cycle battery and a 2000W inverter. Across the back wall from left to right are the input line from the 100W solar panel, a 120V battery charge, a 12V ground point for the items in the box itself box, a solar controller, a fuse panel for the box itself (there will be another on the trailer box), a on/off switch for the trailer box electrics and the 12V output line to the trailer box. In the bottom corner is a junction box and switch for the ship to shore power. There’s also an LED light on the underside of the lid.

picture.php


Here’s a side view of the box. Most of the wiring is now in corrugated plastic loom and attached to the box wall but there are still a few loose ends. It’s only electrical stuff. What could go wrong … eh?

picture.php


This is the front of the box. On top is a 12V socket and 2 USB ports. The bottom is for the ship to shore electrical line.

picture.php
 
Last edited:

PCO6

Adventurer
I finished the interior side of the tailgate yesterday. I started by lining most of it with 1” of plywood primarily to give it some weight and to provide a solid base for mounting items to it. I used PEX tubing as a conduit for the licence plate light wiring. I ran a few extra wires in it for a 3rd brake light that I plan to install later. I then cut a sheet of aluminum to match the exterior covering.

picture.php


I used a 4 wire trailer harness for the tailgate wiring. This will make it a lot easier if I ever need to take the tailgate off. The plug is now attached to the underside of the fire extinguisher with Velcro. This keeps it up and out of the way so the harness won’t conflict with opening and closing the tailgate.

picture.php


Here are the items that I attached to the interior side.

picture.php


I used a combination of Quick Fists and brackets that I made for the axe and shovel. The brackets are Unistrut ceiling anchors that I added 3/8” galvanized threaded rod with thumb screws to (I still need to shorten the rods). Quick Fists just didn’t fit securely on one end of both items. The flashlight is held in place with Maglite clips. The plate in the middle is removable and allows me to access the wiring harness.

picture.php
 

Forum statistics

Threads
188,296
Messages
2,905,077
Members
229,959
Latest member
bdpkauai
Top