King 2.5 Shocks with Remote Reservoir 100 Series Land Cruiser
Thanks all!
Ryan, great meeting up with you last weekend. That is one sa-weet 200 you have gotten yourself into. You have got to let my wife drive it so that I can talk her into getting one.
As for the build, I finally got the King 2.5s with remote reservoirs installed. Carl at JustDifferentials.com is great to work with and was very responsive with the 36 emails I sent him during the night I did the install.
NOTE(s):
1. The rear shocks need to be mounted with the remote reservoirs pointing towards the center of the vehicle. It will look like they will interfere with the brake lines on the driver's side but there is ample clearance.
2. A thin and thick bushing comes mounted on every shock. Place the thicker black bushing closest to the ground as it will allow for a little more droop.
3. If you have a front aftermarket bumper with a winch plate, you will have to cut the forward (included) mounting brackets for the remote reservoirs in order not to interfere with the clearances between the frame, winch plate and bumper brackets. This leaves you with one mounting hole per bracket (as opposed to three), per side to work with. I was a little worried about the reservoir being adequately secured but after a few thorough trail rides, I think it is good to go.
4. If using the supplied reservoir mounting brackets for the fronts, it will necessary to run wheel spacers if running an over-sized tire (I run 1.25" lug-centric wheel spacers up front) . I was also advised to adjust my turn-stops but after buttoning everything up, I did not experience any rubbing.
5. The rear shock mounting points on a 100 expose the naked shock shafts to potential damage from rocks/debris kicked up by the front tires. I picked up some $7 shock boots from 4WheelParts and cut the bottoms off in order to fabricate some protection for them. Cutting the boots keeps moisture from getting trapped against the shocks while at the same time lessening the chance of pitting from trail impacts. It isn't pretty, and I have gotten an ear-full from people telling me that Fox/King/Radflo/Icons should never be humiliated in such a fashion but I'm shooting for function over looks in this particular instance.
6. Not sure what all the fuss is about with getting the old rears off. I hear it can be a bear but mine came out without much of a fight. It guess it does help to use the proper tools (ratcheting box-end wrench and rubber strap wrench) and being blessed with Greek God-like strength.
On to the pics...
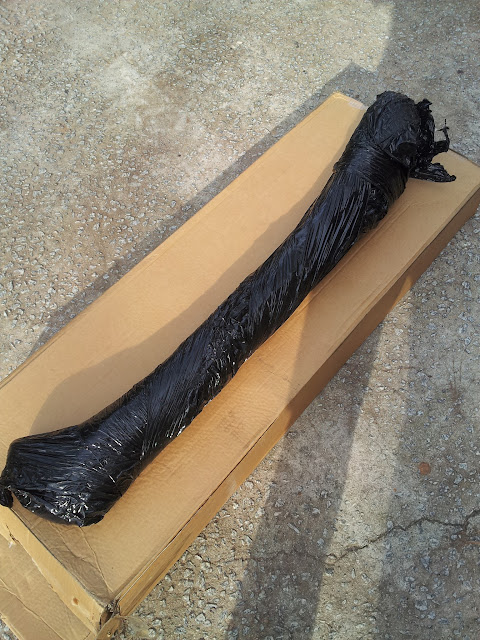
Right after the unboxing
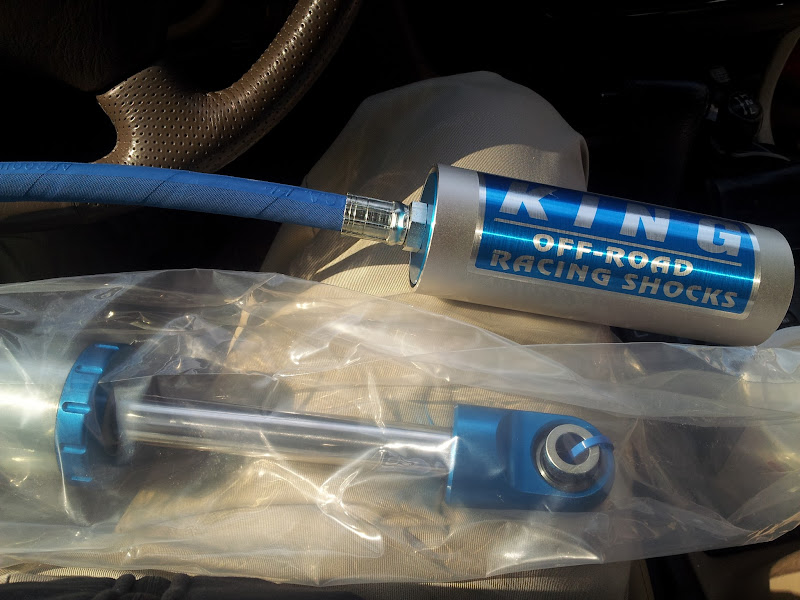
Nerding out in my driveway (because I knew my wife would start making fun of me if I brought them in and checked them out at the kitchen table). I can honestly say that this is the first time I ever spent 20 minutes groping an off-road shock while drooling all over myself.
Comparison against the Monroe Reflex that the previous owner had installed. The Monroe is the same length as OEM in case anyone is wondering.
Fronts installed. The front install was made much easier by having the front up on jack stands and using a floor jack to precisely control the height of the lower control arm.
Checking for tire rub clearance on the fronts
Rears - Note that I have the remote resevoirs pointing outboard towards the tail lights. DO NOT MOUNT THEM THIS WAY.
Protecting the rear shock shafts
")


")