Post up your drawer/storage system

COAKXterra

Well-known member
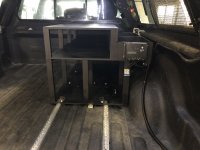
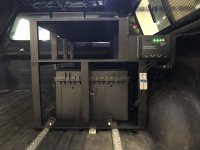
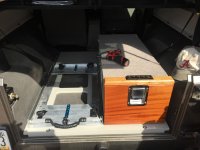
Been working on trying to do better organization in our PW over the last couple years, starting with a unit I built when we had our Habitat and now continuing into ARE canopy territory. This is version 2 of a “shelf unit” that I’ve done.

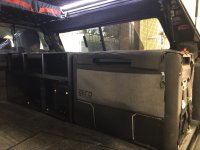
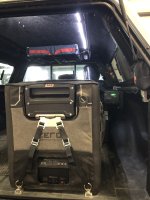
For starters, I ran two 6’ lengths of aircraft track down the passenger side of the bed. This allows relatively quick mounting and removal of the fridge and shelving in case I need to use the truck bed for truck bed things. I’m probably around 10-15min for install or removal of everything.

Version 1 had cubbies for two small action packers (one for dog stuff and one for camp/cooking) and a weird-sized random item cubby on the bottom, and a wider upper cubby that I stowed pillows and sleeping bags, etc in. This version left the area between the front bed wall and the wheel well open, but not really usable. Chairs kinda fit, but would often get caught. Plus you’d be monkeying stuff around the fridge and it just wasn’t ideal. I didn’t initially have any provision for power since I’d plug the fridge into the 12v in the habitat while driving and had the ARB battery for the fridge when parked. Last summer I was gifted a couple used solar batteries and decided to do a DIY box to power the fridge and usb stuff, but the shelf unit didn’t have a good spot for it, so it often sat just on the floor in the bed of the truck. In the way.

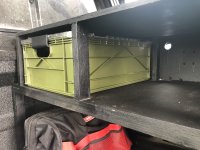
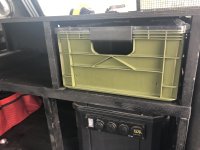
We sold the habitat last year and inherited an ARE hd fiberglass topper with the internal rack as part of the deal. I was super frustrated with the ineffectiveness of the version 1 shelf and the lost space with action packers, and since we’d also swapped back to ground tenting, just started playing Tetris with packing for trips. Which currently at minimum includes ground tent, big air mattress for the better half and I, pack n play and mattress for the tiny human, chairs, dog stuff, action packer with cookware, bag of dry goods, etc etc. You all know this picture. We’ve all been there, hence this thread. Sheer packing chaos. Which got on my nerves. Quickly. Things were never easy to access and nothing had its “place” outside of the fridge at the back of the bed. I also had put a 100w solar panel on the roof charging my battery box to keep the truck bed camping needs separate from the starter battery, so wanted a more “permanent” spot for that. This chaos went on all summer and it never got easier no matter what we tried. After our last trip, I finally lost it with the chaos and decided to start building version 2. It’s still a work in progress but the minister of finance and I worked over what we wanted to have and where and this is where it’s headed. New shelving unit with dedicated spot for the battery box, two lower cubbies, and three upper cubbies. Behind the upper cubbies are little open-top spots that roughly match the height of the bed rail, used for odds and ends that either don’t live in the truck or are on the medium priority list for access (hammocks, kiddos outdoor playmat, etc). We havent ordered them yet, but each cubby is sized to fit the sidio crates, three shorties up top and two full size down below. Initial plan is for one shortie for dry goods, one for cook/eating ware, and another for odds and ends (or expanded dry goods/cookware). Big box below for sleeping stuff and another for dog or odds and ends. Personal gear bags can sit on top if they aren’t in the cab, chairs secured against the front of the bed, and tent and sleeping pads loose loaded for easy removal. We have a camp table secured up in the interior framework and I might look at getting chairs up there as well. The goal is for things to have their place and be easy to access without unpacking the truck. I also wanted to keep the driver side of the bed open or mostly open in case it’s not a family trip and I just want to throw an air mattress on the floor. Oddly enough, in trying to keep this thing fairly low in the bed, the top of the new shelves match the height of the fridge perfectly so if I had to… could possibly even sleep up there.

Currently it’s all wood, but eventually I may look at 8020… but not sold on the investment yet.

Of course, doing all this as we are about to call it for family camping due to other airplane-based travel coming up in the next couple months, so likely won’t get to fully experiment with best packing scheme in the boxes until next year. Cart…horse. Haha
 

Attachments

  • IMG_6099.jpeg
    IMG_6099.jpeg
    2.2 MB · Views: 113
  • IMG_6102.jpeg
    IMG_6102.jpeg
    2.4 MB · Views: 106
  • IMG_6103.jpeg
    IMG_6103.jpeg
    2 MB · Views: 101
  • IMG_6104.jpeg
    IMG_6104.jpeg
    2.4 MB · Views: 100
  • IMG_6105.jpeg
    IMG_6105.jpeg
    1.7 MB · Views: 104

COAKXterra

Well-known member
Short sidio crates arrived. Test fit in the upper cubby holes and pretty stoked. Started transferring camp/kitchen stuff and then the wee toddler got involved, so we made nearly zero progress on that yet. But excited to be bringing v2 of mimimizing chaos up to speed. I also was able to get ahold of extra extrusion and fittings from ARE so that I can get creative with lighter weight stuff up in the internal rack.

IMG_6954.jpeg
IMG_6953.jpeg
 

motovan_mn

Active member
Short sidio crates arrived. Test fit in the upper cubby holes and pretty stoked. Started transferring camp/kitchen stuff and then the wee toddler got involved, so we made nearly zero progress on that yet. But excited to be bringing v2 of mimimizing chaos up to speed. I also was able to get ahold of extra extrusion and fittings from ARE so that I can get creative with lighter weight stuff up in the internal rack.

View attachment 801556
View attachment 801557

How do you like those Sidio crates? I've been getting bombarded by ads on Instagram for them. I guess in the context of "overlanding" they are not too expensive, but i had a hard time justifying the cost for around the house stuff :)
 

COAKXterra

Well-known member
How do you like those Sidio crates? I've been getting bombarded by ads on Instagram for them. I guess in the context of "overlanding" they are not too expensive, but i had a hard time justifying the cost for around the house stuff :)

Yeah. Totally get that. Figured the cost was worth the space savings vs our current action packers (which will move to our xterra play-around build).

So far… not much to say. Quality looks good, fit is great between lid and crate, dividers are awesome. Kid-friendly in the sense our daughter ate lunch sitting on one of them…. For the price, certainly top of our “storage budget “ but no regrets to date. Will probably get the latch “seals” at some point.
 

williaty

Member
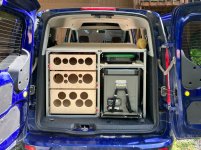
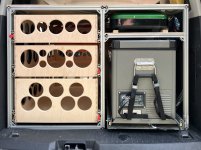
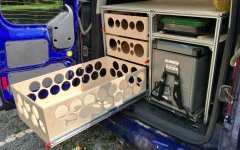
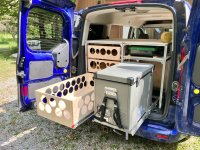
I forgot to post these when I got them (mostly) done. I still need to make drawer fronts and clean up a few details but I wanted to get at least one trip with them done to find out if I needed to make any chances before I put the work in to make them fancy.
 

Attachments

  • IMG_1829.jpeg
    IMG_1829.jpeg
    2.1 MB · Views: 129
  • IMG_1830.jpeg
    IMG_1830.jpeg
    1.9 MB · Views: 126
  • IMG_1831.jpeg
    IMG_1831.jpeg
    1.7 MB · Views: 119
  • IMG_1832.jpeg
    IMG_1832.jpeg
    3.5 MB · Views: 129

greg.potter

Adventurer
I forgot to post these when I got them (mostly) done. I still need to make drawer fronts and clean up a few details but I wanted to get at least one trip with them done to find out if I needed to make any chances before I put the work in to make them fancy.
Very nice!!
Almost exactly what I want to do for my JKUR.
What aluminum extrusions did you use in your build?
 

williaty

Member
Very nice!!
Almost exactly what I want to do for my JKUR.
What aluminum extrusions did you use in your build?
The 25 Series from 8020. I chose the 25 because the fastener size was M6 (20 Series is only M5) and I was worried about anything smaller being too weak. However, with the way this framed up into a bombproof rigid hulk, I think I probably could have gone down to the Series 20, saved a little weight, a little money, and still been just fine. The other problem with the 25 Series is that there's fewer fastener options available for it. I was still able to get everything done, but some stuff like the lock-in-place t-nuts and the hammerhead oopsie-fix nuts aren't available.
 

COAKXterra

Well-known member
I also was able to get ahold of extra extrusion and fittings from ARE so that I can get creative with lighter weight stuff up in the internal rack.

Got the interior ARE rack modified a little. Added a mid-cross span just wider than our REI folding camp table, threw a piece of aluminum between that and the front span, and secured a net… now our table resides up and completely out of the way with room to stash other stuff up next to it in the net.
IMG_7621.jpeg
 
Last edited:

explorer87

New member
I’m curious what everyone is using for a catch for the paddle latches? From what I’ve seen online there appears to be two different approaches for this that most people use: (1.) using a 90-degree mending brace that hangs down from the top and catches the paddle latch, or (2.) cutting a notch into the top board where the paddle latch can live when the drawer is closed (similar to the way a door lock fits into a door jam). Which approach did you take? Can you share some photos?

I decided to go with the second approach - cutting a notch into the top board where the paddle latch can live when the drawer is shut. For this, I bought latch striker plates [1]. However, when I used Southco Paddle Latch that others have used, it didn't align - the area where the latch lives is too far to the front of the striker plate so that the curved area of the striker plate would interfere with my top board and I'd have to account for the curved area by having a gap in between the top board and the drawer front [2][3]. To solve for this, I had a piece of metal welded to the front of where the striker plate's hole is so that it would fit better [4][5][6].

[1] striker plate
Mkqg6FHw9e587S82AK1fnoVTz1sDx-3Hh7Z9nvoh5tU-LSoRIZh47UJ8OkXdhMdivv4x_1Tdzq6r4l0yshG3f9TLiombm5NuWJSTj1PjoVjfufH-89Pq8IKSzWePXt7LMAhg0rBuNegeC0eqqFt6mp0


[2] pre-weld
SezwzYQto9Qt2soqS8BZnPAN7cFnzy0kIW-TMQjKYyzJQyLtql-dvpmiYakA8ONYPQj5y-dNx-ks9aS1_fTRLocGnomqfDJGYB2akfxnb2XVIGUhCJsw2fjCC1C6H1vV8YxwhDbe_IjsxISnw8DorPE


[3] pre-weld
tFxsAJBFjAF8XClyzzQgsxg8iJ__rcFiw6lCm052oX_WLulc9b1mz500FoefkkaQaJSpFVtCAHfVIb7ZbWhodQo-90ZzN03ruf4Pu5Yyh6asbbR8quUa9fMcby7cWhdIPB5z2w8iEC0HRKRe94BE2_Y


[4] before/after weld
nnzNeGhEotV9v7CvU0rRthGn2l6h3bTQilT82F66vb-yutnKs5hb-9nEqv0wDD_9fETLRcg1tTB5hawBUdvKdB-SN7qdHqVdkd_ThRO0Nrp1NXob1i0NWAjinf01OabXni-hLxhNP0SBijNjxgJkZpA


[5] after weld
9VaRnjlBWwKLljJkzXz3dA0qcAf03aod67FG-2wBc-ciAZqSitM8yuVBE7dm9xF6V67HgDDmdtM6vRqOkf63U-nKKTD_zdndBSpxp2SYTtq-Y4KlPj2ZkBpIvByXh3aE0K903aCv6lG_Aig8nQTx2VE


[6] after weld
R0n9ozQ5esf9L5_3dRjOefNh_FYa8rr6_NOZQhw6fanMQ4hFDzcfGQ3RpE4cjqPZ7qcaD4uj_iLhbIq9tGE9WiC-1p73ls-TP1qirP6_wznwM0jYLs2aUdciVfCAq6DkvRhoH7v1U_-gPjw_DNw8SY0


I'll add another post showing the final result. Curious to see what other solutions folks went with.
 

jgaz

Adventurer
On my drawer outer box I just used a standard door strike plate and mortised it into the plywood.
I don’t remember having to do anything special.

This picture doesn’t show much but you can see the curved part of the strike plate in this picture.
IMG_6137_Original.jpeg
 

Forum statistics

Threads
188,063
Messages
2,901,775
Members
229,415
Latest member
Gatofoamball
Top