Pretty Ugly... 1835, The Build Begins

Madoxen

Active member
That is a consern of mine. i have the book but at the front th3 gearbox and drive shaft mean i can get the pivot point no lower than i have put it above on the front. Center and rear can be pretty much anywhere.

The options i have seem to be.
1 Put all 4 points at this lvl regardless of where the longitudal pivot point is.

2 have the pivot points incramentally lower from front to back to try and lesson the sheer preesutes.

3 try to use the longatudal (north south) pivot point at the front. This way will let me put pivot points at correct height all over. Reduce the movement between cab and hab. But it will half the amount of movement the hab box can do b4 it contacts the hard stop. ( if i keep the current height above chassis.(( only way to improve this is double the height of the gap between chassis and sub frame which i cant spare the height to do)) ).

If kept like the above shows do u think the 32mm gap between drive shaft and pivot will be enough?
 

Sitec

Adventurer
That is a consern of mine. i have the book but at the front th3 gearbox and drive shaft mean i can get the pivot point no lower than i have put it above on the front. Center and rear can be pretty much anywhere.

The options i have seem to be.
1 Put all 4 points at this lvl regardless of where the longitudal pivot point is.

2 have the pivot points incramentally lower from front to back to try and lesson the sheer preesutes.

3 try to use the longatudal (north south) pivot point at the front. This way will let me put pivot points at correct height all over. Reduce the movement between cab and hab. But it will half the amount of movement the hab box can do b4 it contacts the hard stop. ( if i keep the current height above chassis.(( only way to improve this is double the height of the gap between chassis and sub frame which i cant spare the height to do)) ).

If kept like the above shows do u think the 32mm gap between drive shaft and pivot will be enough?

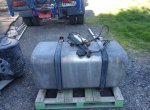
It was exactly the problem I had. The front 'pivot' as you say falls right in the middle of the gearbox. I guess it depends how far off road you plan to go in your truck... I ended up having the outer fixed pivots at the front, and 3 central pivots along the length of the chassis. It still allows the same amount of twist, the only drawback is you have to have sufficient clearance between the rear corner of the Hab Box and whatever you bolt to the chassis underneath. I'm not saying what I've done is the right way, but it works. If you want more pics or a sketch of what I've done, shout.
 

Madoxen

Active member
Wow over a month to report on I must keep more upto date with this and not let business get in the way ;-)

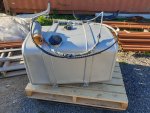
I have been Stripping all the parts from Big Red that I want to swap over onto Pretty Ugly which includes larger air tanks, Undamaged airbox, Exhaust box with Lower rear gas exit, lots of the internals and undamaged dash etc Larger Ali fuel tank, Both cab doors and Hinge units.

the 2 fuel tanks complete with filters lines and heaters 1st is 350ltrs 2nd is 450 ltrs2020-10-02 17.34.18.jpg
2020-10-02 17.33.571.jpg

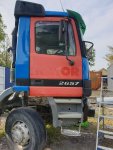
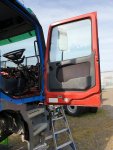
New Doors with better windows and panels etc , Although As you can see I will have to do some panel work on them to cut out the wheel arch and unfortunately when I removed the doors the drivers side fell and has dinged the lower front corner and top Left corner :cry: such a silly mistake and prob should not have lifted it off on my own.
2020-10-04 17.19.13.jpg

2020-10-04 17.19.22.jpg

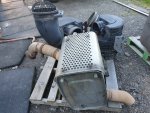
Airboxes and the 2 exhaust choices , I am still not sure that I will not keep the vertical stack one to keep the smells out the way I am just concerned it may soot up the Solar panels

2020-10-02 17.33.50.jpg


2020-10-02 17.33.291.jpg

Oh and I finally got around to swapping the old wheels and rims for the super singles 4
2020-10-11 12.42.351.jpg
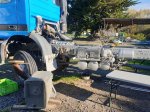
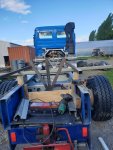
yes yes those eagle eyed of you will spot that the fronts have not been swapped out in this picture yet and that I have been playing with a frame setup to work out the longitudinal pivot point which I will go into much more a little later on
 

Madoxen

Active member
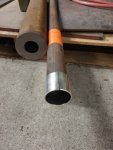
The UD Bushes, 95 ODx47ID and 50 MM high tensile round have arived for the Sub-frame pivots.2020-10-10 12.22.28.jpg

and I have mocked up the wood and made some Vs out of flat with a hole every 10mm going up to test for the correct pivot point for each mount.
2020-10-11 17.17.38.jpg
 

Madoxen

Active member
More goodies also arrived in the mail box for the build

Upon opening the mail box:cool: we found all of this lurking inside
2020-10-22 10.22.12.jpg

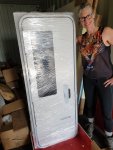
Jemima Looking happy with the doors windows and hatches
2020-10-23 09.41.39.jpg

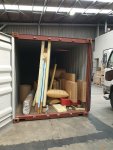
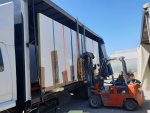
Getting it all into and out of the truck was pretty hard work and there was a lot of learning along the way. each of the straps are holding in the steel strips that will be used to bolt it to the chassis

Once we got the truck home with all the goodies we started to unload but only got as far as getting all the internals and the 2x 50mm wall panels out before the wind caught the roof panel and it fell onto Jemima unfortunately dislocating her right shoulder requiring a ambulance trip to hospital where we also discovered there was damage to the rotator cuff and the ACL :eek: this will be surgery and a long recovery.
2020-10-23 16.46.45.jpg

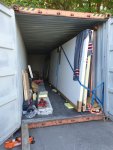
the very next day ;-) we had to get the truck unloaded so decided to work smarter not harder and used the forklift and alot more strapping on all panels to secure them

2020-10-24 14.20.32.jpg

Every thing in and secure thank goodness

2020-10-24 17.48.02.jpg

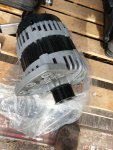
and last but not least we also got the 48v 200amp externally regulated alternator for the battery bank setup and it is Huge

2020-10-23 08.31.32.jpg
 

Madoxen

Active member
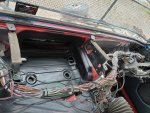
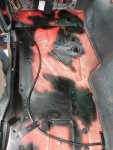
I have managed to get a little more done inside the cab .

16063681812992336065192214666924.jpg

1606368220273722855864683591077.jpg

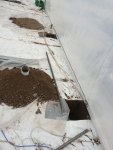
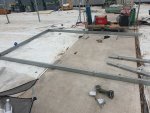
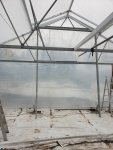
But have been spending most of my time trying to convert an old greenhouse into a workshop to work on the truck in. But these things are never easy. 1st step was to remove half of the green house as sold it to help things along.

then some modifications to the internals on a few trusses to allow for the height of the truck and hab box.
20201020_145354.jpg

An idea of what needs to be done
Lots more to say but have run out of time for the moment . If anyone knows the secret to makeing more time please let me know :)
 

Wyuna

Observer
Hope your wife is recovering well and ACC is looking after the accident.

That alternator is massive :)
 

Madoxen

Active member
Jemima is up for opperation on rotator cuff and ACL but acc is slow and will take a while we have had to take on another staff person to be her hands :-( , but the new person is turning out to be pretty good :).

The Alternator is truly a monster, we have the externL regulater coming from usa so have a while b4 i can test things with it.
 

Madoxen

Active member
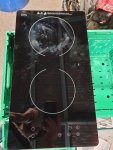
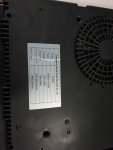
Decided to test the new induction cook top for pretty Ugly, i can only say i am impressed 1 ltr of water in a cold pan and the 1st time its ever been turned on turned it to lvl9 and did not use the boost function. It simmered the water in 3.30 and had a heavy boil at 4.45 mins . Just for giggles I used the sam pan with a fresh cold 1 ltr of water and put it on the medium sized burner of our houses smeg cook top which is Gas. It took 12 mins to get to a lite simmer and 16 mins to get to a lite boil where i got board and turned it off.
Both tests were with no lid and same pan both from cold start.

20201128_093835.jpg
20201128_093901.jpg
 

Madoxen

Active member
Managed to get some holes dug and some welding done today for the new front door of the workshop to be ?

20201128_173400.jpg

20201129_180115.jpg

With any luck it wont be too long before pretty ugly has a roof over its head and i can start to make better progress
 

Forum statistics

Threads
188,179
Messages
2,903,449
Members
229,665
Latest member
SANelson
Top