Colonal Angus
Adventurer
Great build, even better thread. I wish you guys would've recorded the 48 hour mad dash build weekend...editing that into a show wouldve been better than 99.9% of the stuff on tv now.
Get your tickets to THE BIG THING 2026!
Great build, even better thread. I wish you guys would've recorded the 48 hour mad dash build weekend...editing that into a show wouldve been better than 99.9% of the stuff on tv now.
")

.jpg")
Who says we didn't
We had 2 go-pro's rolling the entire time plus a couple of cameras going at any given minute. A good friend of mine (and ExPo'er) is putting it together as a video now
View attachment 157279
I'll post it in the near future
I wish your video guy would hurry up.
Hey Kurt,
I didn't see on the build as to how many miles this rig has on it? Was that a consideration before piling on the gear? Obviously, maintenance and such is something to address with any vehicle, but I would think even a 200k mile 100 series might make you a tad nervous.
I think it had 167k a couple weekends ago. Made me jealous the way it handled and rode, plus the power
Death Start Build Part #6 - Time to put this thing to bed and go to bed myself
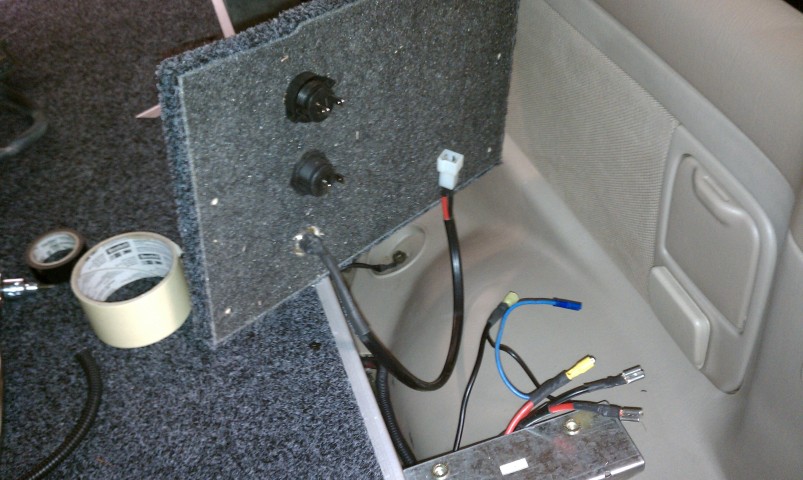
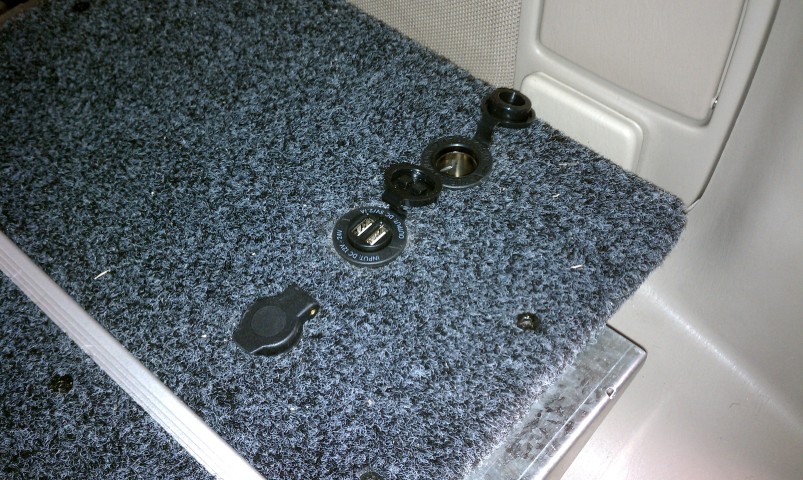
Sunday was fairly low key, after burning the candle at both ends on both Friday and Saturday nights, we were hoping Sunday was going be a cakewalk. The main agenda items were finishing up the wiring to the rear fridge and auxiliary outlets in the rear drawer system as well as work on the Helton shower install. I recruited Cody to help me pull wire from the engine bay to the rear drawers. Cody did a fantastic job tucking it all under the trim and looming it from front to back, leaving a super clean look throughout the cab. We terminated the wiring within the side panels of the drawer system and utilized flush mount plugs for the ARB fridge plug, 12V accessory plugs and the dual USB plug as well. The location of the ARB fridge plug was dictated by the location of the fridge slide but the extra 12V and USB ports just made logistical sense. Not only do they serve the needs from the back of the truck but they are super easy to utilize by those in the 2nd row seating, eliminating cords running from the dash to the backseat.
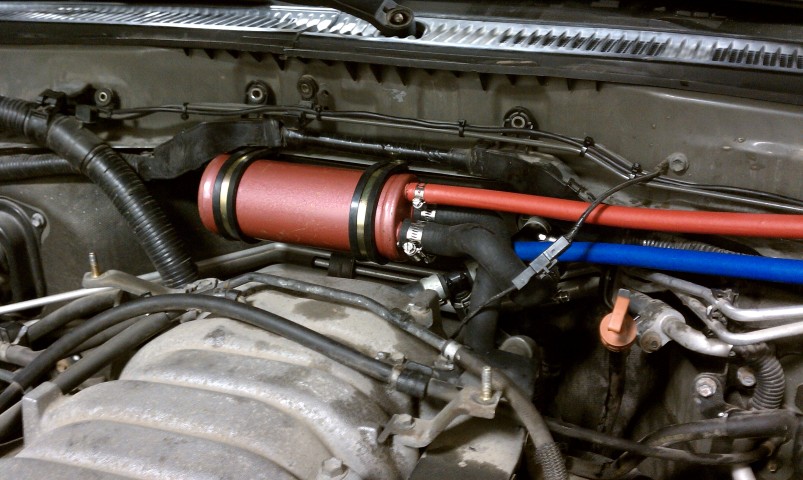
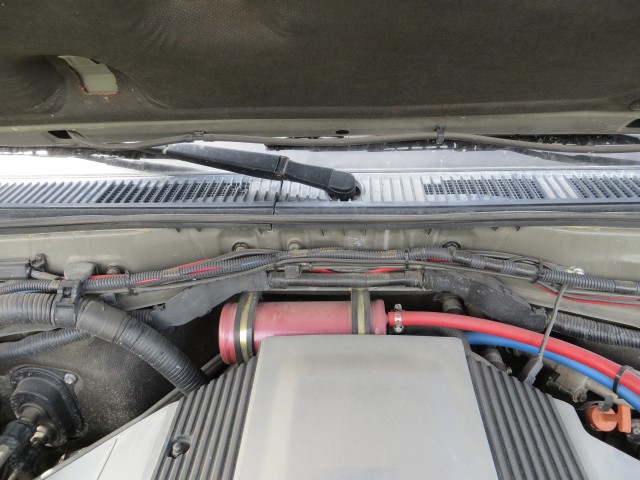
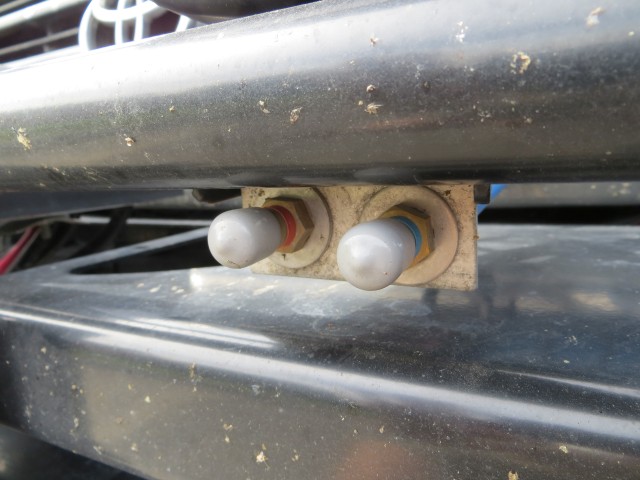
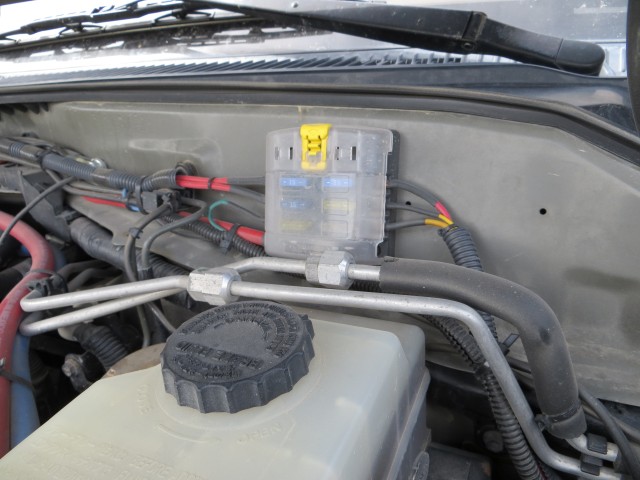
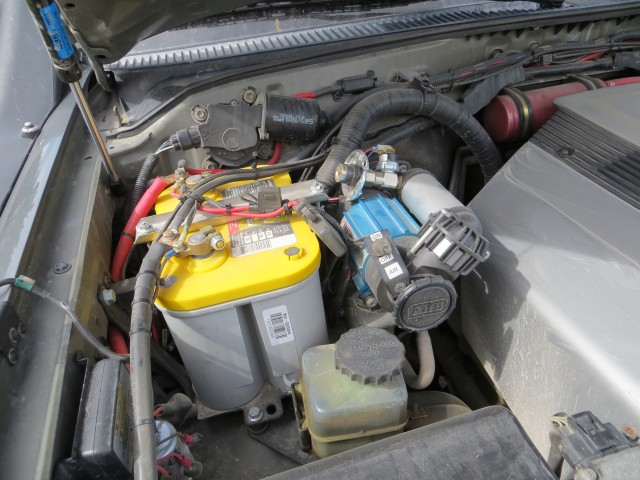
The Helton Hot Water system took a little more time. I have previously installed a handful of Helton systems in 100's belonging to customers but it was always done right against the firewall above the passenger side fender well, unfortunately rightwhere the dual battery is positioned in my particular setup. This required a change of plans as I had the Slee dual battery tray mounted and an ARB compressor mounted right next to the auxiliary battery. After a bit of scoping out and measuring up we found the most copacetic configuration was right behind the shroud of the engine, tucked high against the firewall. While this made for some creative plumbing restraints I was able to tie into the factory coolant system with two additional hoses and if I ever need to remove the Helton, a single OEM hose takes it out of the loop. For the fresh water lines to the bumper I opted for some high temperature rated 1/2" hose in red and blue coloring, the red for the hot (output) side and the blue for the cold (input) side of the system. These lines mate to the Helton bumper fitting bracket thus allowing easy of use in the field.
Plumbing the Helton
Helton Mounted
Helton Bumper Fittings
Rear 12V Plug Wiring
Finalized plug configuration
Bluesea Fuseblock
Finalized Dual Battery & ARB Compressor Mounting & Wiring
To Do List By End of Day 3 (Sunday 8AM - 5PM):
Inventory Parts X
Break wheel lug nuts X
Rear End on Jack Stands X
Remove Rear Tires X
Rear Stock Shocks & Coils Removed X
Rear OME Suspension Installation X
Rear Tires Mounted X
Rear End Lowered & Rear Tires Torqued X
Remove Front Bumper X
LandTank Fan Clutch Installation X
Front End on Jack Stands X
Stock Skid Plate Removed X
Stock Shocks Removed X
Stock Torsion Bars Removed X
OME Shocks & Torsion Bars Installed X
Slee Diff Drop Kit Installed X
OME Torsion Bars Adjusted X
Front Tires Mounted X
Front End Lowered & Front Tires Torqued X
Stock Trans Cross Member Removed X
Slee Skid Plates Installed X
Install ARB Front Bumper X
Warn Winch Installed in Bumper X
IPF Lights on Bumper X
Remove Stock Roof Rack X
Remove Stock Rear Bumper X
Install ARB Rear Bumper X
Assemble & Install ARB Wheel Carrier X
Assemble & Install ARB Jerry Can Holder X
Rough Electrical to Rear X
Rear 3rd Row Seats & Seatbelts Removed X
Outback Drawer System Installed X
Finalize ARB Fridge Wiring & Aux power outlets X
Install ARB Fridge X
Remove Stock Battery X
Install Slee Dual Battery Tray X
Install Optimas X
National Luna Dual Battery System Installation X
Remove Factory Running Boards X
Install ARB Side Steps & Side Rails X
Install Eezi-Awn Roof Rack X
Safari Snorkel Installation X
Helton Hot Shower System Installation X
100% complete, done, finished. While I was fully confident in our ability to make it happen on such a condensed schedule, I was still a bit in awe that all the pieces came together so nicely.
Helpers:
I couldn't have done it without my crew of ringers. These guys all sacrificed parts of their weekend to come slave away on what most considered an impossible build. In the end with many helping hands the actual work load was relatively light and I don't think anyone felt too burned out. We were able to cram nearly 150 man hours worth of projects and installs into a 72 hour window of time and still get a bit of shut-eye in between, all due to the generosity of my pals. I have to lead off my list (which is alphabetical) with my wife Candace who not only put up with my wrenching all weekend but also helped with key components of the build such as parts pickup and even more important feeding the hungry crew.
Candace Williams
Chris Peterson
Cody McKendrick
Corey Fillmore
Dan Lockington
Darren Webster
Dave Connors
Devin Baumgardner
Jake Chatwin
Jason Goates
Johnny Cassel
Josh Stanfield
Kirk Farrell
Olly Bradsteeet
Paul May
Ryan Davis
Scott Jackson
Stephen Nielson
Tovin Benson
(Anyone I'm missing? Please chime in!)
Companies:
While there were many companies that we could have used or did use for different roles on the build, these ones really stood out both in their interest of the project and their ability to help us make it happen on such an abbreviated schedule. I wouldn't hesitate to recommend any of them for your build needs, tell them I sent you
ARB USA - Bumpers & OME suspension
Armor Coatings - Power coating of wheels, bumper and step components
Big-O Tires Sandy - Tires, mounting and balancing.
Equipt Expedition Off-Road - Roof rack and dual battery system
Slee Offroad - Skid plate system, battery tray and diff drop kit.
Ajik/Landtank - Modified fan clutch
Wo
Pfran - Interior LED retrofit kit.
")
Wow massive mods!!! Congratulations, would love to build out mine like this! When you recover, would love to see pics
.JPG")