Rango.....1942 Willys MB

D

Deleted member 9101

Guest
Have you thought about the seats from a Honda Del Sol? The are low, narrow and are really cheap...lol
 

Metcalf

Expedition Leader
Nope, that's a new one. Do they come covered in military colored fabric? :sombrero:
Wouldn't a WWII military jeep self destruct if you put Honda seats in it?
 

Metcalf

Expedition Leader
Not really much progress, I ran out of cardboard.

IMAG0295.jpg


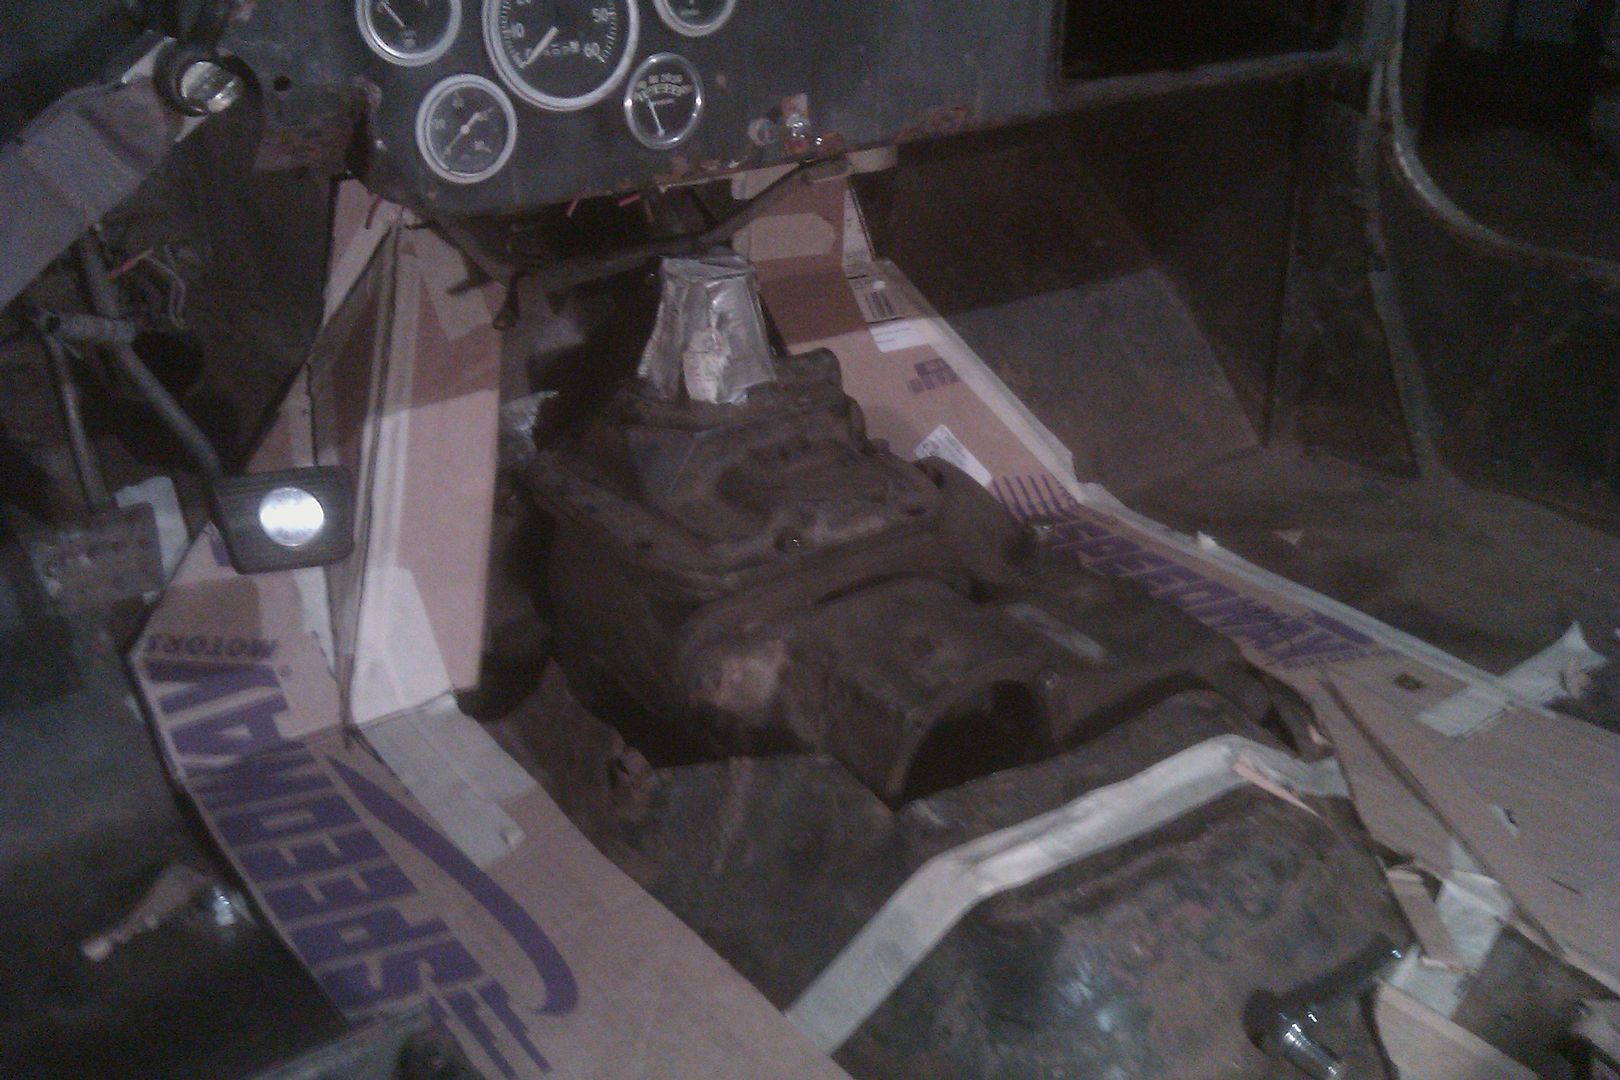
I started mocking up the new tunnel. I tried a few different shapes for the gas pedal area, this one was the best. I think I am going to have to remove the nasty lip of material on the drivers side near the transmission to make a tunnel like I want.

Anyone have a good idea on how much clearance I should leave around everything. I am guessing a little more around the output since it might move the most? Overall I am trying for about 1/2"+ in all areas?

The drivers side of the tunnel next to the transmission is going to end up rather straight up and down I think. That just strikes me as a little odd. I guess in most vehicles you don't sit next to the transmission.....
 

jeepdreamer

Expedition Leader
I scored a pair of MasterCraft seats last year when I was in Iraq. They were pulled from an LMTV that had new ones installed (no rips in new ones...). I really like the MC seats and was intending to run these in my 91 Olive Drab YJ project. To that end I contacted MC about some replacment seat covers and they said they are available. They are OD and sort of fire resistant. I don't think they are made of Nomex but they were a decent color/texture. While they didn't hold up so well to years of GIs crawling in and out in full battle rattle and the general abuse of Iraq...the seats themselves are fine. You may try contacting MC and asking about some low back seats in that fabric for yours?
Only problem is that as we get older, Any seat seems to be a contortionist exercise to fit our bellys around the steering wheel. :)
 

reece146

Automotive Artist
From what I remember the tunnel sides on Suzukis are vertical. It's been almost ten years since I've worked on one though.

My S2000 has vertical sides as well - you sit beside the transmission in that car. The tunnel in that car is a structural member as well - massively built.

As for spacing... hard to tell how much until you start using the finished Jeep. Half inch is likely decent, more if you can squeeze it without losing usable space inside. Worst case you can always massage it with a hammer afterwards. Are you going roll/spray in some kind of bed liner? Don't do that until you are happy with the clearances.
 

reece146

Automotive Artist
Btw, the shifter tunnel looks really tight to the dash... maybe it's just the picture... enough room to shift into first and fourth?
 

Metcalf

Expedition Leader
Btw, the shifter tunnel looks really tight to the dash... maybe it's just the picture... enough room to shift into first and fourth?

No really, its right under the edge of he dash:elkgrin:

I am going to have to build a special 'stick' for sure. The old one I had with the s-bend was close. If I shortened it right as it came out of the tower if would probably work. I will wait till I have the seats in to do the shifter.
 

Metcalf

Expedition Leader
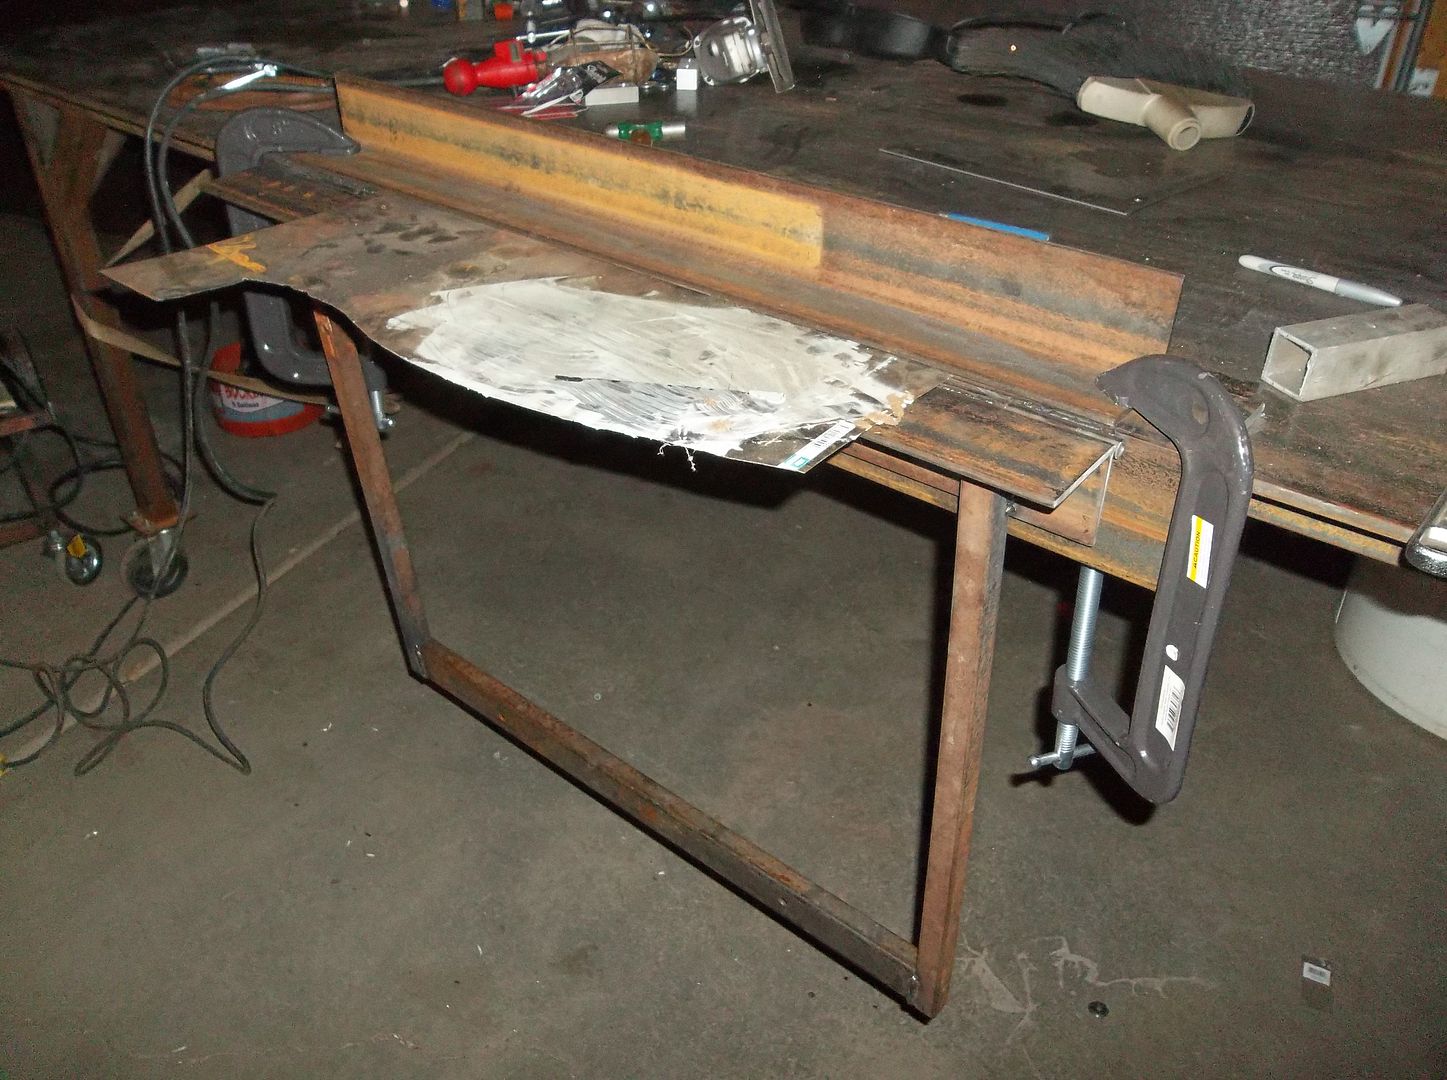
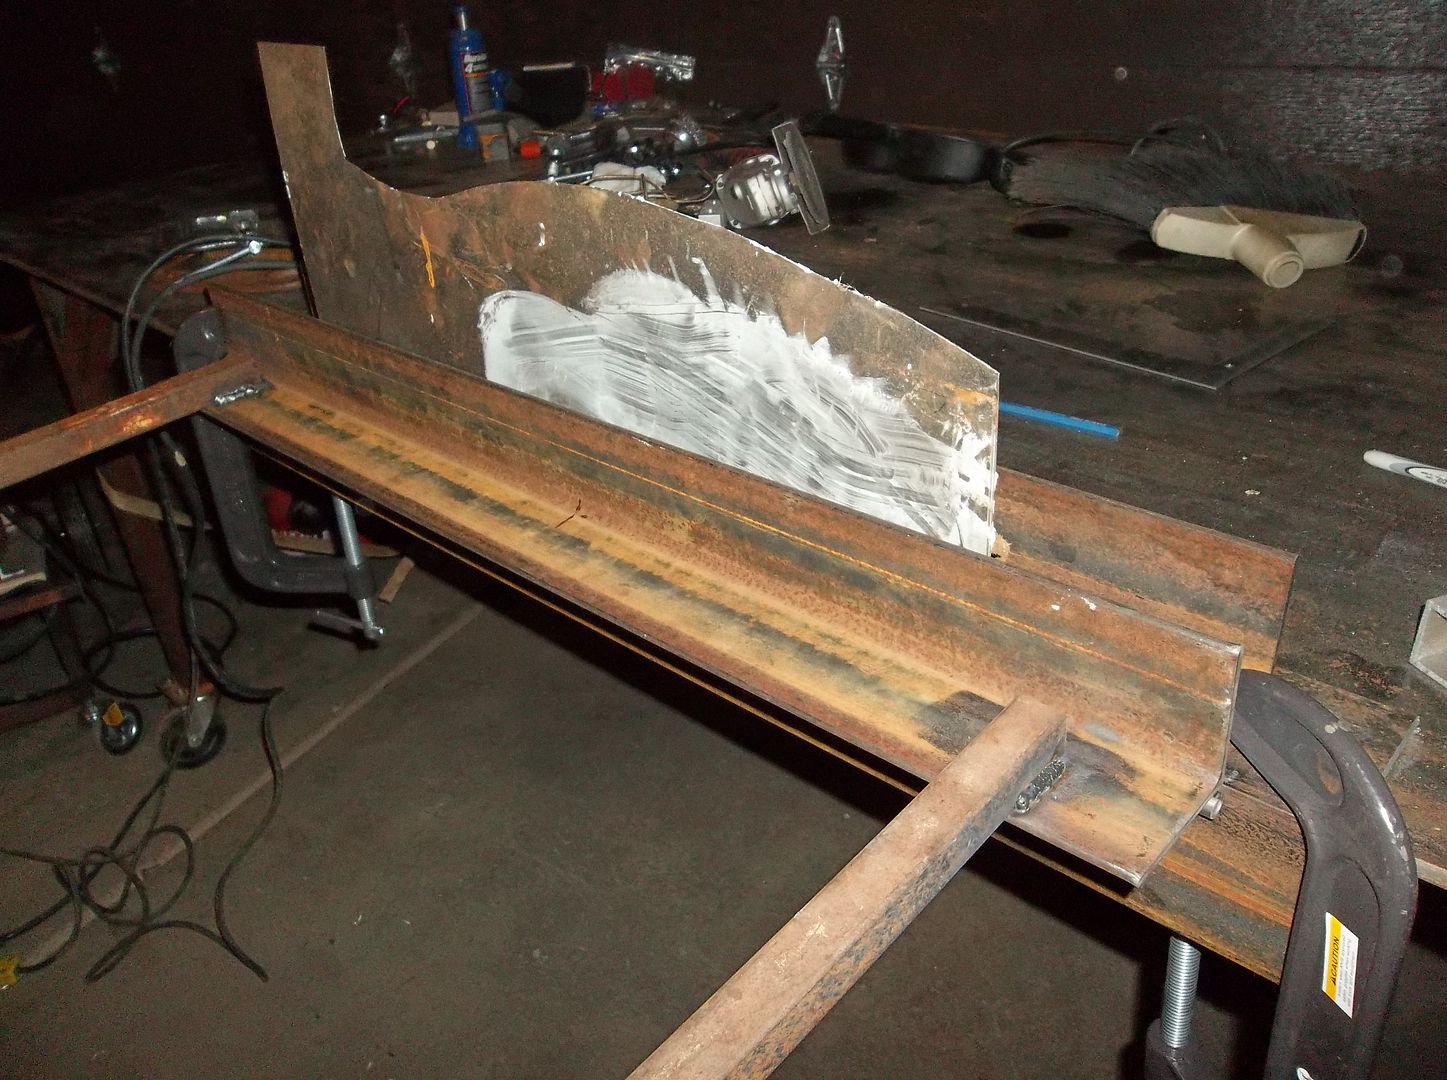
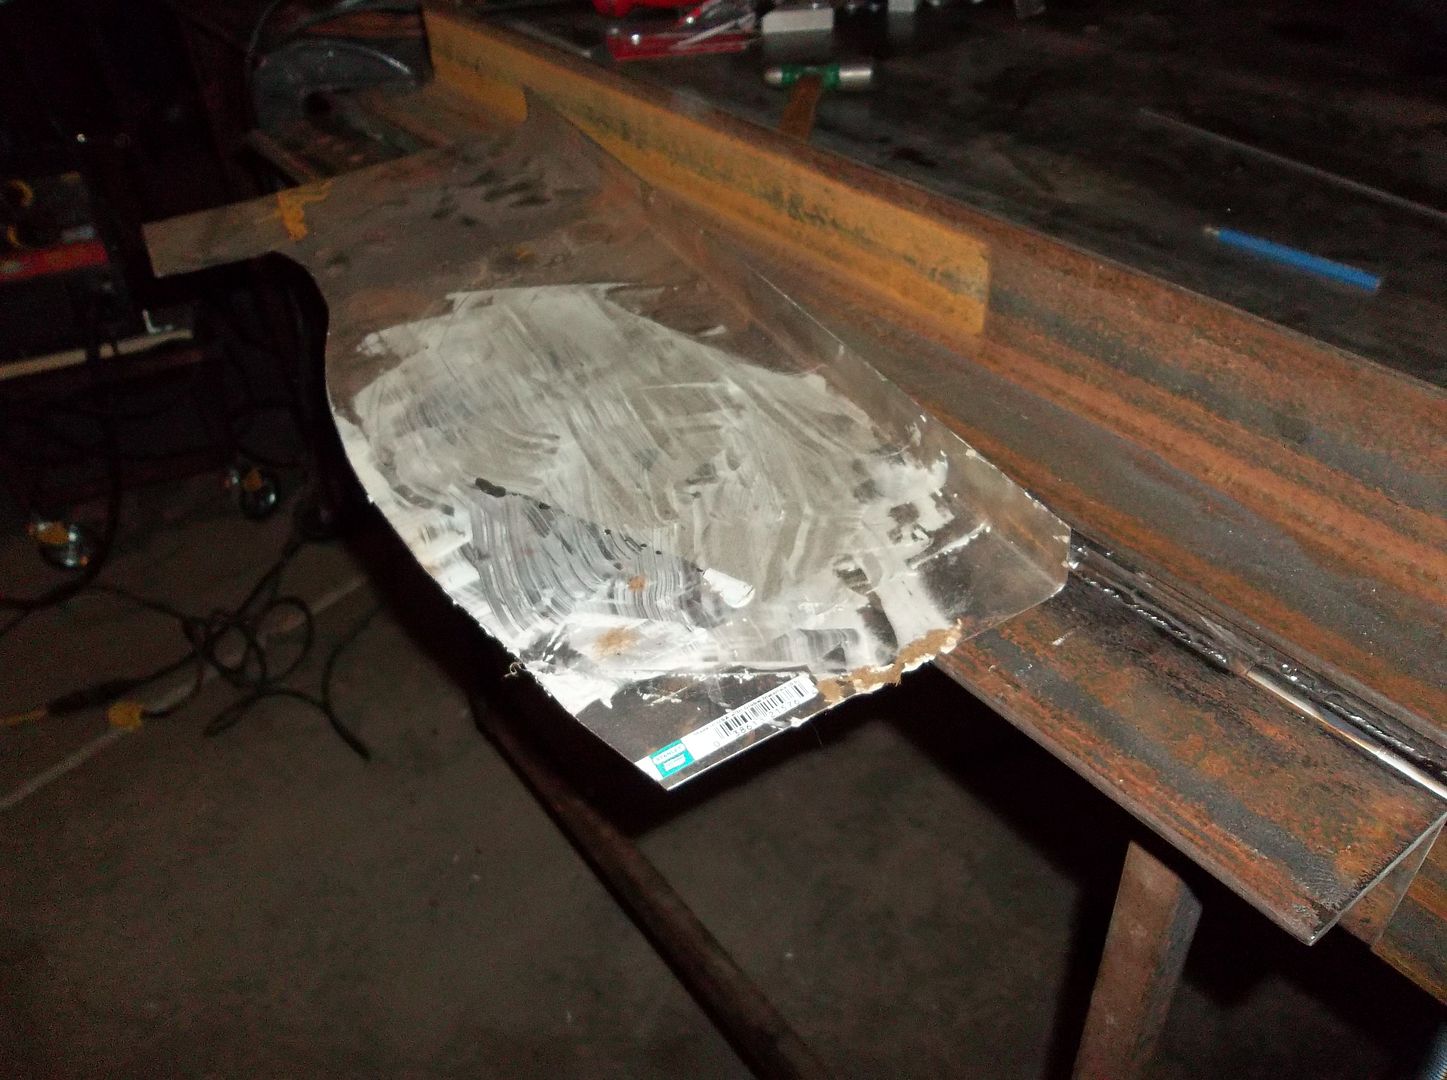
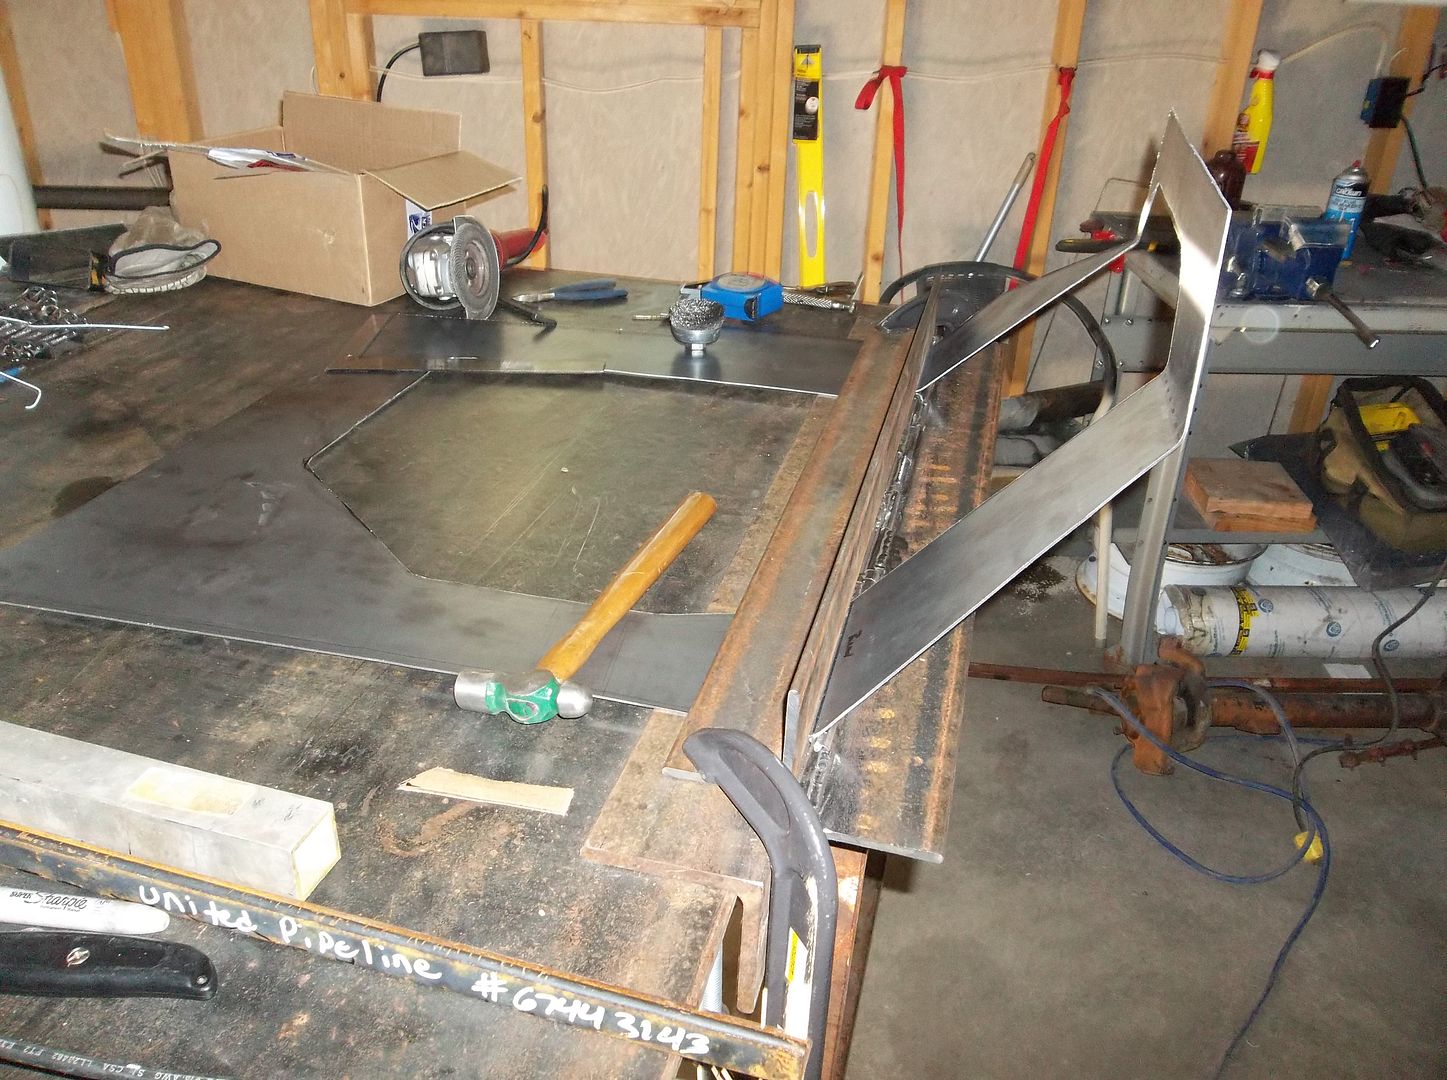
I figured I am going to need something to do this....

100_0308.jpg


So I built this last night when I had a few hours in the shop....

100_0304.jpg


100_0306.jpg


100_0307.jpg


It was almost free since I pulled all the metal out of the scrap bin at work. I did have to spend $10 on some small tubing and all thread to make a hinge.

And then I forgot to bring home more cardboard :homer:
 

reece146

Automotive Artist
I gotta do something like that.

Right now I use a vise some two by fours and a piece of hard wood to act as a dolly of sorts.

Capital PITA.
 

Metcalf

Expedition Leader
I just got done with arts and crafts class....

100_0313.jpg


100_0314.jpg


That was fun....now to make it out of metal....

Note....it comes out in on piece with the shift lever removed.

100_0315.jpg
 

Metcalf

Expedition Leader
I have a few tricks up my sleeve for making it out of metal....

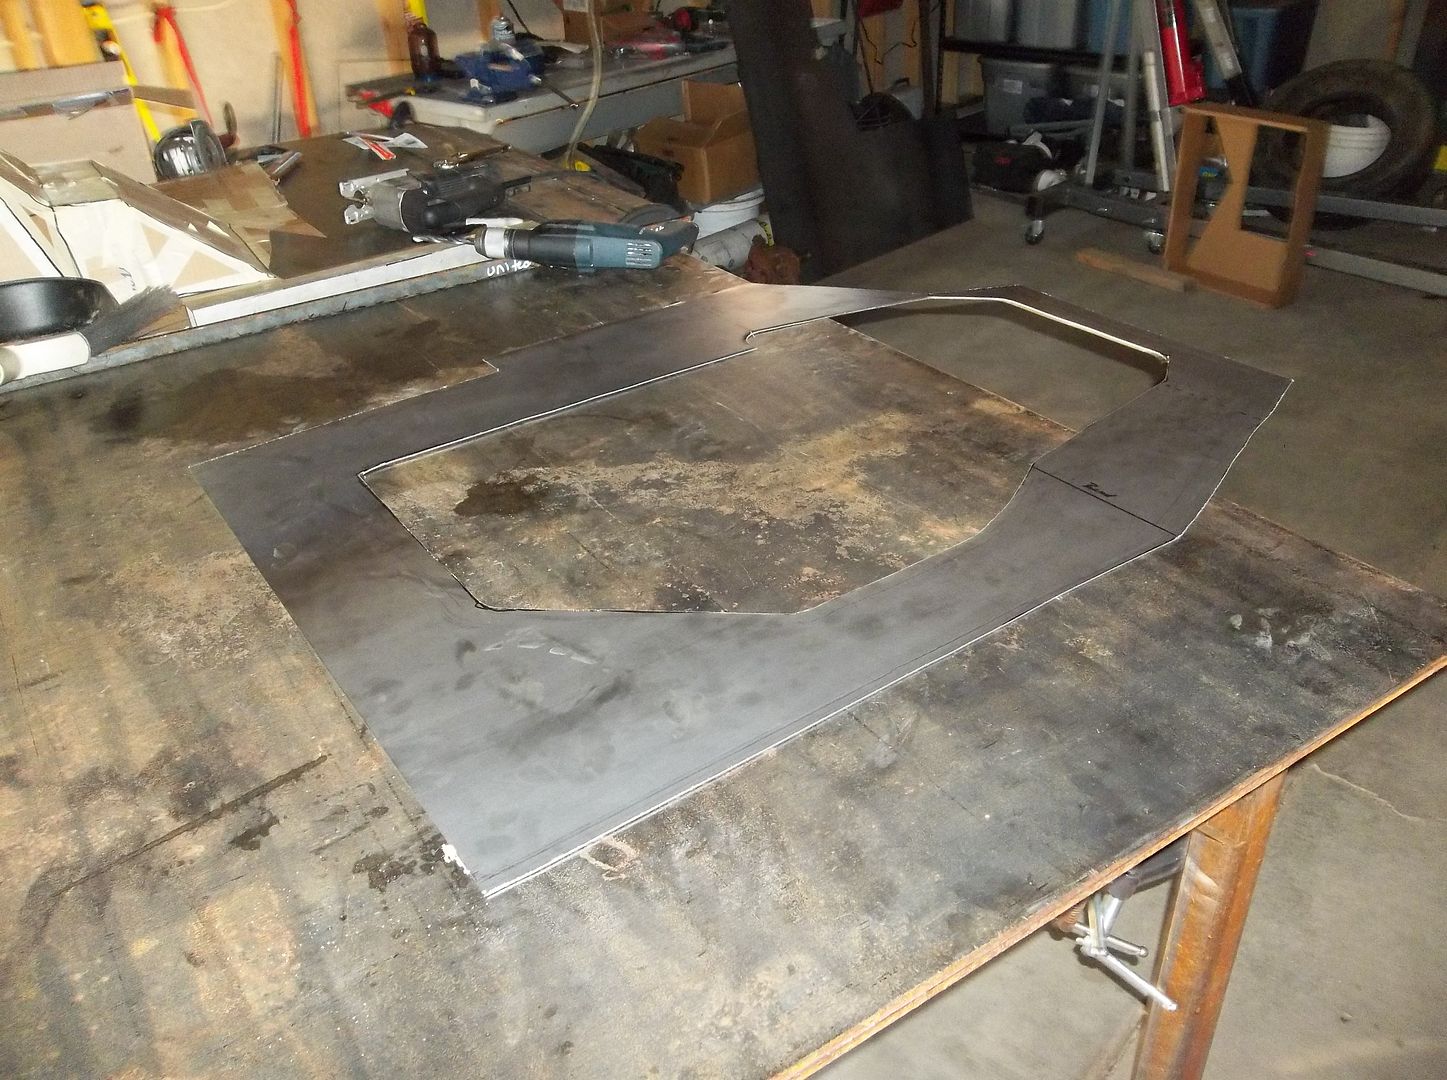
I removed the cardboard and tape crafts project and used it as a template for a bottom plate...

100_0316.jpg


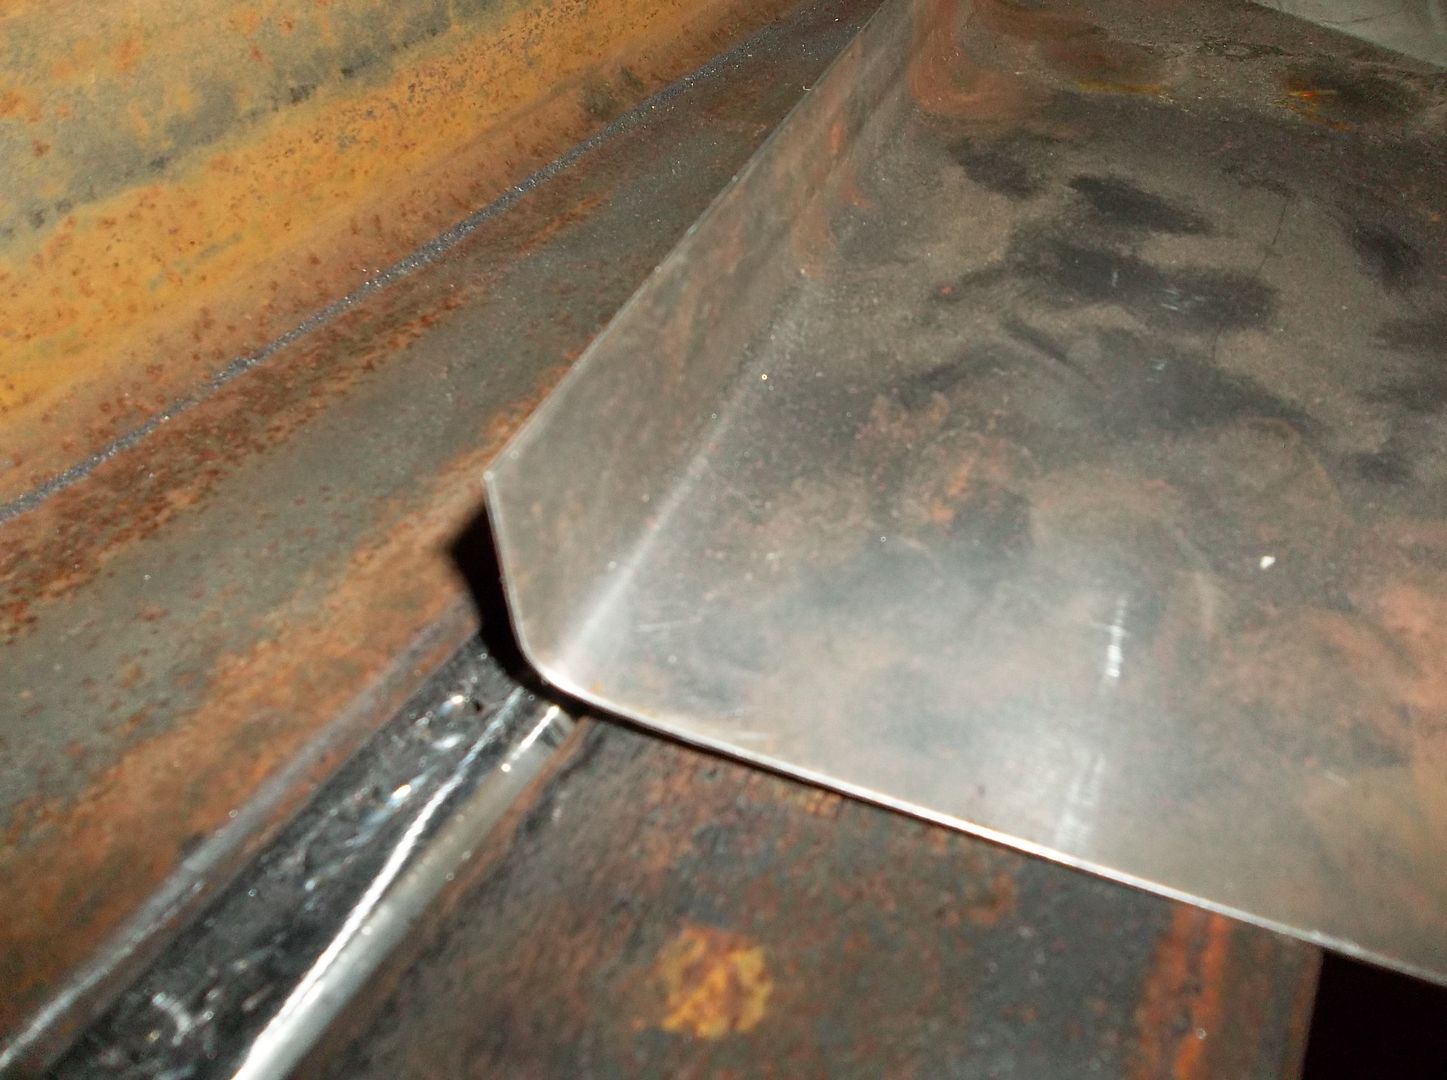
Then I bent the main floor plate in my free press. It seemed to work GREAT. The small bend radius seem to match the Willys floor very well.

100_0317.jpg


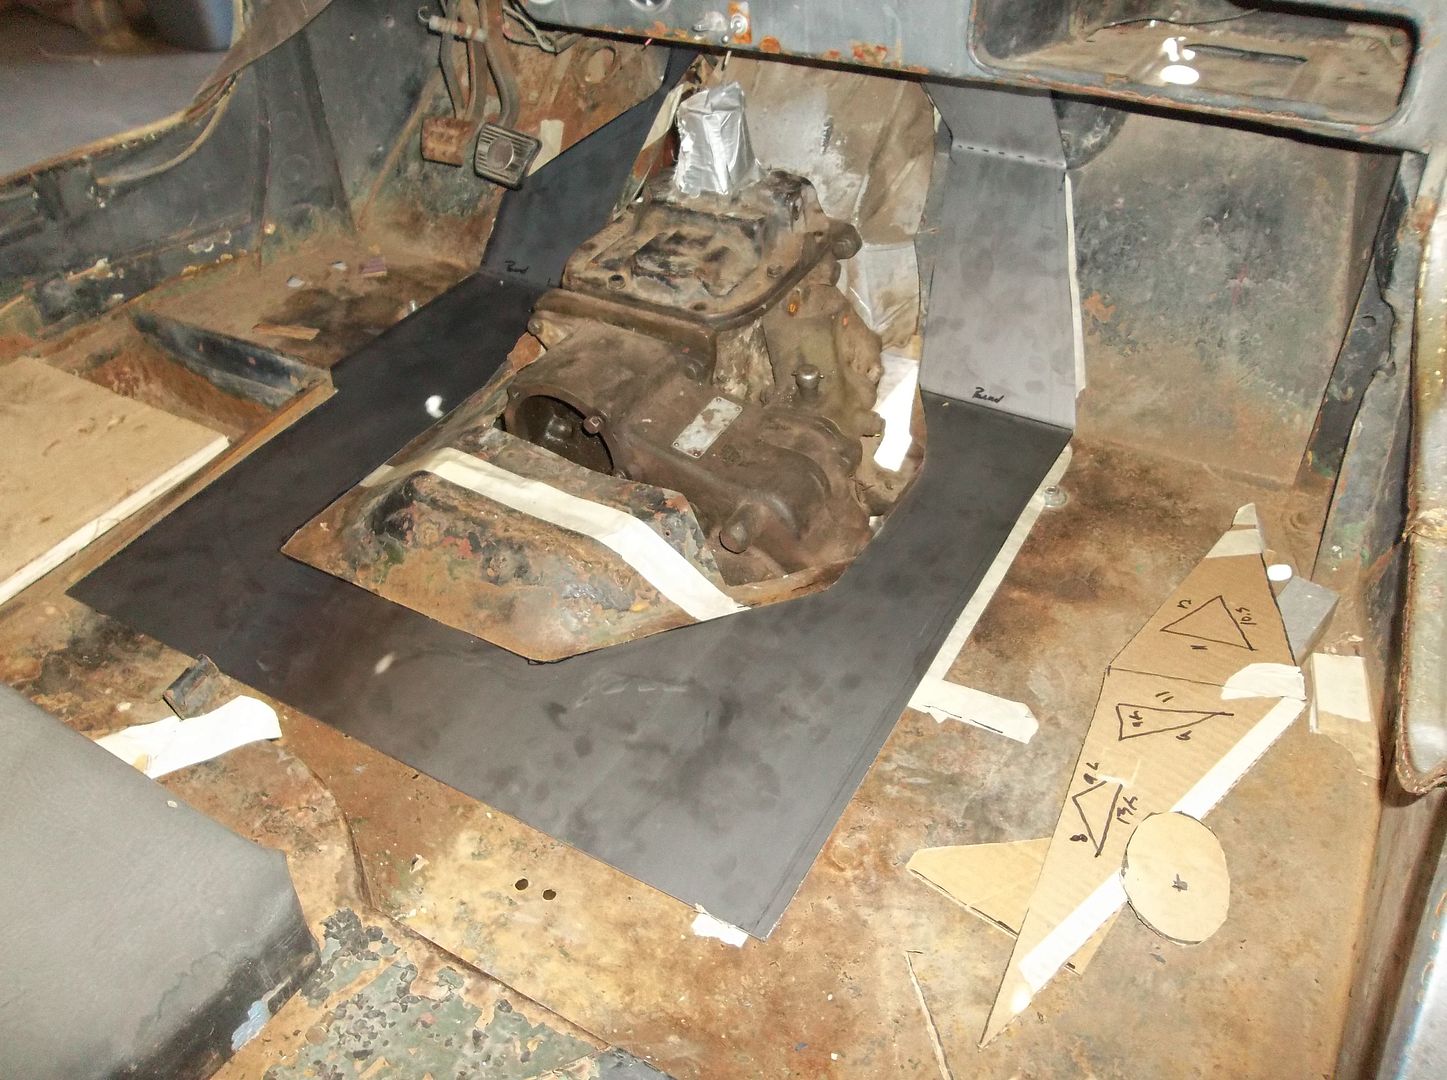
Then I installed the main plate on the floor....

100_0318.jpg


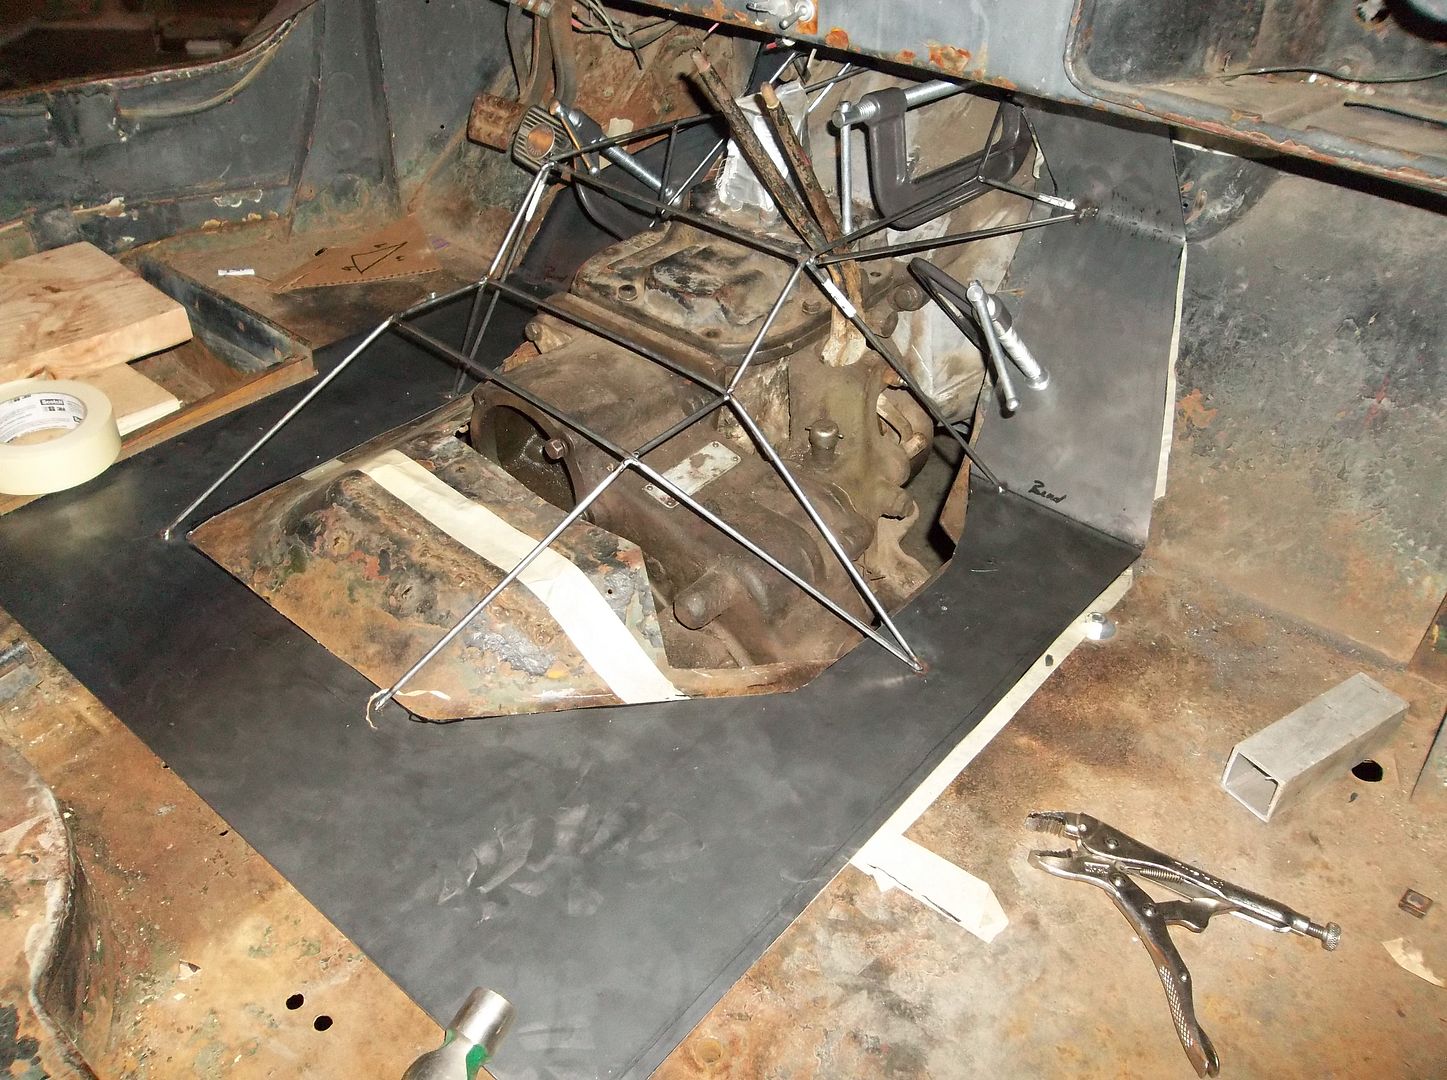
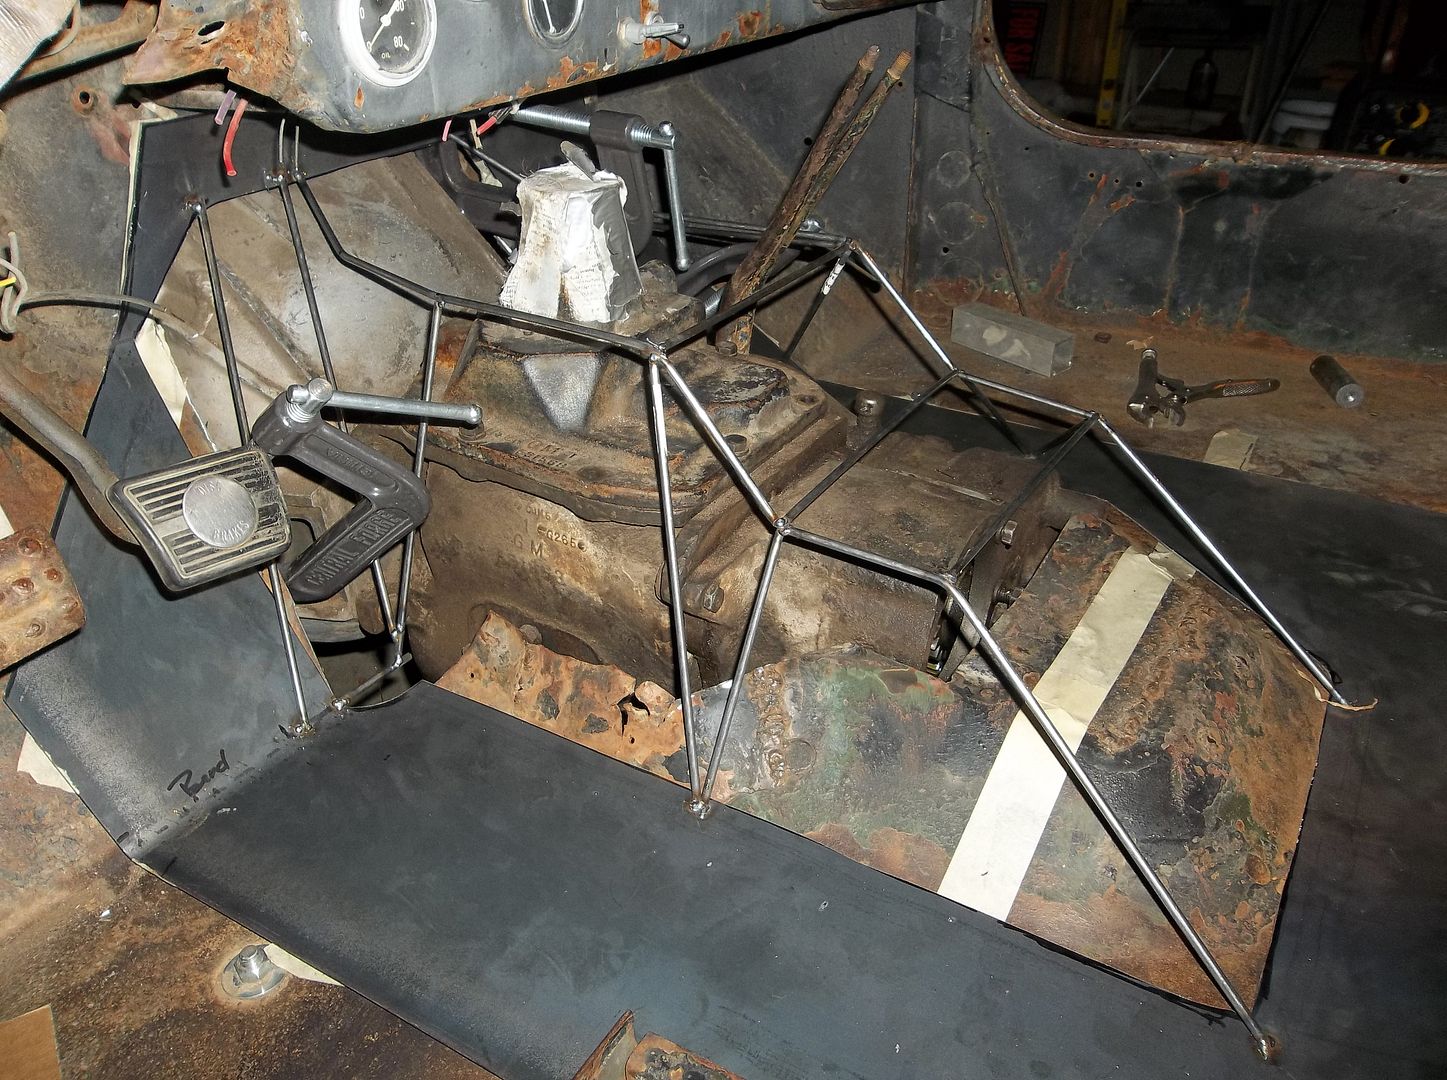
Then I built a wire frame using the cardboard model as a template. It didn't turn out 100% the same, but its pretty dang close.

100_0322.jpg


100_0323.jpg


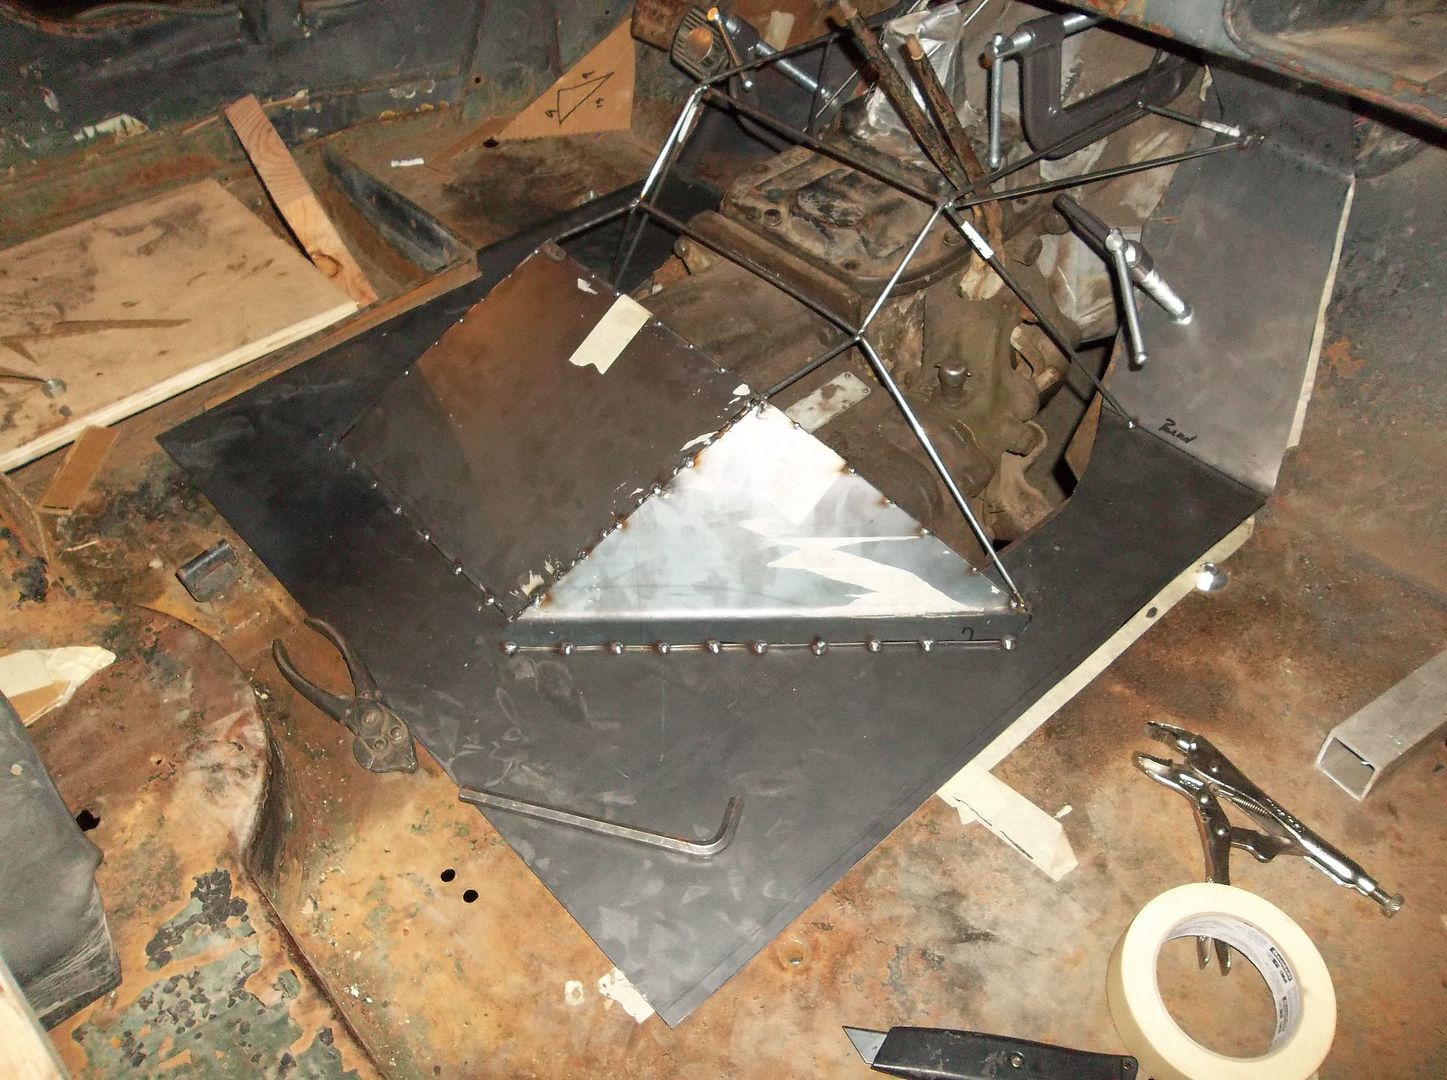
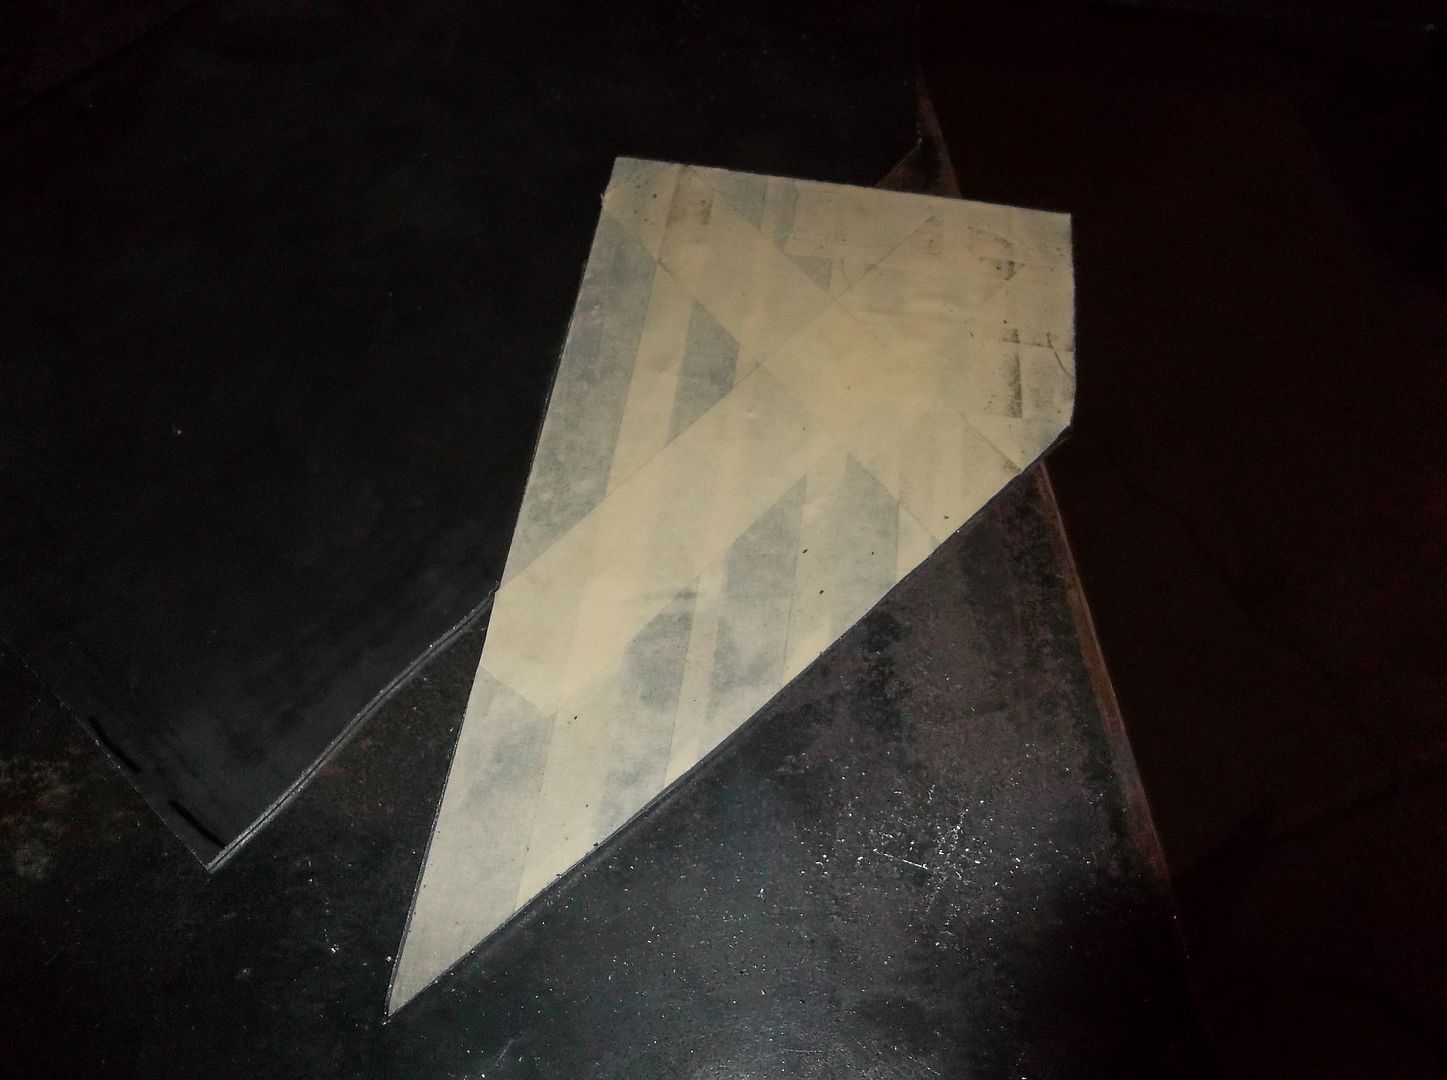
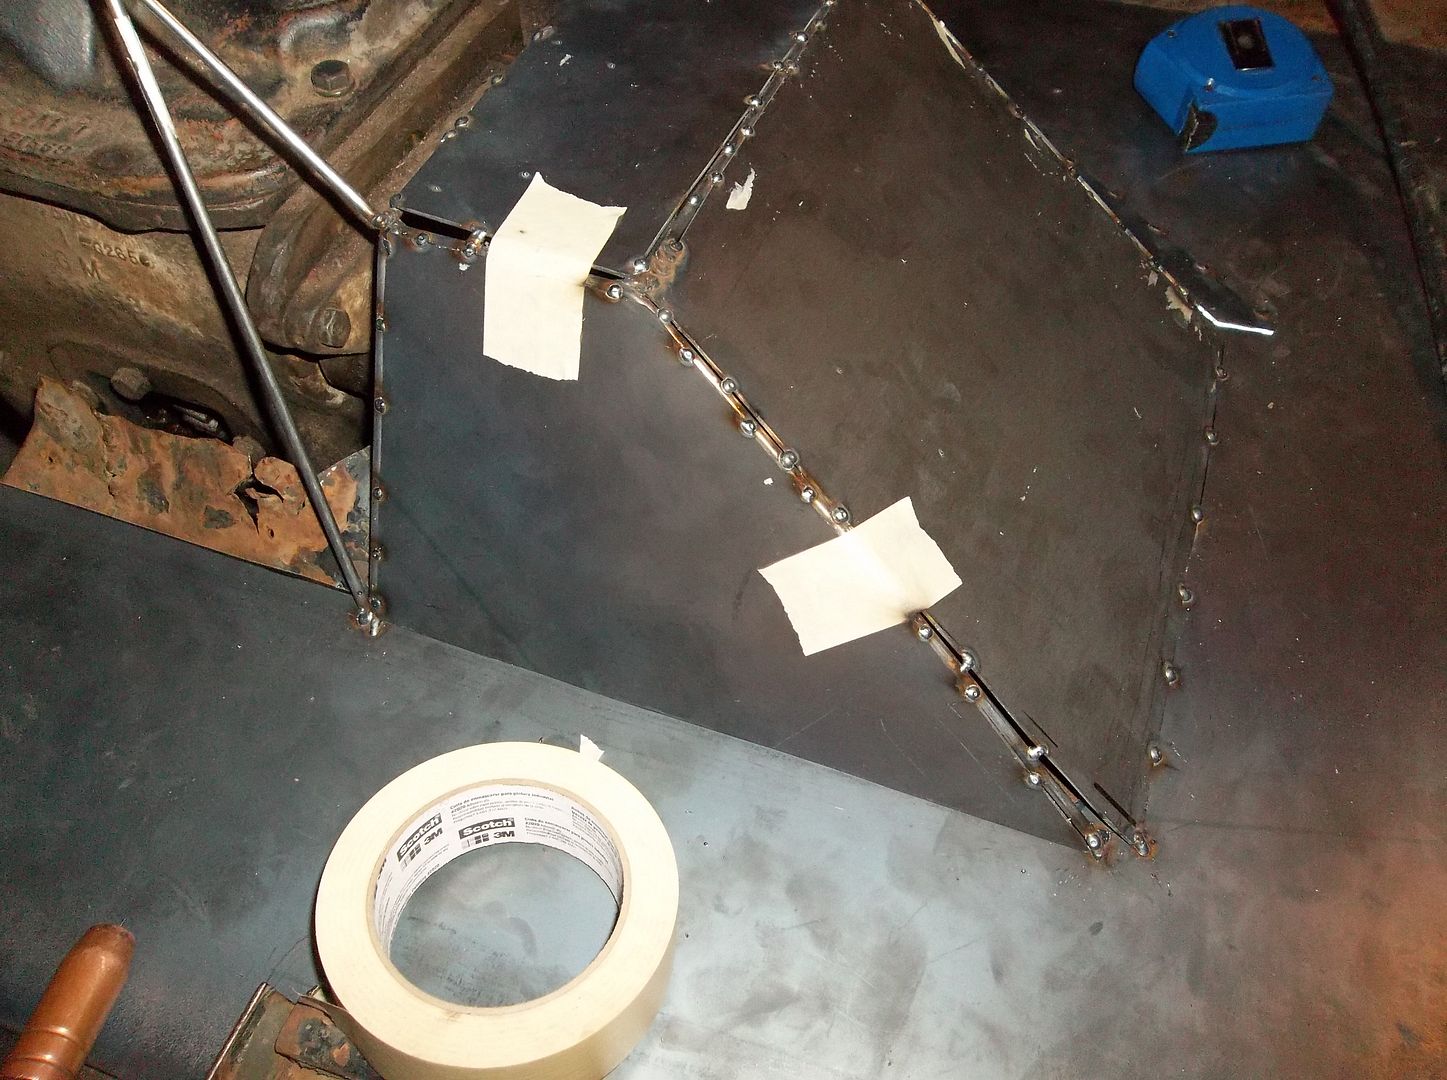
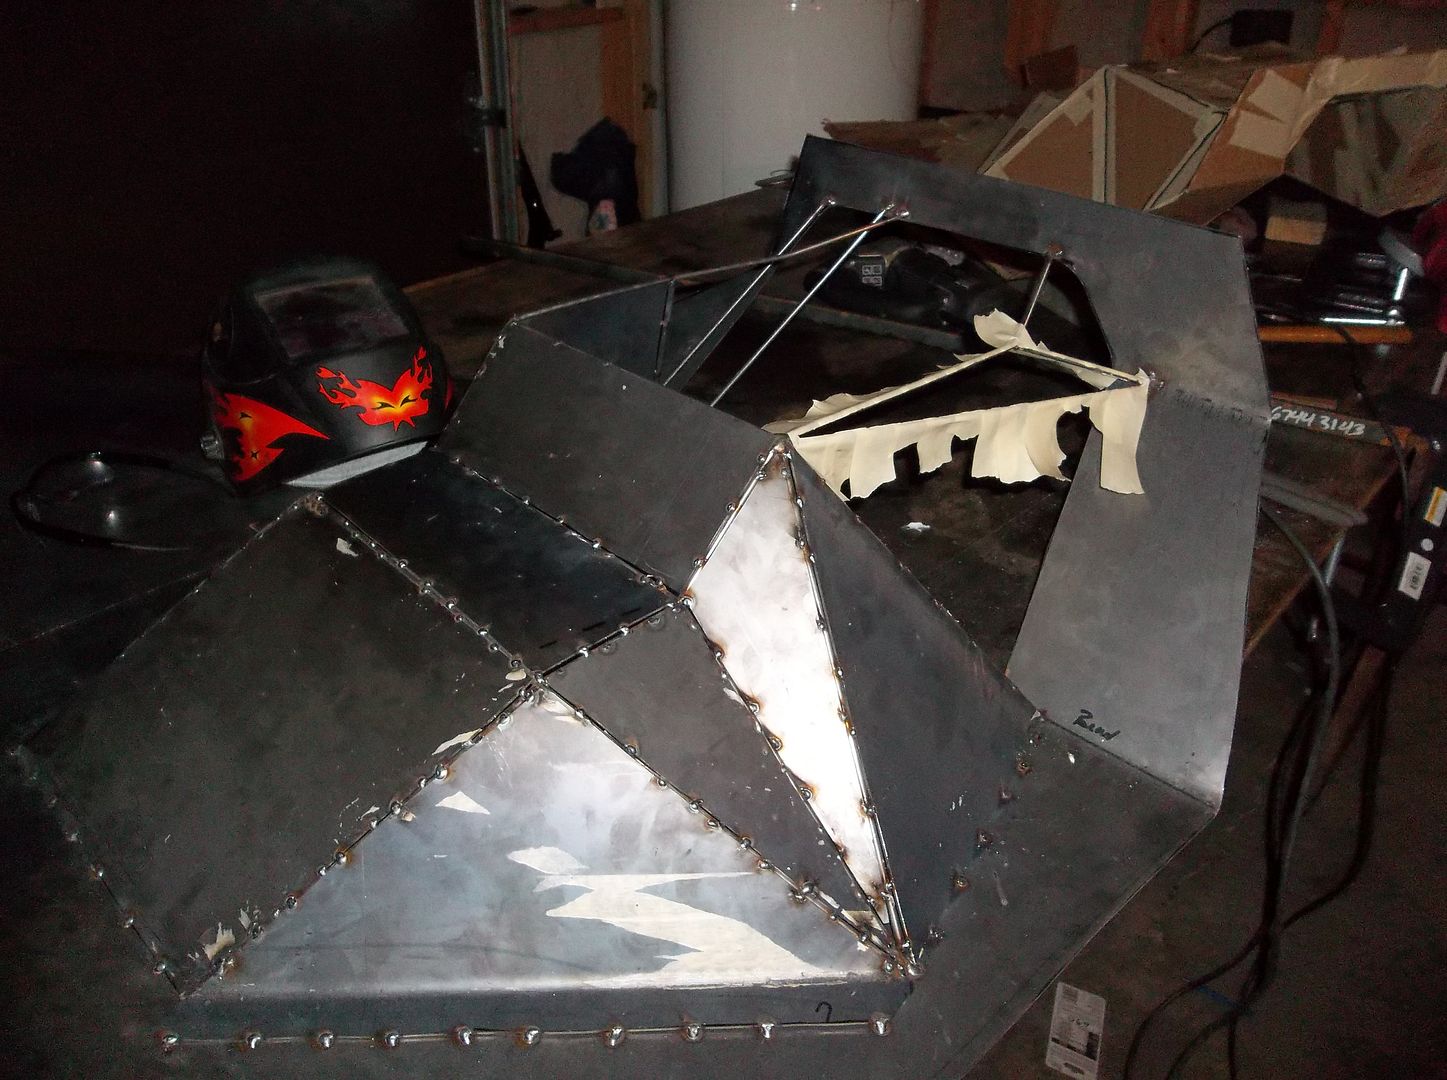
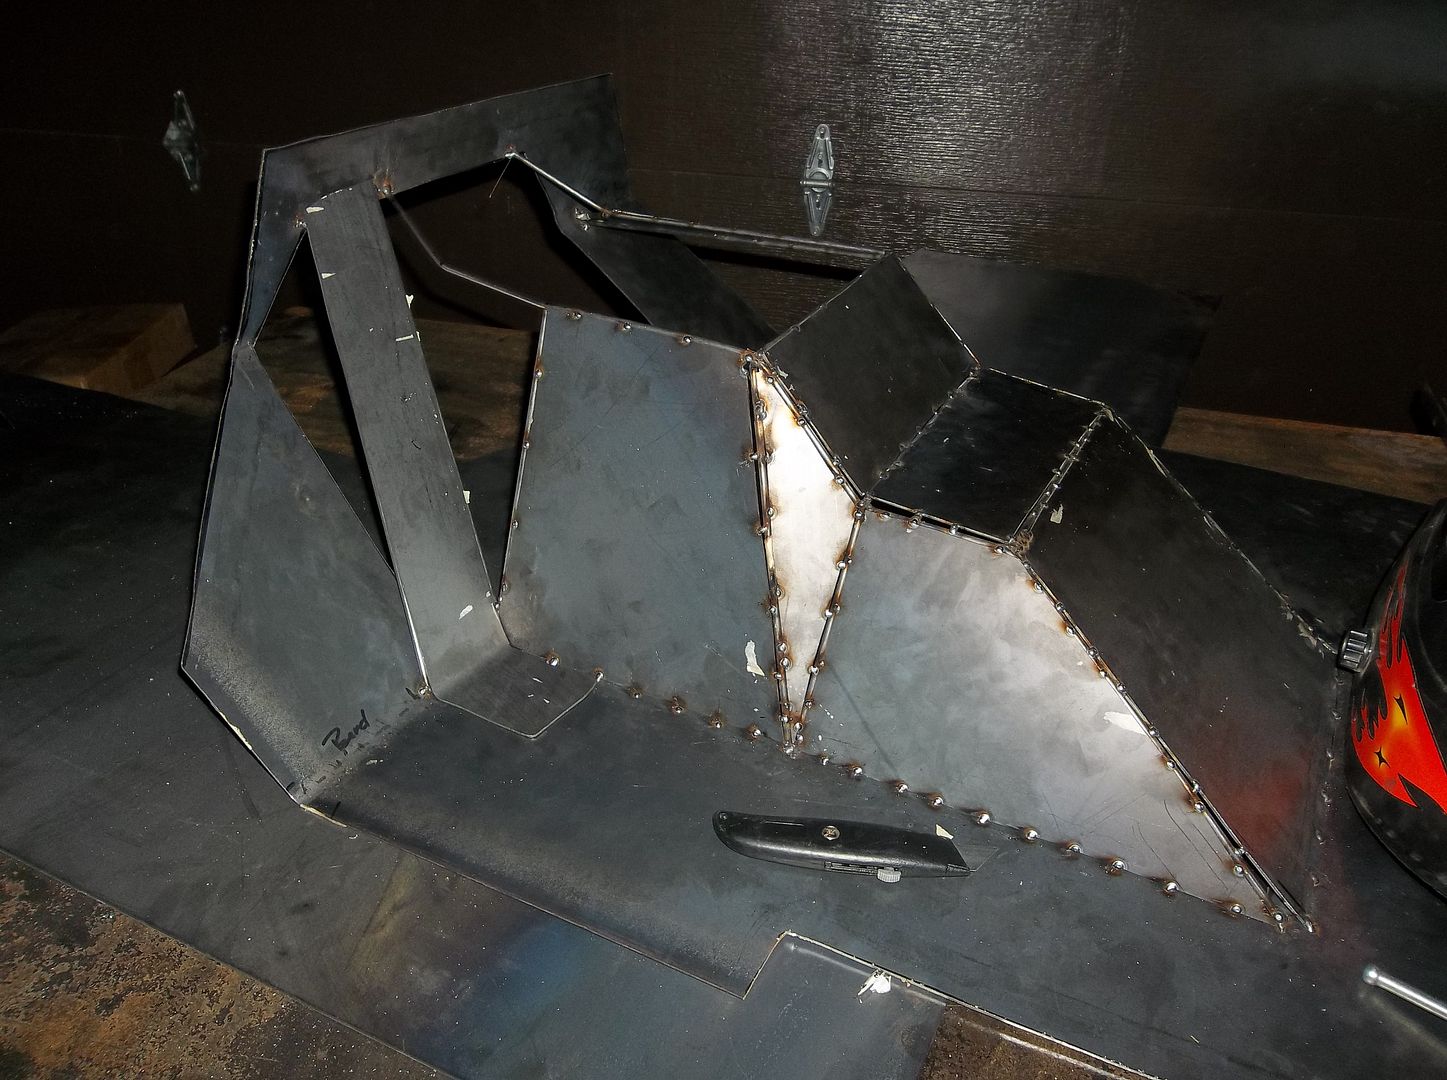
Then just before I ran out of steam I got a few panels make and tacked on. The 3/16" round stock 'wire' frame seems to work great to provide a structure for welding on the plates. I make a masking tape template over the wire, cut it out, then transfer it to the sheet metal for cutting. This seemed to work really well for getting the correct shape. Its not super perfect, but it works for me. I will probably be working on the panels for a few days now. It does take a little time.....

100_0325.jpg


Hopefully I will be able to wrap up the tunnel in the next few days, at least enough that any finish welding can be done out of the vehicle. I will eventually weld all the seams and sand them down a little bit to round all the edges.

After I finish up the tunnel I will be moving onto the front fender 'highline' and moving up the rear tubs. I have an order of small cuts of metal for a lot of other misc stuff on the frame. Seats are going to be ordered in about a week I think. I am sure the other metal work will keep be busy till the seats get in....then after they are mocked up in some mounts I can build the steering column, redo the pedal pack, etc.

Fun Fun.
 

Metcalf

Expedition Leader
Stay tuned! There is another thread about it on pirate, in the Willys section, that gets a little bit 'different' traffic.....ie different questions and different kinds of tech....same general info and updates though.
 

Metcalf

Expedition Leader
Making the skins for the wire frame......

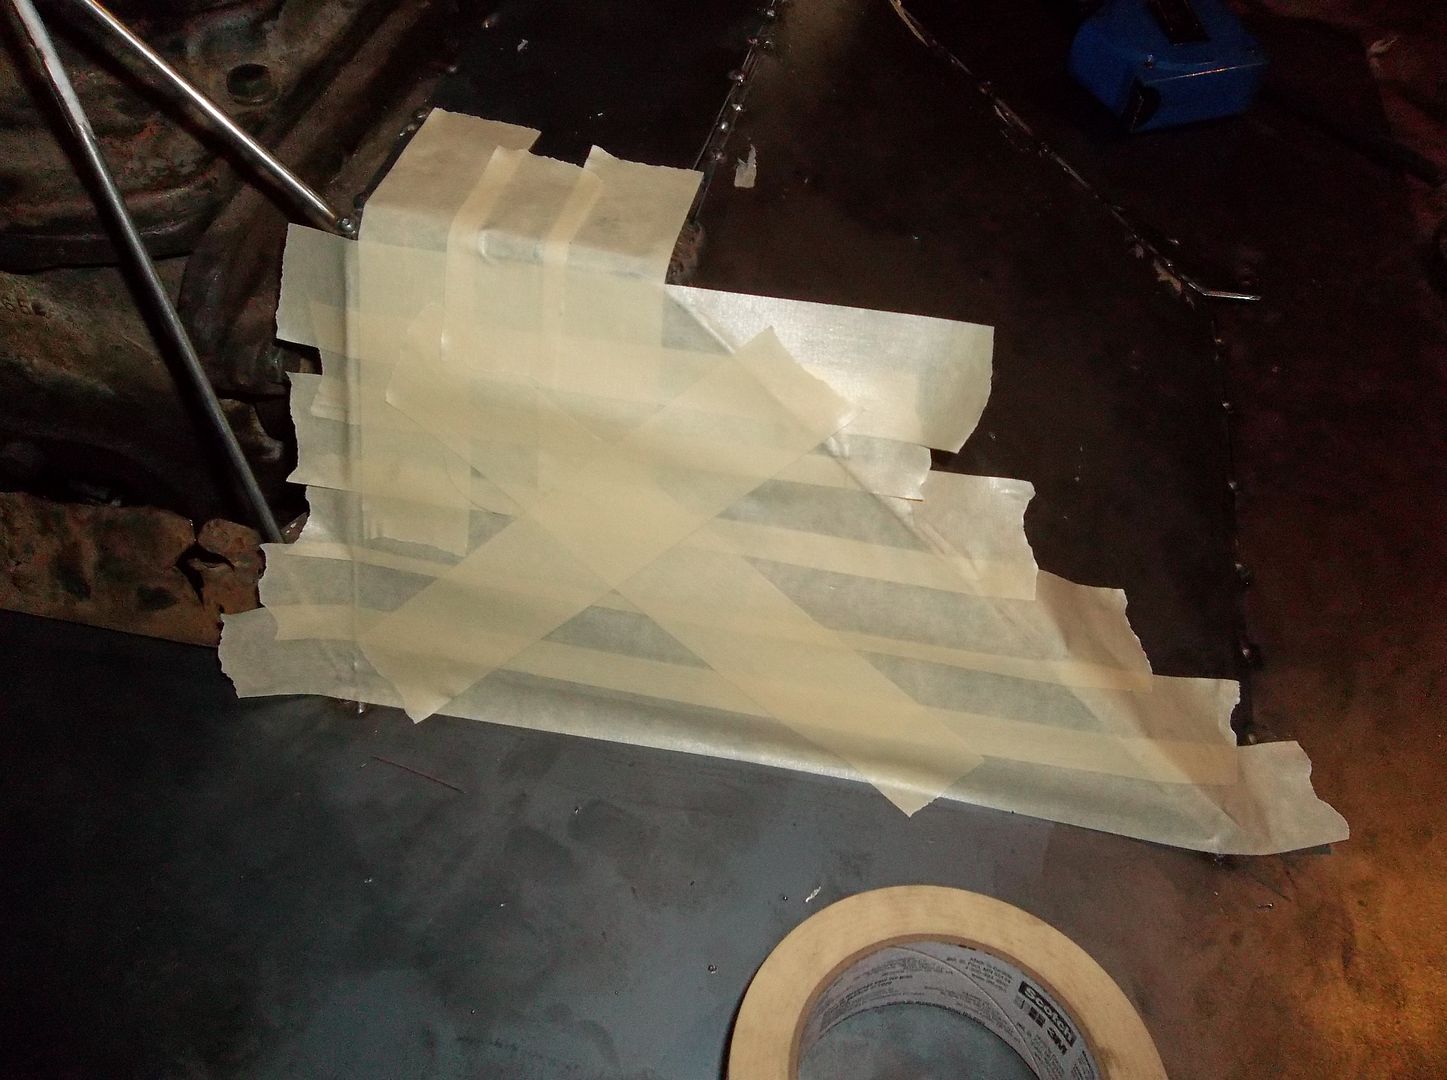
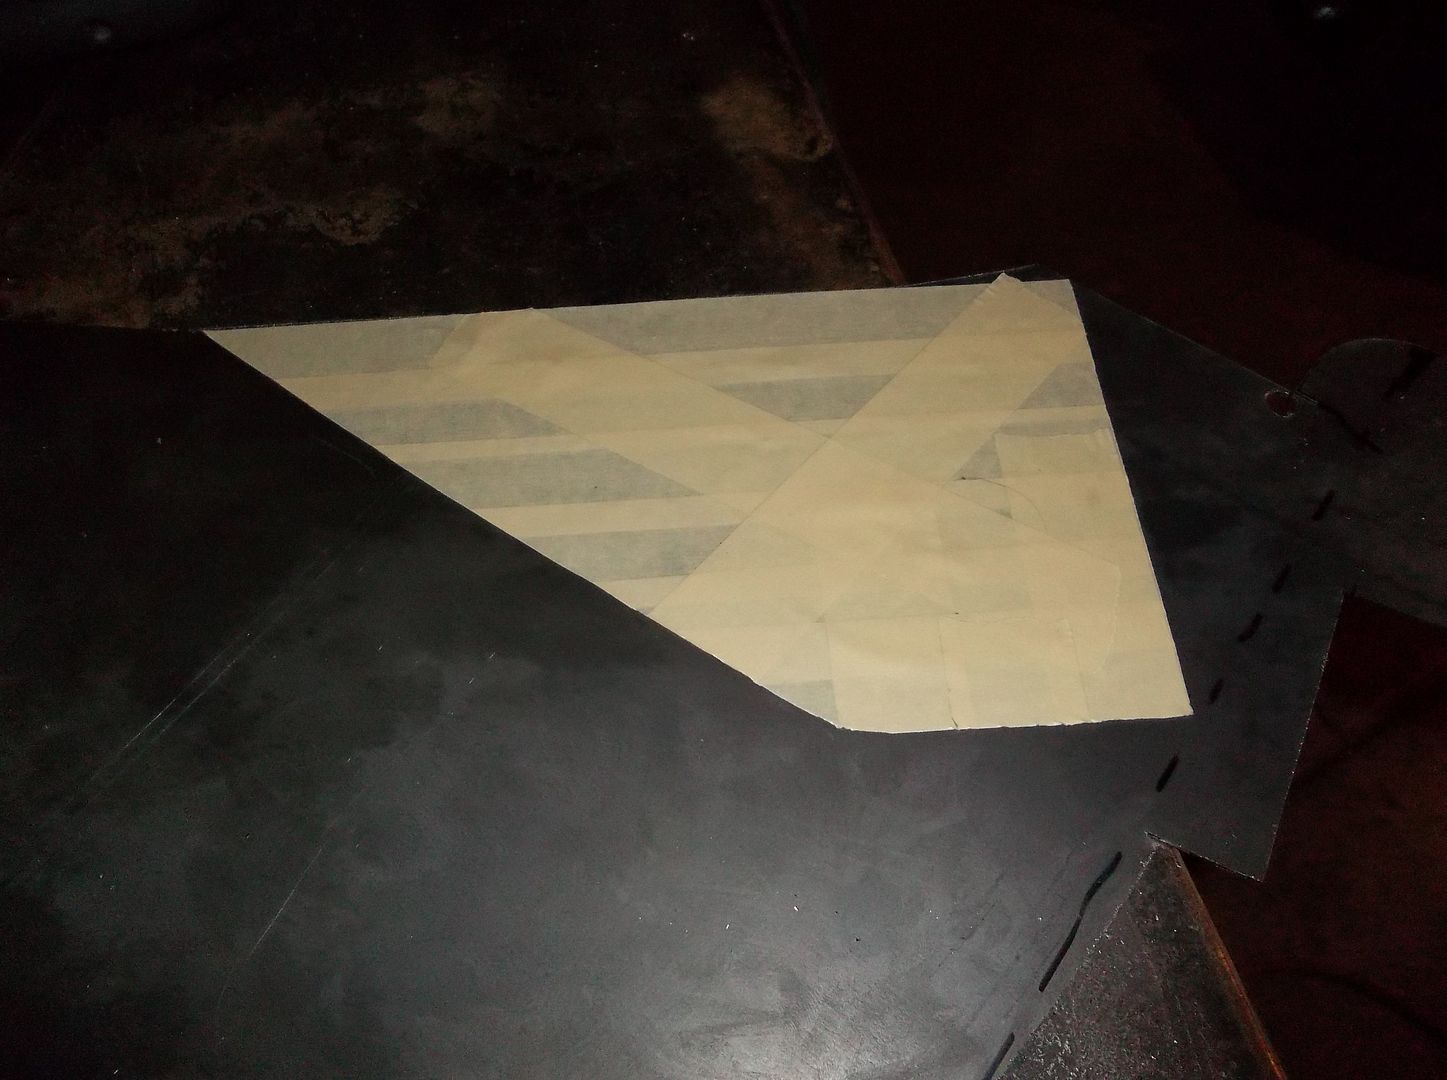
First you get some masking tape. I like the 3M basic stuff for this. It works really well.....sticky but not too sticky. Its light in color that whatever sharpy you have close at hand will show up.

100_0326.jpg


Cover the area you want to skin with tape. I overlap it a big and put a few crosses in there too....

100_0327.jpg


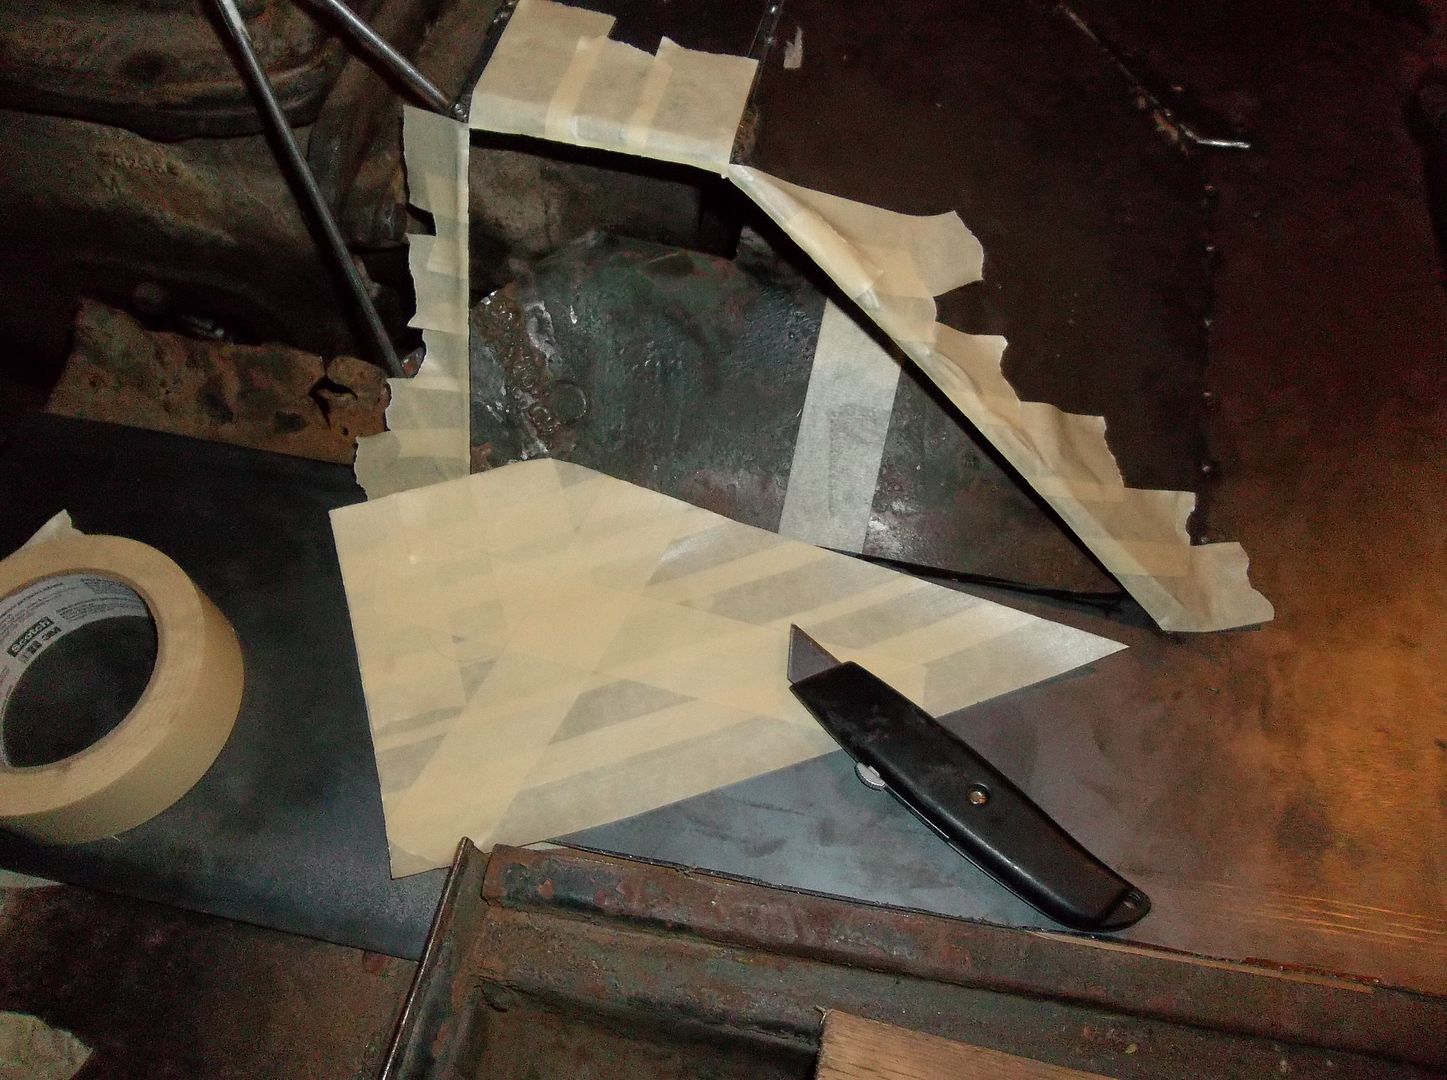
Then cut it off the frame with a box cutter or razor blade, try not to use your good pocket knife when your lose said box cutter or razor blade in the garage mess.....

100_0328.jpg


Lay the pattern sticky side down on some metal. The pattern isn't so sticky that you can't align it pretty careful. Once you have it lined up you can press it down firmly. This makes a great cut template I think. I usually cut it out with a combination of a jig saw and my band saw depending on the size of the host piece of metal. These patterns seemed to REALLY use up the smaller sections of 'waste' material.

100_0329.jpg


Once its cut out I hit the edges with a worn out flap disc.....

100_0331.jpg


Test fit, trim or sand the edges for clearance if needed to tune the fit. I then usually tape it in place to hold it. Then I tack weld it down. If the panel isn't totally flat you can use some pressure to slightly bend the panel for a better alignment and tack weld.

100_0332.jpg


100_0333.jpg


I removed the tunnel once I got to the front panels. It was just too tight to weld them in the vehicle and under the dash. The wire held everything in place pretty dang well! I was able to pull it out in once piece still!

I probably have at least another night to get it skinned. I also need to rebend the shifters before I make the final top panel. Getting it over the transfer case levers will be more challenging. I need to make a access hole for the pin that holds those shifters in place I think? That way I can remove them before I pull the tunnel off. I could also make the top panel removeable....I might to that too.
 

SChandler

Adventurer
The tunnel cover looks like it is coming together. I do have a fabrication question for you. Why not use your "new" sheet metal brake and card board templates for some of the pieces? It looks like you could have made the middle front-to-back strip relatively easily from one piece with a couple of bends in the brake, saving you some welding and sanding time.
 

Forum statistics

Threads
188,293
Messages
2,904,993
Members
229,961
Latest member
bdpkauai
Top