Rango.....1942 Willys MB

Metcalf

Expedition Leader
Ack!

You had me there... I was getting "angry" when you said you were adding a body lift.

LOL

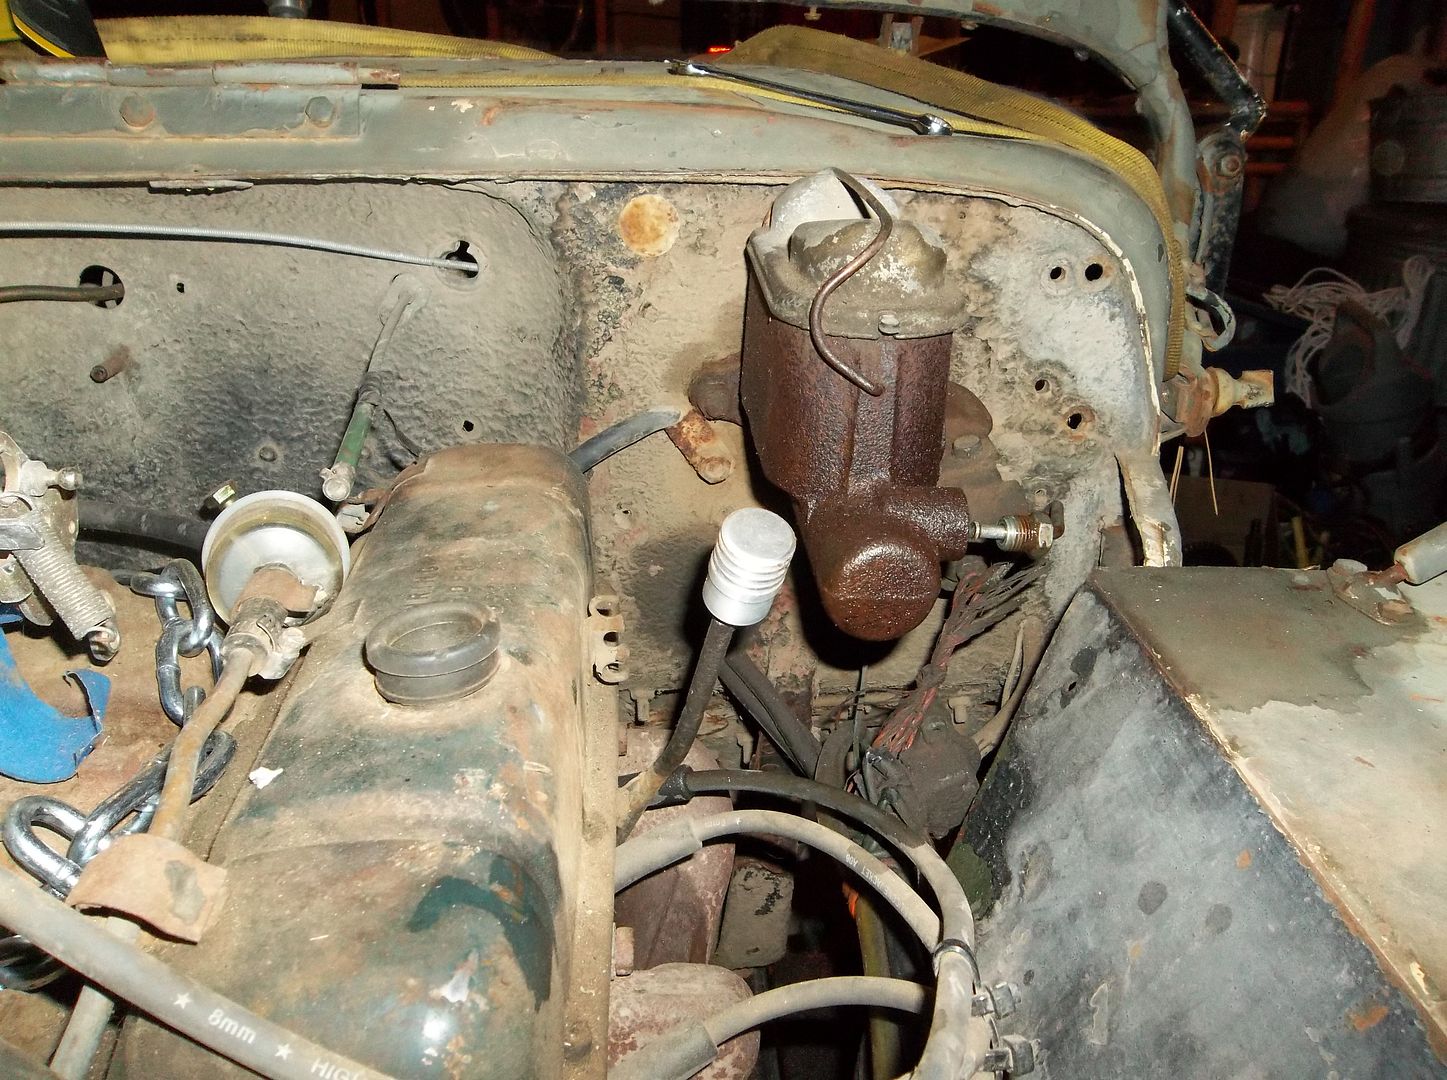
I'd really start looking at what to do about the carb height now. In the image above it is worrying.

Put the e-brakes on your rear disks. Is your rear axle disk already? I recommend sourcing a caliper with the e-brake built in.

haha!

The carb thing isn't THAT big of an issue. I can always run around with no hood or cut a big hole in the hood for the air cleaner :) I have a few ideas on a somewhat different induction system that I may try, first I need to get the thing together enough to drive around. Then I can mess with that stuff. I'm not going to move anything else or change out the motor just for an air cleaner height problem.

For the e-brake. I just don't know. The idea is to have matching disc brakes, spindles, bearing hubs, bearings, calipers, etc on all 4 corners ( less spare parts ). I don't know if I want different rear disc calipers. If I was going to do e-brake calipers I would add in the wil-wood spot units perhaps. A hydraulic brake lock could also work for this old thing.
 

reece146

Automotive Artist
You're trying to annoy me again, aren't you? <mumble> hole in the hood... </mumble> :D

FWIW, I wouldn't do the spot caliper again. If you need it to make a vehicle pass a safety inspection then maybe. I'm not really happy with the clamping power.

What calipers do you have now? Is this a configuration you were already using? Sometimes if you use a large caliper in the rear it can be really hard to get the brake balance right even with a proper proportioning valve. The difference in flow rates reaches a tipping point and the vehicle is really sensitive to loading wrt the brakes. In a flattie that might not be that big a deal.

As for commonality between all four corners, I think it is worth sacrificing to get the correct braking balance provided both sets of calipers are commonly available. The next time I do this kind of setup I'm going to either make the ZJ/WJ drum e-brake inside the rear disk rotor work or use a GM metric caliper with the built in disk e-brake. IMO the key is keep a rough proportional flow rate and swept area as used by the OEM. Example for the WJ, do the math for fluid flow rate, pressure, etc. between the front and rear brake calipers and try to keep that ratio of caliper size between the selected calipers. In my case I ended up with WJ front brakes and Suzuki Sidekick four door front calipers for the rear brakes. The Sidekick caliper is pretty close to the WJ rear caliper but I wanted to match the rotor I am using (also Sidekick) to the caliper.
 

Metcalf

Expedition Leader
You're trying to annoy me again, aren't you? <mumble> hole in the hood... </mumble> :D

FWIW, I wouldn't do the spot caliper again. If you need it to make a vehicle pass a safety inspection then maybe. I'm not really happy with the clamping power.

What calipers do you have now? Is this a configuration you were already using? Sometimes if you use a large caliper in the rear it can be really hard to get the brake balance right even with a proper proportioning valve. The difference in flow rates reaches a tipping point and the vehicle is really sensitive to loading wrt the brakes. In a flattie that might not be that big a deal.

As for commonality between all four corners, I think it is worth sacrificing to get the correct braking balance provided both sets of calipers are commonly available. The next time I do this kind of setup I'm going to either make the ZJ/WJ drum e-brake inside the rear disk rotor work or use a GM metric caliper with the built in disk e-brake. IMO the key is keep a rough proportional flow rate and swept area as used by the OEM. Example for the WJ, do the math for fluid flow rate, pressure, etc. between the front and rear brake calipers and try to keep that ratio of caliper size between the selected calipers. In my case I ended up with WJ front brakes and Suzuki Sidekick four door front calipers for the rear brakes. The Sidekick caliper is pretty close to the WJ rear caliper but I wanted to match the rotor I am using (also Sidekick) to the caliper.

I'm going to try and go basic and simple with the brakes. Sidekick rotors and calipers on all 4 corners with 2psi residual valves on front and rear lines. Then plumb in a proportioning valve for the rear. The master cylinder is still up in the air. I would like to use an XJ pedal pack and booster. I'm still up in the air about adding some rear cutting brakes ( if I can kinda hide them ) and perhaps a park-lock valve on the rear circuit

The front and rear will be getting the same spindles, bearings, hubs, etc on all 4 corners with the full float rear conversion I am doing on the old school D44 rear. Most of this is bolt-on so it works out well. To me, having identical parts on all 4 corners is VERY nice for spare parts and trail fixes. The amount of parts I have to carry or find at autozone goes WAY down. With slip on disc brakes it works out pretty neat since you can pull the spindle nuts and pull the entire mess like a unit-bearing!
 

shortbus4x4

Expedition Leader
My six year old daughter says when the engine sticks out of the hood it means its a fast car.:)

Nice work, love your body lift. Will file that idea in the back of my head for future reference.
 

Metcalf

Expedition Leader
My six year old daughter says when the engine sticks out of the hood it means its a fast car.:)

Nice work, love your body lift. Will file that idea in the back of my head for future reference.

MMMMMMmmmmmm....fast? Probably not so much.

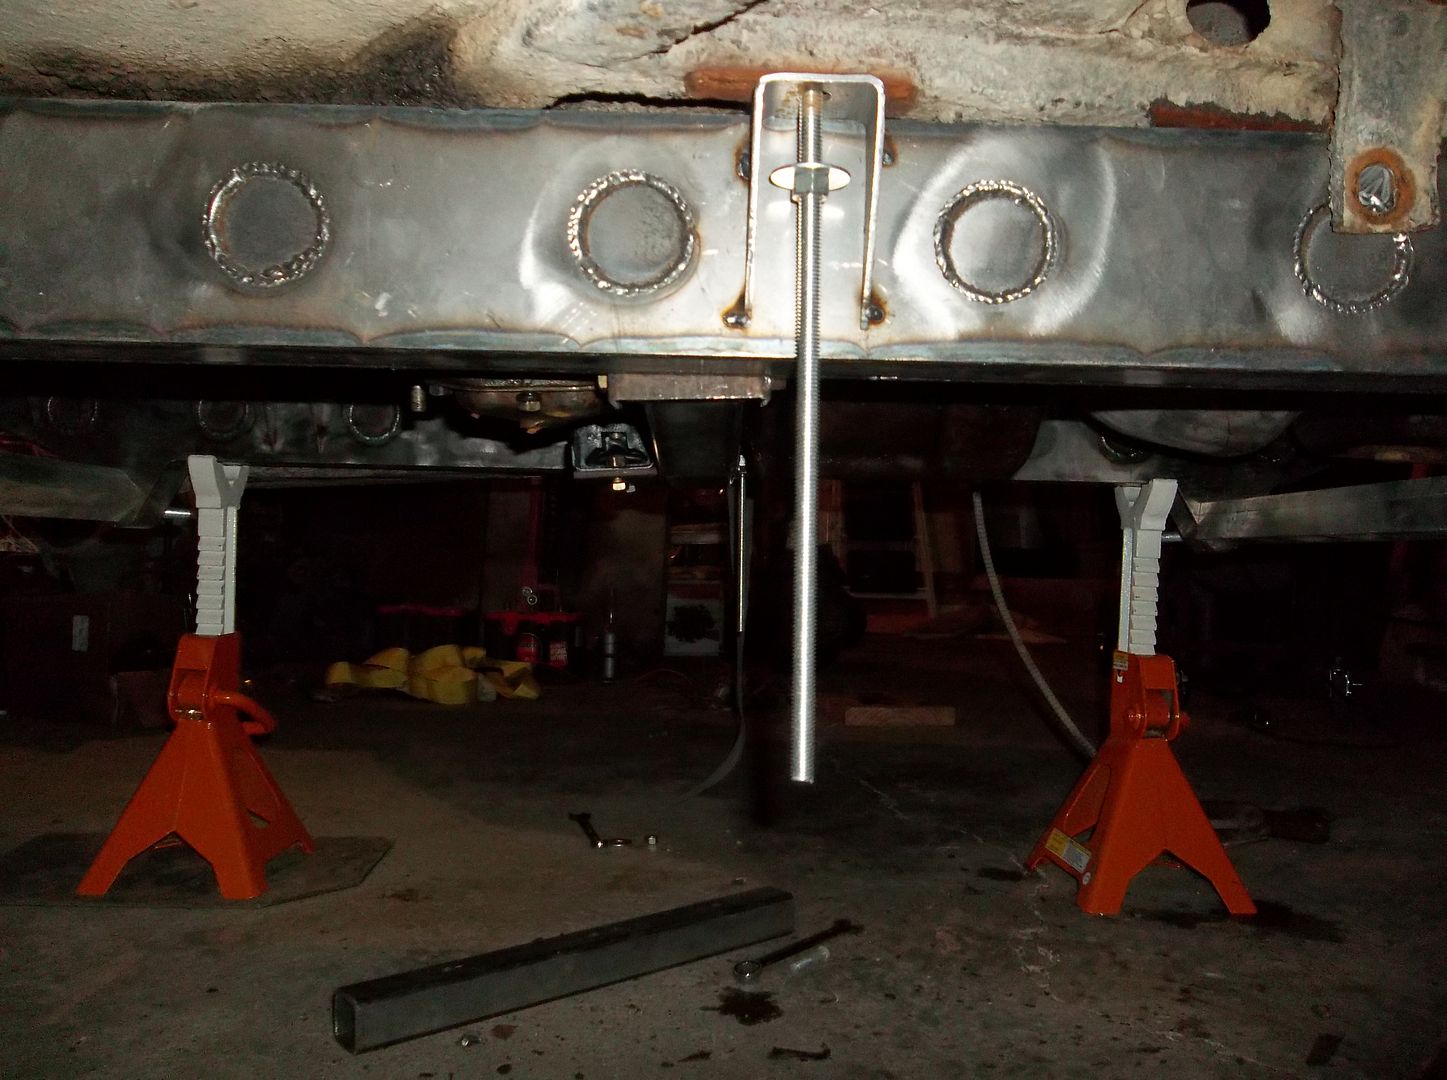
The 'redneck body lift', as my friend calls it, worked incredibly well for for positioning the tub over the frame in the correct location. It allowed me to lower the body and see what was going to hit, then raise it up and trim it. For like $10 in materials it was TOTALLY worth it. I didn't think it would be strong enough to support me standing in the tub to trim stuff, but I tried it anyways. It worked great.

I had this idea a while ago when I was planning the build, it was one of the major reasons that I built the body mounts on the frame first, then installed the drivetrain separate, then the body back onto the frame.

There was a lot of measuring and researching ( and guessing ) in positioning everything in the frame and under the tub. You can't have everything, but overall I think I optimized things fairly well.
 

jeepdreamer

Expedition Leader
http://www.jpmagazine.com/techarticles/drivetrain/154_0609_early_jeep_brake_conversions/index.html

maybe useful for some ideas...? :) Or directly..

*quote
INSTALLATION INSTRUCTIONS:
The dual swinging pedals have been designed for use in Jeep vehicles. They can be easily used on several other types
of conversions. The pedals have been designed so as to allow for the steering column to pass between the two pedals.
To install the pedals, you must first decide on the exact location to be used. Once the position is decided upon, you can
then mark the position for bolting. Drill your marked holes, and be sure to allow clearance holes for the master cylinder.
Bolt the master cylinder to the dual pedals with the firewall sandwiched between the two. After you've obtained the proper
adjustments, be sure to tighten the special hex nuts (P/N 716197) up against the two buttons (P/N 716196) with the two
3/8"-24 nuts (P/N 723705), locking the all thread rods into place. The dual pedal kit must be used with P/N 716118 dual
master cylinder. This is a Chevrolet item that has had the clutch and brake valves interchanged. You will notice that the
markings on the master cylinder will read just the opposite of their actual usage. The slave cylinder for the clutch can be
of many different styles or makes and will probably need some special type of mounting bracket made.
end quote*

http://www.advanceadapters.com/downloads/716117.pdf
 

Metcalf

Expedition Leader
Thanks for the links. That advance stuff seem a bit spendy.....

S-52079034.jpg


new surplus XJ pedal assembly, $40

http://www.oconeeoffroad.com/servlet/the-36487/omix-dsh-ada-CLUTCH-&-BREAK/Detail

These seem to fit the flat fender body really well because the pedals are 'offset' to the left side of the steering column completely. The pedals are nice and short to make them fit under the short flat fender cowl/dash area.

I am hoping that I can fit a small diameter vacuum booster in there. Hydroboost is another option. You could probably rig up a manual setup too.
 

jeepdreamer

Expedition Leader
True...I prefer a hydrolic clutch assembly myself and while I suppose you could go any way you imagination leads, just wanted to toss it out there. Cheaper is usually better too. :)
Dig the body lift creation as well. I wonder if you could have maybe welded nuts onto the bottom of the all thread and used your air gun to make adjusting a lil faster?
 

Metcalf

Expedition Leader
True...I prefer a hydrolic clutch assembly myself and while I suppose you could go any way you imagination leads, just wanted to toss it out there. Cheaper is usually better too. :)
Dig the body lift creation as well. I wonder if you could have maybe welded nuts onto the bottom of the all thread and used your air gun to make adjusting a lil faster?

The body lift thing worked out SWEET. I had to double nut the top to keep the body from shifting side to side, I don't think I could have spun the all thread itself. The nut thing isn't really THAT slow, I needed to go kinda slow to see what and where was going to rub. To go back up I just grab the tub with the engine hoist, lift it up about 6" so I have some room to work, and then spin the nuts down with my finger. I proably takes about 5 minutes or less.

I had a cable clutch linkage before. I am trying really hard to go hydraulic this time. I think I might have to run an internal hydraulic throwout bearing though. I don't know if I have enough room for an external clutch fork :sombrero:
 

Metcalf

Expedition Leader
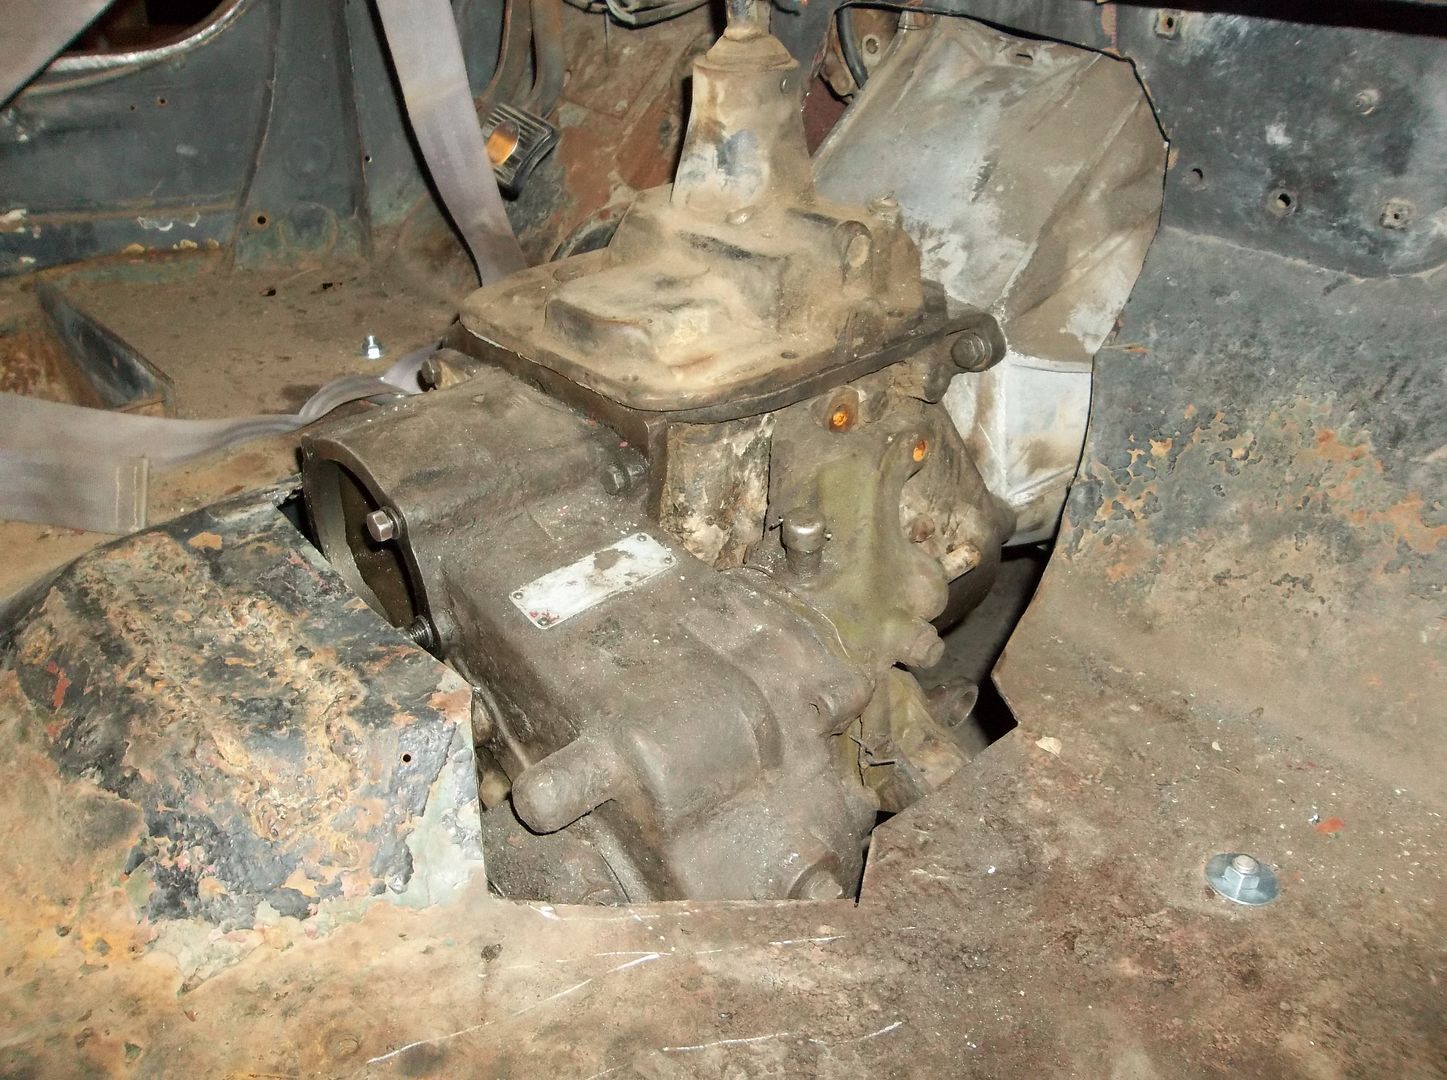
Holy cow...there is a transmission and transfer case in my Jeep....no really, its more in than under!

100_0289.jpg


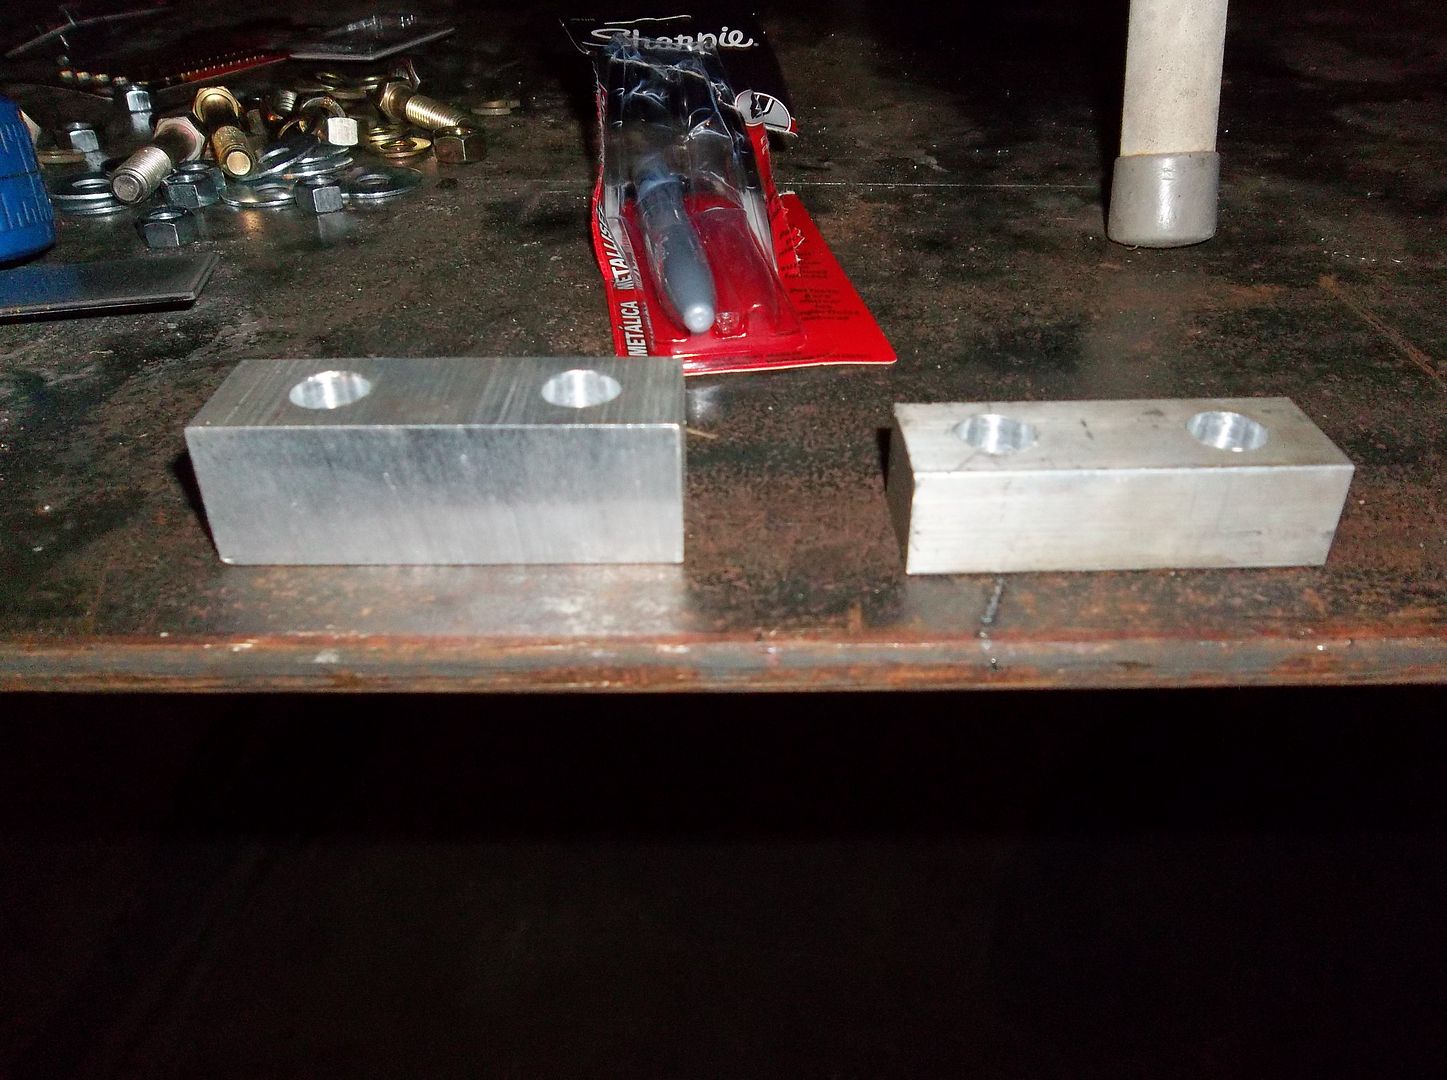
I made the new shim for the transmission mount, it is .25" taller than before. It really helped with the clearance between the crossmember and the transfer case, but I could tell it raised everything that is for sure.

100_0288.jpg


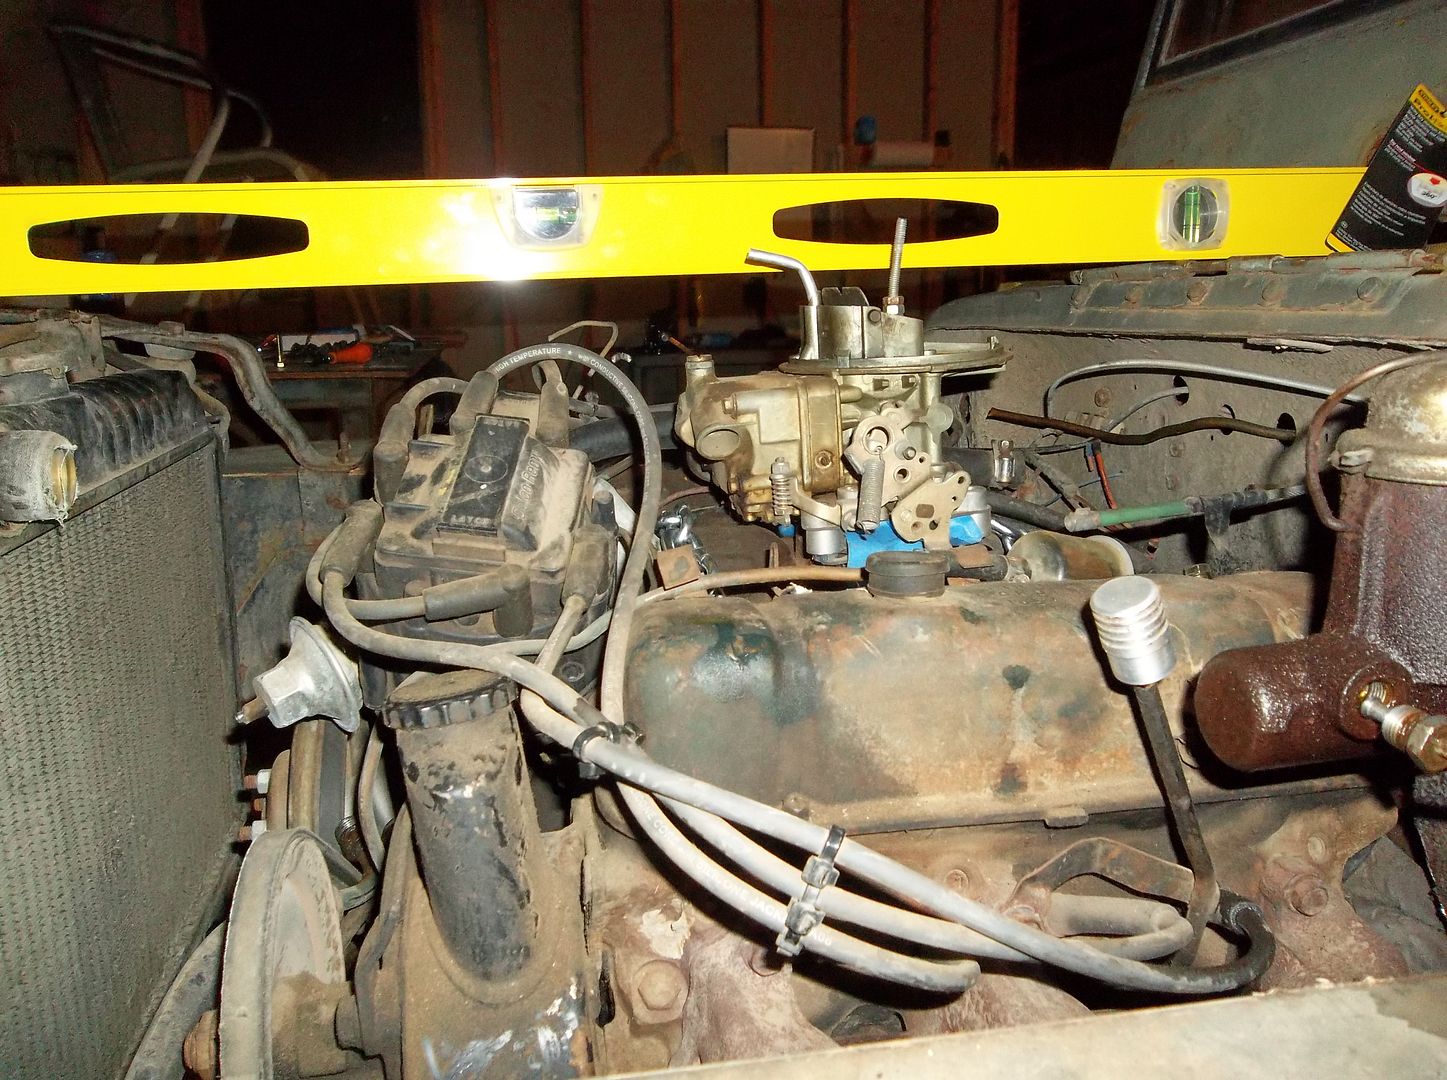
Not a lot of room for an air cleaner :)

100_0294.jpg


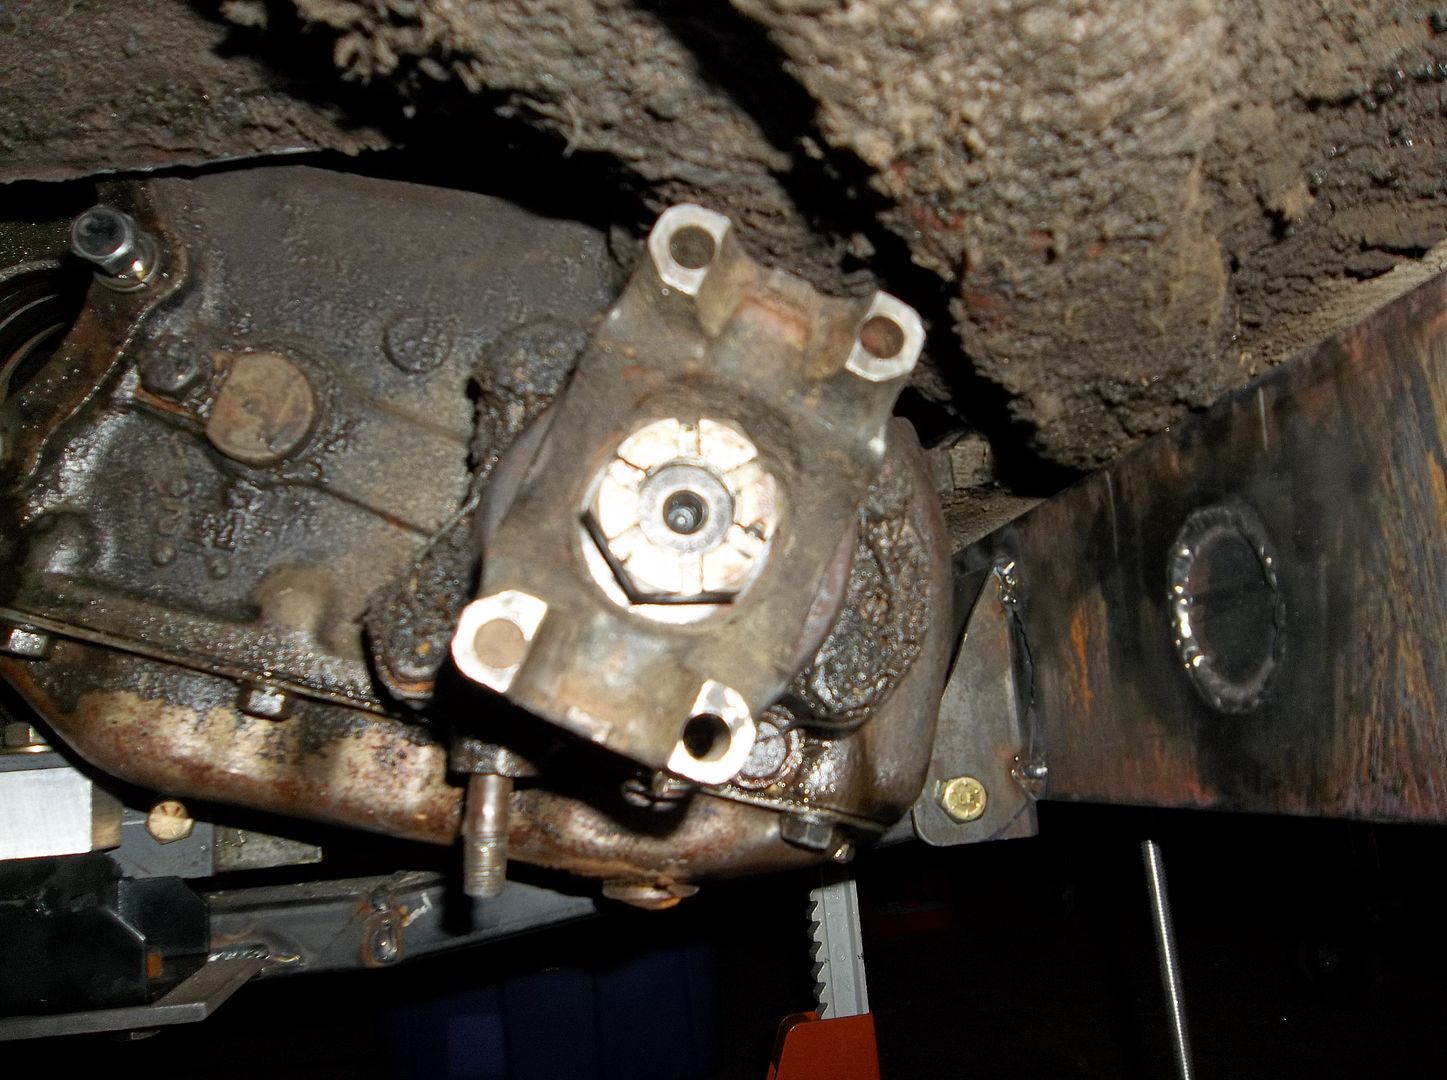
I am probably going to have to rework the hat channel that is over the rear output yoke a little bit. It doesn't need much, but it needs something. Please excuse the 70 years of junk.

100_0298.jpg


I don't know if I am going to be able to fit a booster or not? Manual brakes should work if I have to go that way.

100_0295.jpg


Here is a not so good picture of the final clearance under the frame. Its a decent amount for such a small jeep I think. Even on jack stands it seems that there is going to be a LOT of clearance under the chassis, especially for something with a short wheelbase.

100_0299.jpg
 
Last edited:

Mr. POE

New member
Loving your build, I had a 48’ 2A twenty years ago and I can still spot a flat fender 300 yards off the road in a pile of brush. It never leaves you.

Just to throw this out, I’ve got a 99’ Rav4 and the brake master cylinder and clutch master cylinder share the same reservoir. Could save you some room in that cramped space.
 

Metcalf

Expedition Leader
Loving your build, I had a 48’ 2A twenty years ago and I can still spot a flat fender 300 yards off the road in a pile of brush. It never leaves you.

Just to throw this out, I’ve got a 99’ Rav4 and the brake master cylinder and clutch master cylinder share the same reservoir. Could save you some room in that cramped space.

I have dug flat fenders since I was riding around in them as a teenager. They are timeless and always cool. If your having problems deciding what to build, might as well start with basically the first mainstream 4wd vehicle and go from there :)

They are just a simple and raw vehicle...kinda like a 4wd motorcycle.
 

Metcalf

Expedition Leader
I need some seats!

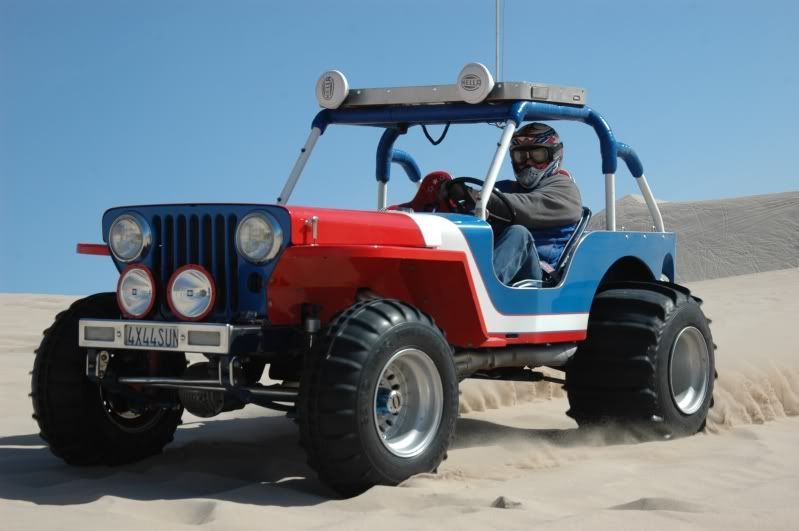
Since I have the MB tub without the storage box and i'm pitching the fuel tank from under the seat I REALLY want to lower the seating position and kick back the seats a bit. Its going to be a bit of a go-cart style seating position, something like this.....

bens-jeep.jpg


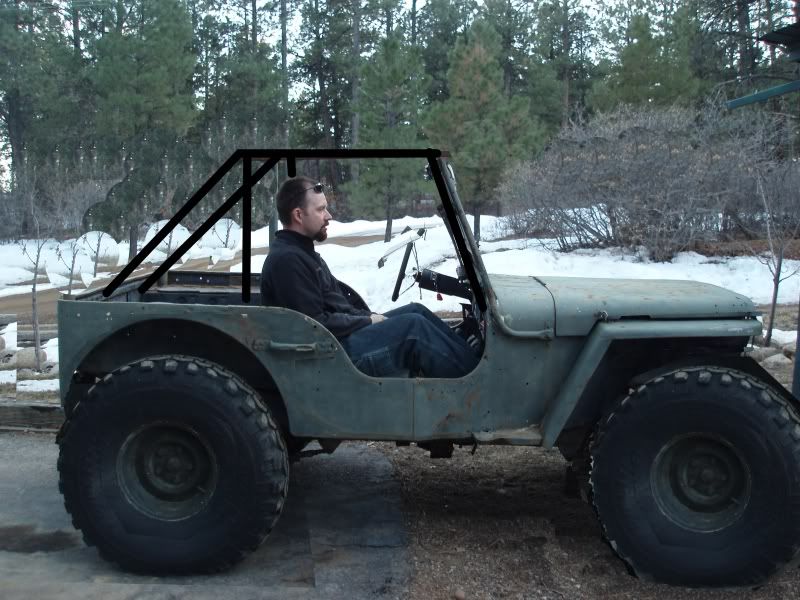
I mocked it up in the jeep a while back and it seemed fairly possible....

rangochop.jpg


I am basically trying to get low enough that I can get my big head below the top edge of the shorter MB height windshield so I can run a nice simple low profile cage. My butt is probably only about 2-3" off the floor and my back is about 2-3" from the wheel well. The MB has a nice sloped wheel well by the way. I think its different than the other flat fender tubs? My head in this location can just see the end of the hood. I would guess that the seat back is about 20-25 degrees laid back?

So anyways. When I was at the EJS vendors show this last year I sat in a low of seats, some where too big, some where too small, but this one seemed just about right....

P1010079.jpg


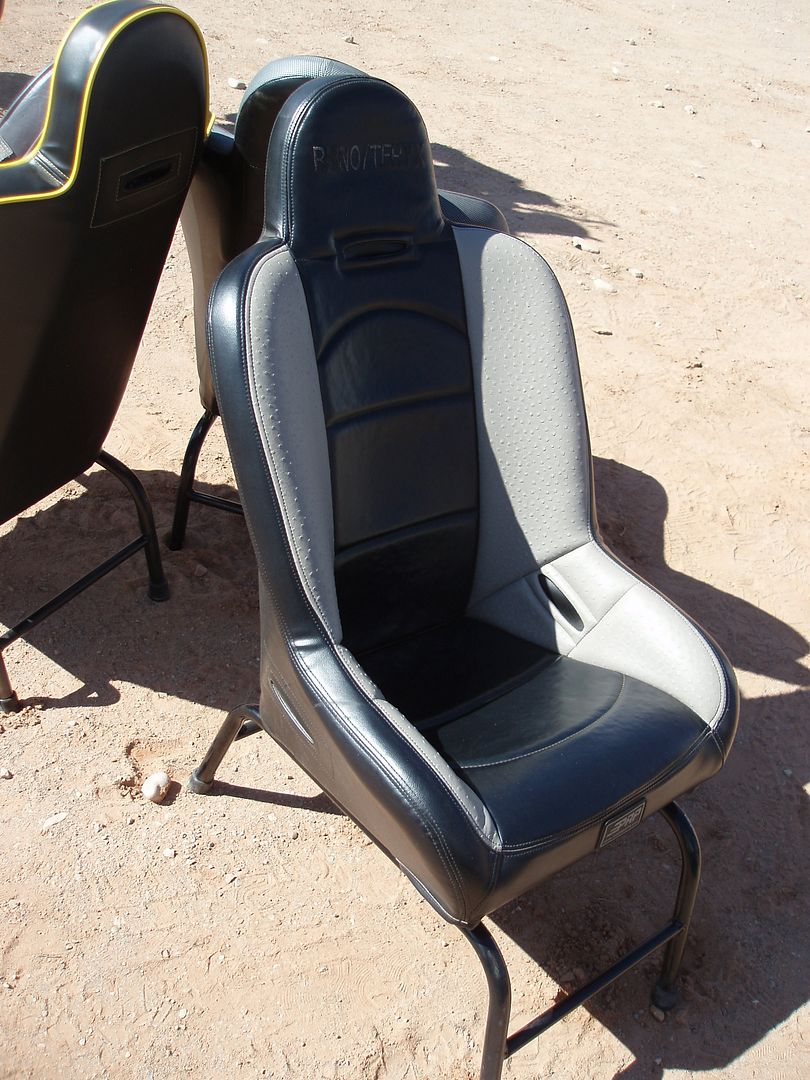
This is a PRP seat designed for the Rhino side by side. Its basically a 'premier' seat but shorter front to back by 3". I think a smaller seat like this will work much better in the small flat fender cockpit. This seat was also VERY comfortable, ask the lady selling the seats, she had to kick me out a few times.

Anyways. I am thinking a pair of these in the low back version....

0000106_175.jpg


I'm checking to see if they can cover them in some Khaki colored 1000 denier Condura nylon. I think that should look kinda like the original military seats did but with a small update. I think olive drab seats with olive drab patina'd paint would be too much olive drab.

Anyone else got any bright ideas?
 

reece146

Automotive Artist
I'm not a fan of deep set seats like that - hard to get into and out of I find. Trying to get in and out front to back is one thing but over the side on a lifted vehicle is another.

Hell, that kind of seat in my buddy's Elise was a PITA to get into and out of and that is the opposite of high. Another buddy of mine had a set of deep set Mastercrafts in his TJ and he ended up pulling them out and putting OEMs back in because they were a PITA.

I dunno... I like the idea of the low backs re-covered in khaki to look like an original MB seat. Sucks for whiplash but on a specialty vehicle like this it doesn't matter really. There must be other low backs that aren't so "aggressive" without being a flat lawn chair?
 

Metcalf

Expedition Leader
These seats didn't feel THAT deep really. It was one of the things I liked about them. Even a seat like the corbeau felt much deeper and tighter.

Don't worry, your going to have to crawl over the 'door' in the tub because the seat is going to so low :sombrero: It wasn't exactly easy to get in and out of before either!

I think I am going to make the steering wheel removeable also, that should help. A flat fender 'cockpit' is just tight no matter what.

You summed it up though, its a specialty vehicle. I'm not going to drive it every day, ok.....maybe I will....but its mine and I can make it like I want :elkgrin: As long as it looks cool right?
 

Forum statistics

Threads
188,293
Messages
2,904,995
Members
229,961
Latest member
bdpkauai
Top