You are using an out of date browser. It may not display this or other websites correctly.
You should upgrade or use an alternative browser.
You should upgrade or use an alternative browser.
Rango.....1942 Willys MB
- Thread starter Metcalf
- Start date
Metcalf
Expedition Leader
These are the reasons for a shake down cruise! Your work is outstanding and inspirational, nicely done!
Thank you. Yes, a lot of shakedown runs end this way. All the big stuff seemed to work really well, even somewhat hack stuff like the 2pc front driveline seemed to work out better than I would have thought.
Now I am basically chasing down and fixing all the leaks in the old parts. Its not the most glamorous thing, but it needs to be done.
The only system that didn't really work like I wanted was the brake pedal package. I need to add a lot more support to the firewall, cowl, dash area to keep the pedal pack from flexing. I also need to reverse bleed the brake system or something.....working all the air out of the lines is a total pain in the rear! The hydro clutch system is also a bit of a pain. It took a lot of adjusting to get the pedal stroke just right so I didn't have the input fitting on the hydraulic throwout bearing hitting the pressure plate.
MrBeast
Explorer
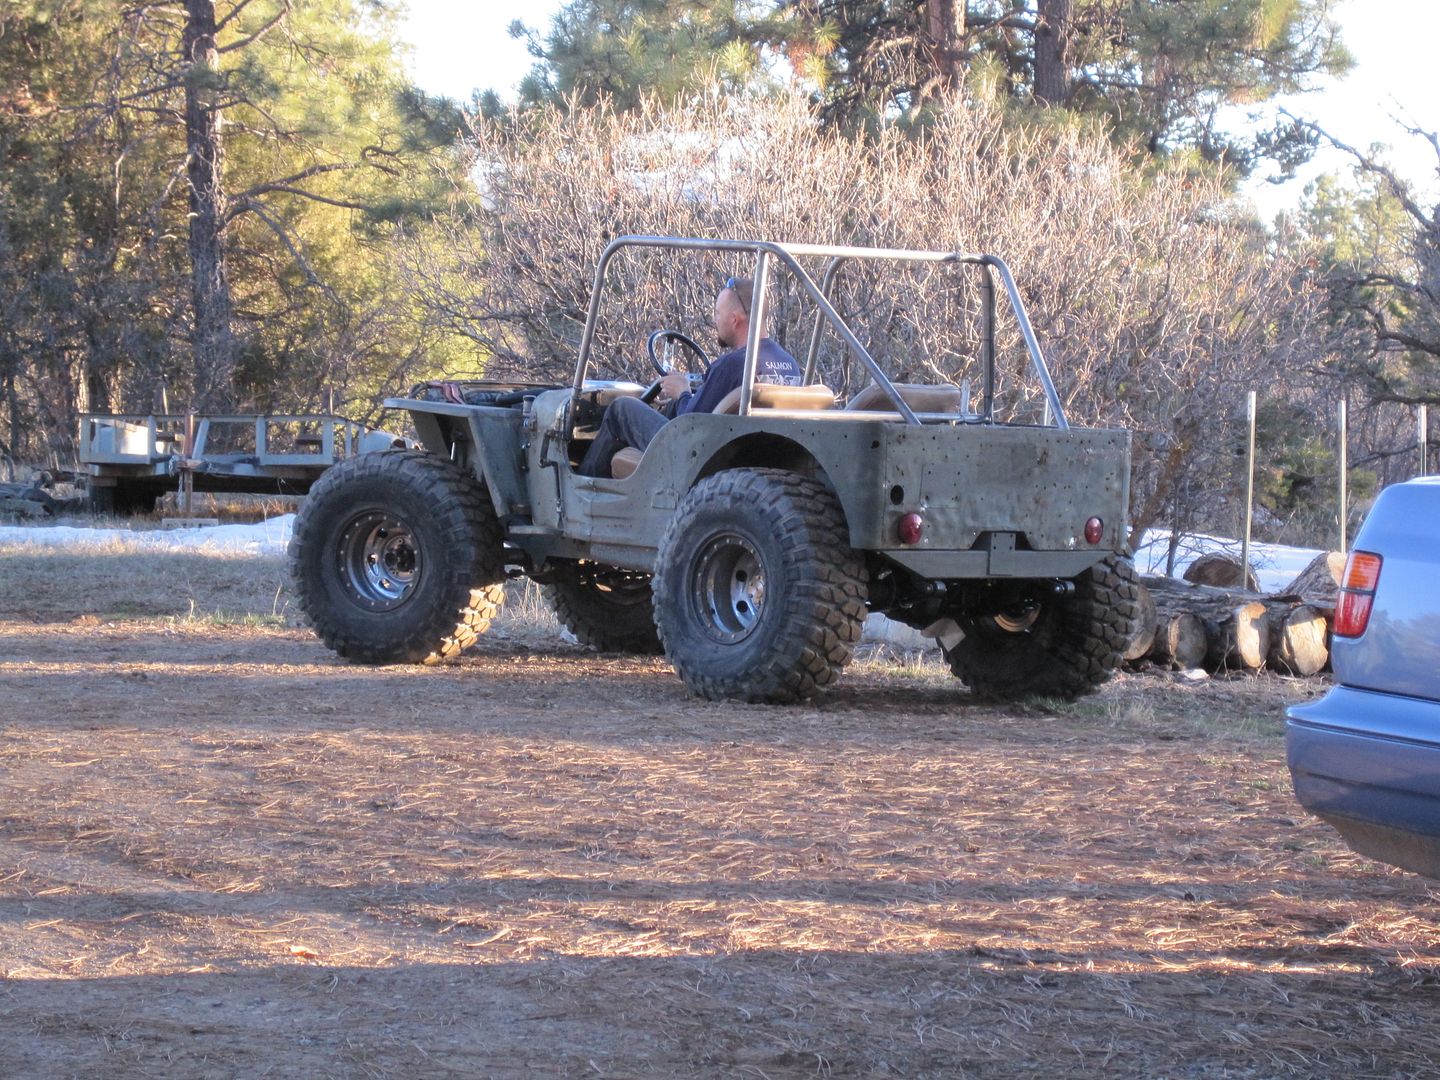
This was from when we first fired it up driving it around the house. I don't know why, but I really like this pic. I think this makes it look about like it does in real life......
I tell you this much, that thing looks fun!
24HOURSOFNEVADA
Expedition Leader
Congrats, the thing looks like a slot car and I mean that in a good way. In all honesty, with the exception of the Skunkwerks FC from Mopar this year, I like your Willy's more than anything else they released for the EJS.
jeepdreamer
Expedition Leader
oozing cool...
more to come?
more to come?
Metcalf
Expedition Leader
Thank you very much. I wish I had more time to get more little stuff done, but I think its still pretty cool! I will be running around EJS thurs-sunday in it. I hope it doesn't draw that much attention. I have lots of other stuff I want to check out 
While some of the pictures start to make it look similar to how it does in real life, you just don't get a good sense of scale until your standing next to it.
I'm going to add a 1" longer rear shackle to level it out a bit, that should only bring the rear up about 1/2" or so. It should sit almost perfectly level at that point. I'm considering adding another hole in the shackle as close as practical so I can bump the rear up another little bit for when I have it loaded down with people, gear, or whatever.
Overall I am pretty dang happy with my little creation. It's not some polished show piece....but I think it just oozes a bit of old school cool ( and gear oil! ). It ended up different than just about everything else, and that is what I wanted.
Over the coming months I will get a lot of the little details sorted out. I could probably tinker on it forever and probably will.
Metcalf
Expedition Leader
oozing cool...
more to come?
Thanks.....it also oozes gear lube, power steering fluid, and engine oil.....
Most of that should be fixed this weekend.
The 'short' list for future 'little' modifications to keep the build going as I start to break in this new creation......
-Wire in the headlights and taillights.
-Rocker guards
-shovel and axle in the original holders
-tie the A-pillar of the cage into the frame somehow
-tie the B-pillar of the cage into the frame.
-install the other 3 handles on the body tub
-rebend and mount the windshield frame
-install some 5.38 gears front and rear
-install some front and rear lockers
-install some alloy axles in the front
-Some light weight diff armor
-build a 'top' of some kind to keep the sun off my head
I think there will be enough to keep the thread going.....
jalbrecht55
Member
As Metcalf had mentioned, he had a minion for the week to help out and ride along to Moab. That minion would be me.
I got into town last tuesday afternoon, and we started in on the flatty after dinner. The amount of stuff to finish was, to put it lightly, overwhelming. I had some flashbacks of my little flatty overhaul a few years back... I had forgot what it's like to do so much with so little... (I pretty much rebuilt my whole willys with a socket set I got when I was 16--and it was metric!--I've since set up a nice garage and bought all the tools I wished I had during the build). He only has two little light bulbs in a decent sized 3 car garage, and has a couple of chairs hanging in front of one of them. So my first quest was to find a drop light. After finding it, I proceeded to break the knob off. Hmm. Good start. I really felt useless in there that first night, I think I managed to install 3 new spindle nuts and drill a couple of holes in the wrong place... meanwhile Metcalf finish welded his entire roll cage and probably a few other things I'm forgetting right now.

This FF setup really is neat. In the process of putting in the new spindle nuts. Surprisingly he had to special order them, I guess parts stores don't stock this stuff anymore. Crazy..

With the trip looming (32 hours to go) we decided to call it quits. Before going to bed we worked up a list... I have to say, that little list made me wonder if we could get this running in a month let alone a day and a half...
I got into town last tuesday afternoon, and we started in on the flatty after dinner. The amount of stuff to finish was, to put it lightly, overwhelming. I had some flashbacks of my little flatty overhaul a few years back... I had forgot what it's like to do so much with so little... (I pretty much rebuilt my whole willys with a socket set I got when I was 16--and it was metric!--I've since set up a nice garage and bought all the tools I wished I had during the build). He only has two little light bulbs in a decent sized 3 car garage, and has a couple of chairs hanging in front of one of them. So my first quest was to find a drop light. After finding it, I proceeded to break the knob off. Hmm. Good start. I really felt useless in there that first night, I think I managed to install 3 new spindle nuts and drill a couple of holes in the wrong place... meanwhile Metcalf finish welded his entire roll cage and probably a few other things I'm forgetting right now.

This FF setup really is neat. In the process of putting in the new spindle nuts. Surprisingly he had to special order them, I guess parts stores don't stock this stuff anymore. Crazy..

With the trip looming (32 hours to go) we decided to call it quits. Before going to bed we worked up a list... I have to say, that little list made me wonder if we could get this running in a month let alone a day and a half...
jalbrecht55
Member
The next morning after a leisurely breakfast I wandered into the shop at about 8:00 and decided to start picking away at what I could do.
Wednesday morning willys

The first little job was fitting the windshield to the cage. We had to remove the factory tilt mech because he set the A pillar right up against the windshield. (We discussed remounting the mech in a different location at some other date. The windshield is siliconed shut currently, so it's not a big deal at this time). That probably took me 2 hours... *sigh* But I did manage to cut off the old brackets without ruining them. As you can see, we still need to bend up the lower/legs of the windshield to get it to fit right.

Next I decided to paint the hood. Or at least the metalwork (stretch, highline, air cleaner hole). I chose this nice snowbank as a hood holder, then tried my best to fade in the fresh fab work while retaining the old pantina. hah.. painting isn't my strong suit.

I continued to tinker away... put in some crooked hood hold downs, changed out the diff covers/gaskets and put in some fluids, started to install the locking hubs, but found 4 bolts broken off in one wheel hub and no bolts of the right length in any... I took some measurements for the 2 gauge power wires/grounds and fuel tubing, started to install the new coolant and oil pressure senders but struck out on both accounts... I lost a few special parts, broke the tip on his one and only flathead screwdriver... I also cleaned all the rest of the old gauges/wires/junk out of the dash in preparation for a clean start.

only 14 hours to go....
Wednesday morning willys

The first little job was fitting the windshield to the cage. We had to remove the factory tilt mech because he set the A pillar right up against the windshield. (We discussed remounting the mech in a different location at some other date. The windshield is siliconed shut currently, so it's not a big deal at this time). That probably took me 2 hours... *sigh* But I did manage to cut off the old brackets without ruining them. As you can see, we still need to bend up the lower/legs of the windshield to get it to fit right.

Next I decided to paint the hood. Or at least the metalwork (stretch, highline, air cleaner hole). I chose this nice snowbank as a hood holder, then tried my best to fade in the fresh fab work while retaining the old pantina. hah.. painting isn't my strong suit.

I continued to tinker away... put in some crooked hood hold downs, changed out the diff covers/gaskets and put in some fluids, started to install the locking hubs, but found 4 bolts broken off in one wheel hub and no bolts of the right length in any... I took some measurements for the 2 gauge power wires/grounds and fuel tubing, started to install the new coolant and oil pressure senders but struck out on both accounts... I lost a few special parts, broke the tip on his one and only flathead screwdriver... I also cleaned all the rest of the old gauges/wires/junk out of the dash in preparation for a clean start.

only 14 hours to go....
jalbrecht55
Member
After he got home from work we went to dinner for some much needed R&R and a lot of caffeine. Returning home, I could tell he was just a bit overwhelmed by all the work... but we started working. One thing at a time. I have to say, he works a lot faster than I do!!
I started laying out and running wires. Below is most of the 'interior' wire harness. 4 fuses, two switched, two constant, heavy gauge wire throughout. Strong and simple. The one luxury was a cig lighter port for phone/GPS charging.

It was crazy how I would run a wire and things on the flatty just morphed from one state to the next... one minute the tire was on, the next it was off, the hub was pulled, on the lathe getting bored out for a normal size seal, then the next... the tire's back on and he's onto the next thing. It all happened in a blurr... adding fluids, bolting down the cage, building seatbelt brackets, turning miscellaneous parts on the lathe, welding something else up, doing this, doing that.... meanwhile, I crimped a wire, or miss-measured something and cut it twice, both times too short.
I like this little 'bender' he came up with. I can't remember what it was for.. seatbelt brackets?

We finally ran out of steam about 2:00am... only 6 hours until moab. Something tells me we're going to be late.
I started laying out and running wires. Below is most of the 'interior' wire harness. 4 fuses, two switched, two constant, heavy gauge wire throughout. Strong and simple. The one luxury was a cig lighter port for phone/GPS charging.

It was crazy how I would run a wire and things on the flatty just morphed from one state to the next... one minute the tire was on, the next it was off, the hub was pulled, on the lathe getting bored out for a normal size seal, then the next... the tire's back on and he's onto the next thing. It all happened in a blurr... adding fluids, bolting down the cage, building seatbelt brackets, turning miscellaneous parts on the lathe, welding something else up, doing this, doing that.... meanwhile, I crimped a wire, or miss-measured something and cut it twice, both times too short.
I like this little 'bender' he came up with. I can't remember what it was for.. seatbelt brackets?

We finally ran out of steam about 2:00am... only 6 hours until moab. Something tells me we're going to be late.
jalbrecht55
Member
A few short hours later we were back in the garage working away. I came out to him trying to fit the shift tower back into it's home. As he's said, 10lb of stuff in a 5lb bag...

Moments later he was on to the next task, so I started hooking up the battery cables. I chose to route them out the forward drain hole of the gas tank well. The ground went to the first body mount.. pos runs past that, up the firewall and onto a main-lug stud that passes into the pass compartment.

As I routed wire, he really got a lot done. Set up the gas pedal, routed fuel line, finish welded the carrier bearing holder, installed some other stuff I forget what... etc.
At one point I was wiring under the hood. I stopped to install the winch solenoid. I drilled a hole, then he swooped in and pulled a tire and the hub. I drilled another hole, meanwhile, he swapped the studs and bearings from the wheelhub onto a new one, packed some new bearings, etc... I went over to the bench to crimp a few wires and take a picture and when I came back, the tire was back on (new hub installed and done) and he was off to the next task..

Eventually I finished up the wiring.

By that time he had all the fluids in, seats in and it was about ready to start!

Moments later he was on to the next task, so I started hooking up the battery cables. I chose to route them out the forward drain hole of the gas tank well. The ground went to the first body mount.. pos runs past that, up the firewall and onto a main-lug stud that passes into the pass compartment.

As I routed wire, he really got a lot done. Set up the gas pedal, routed fuel line, finish welded the carrier bearing holder, installed some other stuff I forget what... etc.
At one point I was wiring under the hood. I stopped to install the winch solenoid. I drilled a hole, then he swooped in and pulled a tire and the hub. I drilled another hole, meanwhile, he swapped the studs and bearings from the wheelhub onto a new one, packed some new bearings, etc... I went over to the bench to crimp a few wires and take a picture and when I came back, the tire was back on (new hub installed and done) and he was off to the next task..

Eventually I finished up the wiring.

By that time he had all the fluids in, seats in and it was about ready to start!
jalbrecht55
Member
You might be wondering, "I thought they were leaving in the morning?"... well... we were trying. But failing  As luck would have it, our other friends weren't doing much better. The first ran into a major case of death wobble, some 500 miles short of Moab, forcing him to dump his Jeep at his parents house and instead he took his wife's 4 door taco running four nearly new studded snow tires. Hum. (studs in Moab??)... Our other friend blew out a front output seal on his t-case (in the middle of nowhere) forcing him to do roadside repairs, etc.... so everyone was running late.
Once we got the brakes and clutch bled 'good enough' (not really) we rolled it outside and fired up the flatty. A couple cranks and it fired right up! I wish my jeep would do that, especially after sitting for two years.
The first test run was interesting. We had some clutch issues, as the air bubbles worked out, we were actually over-travelling the clutch (unknowingly). This finally culminated in the hydraulics blowing out, leaving us with a non shifting jeep and a puddle of brake fluid underneath and the possibility of pulling the motor just to get it back together. Internal slave clutches have some serious drawbacks. My friend basically lost all motivation at that... what an anticlimatic end to the rollercoaster of the last two days. Thoroughly bummed and starving, we headed into town for some dinner.
After dinner we took another look, just to verify that situation really was as bad as we had thought. ... low and behold, one of the fittings had just come loose (due to rattling against the pressure plate when the TO bearing moved too far forward). We frantically re-bled it and got things moving again. Wow, we really were going to have a flatty for moab!
Since it was already late out, we decided to just stay the night at home and load up in the morning.
jalbrecht55
Member
The next morning, we got things out, fixed a few more bugs and drove it around the yard a few times.
I've got an electrical question--I hooked up the alternator field and HEI power to the same switch. When you turn off the switch, the field still provides power to the HEI--and the engine won't shut off. Makes sense, right?
As a quick fix, I simply routed the field from a constant power source, through a separate switch. It seems like I could simply put a diode (or even an LED?) in between the HEI power and the alternator field, and then it should work properly-- the field should be energized when you provide power to the HEI, but shouldn't power the HEI when you turn off the power. Right? Anyone know how much current the field draws? (I blew out his multimeter on accident :homer
Here's the flatty, moments from the trailer.

On the trailer, behind his beastly DD..

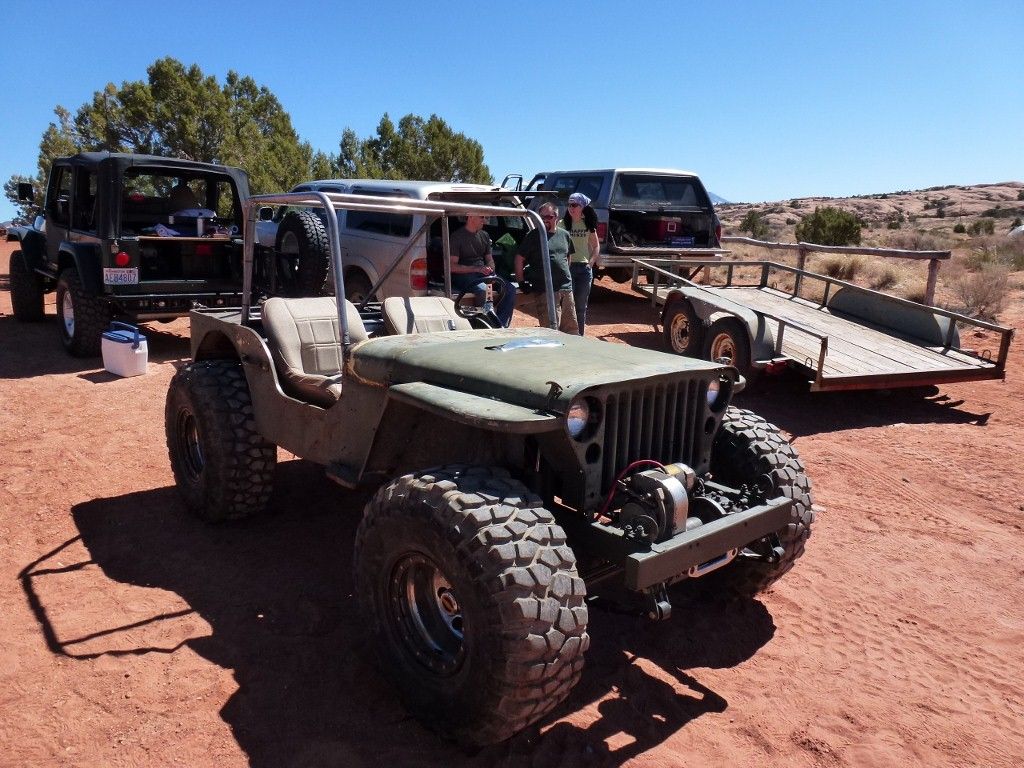
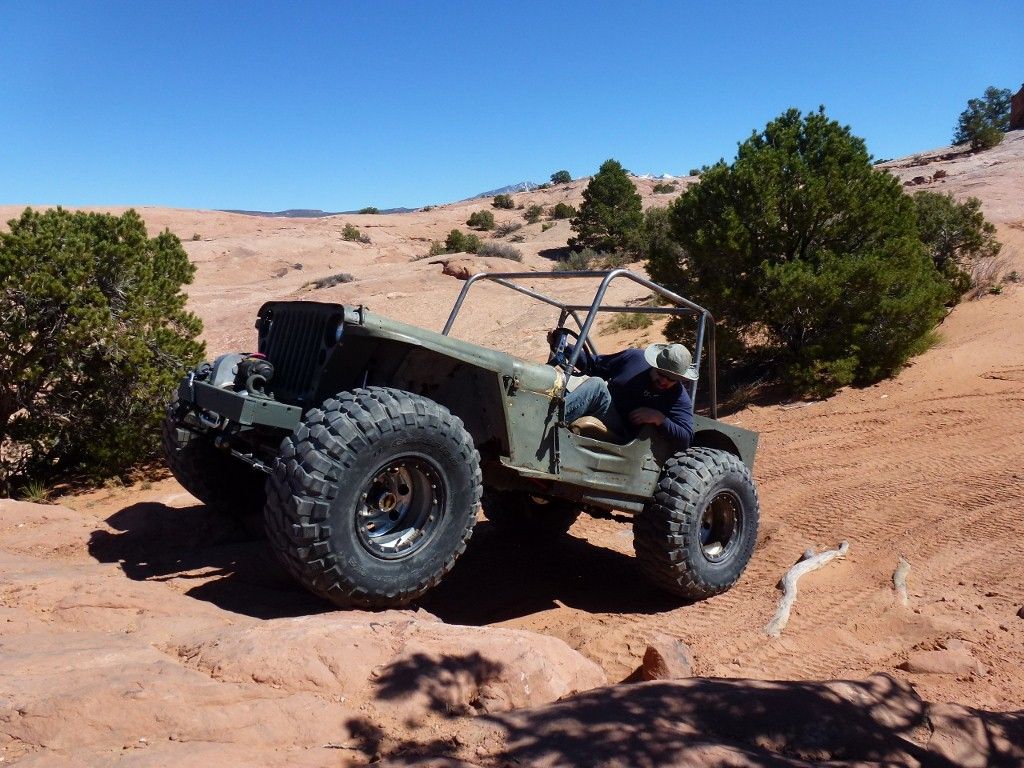
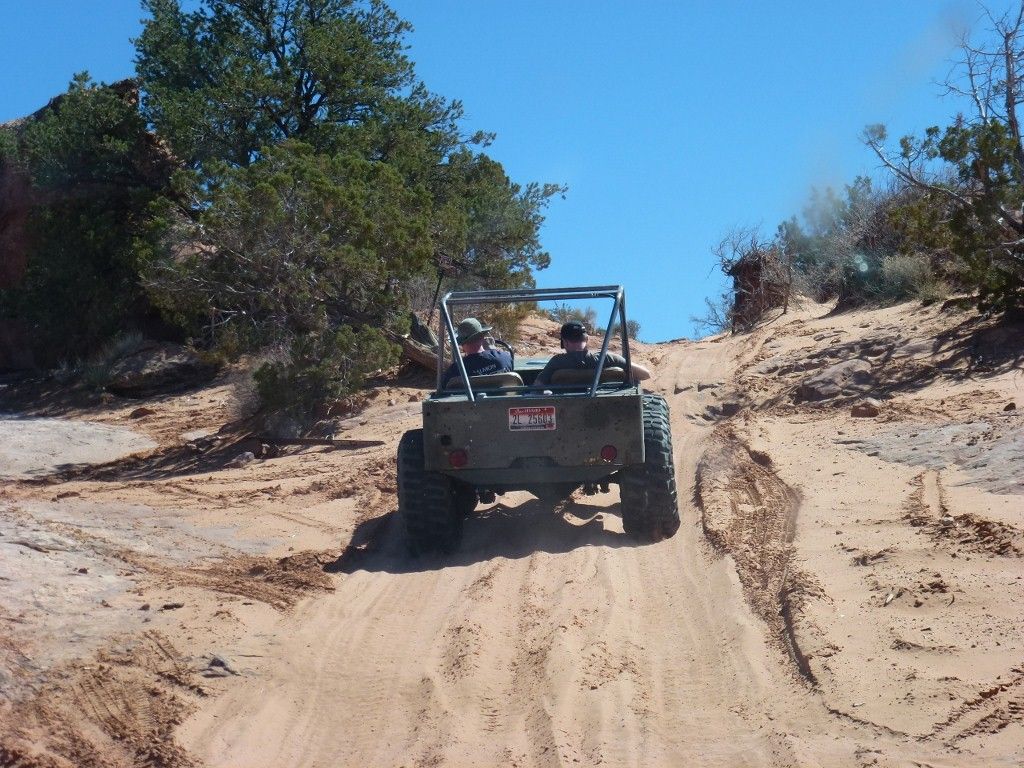
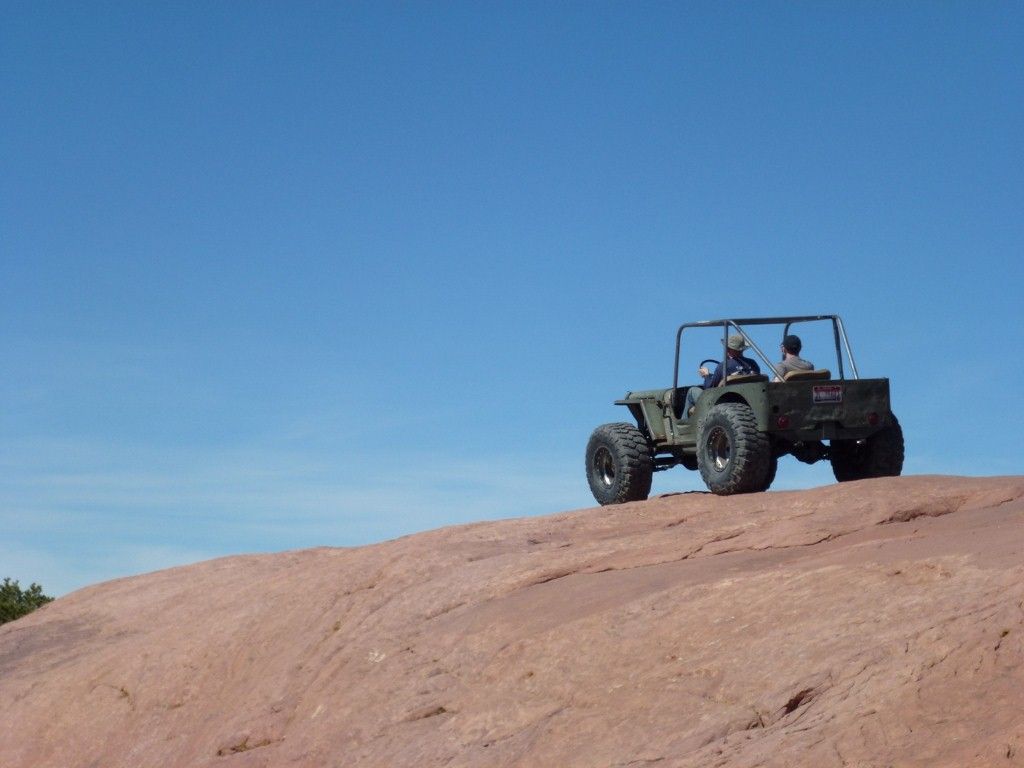
And finally another shot in moab a few minutes before practically every seal in the willys decided to simultaneously give up.

Despite the failures we had, I think the flatty is going to be super fun. It's very small (it somehow feels smaller than my stock CJ-2a!). The seating position is reminiscent of my daughter's car seat. Very low-rider ish. (in relaxed position, my line of site is _under_ the steering wheel rim). There is enough room to work the pedals, although it is tight. The steering wheel position seems pretty comfortable (though I would like it a little lower, being only 5'8" and having a short torso--then again, I'm probably the only guy on this planet that wishes my 2A windshield were an inch lower so I could see out better).
As he said, the height of the jeep is something else. It's all tires and WWII style patina... it's the neatest little flatty I've ever been in. Aired down in the sand I swear the top of the tub was about mid thigh high... And with all that clearance underneath, I'm sure it will go. The steep climbs in moab may be a challenge on the short wheelbase.. and I hope he can get the carb running near perfect so it keeps running on those steep climbs.
Anyway, I'm back home doing diaper duty and ignoring my unfinished projects... But it was a fun and interesting week I won't soon forget!
I've got an electrical question--I hooked up the alternator field and HEI power to the same switch. When you turn off the switch, the field still provides power to the HEI--and the engine won't shut off. Makes sense, right?
As a quick fix, I simply routed the field from a constant power source, through a separate switch. It seems like I could simply put a diode (or even an LED?) in between the HEI power and the alternator field, and then it should work properly-- the field should be energized when you provide power to the HEI, but shouldn't power the HEI when you turn off the power. Right? Anyone know how much current the field draws? (I blew out his multimeter on accident :homer
Here's the flatty, moments from the trailer.

On the trailer, behind his beastly DD..

And finally another shot in moab a few minutes before practically every seal in the willys decided to simultaneously give up.

Despite the failures we had, I think the flatty is going to be super fun. It's very small (it somehow feels smaller than my stock CJ-2a!). The seating position is reminiscent of my daughter's car seat. Very low-rider ish. (in relaxed position, my line of site is _under_ the steering wheel rim). There is enough room to work the pedals, although it is tight. The steering wheel position seems pretty comfortable (though I would like it a little lower, being only 5'8" and having a short torso--then again, I'm probably the only guy on this planet that wishes my 2A windshield were an inch lower so I could see out better).
As he said, the height of the jeep is something else. It's all tires and WWII style patina... it's the neatest little flatty I've ever been in. Aired down in the sand I swear the top of the tub was about mid thigh high... And with all that clearance underneath, I'm sure it will go. The steep climbs in moab may be a challenge on the short wheelbase.. and I hope he can get the carb running near perfect so it keeps running on those steep climbs.
Anyway, I'm back home doing diaper duty and ignoring my unfinished projects... But it was a fun and interesting week I won't soon forget!
VanIsle_Greg
I think I need a bigger truck!
Love this Jeep!
Looking good from another perspective as well...lol. SO small, like a really BIG V6 quad. heh
Looking good from another perspective as well...lol. SO small, like a really BIG V6 quad. heh
Similar threads
- Replies
- 7
- Views
- 848
- Replies
- 4
- Views
- 2K
- Replies
- 65
- Views
- 6K

