Refreshing a Built Range Rover Classic - Thread

RoverFan

Member
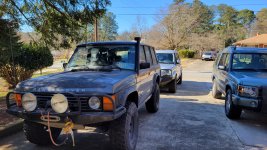
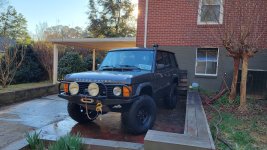
I’ve been a longtime member of ExPo and a Land Rover addict for nearly two decades. This is the first “build” thread I’ve done on here, however. I bought this 1992 Range Rover Classic County over a year ago and, in my usual fashion, decided to give it a new lease on life. For some reason, I just really enjoy rescuing Land Rovers. A long time ago this truck had been outfitted with the best parts money can buy. She was kind of tired and leaky, but a trooper nonetheless when I found her. Here she is when I got her, right off the truck from the complete opposite corner of the country.
20220206_111859.jpg

For some background, I grew up in my family’s European car repair shops and learned about cars from my dad and his mechanics. I was pretty lucky to sit and watch guys diagnose and fix some of the most complex cars in the world. I also got to ride in everything from a silver DB5 (it had red interior, so it wasn’t Bond’s…though close enough for a kid), to a red 365 GTB with custom exhaust, to modern GTIs, S4s, S8s (Ronin era), RS6s, M3s, M5s, and so on. The shops specialized in German cars but I always fell in love with the English ones. To this day the X308 is one of my favorite Jags. Land Rovers and Jags weren’t common in the shops, but I was very curious about them when they did show up. When a mechanic was promoted to shop foreman of one of our shops, he picked up a black Vogue RRC and I got to drive it. That was the free taste that hooked me to this day.

Fast-forwarding to now I have this RRC that was extremely modified by a previous owner. It runs fine, has some quirks, and exhibits some typical life-long rock warrior wear.

First thing’s first, a good wash and examination to determine its needs.
20220206_170228.jpg

Well, it didn’t “need” much, as it ran and stopped better the more I drove it. You could tell it had sat for long periods of time. She wanted to drive. The previous owner I bought it from was super stand-up and honest about it.

Growing up in Euro shops I became a "while you're in there" and preventative maintenance nut, so let the journey begin.
 

RoverFan

Member
After a basic tune-up I noticed Rimmer Bros now sells stainless headers for these things. Wanting to let the hot rod RPI 4.6 breathe, I placed an order and waited on some British steel.

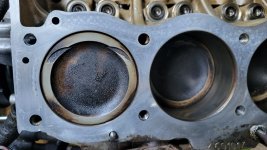
Well, while removing the Rover manifolds the last manifold bolt brakes off. It’s the rear most bottom bolt, of course. I weld a nut to it, but that just shears flush with the head. Okay. Off with its head(s)!!! Check out these fly cut pistons.

20220717_193439.jpg

I wish I would’ve taken pictures of the heads. RPI does fantastic port and valve work. The factory Rover exhaust ports are pathetically small, and my machine shop heavily works over Rover heads when I have them rebuild sets for my projects. With these heads though, none of that was needed. I told the shop to take a good look at the port work, because the RPI heads are top shelf. Below is a shot of a set of heads my machine shop worked for me, but the RPI heads are even more aggressive.

20210616_204848.jpg

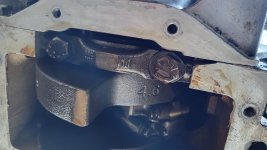
While the top end is apart I tackle a leaky oil-pan gasket and confirm the big boy crank is present.

20220717_175251.jpg
 

RoverFan

Member
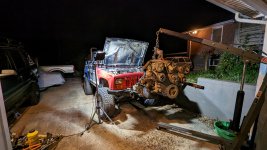
Okay, here’s our first diversion. While the RRC’s engine’s apart I have an emergency. My faithful race Jeep that I use for maybe a week out of the year starts mixing coolant with oil. I work all night to pull the engine and disassemble it so I can take the block and crank to the machine shop. I had already ordered a built race head and cam so all I needed was a polished crank and a prepped block. It was a long night.

PXL_20230331_055155803.jpg

Back to the RRC. I decide that with the top end rebuild I should install a HEI distributor from Davis Unified Ignition. I am already installing all new gaskets, mounts, and sensors (Bosch O2s, genuine fan and temp sensors, etc.), what’s an ignition system?

96820RD.png

This RRC had a remote-mount ignition module installed by Denver Land Rover early in its life, so this was a mission-creep mod. Of course I order the distributor with a side of Live Wires. I’m actually not terribly familiar with RRCs at this point, and there was no internet consensus on how much work it took to install the THICCCCC dizzy. I cut my teeth on D2s, P38s, LR3s and L322s. I owned some D1s in college, but that’s because they were all I could afford. Perhaps surprisingly, I did not have to work on them much at all. That meant I never learned a whole lot about them until after grad school when I started buying them as projects. I guess that makes the D1 guys’ point, but I’m still firmly in the D2 camp.

The few posts I can find are all over the place. Some guys say they bolt right in! Others say they had to grind everything and they gave up! Well, it’s another learning experience for me because this truck has a custom Mean Green alternator set-up with a serpentine belt/v-belt Frankenstein setup.

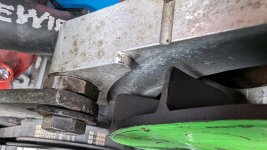
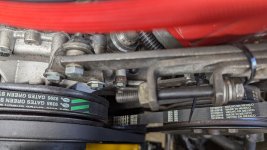
Here’s what I ended up doing: 1) basically cut the engine lift ear off of the power steering bracket, 2) flip and space the tensioning rod out from the waterpump and alternator with some nuts and washers, 3) hack the dizzy hold down until I realized DUI sent me a custom hold down that had just fallen to the bottom of the box. Wiring was pretty easy though, again, this truck has a different alternator set-up (RRCs get their tach signal from an alternator wire that my truck doesn’t have). I also opened plug gap to 0.055.

PXL_20230927_184315750.jpg

PXL_20230710_170104697.jpg
PXL_20230710_170057409.jpg

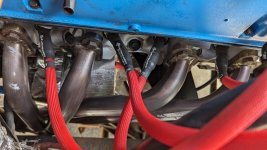
Alright, I solved the mysteries of the distributor, time to handle the headers. Oh boy, for expensive headers the Rimmer Bros units required some serious work. I had to grind the LH front flange quite a bit so the power steering/alternator bracket would fit onto the headbolt/stud. I even had to grind down a little excess pipe from the engine side of a flange. Then, I had to use small ratchet straps to squeeze the header pipes together so the bolts would go in easier. All said and done they’re sold pieces. They just need a better jig.

PXL_20230927_184403185.jpg
 
Last edited:

RoverFan

Member
As I cleared the dizzy hurdle, my machine shop tells me they won’t have the Jeep engine block ready in time for the race this year. So, in two weeks I found, purchased, and built (with the help of family members working long nights) this Hemi stand-in. If you look back through some old posts you’ll see I owned a blue Hemi WK an eon ago. These are such underrated beasts and this was a one-owner bone stock truck when I found it. It gets smiles everywhere. It’s kind of cool having a race truck with leather interior, navigation (very helpful for waypoints, actually), and a DVD player.

PXL_20230415_212016469.jpg

With another race in the books it was back to the RRC and onto cooling. The copper vs aluminum radiator debate is a before my time issue. I came of age in the early 2000s, so copper is old tech to me and I used aluminum in all my race cars. In goes a beefy 4(?) core aluminum unit. Well the English BSP hoses for the cooler’s don’t match! Come to find out, Land Rover switched hoses from the RRC to the D1 and only late RRCs got the D1 hose ends. Great. Now to spend more money.

20220718_200227.jpg
20220719_230450.jpg

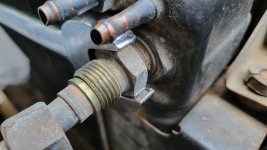
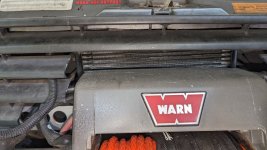
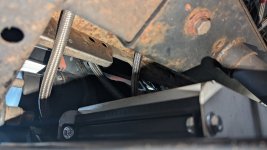
I ordered two Derale coolers, an oil cooler to mount in the grill where the factory trans cooler fits and a THICC trans cooler to mount in the skid plate. I fabbed some oil cooler brackets from angle stock and Swiss-cheesed them for cool points. I then Swiss cheesed the skid plate and offset the trans cooler for maximum 80’s/early 90’s asymmetry (see FC3S, most turbo cars, etc.). The trans fan doesn’t fit yet, so that’s a problem for future me. It took a lot of trial and error finding the right AN fittings for the trans and timing cover. The timing cover oil ports were especially hard to find AN adapters for.

PXL_20230927_184525889.jpg
PXL_20230927_184546795.jpg
PXL_20230927_184608279.jpg

Okay, time to fire it up right? Nope, have to prime the oil pump first. Well, I end up scratching my head over a failure to prime coupled with a gurgling noise. I found out the hard way that the distributor timing cover and coil-on-plug timing cover have slightly different gaskets. Being a Bosch guy, guess which one I used? With the timing cover off I check the oil pump housing and discover it is gouged. So, off to Rovers North for new gears and a plate gasket. I could not find the housing plate new, so I planed it to remove the gouges. Happy to report that with everything back together and packed with copious assembly grease the pump primed instantly!
 

RoverFan

Member
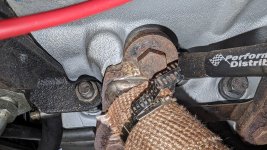
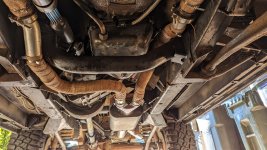
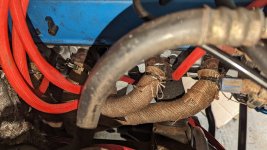
Okay, with the truck running again, it’s time for the exhaust shop. My exhaust shop does trick work an they hooked me up with an entirely new stainless exhaust from the headers back. I’m not crazy about the LH pipe going over the cross member now, but I wrapped it to shield the transmission. They were trying to tuck the pipes up for crawling, but this truck has so much clearance it’s really not necessary.


PXL_20231001_212822428.jpg


Now that I can hear it, I notice a misfire. Turns out two stock injectors failed just sitting on the bench. I had an injector shop rebuild them while I was working on the truck and the same shop has done many sets of the newer Bosch truck injectors for me without issue. An Ebay search for mid/late 90’s Volvo Bosch injectors p/n 0280155746 yields a great deal for a reman set of 8 genuine units. With them installed the truck starts up near immediately. I mean, faster than some new cars. It was quick for an old Rover before. But, with the top end rebuilt, DUI ignition, headers, and 21(?)lb injectors it flat-out hauls for an old rig. A little kick-down cable adjustment was needed as it was holding gears to 3000rpm, but it calmed down. It sucks the snorkel hard now, so hard that it whistles loudly at partial throttle.

All was fine for a short while. I started noticing that on cold starts it would idle up to nearly 2000rpm. At first I thought I may have ignition timing too advanced or a vacuum leak. Long story short, I had installed a new idle control valve of a different brand and it solved this issue.
 

RoverFan

Member
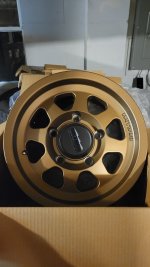
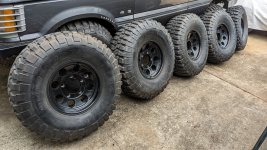
Now time for some bling. The truck already had some Pro Comp alloys, and I love rare parts you can’t buy anymore. However, I also love gold wheels on dark cars. So, on go some Method bead grip wheels and BFGs.
20220224_221204.jpg

PXL_20230629_182510756(1).jpg

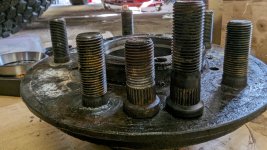
I immediately noticed the Method wheels have a thicker flange than the Pro Comps. Neither set of alloys use stock LR lug nuts, which are probably the best lug nuts ever (said the LR fan). The lug nuts these use barely get 9 turns before bottoming out. LR studs are girthy but short. Maybe some of you guys can relate. So, it’s time for surgery.

I found extended studs at Rovers North. They’re pricey though and I need 20. Back to our English friends at Rimmer Bros. With the new studs I installed new wheel bearings, hub seals, swivel seals, brake pads, and brake discs. Here’s where I find out Lucky 8’s wheel bearing kit listed as a “front and rear” kit is actually a front OR rear kit. It only does one axle. Back to their site, another $150 down, and another week on jack stands. Oh, and the “front” brake discs I ordered from them show up but they’re not vented. I’ve never seen non-vented front discs on a RRC, but I guess I need to read descriptions better. This time I turn to Rock Auto for Bosch discs and pads to make sure I get what I need.

PXL_20230902_202925970.jpg

Okay almost everything is installed and the last pieces, steering rods, are ready. Except they’re not. I ordered a tie rod kit from Lucky 8 that came with three RH and one LH thread boxes. The LH thread box was taped up and actually contained another RH tie rod. So, I ended up with three RH thread tie rods when I needed two of each kind. I call Lucky 8 and the truck sits another week on jackstands. I should’ve ordered the tie rods individually, but another lesson learned about “kits”, modified trucks, and supply chains.

After installing the Lemforder tie rod ends I decided to replace the rusty OME steering stabilizer with a new one. I also decided to wrap the stainless headers. Wow, what a pain with them on the truck. Had I thought about it, I would have had them coated before installation. I did not want to pull them off though, so copper wrap is the next best thing. It makes an absolute MESS though.

PXL_20230710_170145407.jpg

PXL_20230927_184458380.jpg

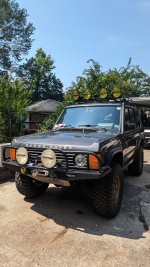
For the cherry on top, on goes an aluminum safari rack with lights. I tried to match the previous owner’s Aussie energy with some large LED lights. I almost chose halogen for period correctness, but I prefer LED output.

PXL_20230823_160417819.jpg

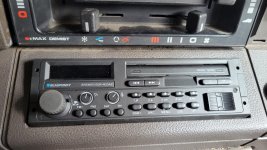
Oh, and here’s the coolest little retro radio I have ever seen. I guess with 80’s/90’s style making a strong comeback Blaupunkt wanted in. This thing looks stock but packs modern features.

20221125_130349.jpg
 

RoverFan

Member
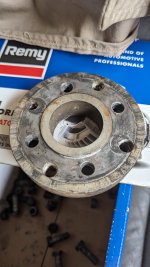
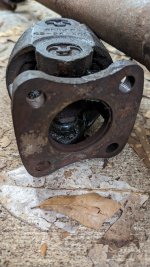
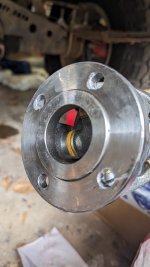
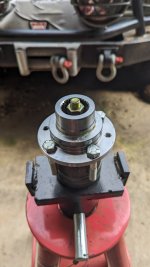
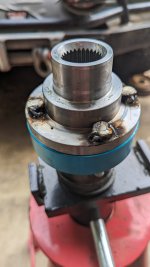
I almost forgot about the driveshaft puzzle. They’re old and rusty, but nothing is really wrong with them. Tom Wood’s had a sale though, so I ordered two new double cardan shafts for a RRC. The problem is the spacers the previous owner used on the Defender/D1 1.4 transfercase are also bolt pattern adapters and the output bolt pattern is no longer Land Rover. I should’ve before I ordered. I considered sending both sets of shafts to Tom Woods and have them swap the cardan flanges. With how much shipping is these days, plus the labor, that would be almost as much as the shafts costs. So, I cooked up another idea. I bought driveshaft spacers, extended bolts, and front and rear output flanges for the transfercase. I tack welded the bolt heads to the back of the new flanges and swap them in. I then slide the spacers over the extended studs and on go the Tom Woods shafts.

PXL_20230625_211637403.jpg
PXL_20230625_211625068.jpgPXL_20230625_211717251.jpg
PXL_20230625_204808956.jpgPXL_20230625_211016468.jpg
Not the best welds but I was concerned about heat, and the bolts self lock against the flange anyway. I repeated the process for the rear, placing the spacer outside the transfercase brake drum of course.

The truck drives fantastic now. The snorkel howls under light to mid throttle thanks to the drastically increased exhaust flow. It was kind of cool for a minute, but it is also loud right next to the window. I think I’ll disconnect the snorkel from the air box until I need the snorkel. The exhaust sounds very good though.


RoverFan

Member
Where did you get the Method wheels from?
I am pretty sure I got them off Ebay. It has been a minute.

The Methods required longer studs, at least to make me comfortable. Finding standard type lug nuts for rover studs was fairly difficult too.

The ProComps that came off left just enough stud showing to be comfortable. I guess I also felt more comfortable with these on the stock studs since they were on the truck for nearly 20 years.

PXL_20230715_165106210.jpg
 

RoverFan

Member
Previous owner here, I am really happy to see the truck getting a new lease on life. It looks and sounds amazing! I will definitely be watching this thread.
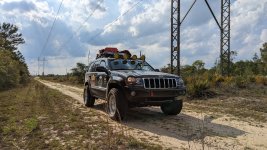
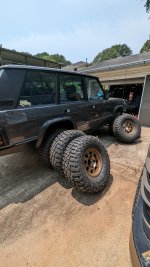
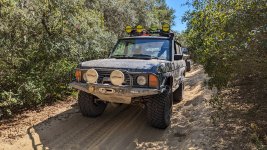
Glad you approve! I actually took it on its maiden offroad voyage recently. It did everything with ease, including pulling a dead Jeep out of a sand bowl and beading the Jeep's tires with the onboard air compressor. The trees were not kind to the aluminum roof rack, so I think I'll be looking into a slimmer one in the near future.
 

Attachments

  • PXL_20231021_172211238.jpg
    PXL_20231021_172211238.jpg
    4.8 MB · Views: 36

RoverFan

Member
any issues with the axles with those tires?
No. A previous owner installed upgraded axle shafts, stubs, and ARB locking diffs. It has stock gearing in the axles but a Defender 1.4 transfercase with a Maxi Drive reduction gear.
 

Forum statistics

Threads
188,206
Messages
2,903,778
Members
229,665
Latest member
SANelson
Top