Refreshing the TJ - Build Thread

bob91yj

Resident **************
Looking good. I wish I outboarded my shocks when I went through my last round of upgrades.

I'd put the track bar in and cycle the suspension to make sure you have no clearance issues. My junk about drove our crew chief crazy when he put my Jounce bumps in. He kept having to re-rack the Jeep because it walked over a bit with each suspension cycle. One of these days I'm going to get rid of the track bar with a three link or triangulated 4 link. The factory 5 link design sucks at speed in the dirt.

I've heard good things about FOA shocks. I'll be interested to see what you think of them.
 

GP'd

Adventurer
I would love to see your ideas for relocating the fuse box and computer.

Matt, will do! Sooner I get through this drivetrain stuff the sooner I can focus on what I would consider more overland related projects!

I'd put the track bar in and cycle the suspension to make sure you have no clearance issues. My junk about drove our crew chief crazy when he put my Jounce bumps in. He kept having to re-rack the Jeep because it walked over a bit with each suspension cycle. One of these days I'm going to get rid of the track bar with a three link or triangulated 4 link. The factory 5 link design sucks at speed in the dirt.

Today I am going to mock up a mount to fit between the outboarded bucket and the re-positioned upper coil mount. Suspension will be cycled and tested before final welding.With coilsprings retained, I don't think I should have any major binding in that 10.5" of travel.

I've heard good things about FOA shocks. I'll be interested to see what you think of them.

I have too and the price was right. I'll do a mini review of them on the packaging cosmetics shortly, followed by the real information after the Jeep is back on the road.
 
Last edited:

GP'd

Adventurer
Are you happy with the Garvin Wilderness Expedition Rack? Thanks, John

Yes, I am happy with the Garvin Rack. I have used it a few times for 'Overland' Purposes, however, most if its use comes as a lumber rack or furniture moving rack.

Only thing that has bothered me is that after moving to the San Francisco area the powdercoating has started to bubble and allow rust underneath. I guess that comes from living a 1/2 mile from the ocean.
 

GP'd

Adventurer
Been pretty busy with work and other hobbies lately but everything is slowly moving along. This coming weekend is going to be another one of those 16 hours on Sat and 16 hours on Sunday type weekends. I'm tired just thinking about it.

Tomorrow I hope to clock the transfer case and get it back together and painted.

A few things I have gotten done :

AW4 cleaned up and painted Chrysler Red, Neutral Safety Switch Rebuilt and new plumbing started. Photo makes the transmission look a bit oranger than it is. It is a nearly identical match to the ARB diff cover.

280235_998456922225_6401029_45889220_2343415_o.jpg


278308_998456777515_6401029_45889217_6321696_o.jpg
 

Scott Brady

Founder
Gianni,

Nicely done as always. If even some of your mad skills with the Ranger Hoodie manifest themselves in your Jeep it will be awesome!

Also nice to see how much of the work you are doing personally. You will know the truck front to back and everything in between.
 

BigAl

Expedition Leader
, Neutral Safety Switch Rebuilt

I love the rear shock set up, i will definitely be copying that when my rear shocks start leaking again. I have too much droop for all the more length my stock position can give.

I just grounded my park/neutral switch b/c it was so much trouble, although it did make a good anti theft device, some days i couldn't drive it:sombrero:
 

GP'd

Adventurer
Gianni,

Nicely done as always. If even some of your mad skills with the Ranger Hoodie manifest themselves in your Jeep it will be awesome!

Also nice to see how much of the work you are doing personally. You will know the truck front to back and everything in between.

Thank you for the kind words Scott! I have learned a TON about the drive-train so far in this build...especially with the re-gearing and transmission modifications.

I just hope once it is back together I will spend my time driving it, rather than trail fixing it.

I love the rear shock set up, i will definitely be copying that when my rear shocks start leaking again. I have too much droop for all the more length my stock position can give.

Great to hear! The upper buckets and lower shocks from Poly Performance were top notch. I'm really excited to get it on the road and see how much it changed the ride and travel.
 

GP'd

Adventurer
Changed gears today and welded the relocated coil buckets in so that I could plan the track bar mount.

282445_999301399885_6401029_45903440_178825_n.jpg
 

GP'd

Adventurer
Some updated progress:

Rear Track bar bracket mocked up

287665_10100103957979235_6401029_46039162_996922_o.jpg


281619_10100100959393425_6401029_45981684_1569482_n.jpg


229597_10100103957784625_6401029_46039152_4378949_n.jpg


AW4 Tailhousing clocked 11° for transfer case.

Template

287857_10100103957939315_6401029_46039159_4158448_o.jpg


Drilling

287606_10100103957839515_6401029_46039154_5651645_o.jpg


Completed

288623_10100103957899395_6401029_46039157_7600374_o.jpg
 

GP'd

Adventurer
32RH Dropped

291458_10100107734161735_6401029_46105485_3008396_o.jpg


Torque Converter still attached.

292758_10100107734096865_6401029_46105483_5377435_n.jpg


Now it's time to replace the rear main seal.

Does it end?
 

GP'd

Adventurer
Changed my mind mid day again. I was to tired to pay attention to the details of installing a rear main seal so I pulled the old D30 out instead.

287325_10100107805598575_6401029_46106504_7315161_o.jpg


262858_10100107805553665_6401029_46106502_6950482_n.jpg


290991_10100107805718335_6401029_46106507_5441067_o.jpg


On hour 9 in the garage today... so I'm going to go pull the arms off, clean up, make myself some food and have a beer. It's exhausting doing all of this solo.

Hopefully I'll have have more build and less tear down photos shortly!
 

GP'd

Adventurer
Beautiful night, so the D30 went in. Still have to paint the old knuckles, install them, and drill out the stock TB mount for the Currie track bar 5/8" bolt.

294462_10100109101915745_6401029_46137536_6940991_n.jpg
 

GP'd

Adventurer
Been solving front steering and suspension issues for the past 2 nights and finalizing them today.

Lets just say the combination of heavy duty components with less than a 3 inch lift and the want to retain factory bump stops causes issues.

ARB and Currie Track Bar Collision with ~4.5 " to bump stop. Time to grind away and clearance it.

291502_10100111484790445_6401029_46175696_2614839_o.jpg


Factory Diff Cover. Whats strange about a few of these collisions is the factory bumpstop doesn't protect from them...

Upper Control arm vs Lower Radiator Hose. I think I am going to cut another hose open and double wrap this section to protect it.

287587_10100111484975075_6401029_46175702_3614114_o1.jpg


Axle Tube and Housing vs Oil Pan
324636_10100111485024975_6401029_46175704_2038090_o.jpg


Currie HD Steering & Currie Tie Rod - Drag Link, Tie Rod, Track Bar all touching at full bump. Minor tweaking was done and everything clears now.

323133_10100111484895235_6401029_46175700_7412235_o.jpg


Passenger Side Bump

312280_10100111487006005_6401029_46175759_2537483_n.jpg


Driver Side Bump - No wonder my oil pan is dented. Axle hits the pan before the bumpstop. My engine lift will solve this.

310889_10100111484745535_6401029_46175695_5347883_n.jpg


How I ground the ARB Cover. I have a bit more clean up to do and then I'll pant it. With this ground I am able to fully stuff both side of the axle at the same time as well as clear during full articulation. I'll post up final images when the cover is painted and everything is in.

Profile:
338226_10100111487814385_6401029_46175771_4836312_o.jpg


303581_10100111487794425_6401029_46175770_7365009_n.jpg
 

GP'd

Adventurer
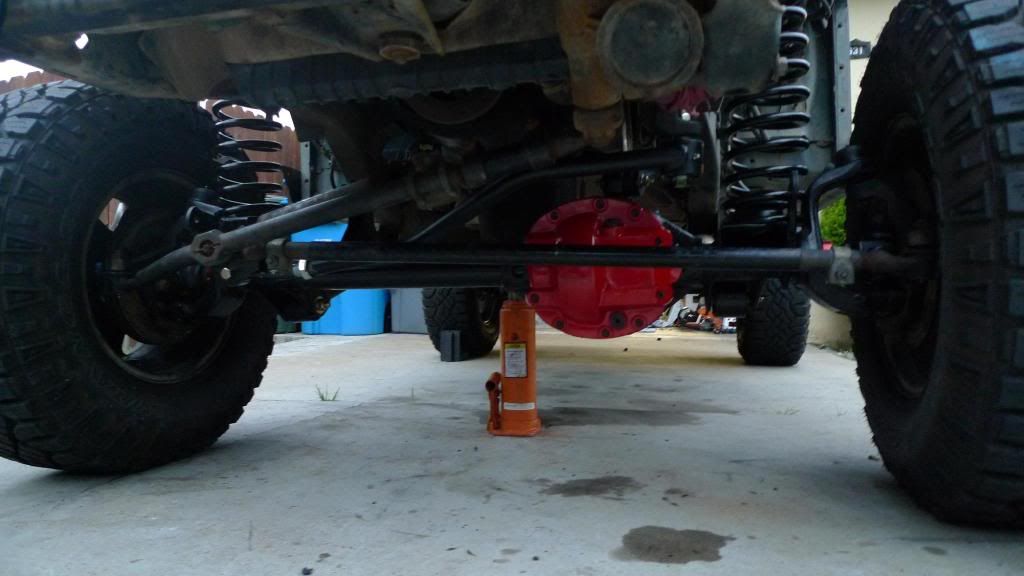
Diff cover painted and installed after final grinding and clean up:

322758_10100112127327795_6401029_46188143_8043673_o.jpg


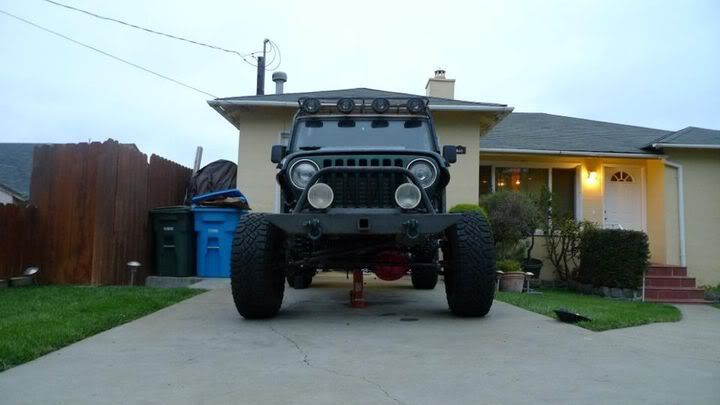
New front stance

301608_10100112127013425_6401029_46188132_1551999_n.jpg


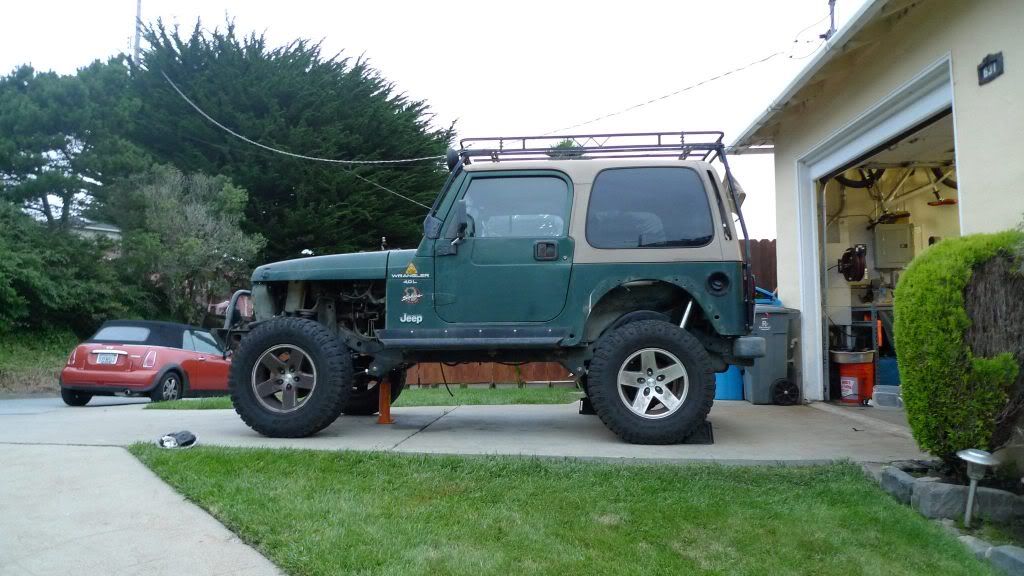
New stance profile

New ride height with OME 2.5" Springs.

Front: 6.5" up travel, 4.5-5" down travel
Rear: 5" up travel, 5" down travel

Clearance to belly : 19"

323633_10100112127198055_6401029_46188140_4842174_o.jpg


On the rear I need to finish bending the passenger side brake line and hook up the e-brakes. Other than that it is done.

On the front, I need to start building the front shock towers so that I can run 12" shocks.

Biggest part of this build left is getting the transmission and transfer case back in and having drive shafts made. Everything else is cosmetic and can happen after the vehicle is running again.

Anyone in the bay area have a transmission jack I can borrow? I think i'm going to need to pick one up this week because the motorcycle jack I used wasn't ideal for pulling the tranny out. I would never be able to get the splines aligned well enough during reinstalling.

***Sorry about the pictures sizes jumping back and forth. I have no idea why they are doing that after uploading.
 

Forum statistics

Threads
186,508
Messages
2,886,801
Members
226,515
Latest member
clearwater
Top