Installation
Archive Garage SFK:
http://archivegarage.com/products/2000-2006-tundra-sfk
Archive Garage 6" Shackle Kit:
http://archivegarage.com/products/tundra-lt-shackle
I take no accountability for issues or accidents you may have while following my "guide" below. Always work safely and double check your work. Remember, this is a guide for reference sake only! Hire a professional certified mechanic or fabricator if this is out of your range of skillsets.
Tools:
- 19mm socket
- 19mm wrench
- 17mm socket
- Breaker bar
- Torque wrench
- PB Blaster (not necessary)
- Drill
- Various bits up to ½” (Eric can provide the bits with the kit if needed)
- Punch
- Grinder or Dremel (not required but is helpful)
- Paint/Primer
- Hammer
- Floor Jack
Measurements:
I will update this as we gather more data on suspension travel. My suspension travel numbers may differ as I am running Fox 10” stroke shocks. Factory shocks are much shorter in travel and will limit the droop values for the this setup and the factory hangers.
1) Un torque the rear lug nuts. Do not remove the lugs completely but break the torque so they can be removed once the rear wheels are in the air (or use the E-Brake later).
2) Chuck the front wheels and lower your spare tire and remove it.
This just allows more space for you to work on installing the SFK
3) Using the floor jack, jack the rear of the truck in the air, with the jack under the rear diff housing.
You will want to jack it fairly high to allow more room to work underneath later.
4) Place the 2 jack stands near the front leaf hangers on the frame. I used the arms running from the rear supports of my sliders to the frame, in order to support the truck. Ensure the jacks are set/locked properly and that the truck will sit level and support itself. It took me a couple time to get it situated perfectly.
** Remember you will need to set the truck high enough so that when the wheels are off and the leafs are fully drooped that the drums will not touch the floor **
5) Remove the rear wheels
6) Now lower the floor jack so that the leafs are fully drooped and remove the floor jack. Your suspension should now be fully "flexed" out and the truck should be fully supported by your jack stands. Keep the floor jack under the diff housing with minimal upward tension.
7) Spray PB blaster on the rear leaf shackle bolts (may not be required) and lower shock mount bolts (both sides of truck).
8) Remove the 17mm lower shock mount bolts on either side or truck.
9) Remove the 19mm bolt that mounts the shackle to the factory shackle hanger. This will be the bolt that is NOT running through the leaf eyelet.
NOTE: the suspension should be fully drooped out and is not under tension, so it should not pop out with any force. Once the bolt is removed, the leaf pack should stay exactly where it is, as the floor jack is now supporting the axle assembly and leafs.
10) Flip the shackle out of the way to allow access to the factory leaf hanger. The leaf pack and shackle will still be in the way – raise the floor jack until the leaf eyelet and shackle are almost touching the underside of the bed. You will now need to drill out the rivets that attach the factory hanger to the frame.
11) Grind the round heads off of the factory rivets so that the heads have a flat spot in the center. This is not necessary but will make drilling them out more accurate and easier.
12) Now use the punch and hammer to punch the starting point for your drill bit.
13) Drill out the rivets, starting with a small bit and working up to the final size of ½”. Ensure to keep the drill perpendicular to the frame and try to avoid having oval holes however possible.
This is the most difficult part of the process. Remember to lube the drill bits and take your time as it is quite awkward getting a drill in there with the bedside interfering. I drilled the upper left (when looking at the factory hanger from outside the frame rails) bolt out from the inside, opposite to all the others.
14) Once it has been fully drilled out, a good ********** with a hammer should pop the hanger off of the frame.
15) Grind the mounting surface flat with a flat disk or similar, to remove any old rust or debris that were hidden behind the OE hanger.
16) Lower the floor jack so the leafs are now below the frame rails. This will enable you to mock up the new bracket.
Comparison: Old vs New
17) Mock up the Archive Garage SFK to ensure fitment with the mounting points of the new hanger with the holes you just drilled through the frame.
NOTE: You will have to insert the one upper forward mounting bolt from the inside of the frame, as shown in the photos.
Mock-Up:
18) Once it has successfully been mounted, remove the bracket and apply paint/primer to the frame where you had ground it smooth. Allow adequate time to dry.
19) Permanently mount the new SFK bracket.
NOTE – Corrosion: I sprayed a layer of Fluid Film over the new paint layer once it had dried and then mounted the SFK in place. Fluid Film is a wax/oil based product that I spray on the undercarriage each year to avoid corrosion and I have excellent success with it over the years. Eric @ Archive Garage suggests applying a bead of silicone to the top of the SFW bracket to help mitigate water ingress in behind the bracket. My thinking was that the fluid film would still allow everything to breath (as I didn’t seal it with silicone) and will just mitigate the rust probability. Keep in mind the factory bracket also is essentially “sandwiched” to the frame rail (using the rivets) and has minimal rust/corrosion behind it with no fluid film or silicone in the 12 years and 250,000kms my truck has driven. Do as you see fit for rust/corrosion evasion on this step.
20) Torque the SFK bracket bolts to 80 ft/lbs.
NOTE: The kit comes with locknuts and washers, eliminating the need for Loctite.
Installed and Torqued:
21) Remove the factory shackle from the leaf eyelet, paying attention to it’s direction. You will have to rotate the shackle 180 degrees and re-install it if using the factory shackle.
22) Install the shackle (factory or ext. length) to the leaf eyelet. Do NOT torque the shackle bolts at this time.
NOTE: If using the factory shackle, be sure that the “brace” that ties both sides of the shackle together, is now facing rearward when it is in it’s new mounting position, as shown in the photos below.
23) With the shackle installed back on the leafs, raise the floor jack until you can align the shackle mounting bolt with the holes in the SFK bracket now on the frame. There are 3 mounting positions which allow slightly different lift heights and will allow you to optimize your shackle angle once the truck is sitting back down on the suspension.
NOTE: I am currently on the middle mounting hole with my 3 leaf AAL and factory shackle in order to get ideal shackle angle at static height. It is recommended to have a shackle angle between 10-30 degrees from vertical.
New shackle orientation once on leafs:
24) Once everything is lined up, install the shackle bolt and tighten finger-tight.
25) Once both sides have been completed, re-install the shocks onto the lower axle mounting points.
26) Lift the floor jack so that you have enough room to re-install your tires.
27) Raise the floor jack until the weight of the truck is off the jack stands.
28) Lower the truck back down to let it now sit on the suspension.
28) Torque shackle bolts to 98 ft/lbs once you are satisfied with the shackle angle.
29) Torque lugs to required specs.
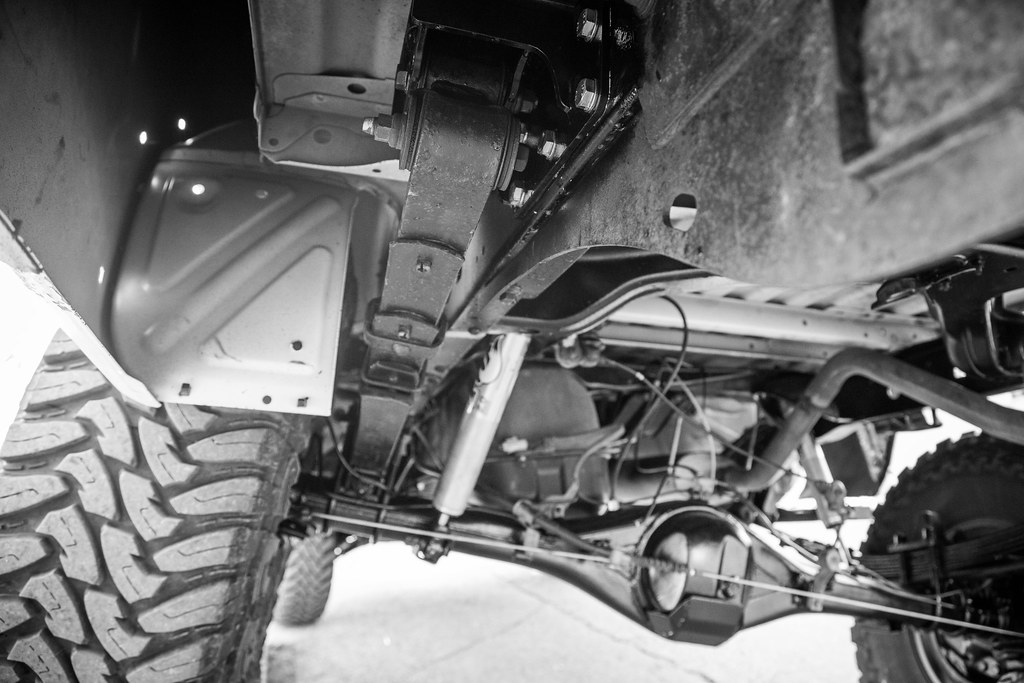
Full Compression - shackle angle:
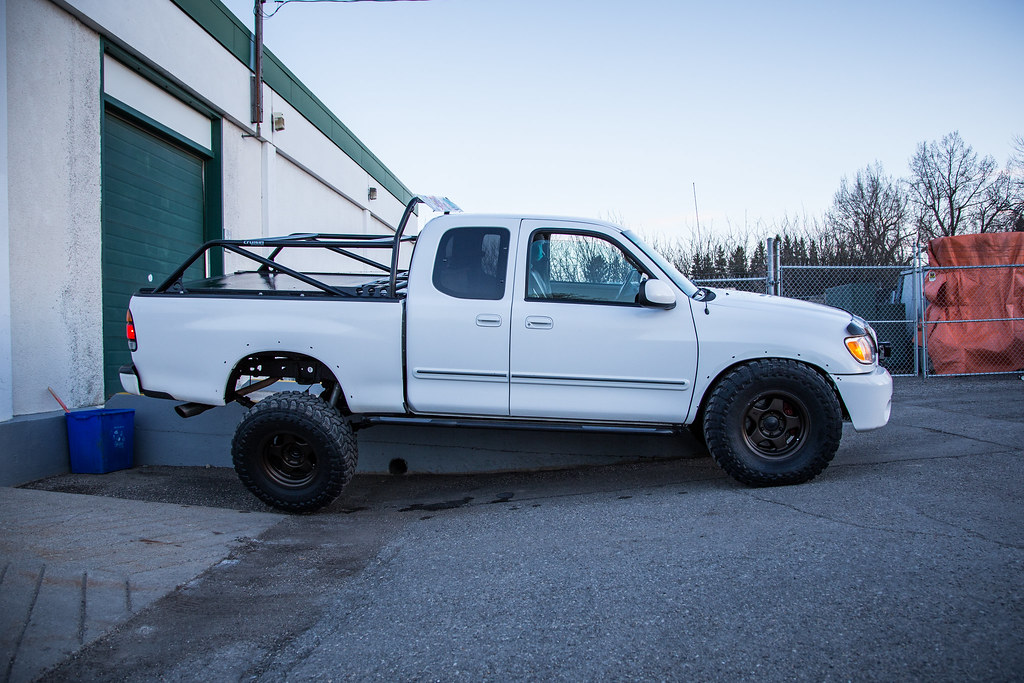
Full Droop - side profile with factory 4.5" shackle and 10" shocks:
Full Droop - factory 3.93" shackle and angle with 10" shocks: