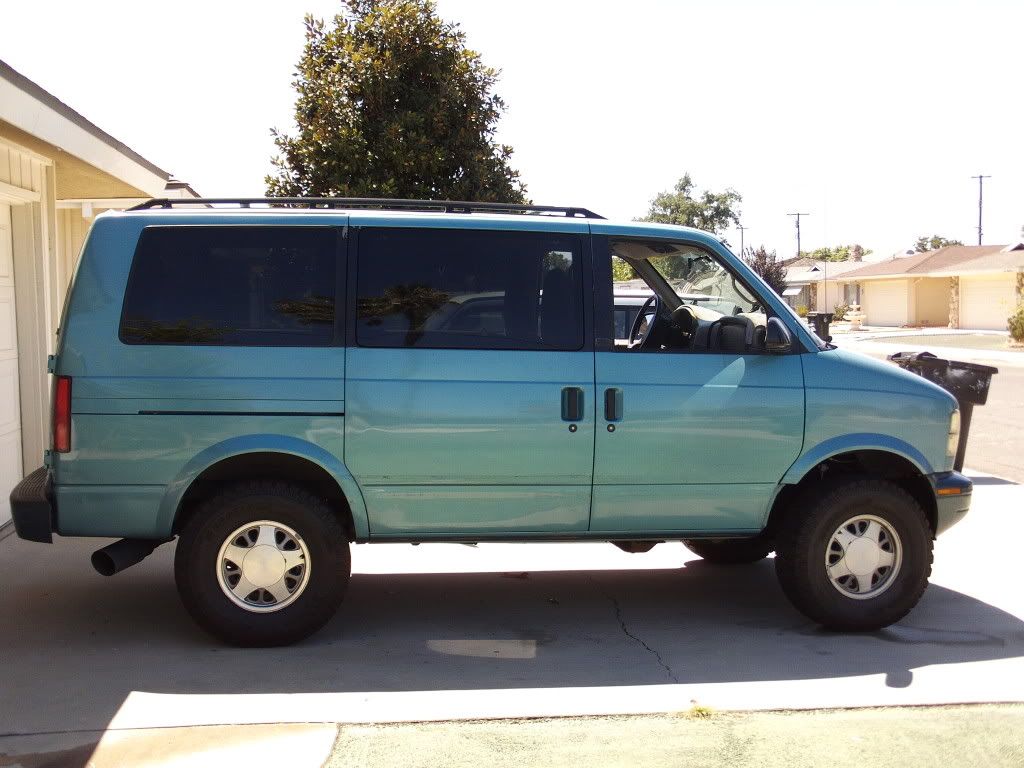
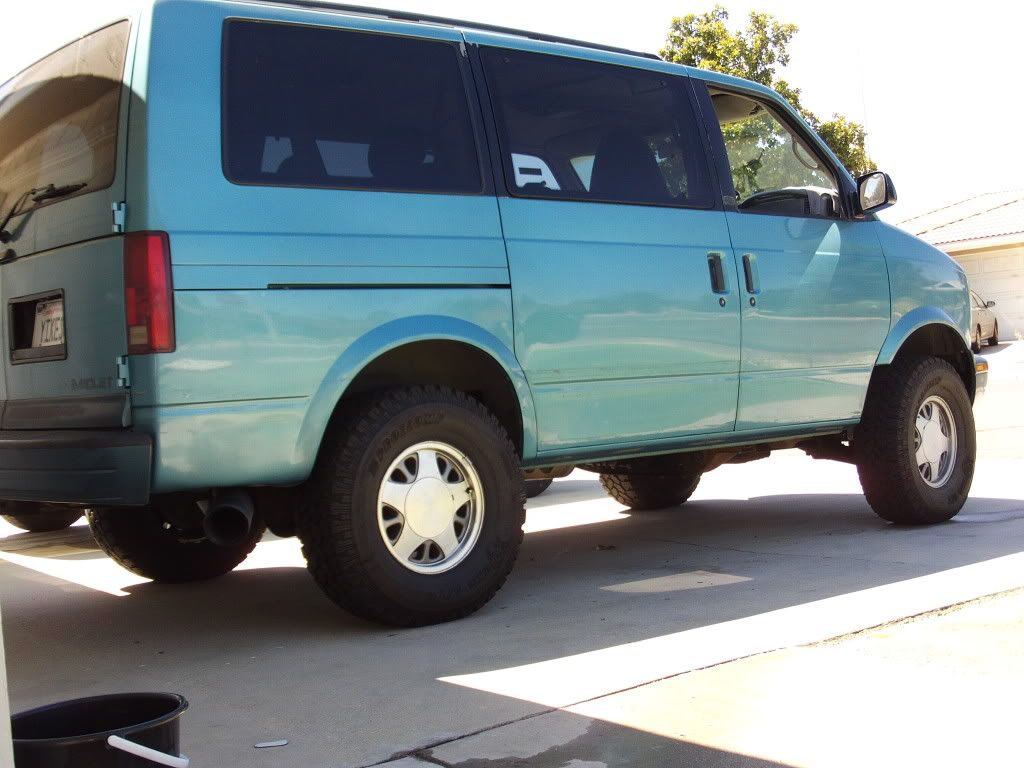
RK's MANi-Van - UP FOR SALE

ihatemybike

Explorer
From what I've seen the doors are just adhesive. The rest is a combination of adhesive, plastic and regular rivets and sheet metal screws. The thin pieces on the body under the doors, attach to the cheap thin steel retaining strips. The whole shebang isn't that hard to remove, the adhesive cleanup being the hardest part but a good heat gun and some 3M automotive adhesive remover help a lot. The cladding does include the back part of the front wheel wells and this trim should be sourced from a non-cladded van to make the switch complete.
 

T.Low

Expedition Leader
I am going to remove my cladding also. I have the non cladding fender flares from a cargo van sitting patiently in the garage. I will also keep mine body color.

It may be a winter weekend project: too much riding and paddling to do yet this summer.
 

RocKrawler

Supporting Sponsor
Got up this morning and played xbox for a while and got bored, so I went out and took off the passenger side cladding on the E.50 - took about 20 minutes to get the plastic off, another 20 for the plastic cladding retaining strips on the doors and rear quarter panel, and screwed on lower rocker steel strip. Then it took about an hour and a half to get all the tape off (with a plastic putty knife and a heat gun). Note to those contemplating doing this, not terribly difficult but don't assume there is no body damage behind the cladding if you aren't the original owner! I found some small dents and rings, nothing serious and the bed liner I plan on spraying down there will hide it all. Drivers side up next.

Basic rundown of what to expect when removing yours (as experienced on my 1996 model):
Rear 1/4 pieces: 7mm screw behind bumper facing back, three 7mm screws at front of classing in rear wheel well, 2 plastic snap in clips on underside, 1 plastic upper retaining strip held on by 2 sided tape under the cladding, and foam 2 sided tape on the top edges of the cladding itself.
Door pieces (P/S): upper and lower retaining strips both held on by 2 sided tape, and the upper edge and sides with 2 sided foam tape
Lower rocker pieces: 6 plastic snap in clips on the underside, steel retaining strip along entire lower rocker with 8 self tapping sheet metal screws (7mm head) and 2 sided tape behind it, three 7mm screws in both the rear and front wheel well, and one 7mm screw in the inside rear of the side doorjamb

Sent from my HTC Thunderbolt.
 
Last edited:

ExpoMike

Well-known member
Hi Terry. Nice van and mods coming along. One questions, what's with the name change to E.50? If this is a reference to the E series vans (E250, E350), E series is a Ford model. GM vans were G series (G10, G20, G30) so maybe G.50 would be better. :D

Keep up the nice work.
 

RocKrawler

Supporting Sponsor
Hi Terry. Nice van and mods coming along. One questions, what's with the name change to E.50? If this is a reference to the E series vans (E250, E350), E series is a Ford model. GM vans were G series (G10, G20, G30) so maybe G.50 would be better. :D

Keep up the nice work.

Its a reference in my first post to being a Ford guy trapped in a GM vehicle, and its about half the size of my old E350 I sold to Nely, thus the E.50 since I wish it was a Ford. The G would just further depress me
 
Last edited:

RocKrawler

Supporting Sponsor
Decided to price out all of the steering components and thought I'd post up the part numbers for easy reference if anyone needs them. These are the current MOOG part numbers for the AWD vans (all are lifetime warranty)

  • Inner Tie Rod Ends ES2838RL
  • Outer Tie rod Ends ES3254RL
  • Tie rod Adjuster Sleeves ES2004S
  • Upper Ball Joints K6292
  • Lower Ball Joints K6291
  • Idler Arms K6392T
  • Sway Bar Links K6428
 

RocKrawler

Supporting Sponsor
Jeffryscott: You had requested a pic of the van next to the Sidekick some time ago, when downloading the declad pics I found the one I took that you originally asked for and posted it back in my reply in post #93 if you still want to see the size comparison.

OK, the unclad side - hoping to make the drivers side match tomorrow. Opinions?

FILE0002.jpg


FILE0003.jpg


I still have to get the adhesive remover juice but all of the tape is off & wasn't that hard at all except for the very top layer on the sliding door, it hardened and was very stubborn
 
Last edited:

RocKrawler

Supporting Sponsor
Took the van off road for the first time, rough dirt with some rock and then through a deep, wide sandy wash - something that would definitely get a 2wd rig stuck, deep. it motored through it like it was nothing. Now I have confidence that this will be more than adequate for what we intend to use it for, and I am very pleased with my decision and work thus far. I did slightly scrape the gas tank skid at one spot, but I was climbing up a small shelf that I really should not have been on. Nevertheless it did what it was supposed to do without braking a sweat (although we did, it was over 105* today in Palm Springs and I havent got the AC fixed and working yet). The Pro Comp Xtreme All Terrain tires did perfectly as well, never even aired them down and they chugged right through the sand and dirt. I still am dying to try out the new Goodyear Duratracs, but unless someone wants to buy these it will be a long time before I get the chance to change over. While I should have stopped to take pictures, we had to get over to the families house for lunch. Next time we will snap some for sure!
One last thing I have decided to do is keep the thread title updated with the current mod or upgrade in progress, which will motivate me to change it often and keep working on the van to get it ready for camping and exploring duties in the upcoming months.
 

jeffryscott

2006 Rally Course Champion: Expedition Trophy
Thanks for the pics Terry. I went with a Trooper, but seeing pics of your van makes me kinda wish I'd done the Astrofari (I actually made a deal on one and got the financing approved, but another salesman sold it without telling anybody at the dealer.)

It does look extremely capable, can't wait to see off road pics.
 

RocKrawler

Supporting Sponsor
I really like the Troopers myself, looked at them for a while and determined with my sons current 6'3" height and growing something with more back seat legroom the van would be a better fit. Getting better than expected mileage with the larger tires so happy there as well. Keep debating doing a solid front ale to make everything stronger and provide the air locker option, but we will see. Still have the Sidekick as well, and chomping at the bit to make that a trail beast. As everything currently sits, the Van is the keeper by necessity, and the Suzuki is the wildcard.
 

Kenny Johnson

New member
I just saw this thread. I read Herbie's previously. Thank ya'll for inspiration. I am in the Army and have missed my days of camping, hiking, fishing, rafting, etc for fun. I bought an Astro van recently because I get out of the Army in 9 months. My friends and I are planning a road trip to Alaska or BC (Camping, kayaking, hiking, etc). I hope to convert to 4 wheel drive and pop-top as well, but my Astro is 2 wheel drive. Any ideas on the difficultly of converting the 2wd? I thought about buying an older doner that is AWD. My Astro only has 90,000 miles, so I have even thought about trading or selling to get an AWD Astro? Any ideas would be a great help. Thank you. You are welcome to see my blog to understand my love for adventure and the outdoors. http://kennyjohnsonarmy.blogspot.com/
 

RocKrawler

Supporting Sponsor
WOW - auto spell check on smart phones really sucks and makes you look real stupid if you don't proofread before posting! From what I read on other forums the sub frame is interchangeable and obtaining an AWD van donor would yield all the necessary bits to convert your 2WD van over.

Sent from my HTC Thunderbolt.
 
Last edited:

ihatemybike

Explorer
From what I understand unless you have a donor for a complete sub-frame assembly swap or are switching to a solid front axle, it's advisable to leave a 2WD van as is. Doesn't mean that a 2WD isn't capable of getting you places though. I off-roaded my 1994 2WD plenty.

Here's a video of a guy tearing it up in an old 2WD Safari.


I assume that you won't be beating on your van that hard.

Cheapest bang for your buck, without getting a different van would be to swap in a G80 rear end from a junk yard van. I obtained Grumpy's for $126 and the install was fairly easy. The G80s are usually found on AWD vans with 3.42 gears, but 3.73 gears can also be found. Since most 2WD Astros came with 3.23 gears, you'd most likely also get a torque gain at the wheels.
This site can help you locate a G80 rear end. www.car-part.com

Start this video at 2:54 to see G80s in action.


Note: Friction modifier is not needed for G80s if API GL-5 spec differential fluid is used.
 
Last edited:

RocKrawler

Supporting Sponsor
The demo video is great at demonstrating the added traction a locker provides, it doesnt mention that the Toyota locking differential is much stronger than the G80, and an ARB is much stronger than the Toyota E-Locker. I was disappointed when I found out the GM 7.625 ARB locker was only for the front of the H3 and would not fit the same size rear GM differential. But.. I might be getting a Jeep JK D44 rear axle dirt cheap from a source who recently did a D60 upgrade. The cool thing about the JK is the near exact same width as the Astro axle, and they both share the same 5x5 bolt pattern (that is for Astro/Safari models up to 2002) and have rear disc brakes as well. Kills lots of birds with one stone, and the D44 accepts nearly every locker option offered by nearly every manufacturer, giving lots of options. If this works out I'll be a very happy camper.
 

ihatemybike

Explorer
True the Toyota and ARB lockers are stronger, but they don't automatically engage. Other downsides, the Toyota doesn't fit the vans and the ARB is expensive. The G80 in the 7.625 size on the other hand was available in many GM vehicles, which means that they are fairly easy to find used and if the entire axle is sourced from a G80 equipped Astro the install is much easier. Another bonus of pulling used from an Astro is that they tend not to have been beaten on as much as a truck or Camaro.

While the D44 axle you might get is a good width with the same lug pattern, note that the Astro's rear differential is offset to the passenger side. Not saying it won't work, but without mods the drive shaft will be closer to the gas tank and drive line vibration may come into play.

Astro stock rear drive shafts lengths
Left axle shaft 34 13/16"
Right axle shaft 30 5/16"
 

Forum statistics

Threads
188,587
Messages
2,907,419
Members
230,704
Latest member
Sfreeman
Top