seanpistol's 01 Tundra

utroda

Observer
I started to remove the flares myself this morning, until i saw that they had grommets holes that would be visible, but looking at your pics makes me want to take them off even more.
 

tyv12

Adventurer
What's ur plan with you're rail caps, I hate the plastic caps but haven't found a good way to finish the top of the box rails without them


Sent from my iPhone using Tapatalk
 

seanpistol

Explorer
Going to do the DIY bedliner and also do it over the edge. I've heard raptorliner is a good option. The holes will be there- they'll be harder to see when they're black. Waiting for the spring to do that.
 

Derek24

Explorer
I agree that the tundras look a lot better with no flares, I always wanted mine gone, but couldn't handle the holes, just me. Be careful with the DIY bedliner, make sure you have a hot day and no rain in sight! I know. If I could do it again i would do linex and go over the top of the bed. Dad has it on his tundra and it tough stuff and still looks good after 7 years. Stuff that I put on was pretty thin and would scratch off pretty easy. That was the Dupli color Kevlar stuff. Good luck with the bumpers, looking forward to it all!
 

drobb

Adventurer
I had Linex over the rails on my old Dodge ...Got it with UV protection. It always looked new and it lasted!
 

seanpistol

Explorer
No doubt that Linex is nice, but to me- it's not worth what you gotta pay for it! Derek- to address your issue, I was planning on doing it extra thick on the bottom and bedrails, and thinner in front of and behind the wheel wells and on the sides. At $125 for the raptor liner, or $100 for the herculiner or duplicolor, I'd rather do it twice than fork out five times that for Linex.

Just sold my TRD flares for $150... :wings: Back into the truck fund!


By the way, I'll sell my electric fans to anyone here for $125. I have them up for $175 elsewhere. Needs a $50 controller, see the link for one in my ad below. This shroud will fit any first-gen! http://www.socaltundras.com/Forums/showthread.php?10192-FS-electric-fans-on-aluminum-shroud-175
 
Last edited:

seanpistol

Explorer
Finally found someone willing to swap my bucket seats for their 60/40 bench. Only took about 30 minutes to do, super easy. They're grey and my interior is tan, but the difference is minimal... I eventually want to get another set of Wet Okole covers, but no rush.


The guy I swapped seats with had an 8000 lb Warn winch with integrated solenoid mounted behind the bumper. It was super tight in there, but really fit pretty perfectly. I was impressed.


Derek24

Explorer
Right on brotha! Nice score on the buckets, nice have three seats with the rear seat removed, actually more room up front!
 

seanpistol

Explorer
New bumper, some assembly required (1.75" DOM tube for qp protection is not shown, or 4" x 4" x 1/4" angle iron for brackets)


Last time seeing the Kim Kardashian *****. For gee wiz info, the rear bumper weighs 55 lbs. The hitch weighs 55lbs as well. We'll see how close to 110 lbs the new bumper is...


The blue line is a ballpark estimate of where my 1.75 tube will wrap around, but I may make the angle a little more parallel to the ground than this.


I spent $82 at the metal store today, which included 60" of 2" x 6" x 3/16 rectangular tube, a strip of scrap 3/16" plate, a strip of scrap 1/4" plate, 2' of 1" x 2" x 3/15" rectangular tube, for round tube to bracket reinforcement, and some 1/2" square tube that will slide inside of 5/8" square tube to make some quick disconnect mudflaps. Thinking with more tire exposed I'll be more likely to get popped for running no flaps. Spent $40 last week to buy the 1.75" x 1.20 wall DOM tube, including $10 to have the guy put two bends in it for me. $8 for LED license plate bolts, and $20 for the 2" receiver. I have some scrap 3/8" plate laying around that I'm going to use for gussets around the brackets and on top of and below the receiver. This thing is going to be stout. Hoping to sell my hitch and old bumper to get most of that money back!

Hopefully it'll be done tomorrow and then paint it in the barn on Christmas day.
 
Last edited:

seanpistol

Explorer
Projects like this always take longer than expected. Yesterday poured rain all day before it switched to snow, and we don't weld or use the plasma inside the shop due to fire hazards (lots of farm chemicals and... things), so progress was slow.

Here's the 2x6x3/16" tube mocked up


My Uncle was feeling real ambitious and eager to help, and we spent a few hours yesterday figuring out how to make the brackets. A few notches needed to be made in the 4x4x1/4" angle iron to fit around a few obstacles, and getting holes drilled in the perfect spot is always a fun challenge. I'm also aware I have cancer under my truck. It's lived its whole life in Utah where they salt the **** out of the roads, and although I crawl under it with a heated pressure washer often you can see it's taking a toll. I plan on removing the bed this summer, getting all the rust off and then POR-15 and fluidfilm.

On each side, I'm using the two bolts on the vertical the bumper used and the two underneath the hitch used. The extra length in my brackets are for more support for tongue weight. The notch at the back is to go around a rivet on the frame. I welded the bumper on just 2 1/8" off the end of the frame rails to keep it as high and tight as possible. These two photos are before holes were drilled-


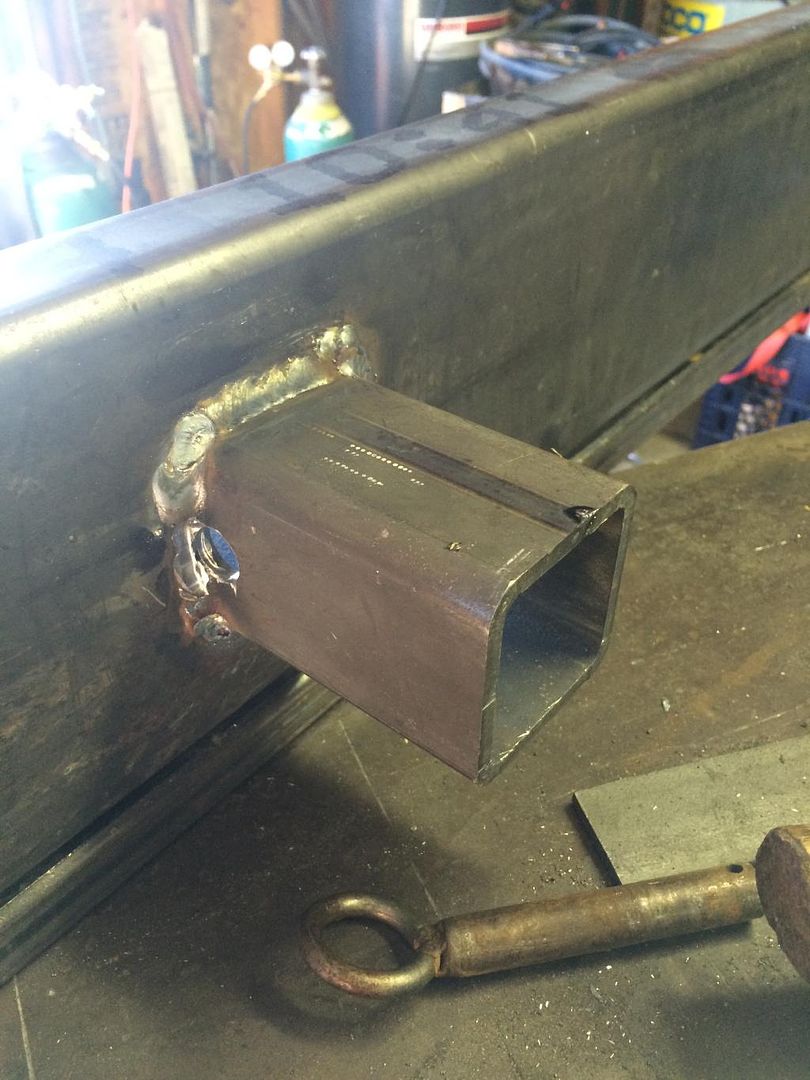
2x6x3/16" box tube capped with some 3/16" plate, and 2" receiver welded in. Flush mount, barely enough room to reach behind a squeeze the hitch pin in.


Brackets welded on. It looks so damn good on the truck that I forgot to snap a photo!


And here's the prime rib we ate for dinner tonight!


Still need to add a few 3/8" gussets around the back side of the receiver, which I will probably punch holes in with the plasma to hook chains onto. Need to weld the 1.75" round tube onto the low point of where I capped the box tube. Brace it with a piece of 1x2x3/16 box tube back to the bracket. Cut the bedside to match the angle and it will be done. Really happy with how it's turning out so far... 8" of additional ground clearance and I think it's going to be within a few pounds of the 110 lbs the old hitch/bumper weighed.

Then I have a paint dilemma. Usually I'd love to paint it with my typical few coats of Rustoleum self-etching primer and then half a dozen coats of bedliner, but it's a high of 35 degrees out and I'd have to paint outside. I'm worried the paint isn't going to cure. I'm debating powdercoating it, but it's obviously expensive and has the possibility of getting scratched and needing to be touched up. No matter what I need to get enough paint on it to drive from Boise to Salt Lake next week and keep it from rusting. Anyone have experience painting metal in the cold?
 
Last edited:

Forum statistics

Threads
188,641
Messages
2,908,249
Members
230,800
Latest member
Mcoleman
Top