Switch's 2022 Tacoma Access Cab Build

Switch

Observer
Last winter I totaled my 2006 Tacoma & so now I'm starting over with a 2022 Tacoma Access Cab TRD Pro. My 2006 build appeared to be inspired by the Lemony Snickets books "A series of unfortunate events ":
  • I backed over a rock which tore off a mud flap and discovered the factory "mud flap delete mod".
  • I crawled over a rock and discovered the "chopped exhaust" mod after I crushed my tailpipe so the engine wouldn't start.
  • I sheared off a valve stem and discovered the TPMS system was a liability.
  • I bent a shackle so I did a rear leaf spring shackle flip
  • I had to replace my rear axle...
  • And so on, until I'd done everything on my 2006 Taco except a snorkel and crawler box.
I'm hoping to be more proactive this time around. I didn't have a "build thread" for my 2006 Taco so this time I'm going to try to keep track of everything I do posted or linked here.

The first thing I did was feel a wave of gratitude for the low cost of gasoline since my new Taco didn't require Premium.
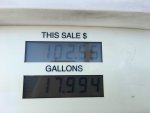
1658286754750.jpeg

Then we went on a dessert trip to Anza Borrego, Joshua Tree, Mojave, & Death Valley.

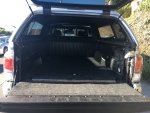
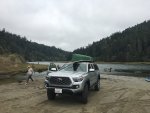
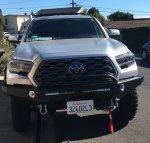
I had already added 33" BFG KM3 MT tires on a set of Toyota OEM wheels I had left over from my last Tacoma. The cap is a SnugTop that I found used on Craigslist.
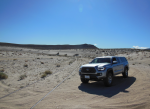
1658287919208.png

1658288653282.png

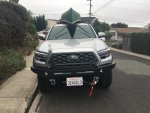
I added my old ProRack rack so we could carry our canoe and search for water in California.
1658288908738.png

And then I started work on the suspension: shocks, springs, UCAs...
These are boring mods that don't need photos...

I also ordered rock sliders, bumpers and a bunch of stuff that has crazy lead times due to the ongoing supply chain issues.

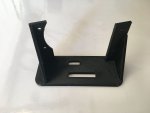
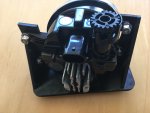
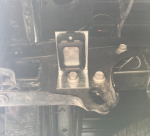
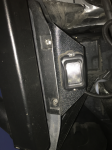
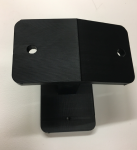
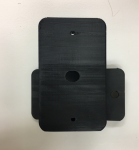
In the meantime I started planning for additional electrical needs and added a fuse/relay box using a set of custom mounts that I designed and printed using my 3D printer. I also swapped out the factory battery with an Odyssey Battery PC1700.
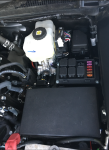
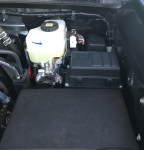
1658290196423.png

1658290083158.png

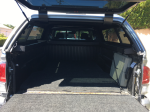
For the truck bed, we use it as a sleeping platform. So I did a DIY bed rug

1658291865882.jpeg

Yesterday I sold the SnugTop shell and got the ARE Z-Series truck cap that I ordered 3 months ago. It came with a Yakima HD bar which was a nice upgrade compared to my old ProRack bar. So I can finally start on the mods for the bed.
  • Wrap around shelf
  • USB power
  • AC power (always on) why does Toyota bother with that stupid teaser AC outlet?
  • LED lights
That's all for now.


*****************************************************************************************
Build summary
Wheels/Tires (two sets):
2006 Tacoma Alloy wheels with 255/85R16 BFG MT KM3 tires. (Summer)
American Racing Mojave Teflon coated wheels with 315/75R16 BFG ALL-TERRAIN T/A® KO2 tires (Winter)
Spare is factory wheel with 255/85R16 BFG MT KM3 tire that fits in the stock location.

Suspension:
FOX 2.5 coilovers remote reservoir front shocks with Eibach 700lb 14" coils
Ikon UCA's
All-Pro Off-Road Body Mount Replacement
FOX 2.5 remote reservoir rear shocksARB Old Man Emu Leaf Springs with Extra Leaf Spring
U-Bolt flip
Timbren bump stops
4 Crawler 1" Body Lift

Armor:
RCI Rock Sliders
RCI Full skid package
RCI Catalytic Guards
RCI Front Bumper (steel) w/ WARN 103253 VR EVO 10-S winch
Brute Force HC Rear Bumper

Bed improvements:
ARE Z-Series truck cap w/ rails for Yakima rack
Wrap around shelves
Custom mounted switch panels, 12V, and USB ports
LED strip lights
Hi-Lift Jack mount
Yakima SkyLine Towers and HD Bars
Custom bed rug
Custom Canoe mounts

Other improvements:
5.29 Nitro gears
Custom mounted OEM fog lights on RCI bumper
Custom mounted Rock Lights
Side lights on ARE truck cap
Side lights mounted below A-pillar
Seat Jacker and Multi Mount Panel from Desert Does It
On Board Air compressor (OBA) under driver's seat
Custom mounted auxiliary fuse/relay block engine bay
Custom mounted taillight auxiliary fuse block
Cab auxiliary fuse block
Odyssey Battery PC1700 w/ NOCO Boost Plus GB40 1000 Amp 12-Volt Lithium Jump Starter
9-Switch panel in center console for independent control of all exterior lights
Redline Tuning 21-27015-02 Hood QuickLIFT.
DYI Dual Battery with custom control panel for switches and voltage indicators

Links to other posts that are relevant to this build:
Never eat a cold breakfast again
DIY Solar Panel
DIY Water Storage
DIY Portable grill
 
Last edited:

Switch

Observer
Last winter I totaled my 2006 Tacoma & so now I'm starting over with a 2022 Tacoma Access Cab TRD Pro. My 2006 build appeared to be inspired by the Lemony Snickets books "A series of unfortunate events ":
  • I backed over a rock which tore off a mud flap and discovered the factory "mud flap delete mod".
  • I crawled over a rock and discovered the "chopped exhaust" mod after I crushed my tailpipe so the engine wouldn't start.
  • I sheared off a valve stem and discovered the TPMS system was a liability.
  • I bent a shackle so I did a rear leaf spring shackle flip
  • I had to replace my rear axle...
  • And so on, until I'd done everything on my 2006 Taco except a snorkel and crawler box.
I'm hoping to be more proactive this time around. I didn't have a "build thread" for my 2006 Taco so this time I'm going to try to keep track of everything I do posted or linked here.

The first thing I did was be grateful for the low cost of gasoline since my new Taco didn't require Premium.

View attachment 732538

Then we went on a dessert trip to Anza Borrego, Joshua Tree, Mojave, & Death Valley.

I had already added 33" BFG KM3 MT tires on a set of Toyota OEM wheels I had left over from my last Tacoma. The cap is a SnugTop that I found used on Craigslist.

Note: for people who want to know what tires fit, these tires are 255/85r16 and they rub very slightly on some plastic in the front wheel well with no other suspension modifications. I think they wouldn't rub at all if the alignment was done better but I don't care. Because I have not changed the gear ratio, the speedometer reads slower by about 10% and the acceleration is a tad sluggish.
View attachment 732540

View attachment 732541

I added my old ProRack rack so we could carry our canoe and search for water in California.
View attachment 732542

And then I started work on the suspension:
ARB Old Man Emu Leaf Springs with Extra Leaf Spring
U-Bolt flip
Timbren bump stops
FOX 2.5 remote reservoir rear shocks
FOX 2.5 coilovers remote reservoir front shocks
Ikon UCA's

These are boring mods that don't need photos...

I also ordered rock sliders, bumpers and a bunch of stuff that has crazy lead times due to the ongoing supply chain issues. Most of that work is waiting for parts.

In the meantime I started planning for additional electrical needs and added a fuse/relay box using a set of custom mounts that I designed and printed using my 3D printer. I also swapped out the factory battery with an Odyssey Battery PC1700.

View attachment 732545

View attachment 732544

For the truck bed, we use it as a sleeping platform. So I did a DIY bed rug

View attachment 732561

Yesterday I sold the SnugTop shell and got the ARE Z-Series truck cap that I ordered 3 months ago. It came with a Yakima HD bar which was a nice upgrade compared to my old ProRack bar. So I can finally start on the mods for the bed.
  • Wrap around shelf
  • USB power
  • AC power (always on) why does Toyota bother with that stupid teaser AC outlet?
  • LED lights
That's all for now.

Now that I have the new Yakima HD rack installed on the new ARE Z-Series truck cap, I upgraded my DIY canoe rack
1658984168985.png

IMG_2553.JPG
 
Last edited:

Switch

Observer
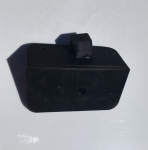
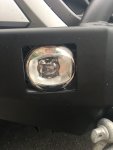
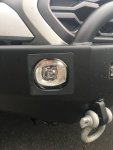
I installed my RCI front bumper last week and then tackled the problem of how to mount the Toyota OEM fog lights. I didn't want to blow $200+ on aftermarket 4" LED cubes and deal with the wiring when I had perfectly functional fog lights that came with the truck.

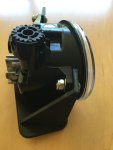
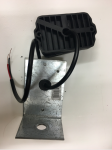
I couldn't find mounting brackets for the OEM fog lights online and RCI didn't know of one either. So I designed a set of mounts to fit the OEM fog lights to the bumper exactly using FreeCAD and my Prusa MK3S 3D printer. One bonus is the OEM fog lights are angled inside the bulb so I could take advantage of that in the fitment. The cube lights all face straight forward so they end up recessed inside the bumper a little bit.


IMG_2666.JPG
Later, I think I'll take the time to make a guard that protects the bulb and fills in the square corners of the cut out.

The mount itself it pretty simple but took hours in FreeCAD to get the dimensions just right and numerous test prints. Design. Print. Attach fog lights and test fitment. Wash, rinse, repeat...
IMG_2674.JPG

These are prototypes so they are printed hollow so they use less material and print faster. My final version will be printed with 100% infill so they are solid PETG & I think 4mm thickness is really strong.
IMG_2673.JPG

I had to turn the fog lights up-side-down so the adjustment knob would not contact the base of the bumper and then reverse left and right fog lights so they tilt in the right direction.
IMG_2660.JPGIMG_2661.JPG

To make sure I had the mounting holes just right, I printed plugs that go though my mount and the RCI bumper. Later I made those plugs shallower so they serve has guides for the proper position of the fog light.
IMG_2655.JPG

Although I designed these mounts to fit my RCI bumper perfectly, I think they would fit any after market bumper that has similar 4" LED fog light holes.

IMG_2665a.jpg
 
Last edited:
Switch

Observer
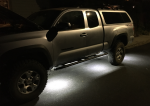
I've also been making progress on the rock lights.

I decided on MICTUNING C2 Curved White LED Rock Lights because they were not to expensive and I'm not obsessed with getting the brightest LEDs on the market right now.

They also promised Fashion Design and Craftsman's Quality.

1660187692268.png

Compared to the rock lights I had on my last Taco these are amazing.

My plan was to place 8 lights total. Two on each side behind and in front of each wheel.

For the back, I used the existing bolts that hold the bumper and Simpson Strong Tie angles so I could torque the bolts back properly.

1660187942576.png
I drilled out holes for the LED pod screws and used the existing hole in the tie with a rubber grommet.
1660188017202.png
1660188050886.png
1660188073334.png
1660188123828.png
Added connectors and the taped everything up.
1660188200535.png


I removed the lower rear bolt and added the light
1660188243751.png

For the lights in front of the rear tires, I used 1/4" ABS plastic that I had on hand.
1660188758986.png


And mounted in the holes that hold the body to the plastic below the fender well
1660188695800.png

Then I worked on the LED mounts for rock lights around the front tires.
 
Last edited:
Switch

Observer
I've also been making progress on the rock lights.

I decided on MICTUNING C2 Curved White LED Rock Lights because they were not to expensive and I'm not obsessed with getting the brightest LEDs on the market right now.

They also promised Fashion Design and Craftsman's Quality.

View attachment 736500

Compared to the rock lights I had on my last Taco these are amazing.

My plan was to place 8 lights total. Two on each side behind and in front of each wheel.

For the back, I used the existing bolts that hold the bumper and Simpson Strong Tie angles so I could torque the bolts back properly.

View attachment 736501
I drilled out holes for the LED pod screws and used the existing hole in the tie with a rubber grommet.
View attachment 736502
View attachment 736503
View attachment 736504
View attachment 736505
Added connectors and the taped everything up.

View attachment 736506

I removed the lower rear bolt and added the light
View attachment 736507

For the lights in front of the rear tires, I used 1/4" ABS plastic that I had on hand.
View attachment 736509


And mounted in the holes that hold the body to the plastic below the fender well
View attachment 736508


Behind the front tires I didn't want to use self-tapping sheet metal screws like I've seen done elsewhere. There are perfectly good holes for the tube step bars I will never use. Plus I wanted the lights to not be tucked way up under the body, so back to FreeCAD and my Prusa MK3S 3D printer

1660189016678.png
The photo above shows the mount with the holes that line up to the factory tube step mounts.

In the below photo, the LED pod mounts on the bottom.
1660189097736.png

This adaptor positions the rock light right above the bottom of the pinch weld to maximize the spread of the light but just inside the rock sliders to be out of harms way.

1660189158400.png
1660189176803.png

I removed the bolts for the tube steps just behind the cab body mount
1660189232239.png

1660189256570.png

Next came the mounts in front of the front wheels. I had to wait until the RCI bumper was installed so I could see what the space looked like & place the LED pods in the right location.
 
Last edited:
Switch

Observer
Behind the front tires I didn't want to use self taping sheet metal screws like I've seen done elsewhere. There are perfectly good holes for the tube step bars I will never use. Plus I wanted the lights to not be tucked way up under the body, so back to FreeCAD and my Prusa MK3S 3D printer

View attachment 736510
Above is the part that interfaces with the body.

In the below photo, the LED pod mounts on the bottom.
View attachment 736511

View attachment 736512
View attachment 736513

I removed the bolts for the tube steps just behind the cab body mount
View attachment 736514

View attachment 736515

Next came the mounts in front of the front wheels. I had to wait until the RCI bumper was installed so I could see what the space looked like & place the LED pods in the right location.

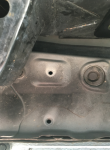
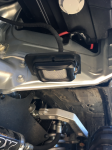
For the front rock light location, I noticed some holes in the body that looked promising.
1660189538676.png

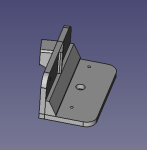
More time in FreeCAD & printing

1660189603537.png
That picture is horrible, here is the CAD version.

1660189705420.png

More important is the installed result
1660189750013.png

I completed the wiring harness for the 6 lights behind the front wheels but still need to create the harness for the LED lights in the very front. So that is the next item on the list to complete.
 
Last edited:
Switch

Observer
Last winter I totaled my 2006 Tacoma & so now I'm starting over with a 2022 Tacoma Access Cab TRD Pro. My 2006 build appeared to be inspired by the Lemony Snickets books "A series of unfortunate events ":
  • I backed over a rock which tore off a mud flap and discovered the factory "mud flap delete mod".
  • I crawled over a rock and discovered the "chopped exhaust" mod after I crushed my tailpipe so the engine wouldn't start.
  • I sheared off a valve stem and discovered the TPMS system was a liability.
  • I bent a shackle so I did a rear leaf spring shackle flip
  • I had to replace my rear axle...
  • And so on, until I'd done everything on my 2006 Taco except a snorkel and crawler box.
I'm hoping to be more proactive this time around. I didn't have a "build thread" for my 2006 Taco so this time I'm going to try to keep track of everything I do posted or linked here.

The first thing I did was be grateful for the low cost of gasoline since my new Taco didn't require Premium.

View attachment 732538

Then we went on a dessert trip to Anza Borrego, Joshua Tree, Mojave, & Death Valley.

I had already added 33" BFG KM3 MT tires on a set of Toyota OEM wheels I had left over from my last Tacoma. The cap is a SnugTop that I found used on Craigslist.

Note: for people who want to know what tires fit, these tires are 255/85r16 and they rub very slightly on some plastic in the front wheel well with no other suspension modifications. I think they wouldn't rub at all if the alignment was done better but I don't care. Because I have not changed the gear ratio, the speedometer reads slower by about 10% and the acceleration is a tad sluggish.
View attachment 732540

View attachment 732541

I added my old ProRack rack so we could carry our canoe and search for water in California.
View attachment 732542

And then I started work on the suspension:
ARB Old Man Emu Leaf Springs with Extra Leaf Spring
U-Bolt flip
Timbren bump stops
FOX 2.5 remote reservoir rear shocks
FOX 2.5 coilovers remote reservoir front shocks
Ikon UCA's

These are boring mods that don't need photos...

I also ordered rock sliders, bumpers and a bunch of stuff that has crazy lead times due to the ongoing supply chain issues. Most of that work is waiting for parts.

In the meantime I started planning for additional electrical needs and added a fuse/relay box using a set of custom mounts that I designed and printed using my 3D printer. I also swapped out the factory battery with an Odyssey Battery PC1700.

View attachment 732545

View attachment 732544

For the truck bed, we use it as a sleeping platform. So I did a DIY bed rug

View attachment 732561

Yesterday I sold the SnugTop shell and got the ARE Z-Series truck cap that I ordered 3 months ago. It came with a Yakima HD bar which was a nice upgrade compared to my old ProRack bar. So I can finally start on the mods for the bed.
  • Wrap around shelf
  • USB power
  • AC power (always on) why does Toyota bother with that stupid teaser AC outlet?
  • LED lights
That's all for now.
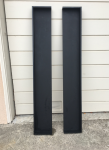
For the wrap around shelf, I decided to use HDPE instead of plywood. I want everything I do on this new build to take the work I did on my 2006 Taco to a new level. The plywood was great but it did not have a lip on the shelves so stuff would just fall off. And this time, I wanted a more professional finish. Here are the sides:

1660190784318.png
HDPE is impossible to glue so I used 1" stainless steel screws to attach the sides to the bottom.

In this photo the front shelf is already in place and I'm about to add the sides.
1660190997848.png

Here the sides are installed and I realized I needed shims to make them straight because of the angle of the fiberglass of the ARE Z-series truck cap
1660191132961.png

Next:
1: the Hi-Lift Jack mount goes on one side
2: LED lights, USB chargers, and switches to control all of the accessory lights from inside the bed
3: Shelves on the sides above the windows.
 
Last edited:

AggieOE

Trying to escape the city
Nice updates! Its nice seeing so much use out of CAD and a 3D printer. I'm really curious though about the durability of the foglight mounts though. Any considerations for fatigue stress?
 

Switch

Observer
Nice updates! Its nice seeing so much use out of CAD and a 3D printer. I'm really curious though about the durability of the foglight mounts though. Any considerations for fatigue stress?
I'm just going to have to run them and find out. I can always augment the design to strengthen any failure points. One obvious design improvement would be to add fillets where plates meet a right angles. That's what I did with the front rock light mount:
1660189705420-png.736518
 
Last edited:
redthies

Renaissance Redneck
Its nice seeing so much use out of CAD and a 3D printer.

Not being negative, but I was just thinking the opposite. It seems every time I go here or on ‘Mud there is a “build” thread that is a lightly veiled advertisement for someone’s new 3D printer business. The Etsy link proves my point. I get that some people are excited about the tech, but at least show us some of the “boring” stuff. I’d much rather see those Icons and the new cap (not all of us are familiar with every option out there in bolt on parts).

All that said, I really like the way you are building the truck. Our ‘20 Tacoma ran on 255/85-16 ST Maxxs at the beginning, and there was zero rub pre lift. I love the KM3s. Hope they last a long time for you.
 

grizzlypath

Active member
Not being negative, but I was just thinking the opposite. It seems every time I go here or on ‘Mud there is a “build” thread that is a lightly veiled advertisement for someone’s new 3D printer business. The Etsy link proves my point. I get that some people are excited about the tech, but at least show us some of the “boring” stuff. I’d much rather see those Icons and the new cap (not all of us are familiar with every option out there in bolt on parts).

Ehh he's fabbing up stuff because it doesn't exist and then putting it out there for others if they need it. If he wants to charge a few bucks for all the R&D then what's the harm in that? You can buy a 3D printer for like $250 and if you have a lot of custom work then it could be worth it. I've read this entire thread and I read it as him doing it for himself not necessarily to make a ton of money off of it.
 

Switch

Observer
Hey Grizzlypath. Thanks for adding your perspective.

I do think Redthies has a point though, so I'm grateful for his constructive criticism. I've never done a build thread before & if I'm skipping over important stuff like the actual front suspension mods & placing too much focus on stuff I worked on or created directly, then that is good feedback to receive.

I've done a bunch of DIY posts on this forum and others over the years; so you can see for yourself how much time I've spent on projects just to get exactly "one" of what I needed. With this 3D printer I can actually clone my work when I'm done & I take pride in being able to make that available for others.
 
Last edited:
Switch

Observer
https://youtube.com/shorts/xSQ0Ts6qWJQ?feature=share
I installed my RCI front bumper last week and then tackled the problem of how to mount the Toyota OEM fog lights. I didn't want to blow $200+ on aftermarket 4" LED cubes and deal with the wiring when I had perfectly functional fog lights that came with the truck.

I couldn't find mounting brackets for the OEM fog lights online and RCI didn't know of one either. So I designed a set of mounts to fit the OEM fog lights to the bumper exactly using FreeCAD and my Prusa MK3S 3D printer. One bonus is the OEM fog lights are angled inside the bulb so I could take advantage of that in the fitment. The cube lights all face straight forward so they end up recessed inside the bumper a little bit.


View attachment 736469
Later, I think I'll take the time to make a guard that protects the bulb and fills in the square corners of the cut out.

The mount itself it pretty simple but took hours in FreeCAD to get the dimensions just right and numerous test prints. Design. Print. Attach fog lights and test fitment. Wash, rinse, repeat...
View attachment 736456

These are prototypes so they are printed hollow so they use less material and print faster. My final version will be printed with 100% infill so they are solid PETG & I think 4mm thickness is really strong.
View attachment 736457

I had to turn the fog lights up-side-down so the adjustment knob would not contact the base of the bumper and then reverse left and right fog lights so they tilt in the right direction.
View attachment 736458View attachment 736460

To make sure I had the mounting holes just right, I printed plugs that go though my mount and the RCI bumper. Later I made those plugs shallower so they serve has guides for the proper position of the fog light.
View attachment 736459

Although I designed these mounts to fit my RCI bumper perfectly, I think they would fit any after market bumper that has similar 4" LED fog light holes.

View attachment 736454

I finally got the finished mounts printed with 100% infill and they are solid. I also designed inserts to clean up the round light in square hole effect that I had achieved.

IMG_2746.JPGIMG_2747.JPGIMG_2748.JPG

Then I started working on the wire harness for the front rock lights & I noticed the winch was mounted at an odd angle. Well, it turned out to only be mounted by one bolt...

https://youtube.com/shorts/xSQ0Ts6qWJQ?feature=share

I'm going to have to take this back to the shop that installed the bumper. This could have caused some real damage had I not noticed.
 

Switch

Observer
Last week and the week before we got to do some world class paddling at Elkhorn Slough and on the Russian River in California. We also explored some moderate jeep trials in the Mendocino National Forest.
IMG_2804a.png

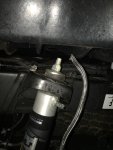
Not all of the trails were easy and we managed to take out a rear shock.
IMG_2884.JPG

Fortunately the shop that installed the rear shocks is fixing next week under warranty. It wasn't properly torqued and rotated so that the tire contacted the remote reservoir hose when side loaded on a trail. The photo above is after pressure washing an unholy mess of oil from inside the wheel well.

So with my Taco grounded for the weekend, I worked on the back log of projects.
1: Rock light harness
1662956848639.png

I'm using Dorman 91441 2 Wire Male And Female Pigtails for the connectors. They were easy to splice in with heat shrink tubing.


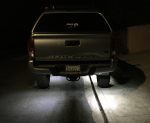
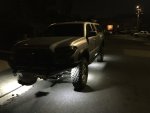
Testing the light pattern. The rock sliders cast a hard shadow on the lights aft of the rear tires. I'll have to see if I can adjust that.
1662957232866.png
1662957478235.png

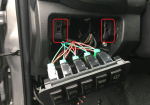
2: Aux switch panel from Fitzaprint

1662957683425.png
Switches wired up for installation.
The switches are from CH4X4.

1662961456877.png
I had to cut away some plastic to get the right and left switches to fit but the plastic was very soft and only took a few minutes to cut with a utility knife.


1662957545687.png

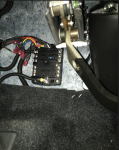
3: Fuse block inside the cab.
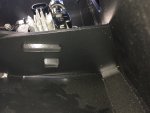
The location is to the left behind the break pedal adjacent to the factory fuse panel.
1662957358244.png
This will be used to power the Aux switches shown above, a compressor, always on USB charging ports, and an AC inverter.

The loose connectors in the above photo are for switches located in the bed.
 
Last edited:
Switch

Observer
Last week and the week before we got to do some world class paddling at Elkhorn Slough and on the Russian River in California. We also explored some moderate jeep trials in the Mendocino National Forest.
View attachment 742169

Not all of the trails were easy and we managed to take out a rear shock.
View attachment 742170

Fortunately the shop that installed the rear shocks is fixing next week.

So with my Taco grounded for the weekend, I worked on the back log of projects.
1: Rock light harness
View attachment 742171

View attachment 742174
View attachment 742176

2: Aux switch panel from Fitzaprint

View attachment 742178

I had to cut away some plastic to get the right and left switches to fit but the plastic was very soft and only took a few minutes

View attachment 742177

3: Fuse block inside the cab.
The location is to the left behind the break pedal adjacent to the factory fuse panel.
View attachment 742175
This will be used to power the Aux switches shown above, a compressor, always on USB charging ports, and an AC inverter.

The loose connectors in the above photo are for switches located in the bed.

4: Wire harness for bed power and switches.
  • We sleep in the truck bed so I wanted always on power for lights, an AC inverter, and USB charging ports.
  • Since I already have the above power in the bed, I plan to put a relay in the bed for the rear lights when I get the new rear bumper. So I need a wire from the cab to the bed to control the rear lights.
  • Then I realized if I can control a relay in the back of the truck from a switch in the cab, I could also control the relays in the front of the truck from switches in the rear. And this would solve the problem where we wake up in the middle of the night due to some noise and can't see a goddam thing outside the truck cap. So I'm putting switches in the bed to control all of the lights that can be controlled from the cab.
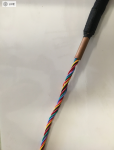
So I made a wire harness with a 10 AWG wire at the core and 6 18 AWG wires for controlling relays.
View attachment 742179
Here's the wire harness being run though a copper pipe to apply the expandable braided cable sleeve.
View attachment 742180


4: Wire harness for bed power and switches.
  • We sleep in the truck bed so I wanted always on power for lights, an AC inverter, and USB charging ports.
  • Since I already have the above power in the bed, I plan to put a relay in the bed for the rear lights when I get the new rear bumper. So I need a wire from the cab to the bed to control the rear lights.
  • Then I realized if I can control a relay in the back of the truck from a switch in the cab, I could also control the relays in the front of the truck from switches in the rear. And this would solve the problem where we wake up in the middle of the night due to some noise and can't see a goddam thing outside the truck cap. So I'm putting switches in the bed to control all of the lights that can be controlled from the cab.
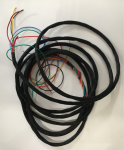
So I made a wire harness with a 10 AWG wire at the core and 6 18 AWG wires for controlling relays.

Here's the wire harness being run though a copper pipe to apply the expandable braided cable sleeve.
1662960279715.png

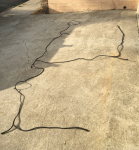
And here's the harness with the expandable braided cable sleeve - its about 18 feet long.
1662960315970.png

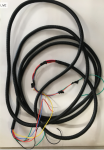
And here's the harness after adding split conduit tubing
1662959258504.png
Edit [09/25/2022]
The harness shown above is now fully taped using wire harness tape.

Next on my list:
  1. Get that rear shock fixed.
  2. Wire up the LED light bar in the front bumper
  3. Finish wire harness for front rock lights
  4. Install bed lights, USB ports, and inverter
  5. Install switch panel in the bed
  6. Install side lights
  7. Install grab handles on Yakima rack
  8. Install compressor for on board air
edit [9/13/22]
I completed two items from the above list today.
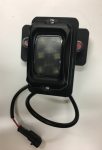
2: LED Light Bar (shown off in photo below)
3: Finish wire harness for front rock lights
IMG_2886.JPG
Tomorrow that rear shock gets fixed.
 
Last edited:
Forum statistics

Threads
188,343
Messages
2,905,837
Members
229,959
Latest member
bdpkauai
Top