The CrowsWing - Offroad Teardrop Trailer

skersfan

Supporting Sponsor
When you finish burning the trailer trash, could you come over here, we have a whole nest of em down the road!!!!

You guys are builidng a work of art, absoluely fantastic. I can hardly wait to see it finished. What an accomplishment
 

jim65wagon

Well-known member
I'm sure California has a regulatory commission on burning trailer trash, and it might be nigh on impossible to rid yourself of yours.....good luck.

Thanks for the compliments guys!
 

ZR2nit

Adventurer
Nice build sir. Are you and your wife really planning on taking your teardrop offroad??? Only reason I ask is because it would be a shame to mess it up. Its got to be the niceset teardrop I have ever seen. Great job. Your wife has some great carpentary skills.
 

jim65wagon

Well-known member
Nice build sir. Are you and your wife really planning on taking your teardrop offroad??? Only reason I ask is because it would be a shame to mess it up. Its got to be the niceset teardrop I have ever seen. Great job. Your wife has some great carpentary skills.
Well, let's see, in reverse order to you:
3)Thanks, my wife discovered her woodworking skills when we rebuilt our farmhouse in PA a few years ago.
2)Thanks, again. We are trying to build the nicest teardrop we can. We are Glampers in heart and have a reputation to keep:cool:.
1)Well, yes, we really are planning to take it offroad....maybe not Rubicon offroad, but offroad nonetheless. Our idea was to design the trailer with more capabilty than our Tundra has. This way, in our travels, when we see something shiny on the map, we can fly over to it without the trailer being a limiting factor. It also had to have high quality marine grade hardware and finishes.....it should see as much beach time as it does mountain time.....Now before anyone forgets, yes we still are building. The last two weekends have been staining and varnishing of the cabinets, face frames and doors. It's a lot of sanding, cleaning, tack clothing, etc. It's a ton of work and we have a lot done, but it translates to not so great photographs.Beth staining the cabinet face frames.
6848743767_3bace41237.jpg

.
All the frames stained
6848755245_c01edf6e9e.jpg

.
This is the roof and drawers getting their share of polyurethane....
6848753411_a513f37d02.jpg

.
.
The cat doesn't like all the noise and smell in the garage lately....so she's not much help anymore......she just kinda stays in her bed/box and sleeps while we work..
6848751549_e947e18bde.jpg
 
Last edited:

jim65wagon

Well-known member
We did get one coolio deluxe and luxurious item done last, last weekend. We built a headboard for the bed! If you look inside most teardrops they almost never have a headboard.....I don't know why.
This is another of my wifes nice designs and she learned the execution on Mr Gore's internet....
One large piece of foam, you add the layout for the buttons
6848722977_6816abbe35.jpg

.
Drill holes according to the well thought out plan.
6848724599_7b2c737e2b.jpg

.
Apply glue
6848726395_89f9c8c8fa_m.jpg
.....
6848728339_92d371e5d4_m.jpg

.
Add a layer of batting to soften things up
6848730077_6da35392b3.jpg

.
6848735951_08e7fbb479.jpg

.
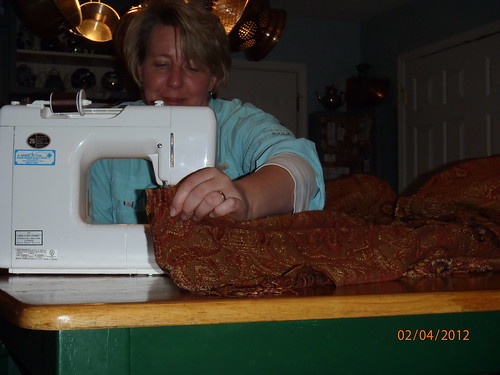
The fabric we picked had a tricky pattern to it and Beth had to do a little match up on the sewing machine to get it to fit the headboard correctly
6848734023_0b5f012ffc.jpg

.
The fabric gets draped over the board, then you push/pull the buttons into the holes you drilled in the foam. This forces the fabric to pleat into a diamond pattern. A little difficult, and the string cuts into your fingers somethin fierce! Yeah, that's my big backside you see. I'm trying to pull a button string tight enough to get the job done.
6848737733_18f762df3f.jpg

.
Staple down all your edges! You can also see the string patterns.
6848739553_40081aaf5b.jpg

.
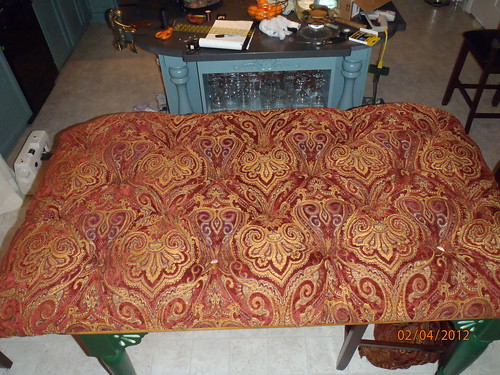
Flip it over and TaDa! If you look close you can see the diamond tucked pattern.
6848741863_527af00f2c.jpg

.
As it will sit in the teardrop.
6848745727_5718960d93.jpg

.
That's all for now!
 

TangoBlue

American Adventurist
Reputation? Yeah, reputation as "Der über-glamper."

Looks posh... reminds me of this time I was on liberty and went to a... well, never mind. It looks quite luxurious.
 

suntinez

Explorer
Just catching up! :Wow1:

You two are moving right along, tons of great ideas, and some very stylish work here. Way to go!!

Yeah why don't they put headboards in these things? Glad you got that covered (and pleated).
 

Glenn

New member
I am very impressed. Mad skills you both have. BTW, i still want your wife to design the inside of my VW bus one day!!!! :bowdown:
 

jim65wagon

Well-known member
Time for more! We've got two more weekends to catch up on, and a lot has been done!
.
Beth started off routing out the doors and frames for insetting the hinges
6936873277_836a0bba1e_m.jpg
.....
6790756848_66ea30f54e_m.jpg

.
and we got the doors all fitted precisely to their matching frame
6790757796_2c6bcd76c1.jpg

.
all the doors had to be stained....
6790759942_4ee743827a.jpg

.
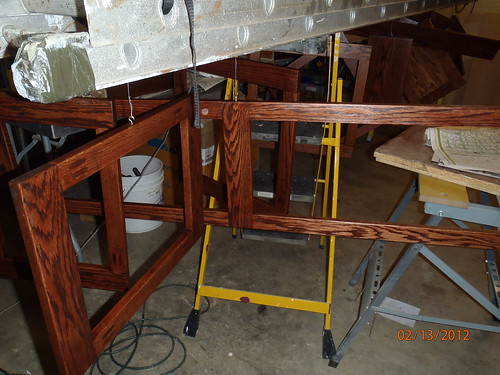
After all the staing dried sufficiently, all the doors and frames got hung up (note the high tech ladder system) and received a couple of coats of polyurethane.
6936880429_75e40eacd9.jpg

.
Poly is one of those fun to do projects, that combines horrible smells with long waits in between coats.....at least your lungs can revive in between
6936878467_3e26976ddf.jpg

.
After the poly, everything got another couple of coats of Epifanes marine varnish, this deepened the color and smoothed the finish to an incredible level. You'll get to see the results in the next couple of posts, but pictures really don't do it justice.
..
Just an FYI, Epifanes is extremely bad for your lungs and head, and a good respirator is a must. Do not think you can apply this without one or with a dust mask!
.
In the meantime.....it was awning time! Originally we were going to just purchase a Fiamma or ARB or similar awning and hang it off the side. The more we thought about it the more we didn't like the looks of the when closed (it would ruin the lines - and look out of place on the traditional style of our trailer).
What to do, what to do?
Build our own of course!
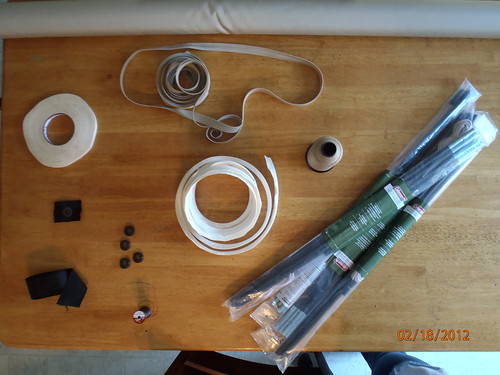
A little Sunbrella fabric, some Sunbrella awning thread, a little Keder welt, a few tent pole repair kits,and some awning rail and voila! Awnings! Well, not quite that easy, but it all came together quite well. Did I mention that my wife is a genius, superb designer, and she sews too?
This shows the roll of Sunbrella fabric, thread, Keder welt, grommets, nylon strapping and tent pole kit
6936881477_f0ec93d60a.jpg

.
Closeup (sample)of the awning rail.
VTS-876-3.jpg

.
and this is an example of the Keder welt. Sewn to your fabric of choice this allows you to slide the awning into the rail with ease.
keder_welt%20white.jpg

.
While I won't say it was simple, I was amazed at how simple Beth made it look. The awning was sized to fit squarely over each door to provide us with some sort of shelter as we ingress and egress (um, that's enter and exit - or climb in and out as the case may be). The tent poles were cut so they were slightly long and formed a nice arched rainfly, exactly like the ones on our Cabelas tents we've camped in for years. A tie was sewn in the center to hold the poles in place, and the nylon webbing was used to make the pockets for the pole ends to catch into - otherwise they'd bust through the awning doncha know!
6790764820_55afa5eac0.jpg

.
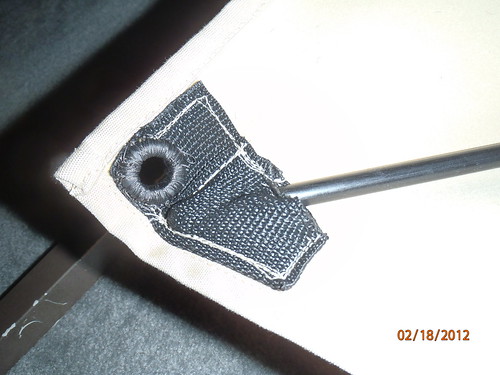
Closeup of the nylon pocket, and the rubber grommet - which captures the upright pole, without which the awning is just an interesting door hanging on the side of the trailer
6936884513_00e0537a07.jpg

.
The end of the upright is a nice fancy hook, which hooks through the grommet. This should keep the wind from blowing the awning off the upright.
6936885561_4992958c2a.jpg

.
This shot is a nice example of how it slides together. You can see the awning, with attached Keder welt, and how the welt slides into the awning rail.
6936887299_c4d6b28650.jpg

.
This is the finished product. You'll have to imagine that the uprights are actually connected to the running boards on the trailer with some Bimini hardware.
66220.jpg

When not attached the awning and poles will live in a duffel bag in the basement (EDIT! This proved to be a bad idea - the tubing held water from rain and it was enough to make anything fabric in the basement wet. We have since installed pvc tubing to store all the poles in keeping everything else in the basement dry), and all you will see on the trailer is the awning rail above the doors. The clamps will be replaced with screws, so you won't see those either!
6790775124_0e0c696668.jpg
 
Last edited:

Forum statistics

Threads
188,184
Messages
2,903,530
Members
229,665
Latest member
SANelson
Top