The Restoration And Build Thread For My 1992 FJ80

Summit Cruisers Jr

Well-known member
Sanded down the second layer of bondo yesterday. The base edges are about as good as they are going to get, but I still have to do the very back of it once I weld on the hinge for the lid.
image.jpg

I also managed to tack the top piece on.
image.jpg

image.jpg

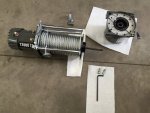
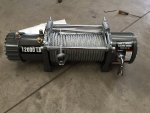
Then I figured I would take a break from welding and cutting to work on clocking the winch. I've been putting new it off, but figured I would get it done so I can look at cutting my bumper off next week and replacing the broken winch.
image.jpg
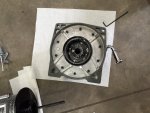
It was pretty simple. Unscrew the two bolt larges on the clutch side.
image.jpg
Then unscrew all the small allen bolts and rotate the plate. Then put them back in, and slide the clutch back on.

image.jpg
 
Last edited:

Summit Cruisers Jr

Well-known member
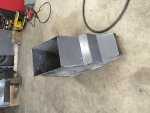
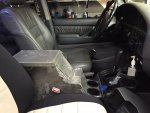
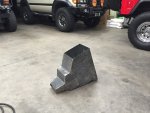
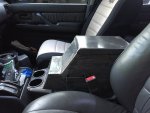
I'm finally nearing completion with the console.
image.jpg
I welded it all up yesterday and then used a flap disk to smooth them all out. I also have internal supports. This console is stout!

image.jpg

image.jpg
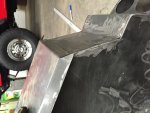
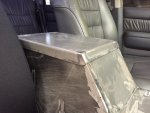
I also got the lid cut out and completed bending the front and sides. Bending the lid was a little tricky and I ended up cutting out another lid. I will look at welding the corners of the lid up tomorrow, trimming down those edges, and installing the hinge.

image.jpg

I'm unsure if I want to use a piano hinge like Tuffy uses, or use a pair of hinges that can hold the lid open at fully extension. I feel like that's a more useful option while the piano hinge is a cleaner and more secure option. If I went with a pair of hinges, that would mean more space for the Wit's End console organizer because I wouldn't need a limiting cord.

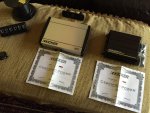
I also ordered two amps, a Kicker KX400.4 amp and a Kicker CX300.1, a rock light rocker switch, and two 20 piece strands of LEDs in the cool white as rock/light the ground up at camp lights. I still need to figure which gauge of wires I need to run for the amps, and a good rca cable brand.
 
Last edited:

Summit Cruisers Jr

Well-known member
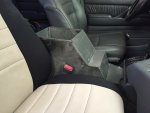
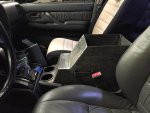
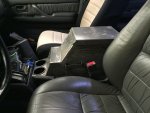
I haven't been able to work on the console in the past week, but I did get the lid formed and the cupholders in.

image.jpg
image.jpg
I also added a spot to hang things from. Eventually when I upgrade from a prehistoric hand held cb radio to a smaller modern one, this should be a great place to hang it.
image.jpg

I've been driving around with the console and cup holders in, and it's really awesome. I can't wait to get a pad for it to bring it to the perfect height and to have a cooler surface to touch when the truck has been parked in the sun.

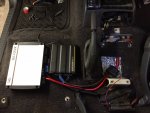
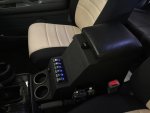
My amps showed up, and I have more parts to install them that should hopefully be showing up in the next week. I also got a rock light rocker switch and added it to the switch panel. Rock lights should also be in soon.
image.jpg
 

Summit Cruisers Jr

Well-known member
I haven't had much free time lately to work on the console and amps, but I managed to run all the power wires to the amps, ground wires, and speaker wires. The speaker wires were a PITA to get through the door passthroughs, and I immediately regretted not adding more door passthroughs when they were off for paint.

I went ahead with 4awg power/ground wire for the KX400.4 and CX300.1 amps. Might be a little overkill, but I know I won't have any issues. I have a Kicker 100 amp fuse and fuse block mounted on the battery, and a Kicker power distribution block underneath the console. Unfortunately, I ended up about 1-2ft short of red wire so I had to use the ground wire as the power wire for the CX300.1. No big deal just the color isn't ideal as the grounds are the same.
image.jpg
image.jpg

I also managed to get some insulfoil on the insides of the doors.
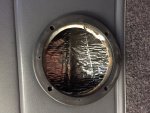
image.jpg
All I have left to finish the amp install is to plug in the RCA cables, solder in the remote power wire, and crimp the speaker connectors onto the wires in the doors.

-
My $5 rock lights from China showed up. 20 pods that are all really bright will be installed with NP1 adhesive later this week. I painted them black to help make them look stealthier.
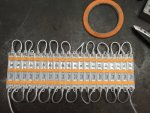
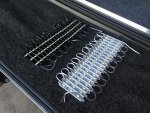
image.jpg
image.jpg
-
The console is nearing completion. The black piano hinge finally arrived and I cut it down and it's ready for install. I got a new handheld CB radio for my birthday which was a nice surprise since the one I've been using is most likely older than the Cruiser.
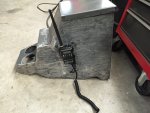
image.jpg


My last day of class is Tuesday so after Tuesday morning I will be diving in to complete all of these projects before leaving for Colorado on the 3rd.
-
Huge list of things to do in several days
-
Bike
Bump fork travel back up to 140mm
Flat pedals
Make sure it isn't skipping
Kenda nevegals tubeless on new wheels
Adjust rear brake? Seemed weak


Truck
Finish Receiver support
Fix broken steering column cover (again)
Replace dash speakers
Oil change
Detail/wax/wd40 in wheel wells
Finish amp/speaker wiring
Finish Center console
Switch panel wiring
Replace winch?
Fix driver's side fog light
Put on CVT
Trasharoo
Tool bag check for lug nut lock tool
Oil cap gasket
Find vacuum leak?
Speedo cable seal
Replace fuel strainer and/or filter?
Clean wet okoles (again)
Put wet okole back on driver's seat
Rewire LFs separate from high beams
Install new cb radio
Tune cb radio?
Put antenna back on
Board for sand boarding?
Paint bumper inserts black (again)
Build cooler slide (haha time)
Build swing out for yeti cooler (HA)
Pack
 
Last edited:

Summit Cruisers Jr

Well-known member
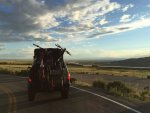
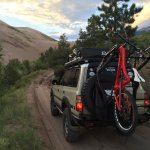
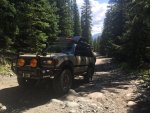
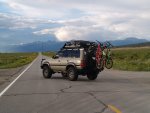
Console is 90% done. I've been road tripping the past couple days and it's awesome. I have even better photos on the big camera, but I don't have a way to get them off so here's some iPhone pics for now.

image.jpg

image.jpg

On the way to the Great National Sand Dunes.
image.jpg

image.jpg

image.jpg

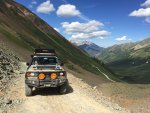
Tin Cup Pass

image.jpg

image.jpg

Now in Created Butte for several days of biking.
 
Last edited:

Summit Cruisers Jr

Well-known member
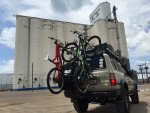
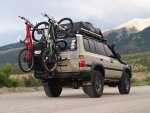
Just finished my annual Colorado trip. I drove roughly 2200 miles, and the truck averaged 11.42 MPGs compared to 10.67 MPGs last year with the stock gears, 33s, and stock injectors. The highest fuel mileage it achieved was 14.3 and the lowest was 9.1.

I only had two minor issues with the truck on the trip.

My A/C, which I recently recharged, started getting warm on the last couple days. I tried to find a leak with soap and water several weeks ago, but no luck.

The second issue was my driver's window. Also towards the end of my trip, my driver's window started popping on the way down. I am assuming it started breaking off the old teeth on the mechanism. I ended up having to wedge a door shim wrapped in tape to keep it from falling down. I have a new assembly on the way from Amazon.

All in all, the truck performed amazingly well, although I was wishing for a turbocharger or Toyota diesel. At one point it was even cruising at 80+ miles per hour (I may or may not have had a slight tailwind on a downhill stretch)! In the next week, I have to replace the winch, power wash the entire underside, and buff the scratches as well as clean the interior.

image.jpg

image.jpg

image.jpg

image.jpg

image.jpg

image.jpg

image.jpg

image.jpg

image.jpg
 

Summit Cruisers Jr

Well-known member
Love the center console man!

Thanks! It seriously might be my favorite mod I have ever done. It adds so much comfort on long drives.

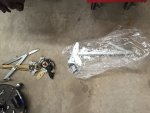
Towards the end of my Colorado trip, my driver's window started slowing down a little bit and then it just stopped working. It was just free spinning. To fix it, I just took out the old one and installed a new window track and motor from Doorman on Amazon for around $70. Fastest driver's window yet!
image.jpg


I also installed the new subwoofer amp today. Not a huge increase in bass, so a bigger sub might be in the works next.

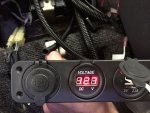
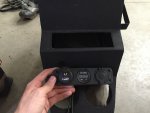
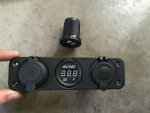
Back on to the console. I've looked at what seems like every folding cup holder design available on Amazon/eBay, but nothing quite fits the vibe of the metal console. Anyways, I was asked on IH8MUD to check if the USB outlets on the 12v/voltmeter/dual USB gang I bought on Amazon charged iPhones. When I plugged the lightning cable in, it didn't charge my iPhone. Only when I plugged a 12v to USB adapter into the 12v outlet did it charge. I got pretty bummed out because my return window expired, and the seller I bought it from on Amazon is nowhere to be seen. The voltmeter also reads out in red...not a blue that matches my switches.
image.jpg

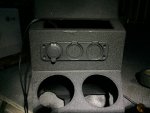
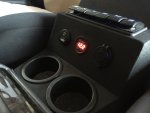
Then I started thinking about buying another for the blue voltmeter but I've never liked the idea of mounting it on the back of my console and having wires and space in the storage compartment. Then I went to the front of the console and looked at the USB/AUX port. It turns out it fits in this 3 gang of deals and I just have to take out the dual USB portion!
image.jpg
When I removed the outlet from my old console I accidentally ripped the cover off of the rubber ring that goes around the backside of the USB/AUX port. It turns out that it fits exactly into the holder!
image.jpg

I like the look of the holder, but since I drilled the hole in the middle of the right half of the console the plate with the three pieces isn't symmetrical.

I also have some touch up to do on the console because I accidentally rubbed the paint off in places when installing it before the trip while it was still curing.
image.jpg

I tested my friend's Galaxy to see if it would charge and it worked. Then for some reason my iPhone started charging after his was plugged in. I went ahead and put them all in individually and put the 12v outlet in the side. It sits right in front of the parking brake so that should be a perfect place to plug in my cb radio.
image.jpg

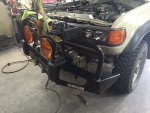
Spent all morning cutting the welds and fighting the bolts that holder on my bumper in order to finally replace the broken winch with another one. Having the bumper off makes me kind of want a lower profile bumper like the Dissent ones made for the 100 series, but oh well.
image.jpg
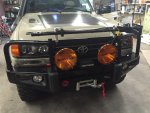
New winch is in! Also cleaned all the grille slats while the bumper and lights were out of the way. I then cleaned my air horns as some oil from my compressor had entered the horns messing with their sound. I also hopefully fixed the driver's side fog light in my ironman bumper. It turns on and off when it rattles and usually stays off, and I tightened up everything on the inside.
image.jpg
 
Last edited:

Summit Cruisers Jr

Well-known member
Love all the mods., subbed.

Well planned out rig! Subscribed for future updates.

Thanks you guys!

Part number for the dorman kit off amazon?

Driver's front is a 741-796

Here's the link
https://www.amazon.com/gp/aw/d/B003...i=AC_SX110_SY165_QL70&keywords=dorman+741-796

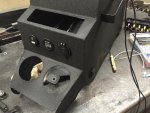
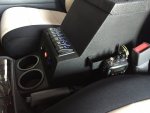
My phone holder and cupholders for the rear should be in sometime next week, but the rear heater vents are drilled out and the voltmeter/12v outlet, and dual USB outlet are installed. I ended up completely repainting it to fix a couple scratches I caused when installing it when the paint wasn't fully cured.
image.jpg
image.jpg
Kind of hard to see, but the 12v outlet resides just under the parking brake handle when it is folded down. Now all my cb wires are contained underneath my seat and not strung out across my dash scratching things.
image.jpg
 
Last edited:

tlin

Adventurer
We spent 10 hours yesterday installing new Osidetiger 4 hole fuel injectors after an injector started leaking. The install went pretty good until tightening the intake back down. Using a torque wrench at the required spec in the FSM, one tired bolt just broke before it was tight. I would recommend buying new bolts if you are replacing injectors/gaskets to save a lot of headache.

The truck seems to start up smoother and quicker, and also has a little bit better throttle response initially. It also seems to be smoother while idling. Haven't driven it much since the install, but hopefully fuel mileage will stay the same, if not improve.
Gaskets from Cruiserdan on Ih8mud
View attachment 277977
This was the most this engine has ever been apart.
View attachment 277978
New injector on the left and the old OEM one on the right.
View attachment 277979
4 holes vs 1 hole
View attachment 277980
New injectors lined up on the cleaned fuel rail. It was nice having so much apart. Got to clean a lot of things that had also been out of reach.
View attachment 277981

Since the EGR system had been deactivated years ago, we also planned to remove that entire mess, but couldn't find plugs and caps locally. That stuff will have to stay for a little while longer.

Looks like you've had the new injectors for ~5 months (sounds like at least a couple of lengthy drives with them in). There are quite a few folks who are "go OEM or go bust"; that said, how did you come across the Osidetiger's? I'm not an injector-guru, perhaps they were an obvious choice.

Had the leak not shown up, would replacing these have been on your radar at all? Nothing is visibly wrong with mine, no noticeable hesitation/sputtering but, as you know, the need to get a little more performance out of the 3FE is omnipresent. I brought the possibility of balancing or replacing mine up once with a local mechanic (very respected) and got quite the "if it ain't broke don't fix it" response (and I do respect his opinion).

Thx in advance - long live the '92!

--t
 

Summit Cruisers Jr

Well-known member
Looks like you've had the new injectors for ~5 months (sounds like at least a couple of lengthy drives with them in). There are quite a few folks who are "go OEM or go bust"; that said, how did you come across the Osidetiger's? I'm not an injector-guru, perhaps they were an obvious choice.

Had the leak not shown up, would replacing these have been on your radar at all? Nothing is visibly wrong with mine, no noticeable hesitation/sputtering but, as you know, the need to get a little more performance out of the 3FE is omnipresent. I brought the possibility of balancing or replacing mine up once with a local mechanic (very respected) and got quite the "if it ain't broke don't fix it" response (and I do respect his opinion).

Thx in advance - long live the '92!

--t

My dad had met a guy with an FJ62 one day locally and they started talking and ended up on the subject of injectors. That guy had put them in his 62 and thought they gave him a little better power higher in the RPMs due to the better spray of 4 holes vs 1 hole of the OEM injectors. In addition to the performance gains, the price was drastically less than OEM. Replacing them would not have even been something I would have considered had there not been a problem. I would say it was probably one of the biggest jobs on the engine second to a head gasket replacement; however, this was the most my motor had ever been apart so I guess there could be bigger projects, I just haven't had issues. It is kind of like those people who replace head gaskets on 1FZs who do it as preventative maintenance, it will more than likely help, but chances are you will be good for a long time with what you have.

With my trip, I did 2100 miles this year compared to two trips totaling about 4500 miles last year. This year, my MPGs were up roughly 10% with the new injectors, gears, and the heavier 35s. I am extremely happy how it performed in the mountains. I am definitely glad I did not go with 5.29s.
 

tlin

Adventurer
^^ Got it, thx.

Another, the Dorman window assembly --> your dad (a while back) responded to a query I had on MUD concerning the original window motor rebuild. In short, I was inquiring about how to keep current constant when trying to lower/raise all four windows at once (current setups reduce current across however many windows are being operated at once). Sounded like two relays per window were going to be required which didn't entirely make sense to me so......if you ever decide to pursue this, please be sure to (like you always do) post some details and pics.

thx again...
 

Forum statistics

Threads
188,392
Messages
2,906,578
Members
230,176
Latest member
Arcadia1415
Top