Trailer wiring...
Hello everyone,
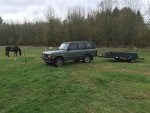
It has been a long time since I posted the status of my Rover, so here it goes. It is running fine, I had a couple small issues with it over this last year, nothing major. I had a leak in one of my power steering hoses, I took it out and had it rebuilt for $60 by a local hydraulic hose business, put it back in, and it worked perfectly. The second thing was, my left rear window decided to go on strike while in the down position, it took me about 10 minutes to fix what ended up being a faulty rear window switch (the one in the door itself, not the center console). I just borrowed the switch from the other door to get it to roll back up, and viola, "crisis" averted. Interesting that the back windows won't roll up or down if one of the two switch (center console and door) is not in fully working order, I am glad I learned about the trick on a day when it was not raining. Other than those two small issues, the Rover has been working well.
Now, to the things I have done to it. Other than doing the routine maintenance, and those couple fixes, I manage to get some time to do the trailer wiring a few months ago. It is not 100% complete but it is 90% done. I have to run a wire that signals the trailer's "trailer brakes". Although Land Rover did leave a connector for a trailer plug option, it did leave a lot to be desired (as did their wiring diagrams and instructions).
I do a lot of research before doing any work on/modifications to my Rover, and it so happens that I was lucky enough to find this fellows page over on Discoweb showing a trailer wiring diagram for a Discovery trailer connector to a "Uhaul taillight 3 to 2 wire converter".
Here is the link:
http://www.discoweb.org/uhaul/index.htm it helped me out greatly.
I chose to go with the Uhaul converter because I decided I was not going to pay $90 for a LR genuine converter. I not only could get the Uhaul converter for $19, but I was going to have to cut the wiring harness anyway, because I want the ability to have a 7 pin round connector plug too. I also wanted it to be neat and clean, rather than hanging down like most of the 4 pin connectors do.
I bought these:
7 pin/4 pin mounted socket
http://www.amazon.com/gp/product/B001NYYREC?psc=1&redirect=true&ref_=oh_aui_search_detailpage
Wiring harness for the mounted socket
http://www.amazon.com/Hopkins-40985...xgy_263_2?ie=UTF8&refRID=06HVEX6RNGBJ6NZJA2RR
Uhaul 3 to 2 converter (couldn't get it online, had to buy it at the store)
http://www.uhaul.com/MovingSupplies/category/Tail-Light-Converter?id=788
Mounting the trailer socket was easy, I did have to bend the bracket a bit to get the socket situated so it would look stock rather than out of place (I think I achieved that quite well, if I don't say so myself). the trailer socket wiring harness was then fed through the bumper over into the right rear tail light. All of that was easy, the "fun" began when I started doing the actual wiring itself.
For those of you who have not heard this before I will try to help you with the..."experience"...I chalked up during this little project. In all of my initial research, I never came across any information that said I couldn't just wire the trailer socket straight to the Rover's trailer connector. I thought "this is going to be easy, might be a couple little bumps in the road while trying to figure out which wire is supposed to do a particular feature, but all in all it shouldn't be too bad...at most it is a couple hour project). I was wrong....
Here is the thing, I did not know that when a vehicle has a separate taillight and turn signal, they can't really be wired up to either of those connectors (4pin or 7pin) very well. I got it semi legal (meaning I had turn signals and brakes but it was a "one or the other, not both" situation and that won't really due. I am not sure how I missed this glaring fault in my plans when I did all of my research, but there you have it...stymied by the Land Rover wiring once again. Nothing to do but admit temporary defeat, so I tucked my tail firmly between my legs, called it a night, and retreated back into the house so I could do a bit more research.
That night I found that wonderful link on Discoweb, (
http://www.discoweb.org/uhaul/index.htm) and the next morning armed with this "new" information, I went and bought the Uhaul converter. The "taillight 3 to 2 converter" in this case made by Uhaul, takes those 3 pesky wires that control the night-time running lights, brake lights, and turn signals, then combines them into a nice 2 wire package that both the socket wiring and trailer's wiring will like.
At this point I am thinking "Right, I have got this handled, i have got the right part, and a wiring diagram, its in the bag now". I was wrong...again....
Turns out LR must have a sense of humor, because they put more wires back there then was strictly necessary for what I had to do, sooo, out came to Big Book O'Land Rover (the book in which i spend more time looking for the right page and diagram, than I actually do working on the darn project). After some choice words, head scratching, and many MANY pages of looking I finally found SOME information not a lot, but some information is better than none. The rest I had to actually test what wire did what, with my volt meter. I know some of you out there are going to be looking at your computer screen, thinking "Oh that is easy", then list off exactly which wire does what, but unfortunately you and I were not in contact that day so this mind-numbing and patience fraying way is how I had to do it.
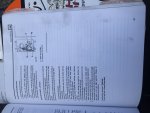
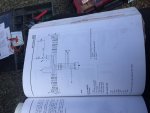
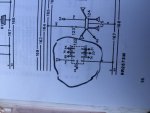
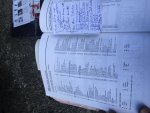
In this picture you can see the sum of my notes for what each wire for the Rover does and what each wire for the trailer socket does.
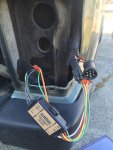
Here is the Uhaul converter wired in along with a few extra bits wired in as well. I still need to figure out how to get signal for the trailer brakes. If anyone out there has any advice I would really appreciate it.
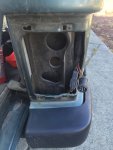
All neatly tucked away.
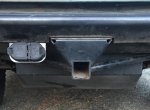
I think it looks pretty close to a "factory look". I do realize that I need to weld a plate onto the bottom of the hitch for the safety chains to hook up to, but that will come in the next few weeks.
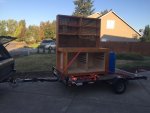
No time to hang around for too long to admire the handy work, straight to work hauling one of my many workbenches to the new shop.
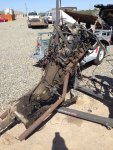
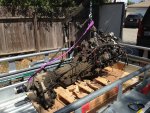
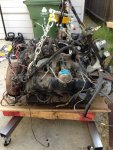
I will have to post the list of stuff on the 6.2 swap tomorrow or Tuesday because its getting fairly late and I need some sleep. I hope this post helps to tide you all over until then.
Have a good one,
Jon

