The Woodsy Bit: Adventures of an '88 Phoenix

subterran

Adventurer
Stage 7: Repaint kitchen, install new cabinet doors

Old:
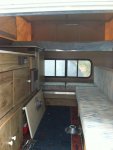
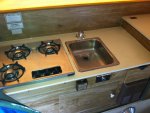
inside_old.JPGsink-stove-old.JPG

The cabinet layout in this camper is functional enough, I suppose. Most of the cabinet doors are made of thin panel board in plastic tracks that slide open and closed. The bigger ones work OK, but the smaller ones stick pretty bad. I tried lubricating them with petroleum jelly, but it made little difference. It becomes apparent that I'll need to tear them out and replace them completely. While I'm at it, I'll paint the now-doorless cabinets a light grey - a more 'manly' color that certainly looks better than the wood paneling. I also paint a couple of coats on the wooden folding top supports, both to strengthen them and hide some water staining left over from the leaks. Where there was water staining, the supports had started to flake some of the wood. This was exacerbated by my cleaning activities. They seem fine structurally though, so painting them seemed reasonable. It has indeed done wonders visually, and cured the flaking. The inside has gone from 'lived in' to livable.

I bought some 'cabinet grade' 3/8 birch plywood at Lowes, and my neighbor and I routed the edges for a finished look. I then putty filled any voids left in the routed edges and hand sanded them smooth. The plywood sure had alot of voids for 'cabinet grade'... I painted them a charcoal grey, and used piano hinges to re-mount them. I changed the door sizes in some cases to make better access to the cabinet space. I was able to mount all the doors but one with the hinges concealed. I went back and forth about handles, and decided finally that I didn't want anything projecting into the walking area to get snagged on, so rather than conventional handles or pulls, I am going to just use some webbing. Light, functional, simple and durable. Perfect fit. I used double-magnets to keep the doors fast, except on the single drawer, where I reused the existing pinch latch. I want to paint it black to match better than the 'hammered copper' it is now, and while I'm at it, I'll paint the furnace cover with black high-temp paint.

NEW:
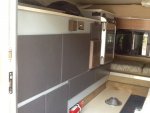
Cabinets_painted.jpg
 

tanglefoot

ExPoseur
Ooh--looks really nice!

Does your camper have those swing-out panels to turn the lower couch into a bed too? I have those but each panel is in two sections--I'm still trying to figure out what the use would be for that.

Have you found a good place to store the table?
 

DAV!D

Adventurer
Hey, question for you about this topper. I came across a old 4wheel pop up that looks very, very close to yours. The inside set up looks near identical. Ironically I also have a black Tacoma that I'd use it on. I haven't been able to see it in person yet, but I'm curious, on the upper bed, do you sleep front to back, or is it wide enough to sleep side to side?
 

subterran

Adventurer
@ Tanglefoot: Thanks, I think it looks much better myself! I like your rig very much - it looks like the camper is about the same size as mine. It would be dreamy if it was walk-through...Yes, mine does have 2 'wings' that fold out to make the sofa into a lower bed. It's nice if you dont want to pop up, too. My sofa seat is 2 part, with a compartment under each, but the 'backrest' is all one long peice. I have started leaving the table at home, as we don't use it. I also am hatching an evil plan to come up with a more compact and mobile interior / exterior table setup. Maybe I can get it to stow in the newfound 'fridgespace'. Hmmm.

@David: This camper sleeps 'east-west' as they say, or crosswise driver side to passenger side. I am 6'1' and I fit perfectly in the bed, though ironically I cant quite stand up in the popup part. It's good enough though. My wife and I sleep side by side, but we sleep in a small bed at home and are used to it. I find that mummy sleeping bags also help to confine us to our little spaces.

@Rangerdog: Kinda funny, we got ours to stay warm in the cold! We're out camping, hiking, skiing, paddling or something as much as we can during the winter.
 

rangerdogg

Adventurer
Ya Mines away because works busy and winter plowing soon so had to move my toys around. Im hopeing next year to use more. I will be watching your build.Happy camping
 

subterran

Adventurer
Time for an update!

Phase 8: The Awning, and it's fancy bag-o-tricks

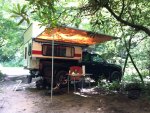
I have already played the awning game with my other camper. It has a Carefree of Colorado 'Campfire' model on it. I mention it because it would work well on this popup, too, but I have a couple of issues with it. It has a hard time with zipping it closed. The fabric gets caught in the zipper, and it's always a fight getting it shut. It also has a rail mounting system that makes it difficult to remove. Good if you never want to remove it, but bad it you want to use it on another truck or camper. My other gripe is that the storage bag is not waterproof - which means that the awning stays wet, and that means mold. Every so often I have to unroll it to dry. I also hit it with bleach cleaner a few times a year to keep it from looking too grimy. Anyway - that's another camper...

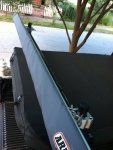
That brings us to my pop-up solution. I decided to go with an ARB 2500 (8.5') unit, after seeing online how the mounts work. I was thinking it would be pretty easy to solve my mounting challenges, and it would be able to work on multiple vehicles / configurations too.

awning in use.jpg

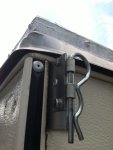
The mounting issue was that on my popup, if I mount it to the side, I'll have to be able to clear the pop-top buckles. I also needed some type of quick release system.

awning gap.JPG

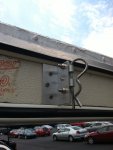
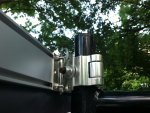
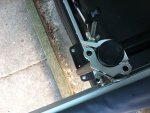
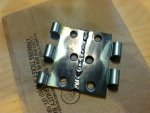
I decided to go with 2.5" door hinges mounted on aluminum angle. I replaced the knock-out pin with a removeable hitch pin. Now when I need to pop the camper up, I can pull one pin, swing the awning out a few inches enough to clear the buckle, then put it back and re-insert the pin. Repeat on the other end. This also makes the awning easy to remove. It so happens that the 2.5" hinges existing pre-drilled holes were a perfect fit spacing-wise to the rail mounts for the ARB awning, so no drilling!

awning qr front.JPGawning QR rear.JPG

I also have another set of hinges bolted to the ARB rail for use on my truck when the camper is off, canoe rack is on. I have a set of heavy aluminum lighting truss clamps that fit my truck rack, also fitted with door hinges. I can just mount the awning right up to the clamps, insert the pins and away I go. When I get where I'm going to camp, the awning being on the side is silly, since we hang out and cook off of the tailgate. I can move the clamps across the back, and move the awning to shade the tailgate.

awning on truck.jpgawning across back.jpg
awning clamp2.JPGawning clamp top.JPG
awning clamp open.jpgawning on truck back.JPG
 

subterran

Adventurer
All this quick-mounting rigging also has one last nifty side effect: Since many times you would want the awning across the back of the camper instead of the side, I have a length adaptor fabricated from another hinge that allows just enough space to rotate the whole awning arond to the side where I can mount it to a folding stand that I bring. Now I can deploy the awning sideways over the camper door. Sweet.

awning qr extender.jpgawning extended.JPG

I have also found that the speaker stand makes a swell lantern stand, too. You can put the lantern wherever you need it.

Parts list:
ARB 2500 Awning
6" x 1 1/2" Aluminum Angle, cut into (2) 3" pieces
(6) 2 1/2" Door Hinges with "knock out" pin
(6) Hitch Pins (same type to lock the pins for a 2" reciever hitch - exactly the correct diameter for the hinges)
(2) Aluminum Lighting Truss Clamp (fits truck rack)
(1) Plastic Lighting Truss Clamp (fits speaker stand "leg")
(1) Speaker Stand (folding)
 
Last edited:

subterran

Adventurer
More bad photos!
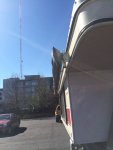
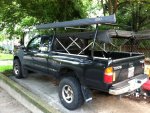
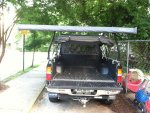
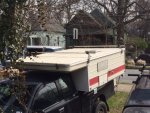
This weekend I put on my roof rack. I really didnt want to punch holes in the roof, but no matter how I tried I couldnt come up with a better way to carry my canoe. I know I'll have to take the damn thing off every time I want to pop the top, and that sucks. But all things considered, it's the best and most efficent way I can devise.
image.jpgimage.jpg
I got a swagman rack kit for a pop up trailer on clearance. It included a pair of steel crossbars, but the ones it came with were crazy heavy, about 10 pounds each! There was no way I was going to try to wrassle that when trying to get this thing popped, so I found a couple of pieces of square aluminum tube 1"x1"x7', and substituted those. Much better: about 3-4 lbs. each. The swagman ends came with nice rubber feet to seal the penetration, and a backing plate for the inside to it won't pull through. I carefully measured to make sure the top would close without punching holes in the fabric or interfering. I have not put the boat up yet, but it seems quite solid so I'm sure it will work perfectly. It's just as solid as my Yakima on the other rig. It's 7'4" clearance now. We have alot of parking decks in our everyday lives around here, and most are 7'6", so that will work I hope.. High density living, right. At least they feed us pretty good.
 
Last edited:

LuckyDan

Adventurer
First of all let my type, "nice camper". I'm enjoying your referb thread.

Second, let me suggest the following link to assist with lifting the roof while loaded:

http://www.wanderthewest.com/forum/topic/2974-roof-lifting-helper-shocks-thingys/

While I know FWC and Phoenix use a different lifting system to raise the roof, I'd guess the thingy's should work with both. I should add that I have not done this to my Grandby yet, but have seen it on enough others to confirm the idea works. Just a thought.
 

subterran

Adventurer
LuckyDan & mangymarmot, thanks, I'm glad you're enjoying this edition of 'this 'ol camper. We are getting plenty of use out of it, and it makes camping very pleasant and convienient. I appreciate your post - I have seen that before and considered going that route, but frankly I'm a little afraid. After the roof rack install, I am sure that the roof is wooden (aluminum skin, thin plywood, sparse wooden frame with blue insulation board, and plastic headliner to be exact) i wouldnt want to stand up there, for instance. I don't know if it could handle the concentrated stress of the lift system. It looks like it would put some evil forces in some places. I may change my mind, but I'll have to get my head around it better first! Also, while this is was made by the company that would later become Phoenix, it is almost exactly like a FWC, except all wooden construction. As I understand it, the original Phoenix guy was one of the original designers of FWC. Today, the two are more divergent. Mine looks just like a FWC, and the lift system is identical. This is a photo of what you're talking about, I think:

image.jpg
 
Last edited:
No, thank you. Everyone including myself love these types of posts! Modifying equipment and custom upgrades give everyone ideas for their personal setups. Hopefully I'll be posting soon about my rig. Currently living part time in my f450 and slide in camper. Will be down sizing once we are back in the states to something more mobile and off-road friendly.
 

subterran

Adventurer
A New Door:

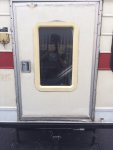
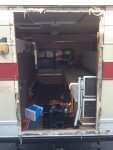
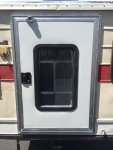
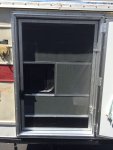
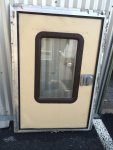
So, this door has gotten old and tired. I moved the hinges to combat sag, and I have shimmed it and slapped screws in it where it was falling apart, caulked it to keep water out, etc, etc ad nauseum. A new door would just work so much better - so I called Emmet door, and spoke with Kathleen, and I had them build me a new door. This one has a screen door, where my old one did not. I was able to rip out the old door, scrape off the old butyl seal with a plastic putty knife (no scratching the siding), and clean off the residue with mineral spirits, which did a great job of cutting the old butyl junk. I put on 2 layers of new 1/8 x 3/4 butyl sealant, and fitted the new door frame into the hole. Fits perfect. Slapped in some screws, moved the curtains and doorstop over. BAM! New door. It closes with a gentle nudge now. The color will blend in after a summer of banging down dirt roads, I'm sure. At least the Window frames match back there now.
DOOR_1.JPGDOOR-2.JPG
--------------Old Door-----------------------------Empty Hole

door-3.JPGdoor-4.JPG
---------------New Door--------------------------Screen Only

door-5.JPG
Anybody want the tired old door? The window is good, and you might be able to rebuild it. The hole size is 28 x 42. I have the key to the lock, too. It's boxed up and ready to ship. $20.00, and you pay UPS...
 
Last edited:

Forum statistics

Threads
188,293
Messages
2,905,026
Members
229,961
Latest member
bdpkauai
Top