GeoTracker90
Adventurer
I went out last night and made the roof rack bars but forgot to take the camera.
Mike
Mike
GeoTracker90 said:I went out last night and made the roof rack bars but forgot to take the camera.
Mike
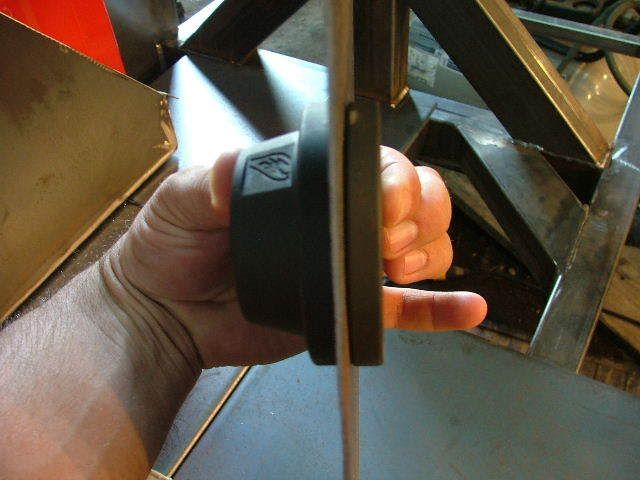
I have been enjoying the build! stumptaco said:Edit #1: I think someone else asked also, but do you just use a shop press with the dimple dies? What kind of tonnage (not even sure if this is a word) do you need? Got a good line on a place that has them for a decent price?
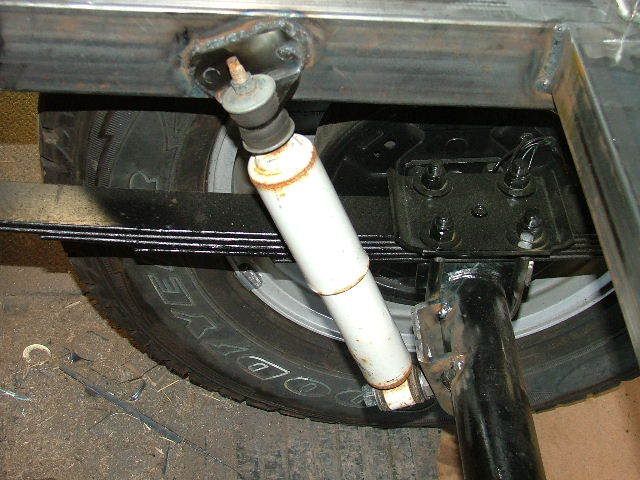
Am I the only that had a ****** moment when seeing the shock mounted this way?GeoTracker90 said:
Frame
-------------------------
        /   <-- Upper shockmount
         \
          \
           \
            \
/O <-- AxleM.Bas said:Am I the only that had a ****** moment when seeing the shock mounted this way?
I'm not an expert in fabrication, mechanics and stuff....
My guess would be that one of your shock mounts is going to break/bend, really really fast.
When the axle moves up the shock is going to rotate counter clockwise a bit, and I don't think the lower shock mount would allow the shock to do that and therefor the upper or lower mount will either bend or break. Or something else is going to fail.
Some ASCI art to show what I mean:
As you can see when the Axle (O) moves up the shock will be compressed but therefor will also rotate slightly counter clockwise, something is going to break when mounted this way. Rotate the shock 90degrees so that the eye of the shock is parallel to the axle, that way the shock can rotate counter clockwise.Code:Frame ------------------------- / <-- Upper shockmount \ \ \ \ /O <-- Axle
But as I said, I'm not an expert in mechanics and fabrication.
Did I mention that something is going to break?
M.Bas said:I personally think it is better to mount them the way I would mount them and not rely on the rubbers to compensate.
BTW, how much travel does the axle have?
Since you mounted the shock when the axle was at its lowest point and therefore will maximise the stress on the rubbers when the axle is at its highest point. Might have been a better idea to mount them when the axle was at normal hight. That way you had stress on the rubbers both ways, now you have maximum stress when going up and no stress when fully dropped. That way you probably had some stress both ways.
But as I said in my previous post, all this is just based on my common sense.

opie said:Mike, I feel your pain in the "details" department. The amount of prep work that needs to be done for just a little bit of welding, comparatively, alone makes me tired.
Its looking killer.
Also, not sure it you are aware of this, if you are using one of those auto darkening hoods there is the whatever thousandth of a second that it takes for the lens to darken that the arc light is getting to your eyes. If you are doing alot of stop start welding in any given time period, its best to use a hood with a fixed shade. I have one of the autos, and I notice after tacking down all my expanded metal everything was bright for awhile.
GeoTracker90 said:p.s. 10 bonus points to the soul that can devine the hidden movie quote in the reply above.
IH8RDS said:Pirates of the Caribbean :088: Sweet, now I am at -246 cool points.
stumptaco said:Not sure if its worth hurting your eyesight, but the trailer looks freekin awesome. The Gillz should be proud!
~James