Tire Carrier Hinges - again

Which tire carrier hinge would you choose?

  • AJ's Offroad Armor - double shear design

    Votes: 19 21.1%
  • Iron Pig's Beefy bronze bushing design

    Votes: 17 18.9%
  • Comp 4x4 Sleeve design

    Votes: 16 17.8%
  • 4x4Labs 1.75 spindle design

    Votes: 14 15.6%
  • Other (EMS, Rockstomper, etc)

    Votes: 24 26.7%

  • Total voters
    90

ScoutII

Adventurer
That's going to break

Thanks for the words of encouragement:wings:

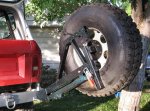
Edit. I made the cable so it could piviot and was surprised to see it spin. Thanks for the tip. The hoist is just tacked in place, and since the cable is rubbing on the lift I will move it out an inch or two to help with that. Plus I have some 1/2" UHMW and will install a piece inside the end of the tube to protect the cable.
Update: Got some time last night to work on it. added the UHMW and move the hoist out a bit more. I need to wait for more parts to arrive so I can continue the process.
 

Attachments

  • scout 121a.jpg
    scout 121a.jpg
    83.5 KB · Views: 201
  • scout 126a.jpg
    scout 126a.jpg
    124.9 KB · Views: 225
Last edited:

ScoutII

Adventurer
Not a 100%, but getting close. Still need to add the high lift jack, maybe a few trim parts here and there.:victory:

Here it is no powder coat, chrome or paint.:coffeedrink:


[ame="http://www.youtube.com/watch?v=HyG9F2BrlXc"]YouTube- Tire Carrier Hoist[/ame]
 
Last edited:

Herbie

Rendezvous Conspirator
Nice!

Is your crank just a bar? Looks like you could make raising/lowering easier if you had a handle. Even something as simple as a hole in the end of the bar and then a dowel with a pin in it, just stick it in while raising/lowering and keep it in the tool box or glove box the rest of the time.
 

ScoutII

Adventurer
The handle does need a knob thats for sure, it is just a small flat bar.
If the bar was a bit longer and knob is added then it would be a lot easier.
But your right you don't want something to big to store. Vise grips will work in a pinch. I still have a few things to add like highlift and shovel mounts. The was just to show it works at this point. Need to upgrade to Imovie 09 so I can fast forward through parts.

The nut in the middle is for the adjustable tire mount. This allows me to tighten the tire up to the carrier so is more stable when off road. I ended up not adding the bolt to tighten the two half's and instead just added some weld to make the receiver tube fit a bit tighter. Most tire carriers have something or they add some rubber bump stops to help keep the tire from wobbling.
 

Attachments

  • Scout bumper build 22b.jpg
    Scout bumper build 22b.jpg
    65.2 KB · Views: 263
  • Scout bumper build 34.jpg
    Scout bumper build 34.jpg
    90.4 KB · Views: 217

ScoutII

Adventurer
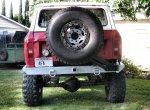
Couple final pic's now that it's painted. No time for the high lift and shove mount as we leave Friday. Those will have to be added later. I can see over the tire so I still have the full view out the window. It's less, but could never see much before.

Edit... Added the mud flaps and high lift mount before the expedition that starts in 2 days. :Wow1:
 

Attachments

  • Scout bumper build 35.jpg
    Scout bumper build 35.jpg
    149.6 KB · Views: 275
  • Scout bumper build 36.jpg
    Scout bumper build 36.jpg
    132.8 KB · Views: 273
  • Scout bumper build 37.jpg
    Scout bumper build 37.jpg
    143.7 KB · Views: 425
  • Scout bumper build 40.jpg
    Scout bumper build 40.jpg
    73.6 KB · Views: 242
  • Scout bumper build 39.jpg
    Scout bumper build 39.jpg
    68.4 KB · Views: 255
  • Scout bumper build 38.jpg
    Scout bumper build 38.jpg
    77.7 KB · Views: 278
  • Scout bumper build 41.jpg
    Scout bumper build 41.jpg
    95.8 KB · Views: 236
  • Scout bumper build 42.jpg
    Scout bumper build 42.jpg
    108.5 KB · Views: 256
Last edited:

ScoutII

Adventurer
Thursday night I had time to get the highlift and shovel mounted. we made our trip and everything worked out great.
 

Attachments

  • Scout bumper build 43.jpg
    Scout bumper build 43.jpg
    128.3 KB · Views: 153
  • tirecarrier.jpg
    tirecarrier.jpg
    137.8 KB · Views: 180
Just wanted to point out that the 4x4Labs website is up and running. I could not be happier with this setup after nearly one year on the road and daily use and abuse...
33993_414456652205_62931757205_4358578_5774577_n.jpg

6012_115860712205_62931757205_2184180_2748564_n.jpg

6012_123821792205_62931757205_2285010_5323460_n.jpg

6012_123821797205_62931757205_2285011_6225433_n.jpg

6012_123821812205_62931757205_2285014_4331125_n.jpg

In the interested of full disclosure I must say that 4X4Labs is one of our sponsors... not monetary just a discount on our 4X4Labs products.
 

ScoutII

Adventurer
That is a very nice hinge that 4x4labs is making! Talk about some beef:drool: About time vendors dropped the 1,000lbs trailer spindle. But I know Dan and he is all about making beefy parts. Wonder if they are going to offer a double shear hinge like 4x4 competition? To me that would take their hinge into world of extreme 4x4, where guys that have huge tire can carry them and not worry. I sent him a link to my vid but never heard back:coffee: Oh well.

[ame="http://www.youtube.com/watch?v=VZoZ0SLCoY0"]YouTube- Competition 4x4 Double Shear Tire Carrier Hinge[/ame]


The Snow was at about 8,000, off of hwy 50 Kirkwood reported 35-45 feet of snow this year, so I think it will be on the tops of the mountains all summer long. That snow was melting fast and will be gone in a couple weeks for sure.
 

alaskaboy

Observer
For those of us who engineeringly challenged, could you compare and contrast the single/double shear terminology?

Mighty grateful.
 

ScoutII

Adventurer
For those of us who engineeringly challenged, could you compare and contrast the single/double shear terminology?

Mighty grateful.

It's just like is sounds. In this case are you holding the item by just one end? Or are you holding the item by both ends?

cut and paste from some site.
Definition: An advantageous, balanced shear relationship which eliminates bending, prying and tension loads on shear attachments while distributing an applied shear load over two shear planes in each attachment.
Definition Copyright ©1989 CRC Press LLC

Wow thats a mouthful, but think of it this way if your were holding onto the end of a broom handle how much force does it take for somebody on the other end to push broom down. Not much as the force is very great created by the lever arm action. Now hold the broom by both ends and somebody pushing down on the end the forces are not so great that you can hold a lot more. The current "engineering" theme is just make it bigger.
They went from 1" 1,000lbs trailer spindles to 1 3/4" 3,500lbs trailer spindle.
Side note: Welding on a trailer spindle is tricky as it needs to cool down very slowly over a couple hours.
 
Last edited:

Bad Karma

Adventurer
figure I'd join in.

I voted for the Comp 4x4 hinge. since I'm the only one who voted for it, I'll explain why I picked it over the other designs. (it took me a LONG time to decide on this hinge.)

first off, I'm not a fan of the bronze bushing type hinges. I built a bronze bushing hinge for my first tire carrier on my old 2003 TJ. It had over 150,000km on it before i sold it. I had to replace the bushings a few times because they ovaled out which allowed the tire carrier to move ALOT...

I picked the Comp 4x4 HD hinge. 1750lbs capacity. (whatever, capacity ratings on carrier hinges are useless.)
what really got my attention with this hinge is the sleeve. I really like the fact that I dont have to weld the spindle. I was however dissapointed with the Comp4x4 design, the spindle is held in the sleeve by a tiny little pin. This little pin is "supposed" to hold the spindle from moving up, down and side to side. yeah, I dont think so. so i did a couple mods to it for better strength and piece of mind.

I real liked the sleeve design, not only for strength and not having to weld the spindle but because I could easily remove the whole tire carrier without have to dismantle the hinge.

first, I got a large washer. Installed the spindle, put the pin in and then welded the large washer to the inside of the sleeve. This makes for a solid base for the spindle to rest on when the pin isn't installed.

second, I am going to be replacing the pin with a set screw. Since I welded the washer in the sleeve, I no longer need anything to hold the spindle from moving down. The set screw will be easier to install and remove than this pin.

third, I will be drilling and tapping the bottom of the spindle. This will allow me to put a bolt in through the washer i welded into the sleeve, to eliminate the spindle coming out of the sleeve in the event of a roll over.

That takes care of the sleeve to spindle issues I had.

Now, I know Double Shear is the way to go. Unfortunately you cant really go double shear with a trailer bearing type hinge if you want to keep the crap out of the bearing.

I am planning on machining a cap that not only protects and seals the bearings but also has provision for a double shear mount.

I am still in the build stage of the tire carrier and most of my design is still in my head. I have installed the sleeve and washer into my bumper.
I'll start a build thread when i get started on the rest.
 

ntsqd

Heretic Car Camper
snipped....

Now, I know Double Shear is the way to go. Unfortunately you cant really go double shear with a trailer bearing type hinge if you want to keep the crap out of the bearing.
Yes, you can though it isn't simple. Use the same lip seal as on the bottom on the top. Make a sleeve with that seal's design ID surface for an OD. Give it a close fit on the spindle, particularly if you add an o-ring groove to the ID of the sleeve to seal it to the spindle, and have a small relief where it pushes on the top bearing's inner race. Capture a removable plate where the sleeve protrudes above the seal with the spindle nut.
 

Forum statistics

Threads
188,395
Messages
2,904,136
Members
230,274
Latest member
mbauerus1
Top