You are using an out of date browser. It may not display this or other websites correctly.
You should upgrade or use an alternative browser.
You should upgrade or use an alternative browser.
Tongue Box Mounting
- Thread starter DiscoCO
- Start date
Mark Harley
Expedition Leader
Through the base with 3/8" bolts threaded into tapped holes in the frame.
workingonit71
Aspirantes ad Adventure
sliding platform mounted tonguebox/easy access to spare tire
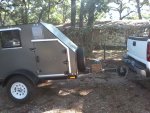
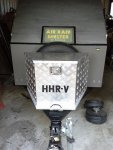
At first, I built my trailer without provision for a tonguebox. When I added one to the tongue, it was just to transfer the weight of the battery forward from its previous home in the galley/rear storage (I needed more tongue weight; the trailer had a pronounced bias to the rear). It was just a diamond plate steel toolbox, and I built outriggers out of galvanized angle (the type with pre-punched holes) to stabilize it on the single beam tongue (3"x3"x.1875). It wasn't exactly right to fit the design in my mind's eye, and soon I realized it was also insufficient for storage needs/move more weight forward. I located an aluminum tonguebox that was just about the right shape and size to fit on my tongue w/outriggers., but was too deep (front-to-back) to be able to access my spare (mounted exactly where I wanted it, no change possible) and still be able to use the tongu jack. Solution: I fabricated a platform to mount the box on, mounted the platform to "boat seat sliders" (6" movement fore-aft), which I mounted to a base of treated lumber I made to fit the vee-shape of the outrigger angle stock. I attached casters under the sliding platform to stabilize the box/platform. This way, the tonguebox is normally locked in place just in front of the spare (prevents removal of the chained spare), and the jack is clear to function. If the spare is needed, I unlock the platform, slide it forward 5"-6", and unlock/remove the spare. After all the gear (including battery) was transferred to the larger box, I attained the proper weight balance for the trailer, and as tested, the sliding platform is stable when on the road. If I ever take the trailer off-road, I'll add drawlatches to cinch it down tighter.
At first, I built my trailer without provision for a tonguebox. When I added one to the tongue, it was just to transfer the weight of the battery forward from its previous home in the galley/rear storage (I needed more tongue weight; the trailer had a pronounced bias to the rear). It was just a diamond plate steel toolbox, and I built outriggers out of galvanized angle (the type with pre-punched holes) to stabilize it on the single beam tongue (3"x3"x.1875). It wasn't exactly right to fit the design in my mind's eye, and soon I realized it was also insufficient for storage needs/move more weight forward. I located an aluminum tonguebox that was just about the right shape and size to fit on my tongue w/outriggers., but was too deep (front-to-back) to be able to access my spare (mounted exactly where I wanted it, no change possible) and still be able to use the tongu jack. Solution: I fabricated a platform to mount the box on, mounted the platform to "boat seat sliders" (6" movement fore-aft), which I mounted to a base of treated lumber I made to fit the vee-shape of the outrigger angle stock. I attached casters under the sliding platform to stabilize the box/platform. This way, the tonguebox is normally locked in place just in front of the spare (prevents removal of the chained spare), and the jack is clear to function. If the spare is needed, I unlock the platform, slide it forward 5"-6", and unlock/remove the spare. After all the gear (including battery) was transferred to the larger box, I attained the proper weight balance for the trailer, and as tested, the sliding platform is stable when on the road. If I ever take the trailer off-road, I'll add drawlatches to cinch it down tighter.
Last edited:
workingonit71
Aspirantes ad Adventure
sliding box w/minimal weight underpinnings
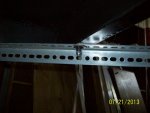
Though I drastically overbuilt my trailer (weighs like a tank), I looked to using lighter materials later, for retrofits. When I put the angle outriggers on, I used a 3/8" u-bolt (like dusty122) to attach them to the 3" square tubing,with #14 TEK screws attaching the other end(s) to the trailer chassis (one each on the crossmember, and one each on the outside frame rail). Later, after the larger box was mounted, I replaced the TEKs with 1/4"-20 bolts and nylocks (in case vibrations were to "unscrew" the TEKs). The reason I used the lightweight, pre-drilled angle for the outriggers, was because a) the weight of either the first or second box was adequately supported by the 3" drawbar, and the outriggers were just intended for locating in position/stabilization, not as a step (I made "NOT A STEP" labels for each; went missing??), and b) my trailer was already at 1775 lbs at that time (since lightened to 1600), and the additional weight of using 3/16" or 1/4" angle stock (I had plenty of each ready at hand) wasn't a good trade-off (too much added weight vs. strength gained, when I could just transfer weight to achieve my desired goal). Now, with the larger box installed, there is no room for anyone to attempt stepping on the outriggers, so I don't worry about them being bent.
Though I drastically overbuilt my trailer (weighs like a tank), I looked to using lighter materials later, for retrofits. When I put the angle outriggers on, I used a 3/8" u-bolt (like dusty122) to attach them to the 3" square tubing,with #14 TEK screws attaching the other end(s) to the trailer chassis (one each on the crossmember, and one each on the outside frame rail). Later, after the larger box was mounted, I replaced the TEKs with 1/4"-20 bolts and nylocks (in case vibrations were to "unscrew" the TEKs). The reason I used the lightweight, pre-drilled angle for the outriggers, was because a) the weight of either the first or second box was adequately supported by the 3" drawbar, and the outriggers were just intended for locating in position/stabilization, not as a step (I made "NOT A STEP" labels for each; went missing??), and b) my trailer was already at 1775 lbs at that time (since lightened to 1600), and the additional weight of using 3/16" or 1/4" angle stock (I had plenty of each ready at hand) wasn't a good trade-off (too much added weight vs. strength gained, when I could just transfer weight to achieve my desired goal). Now, with the larger box installed, there is no room for anyone to attempt stepping on the outriggers, so I don't worry about them being bent.
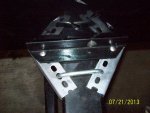
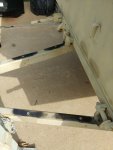
Started with welding on angle brackets and cross braces. Found I needed the box farther ahead to clear the axe, shovel and hi-lift jack.

So ended up using a 3/4" piece of starboard (marine lumber) cut to the same size as the box and bolted to the cross braces to provide a platform for the harbor freight box.

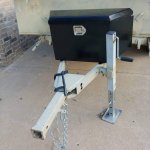
Box mounted to the platform with stainless screws, rtv silicone and single u-bolt.

and stuffed.


So ended up using a 3/4" piece of starboard (marine lumber) cut to the same size as the box and bolted to the cross braces to provide a platform for the harbor freight box.

Box mounted to the platform with stainless screws, rtv silicone and single u-bolt.

and stuffed.

VanIsle_Greg
I think I need a bigger truck!
I wanted to go light weight on the tongue box and mounting as it holds a big fat battery and so I went with a plastic box and a wood frame.
2 x 4 frame made from some very nice hard Douglas Fir, chop saw mitered, screwed together, bondo the seams, sealed the wood, sanded, 2 or 3 coats of paint and then 2 coats of bed liner. None of the seams face forward to avoid water issues should a seam open up. I also sealed it to the bottom of the box with RTV in the seam and sprayed over that with more bedliner.


I then mounted it to the frame of the trailer through the box floor with some long stainless bolts and some large fender style washers.

Because the plastic tongue box is well, plastic and not as rugged or sturdy as a metal unit, I reinforced the floor with some plywood that I stained black. I did the same for the back wall to mount my electrical. So far, it has worked out awesome!
2 x 4 frame made from some very nice hard Douglas Fir, chop saw mitered, screwed together, bondo the seams, sealed the wood, sanded, 2 or 3 coats of paint and then 2 coats of bed liner. None of the seams face forward to avoid water issues should a seam open up. I also sealed it to the bottom of the box with RTV in the seam and sprayed over that with more bedliner.


I then mounted it to the frame of the trailer through the box floor with some long stainless bolts and some large fender style washers.

Because the plastic tongue box is well, plastic and not as rugged or sturdy as a metal unit, I reinforced the floor with some plywood that I stained black. I did the same for the back wall to mount my electrical. So far, it has worked out awesome!
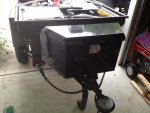
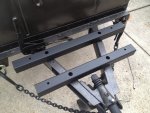
How did this work for you? Any problems?Here was my first one. 2 inch square stock to raise it above the front casting and better support the base of the box. Harbor Freight version.View attachment 246306View attachment 246307
SoDakSooner
Adventurer
Similar threads
- Replies
- 31
- Views
- 3K
- Replies
- 4
- Views
- 1K
- Replies
- 1
- Views
- 567
- Replies
- 2
- Views
- 985

