Total Composites flatbed build

Alloy

Well-known member
Curious on where you are as well… been researching the heck out of hdpe and uhmw for a tray/canopy build…
Look forward in hearing your progress
A good place to do research on how to attach the body to the frame is a commercial/fleet truck outfitter or a Ram/Ford dealer that sell cab and chassis trucks.
 

ben_j_c

Active member
Ben

Would
Love to see more on your composite build that you have done… just to confirm, did you only use the chain guide UHMW? Or do the whole camper out of composite materials?
Ex-industrial designer and fabricator here
The interface between the truck and camper are UHMW chain guides. The camper is composite fiberglass honeycomb with an aluminum exoskeleton. I would not want to try to use UHMW for the body, it is extremely hard to attach things to.
You can see them in this post: https://expeditionportal.com/forum/...ing-composite-f-550-build.215584/post-2962628
 

andy_b

Well-known member
Time for an update!

Big props to @Victorian - he was super accommodating when we changed the plans on our order. This was in addition to all the input he had as we finalized the design. The order was placed in mid-April 2022 and the assembled box was picked up in early October. The only problem with the order was that the exterior walls were supposed to be high-impact FRP. Turned out, none of the exterior skins were high-impact FRP. This was a bummer, but not the end of the world. I had also ordered some honeycomb composite panels to be used on the interior - mine did not come in the order but TC had some lying around to make my order complete.

Likewise, my experience with Pronghorn EV was also almost perfect. The panels arrived to their shop in August-ish and they were done by September. They don’t seem to be building TC bodies anymore and I’m not sure why. Based on their IG, they’re still building some sort of composite campers. Andrea at Pronghorn was able to make scale design drawings based upon the camper itself and all of the individual components I was going to use. This saved a lot of headache at the front end to ensure the layout and everything was going to work as intended. I would work with them again without hesitation.

In total, the cost of the composite box, assembly (including a wet bath inside), pickup of the panels from BC, and complete scale design drawings was ~$36k. There is value for American buyers in having a Canadian builder put together the box - the completed item is a Canadian-made camper, so there are no US-China import tariffs and the exchange rate works in our favor when it comes to labor costs. When compared to the $26k for an 8’ Bobcat, it made sense to us to have a completely custom box made and all of the design headaches worked out. I think the pre-made ones are great, but if you’re interested in some custom features or like the construction of the expedition bodies more (thicker ceiling/floor), I would urge you to consider them. Getting a custom box made in the US would be subject to the tariff and considerably more expensive as a result.

One important thing to consider is that the off-the-shelf variants (as well as my own) measure 81” wide - this is about the width of the cabs on most full sized trucks and within the track width of 350/3500 series trucks. If you get a standard width camper box and install onto a 550/5500 chassis, the wider axles result in the tires being 4-6”wider side-to-side than their smaller cousins. Something to think about when planning a build.

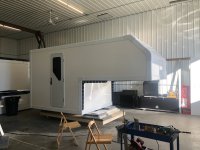
IMG_4800.jpeg
Preparing for install


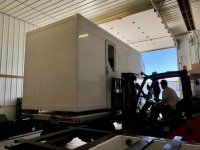
IMG_4803.jpeg
Forklift into place - the camper was pretty balanced front to back

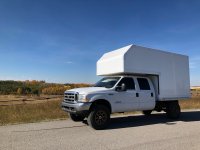
IMG_4808.jpeg
Together at last

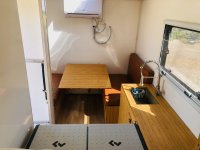
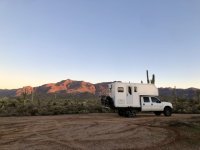
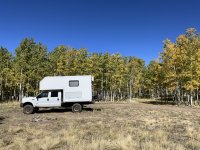
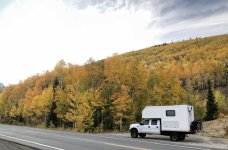
After picking up the camper in October, I was able to get it done by mid-June, although “done” is more of a state of mind since there is always something that needs doing still. Currently, the camper needs a few more windows in the cab over and cleanup of the mini split lines inside the cabin. Otherwise, we’ve been using it these past few months and it has been great; we wouldn’t change anything.
IMG_9579.jpeg
IMG_0347.jpegIMG_8780.jpeg
 
Last edited:

andy_b

Well-known member
Electrical

I am surprised that few people here mention the folks at Explorist.Life but they made wiring super simple. They make line drawings for various sized systems complete with super detailed shopping lists. I bought almost everything from either them or Current Connected. Along with Will Prowse’s website and forum, DIY Solar, the electrical system was probably the easiest system to install and get working.

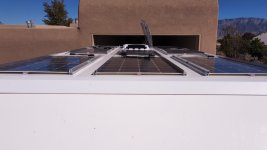
There are 800w of SunPower flexible solar panels on the roof:
dji_fly_20221028_133126_21_1666985521607_photo_optimized.jpeg


dji_fly_20221028_133114_19_1666986857957_photo_optimized.jpeg
In order to make servicing easier, the panels themselves are mounted on some track. I put small battens (visible as the purple center stripe) underneath the panels to help limit how much flapping they experience in the wind. There is now a length of aluminum angle at the leading edge of the roof to act as a deflector.

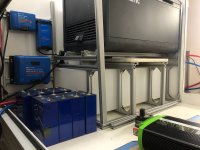
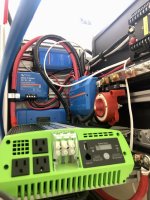
Using the drawings from Explorist as a guide, I used Eve cells from Current Connected and Victron components to build a 7300KwH system. TBH, the batteries took a lot more time than expected, mainly because I had to build an enclosure and consider how to hold everything in place. I did the DIY route out of curiosity and to save as much weight as possible. Next time, I would strongly consider using SOK or similar.

IMG_6533.jpeg
69629761525__E3A84D9A-358C-443F-AE6D-4C5F5F5540AF.jpeg
You can see in the pics I’m using an Orion DC-DC charger. Others have mentioned that they get super hot and throttle down their output as a result. This has been our experience as well. I was not aware this was a thing prior to install, otherwise I would have worked harder to add cooling. Anyhow, this isn’t an issue at all in the summer, but in the winter, even in low-latitude places, solar production is pretty limited so the Orion helps. The newer 50a version seems like a good upgrade.

The solar wiring runs through this chase:
IMG_7246.jpeg
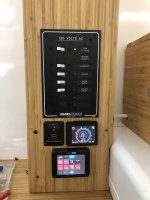
We use an sPod as our DC distribution - this is so great and makes installs so easy. The major drawback is cost but I’d use it again. The only issue here is that by installing the touch panels so low, they get bumped easily. That is a little annoying.

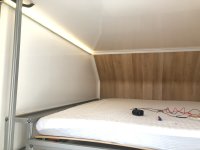
For lighting, we didn’t want anything in the ceiling (and since it was already built, I couldn’t access the chases in the roof). I used LED strip lights and MiBoxer controllers from Super Bright LEDs. The strips are installed in channels VHB’d to the upper walls. These channels are made for LED strip lighting and come with diffuser lenses to improve the output. I’d recommend looking on Amazon rather than Super Bright for the channel.
IMG_7209.jpeg
On

IMG_7252.jpeg
Off
 

andy_b

Well-known member
HVAC

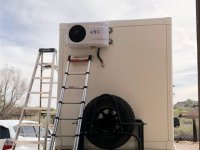
I used a 12 volt minisplint from Amazon. It was variously branded as AC/DC, Solar Velo, or Fleet Welcome. I can confirm they are all the same company (spoke w/ who I think is the only employee lol) and appear to be the same unit that AT is using in their Aterra. It isn’t available on Amazon now. Buying it was a classic pandemic-era waiting game.

It works great in both heating and cooling modes. It was pretty easy to install; I had custom hoses made that were shorter and higher quality. Bleeding the system was easy although I did have to buy a vacuum pump to make it happen.

On startup, it draws about 600w; once the temperature is achieved, it uses ~300w intermittently. It only uses a handful of watts on idle between cycles while the interior unit’s fan blows. In the summer sun, it will keep the interior cold indefinitely and uses no net power. Overnight, we have rarely needed it thus far - on the rare occasions we’re stuck somewhere hot, we use 60-120aH of power overnight; this was replenished in the first 3 hours of sunlight the next day.

The instructions are somewhat limited, especially for the remote. I got separate remote instructions from the company.

Its biggest con is that it is loud. When the system is at max output (heating or cooling), the exterior compressor is as loud as a cheap residential unit; the interior is as loud as a MaxAir fan on high. It isn’t the worst but I wouldn’t run around other campers.
IMG_6901.jpeg
Exterior unit.

IMG_8820.jpeg
The way the line set is routed makes a big mess in the interior :( I’m still working on a solution for these exposed lines. Ideas appreciated.

Overall, the mini split is great. The fan power of the interior unit is somewhat limited (at least in our setup) at getting air from one end to the other; basically, that means the breeze at the far end of the cab over is pretty mild, even on high fan speeds.

The fact that I didn’t have to mount on the roof is super helpful. I’d buy it again; the Crusin’ Comfort is really the only alternative. The loss of the heating function on the Crusin’ Comfort units isn’t as big of a deal as I imagined since solar is so limited in the winter, relying on a minisplit for heat is not the best option. Otherwise, the fact that they are made in the US out of bombproof materials makes them pretty appealing.

Since the mini split wouldn’t be the best way to heat in the winter, there is also a Planar diesel heater mounted in the front wall. I used a Rotopax as its tank and mounted it on the outside of the front wall.
IMG_6487.jpeg

As seen above, I’m using Planar’s PU-28 controller. It seems crazy to me that there is no thermostatic control of this device. According this video at 1:32, it sounds like enabling “ventilate in standby mode” allows this very thing:
I can confirm that this is partially true - in this mode, if the camper is warmer than the set point, the heater will automatically turn on once the temp has dropped, cycle, and turn back off. What is weird is that it only seems to do it once, eg - turn on once the temp drops below the set point, heats back up to the set point, cycles off, and then…nothing. The fan just blows ambient air. In addition, when it is in Fahrenheit mode, the displayed temp is up to 10 degrees off. In Celsius mode, the panel reads the same as every other thermometer. Another frustrating thing is that the heater responds to the setup when it varies by 3 degrees - kind of a wide range, especially in such a small space.
 
Last edited:

andy_b

Well-known member
Plumbing

In contrast to the electrical, the plumbing install was frustrating. Almost every threaded connection leaked; all the Sharkbite connections did not. This led to even less pics being taken than normal.

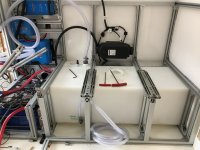
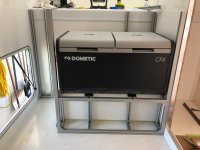
The tank itself is a 37 gallon marine unit. I didn’t need something that big, rather it was the closest in overall size to the fridge it was going to sit under.
IMG_6606.jpeg
IMG_5213.jpeg

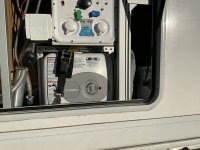
Initially, I wanted to use a 12 volt heater or a boiler in conjunction with the diesel furnace. Pandemic-related issues again prevented that from happening and I ended up installing a small domestic hot water heater. Works great and is way cheaper! The form factor was a little hard to adapt but it worked out. I added a thermostatic mixing valve to help with efficiency.

IMG_0583.jpeg
The domestic heater needed both an 80/20 frame and a ratchet strap to hold it in place.
The ”pipes” themselves were PEX-B and Sharbite fittings. I wrapped the Sharkbites with their underground protective wrap and have had no issues thus far. The great thing about PEX is how bendable it is - I ran a single pipe for hot and cold water supply from one side to the other. I used manifolds to distribute the hot and cold water which made things a lot easier.

I used Sagiv water access points for interior/exterior showers. These check all the boxes in terms of functionality, but they leak a ton. In their defense, they are intended as exterior wall mounted access points so leaks normally are on the “outside.”

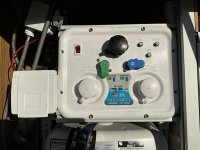
I wanted as few exterior openings as possible and to streamline processes. For the water system, this meant having one mechanism to fill the tank from various sources. This Nautilus fill panel does just that. This allows me to fill the tank from a city connection (imagine a hose attached to a tap) or by using the pump to suck water from a tank outside the camper. It took a while, but I chased down all the leaks only to find that the NPT threads on the city water fitting leaked when being filled with domestic water pressure (even with an inline regulator). Whatever, filling by drafting from tanks is almost as fast and leak free.
IMG_0582.jpeg
Nautilus panel and Sagiv access point. These are both behind the large cargo door on the driver side.

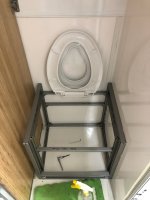
For the toilet, I used a Wrappon. For a brief period, Ok 4WD sold only the mechanism itself. This was cheaper and saved me the hassle of buying a Trekker only to disassemble it and build a new housing. They do not seem to offer that anymore.

IMG_6327.jpeg
Above, the frame awaiting the Wrappon unit

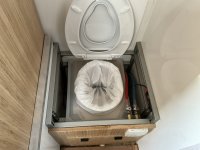
IMG_0580.jpeg
Wrappon ready to work

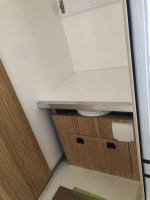
IMG_6583.jpeg
Toilet assembled and in “shower” mode. The Wrappon itself is not at all waterproof so it needs a cover to keep it dry. The door in the front allows you easy access to your gift bag once finished.

The Wrappon is one of the best things ever. It is expensive to buy and operate. The amount of supplies it needs to stay running is not insignificant. Regardless, it is so convenient that alternatives like compositing or cassette toilets would be a huge step back (for us). We carry a lot of extra Wrappon bags. We also use a different coagulant that is cheaper and available in larger volumes with less packaging. Of course, this is also available on Amazon.

For people who are on the road longer than us, a compositing toilet makes more sense. We are only able to take 3-5 day trips 1-2x month so the convenience outweighs the additional cost and environmental concern. We do not anticipate super long or remote trips but if we ever go, we’ll have to cache Wrappon supplies and not regret it at all lol.
 
Last edited:

Alloy

Well-known member
Electrical

I am surprised that few people here mention the folks at Explorist.Life but they made wiring super simple. They make line drawings for various sized systems complete with super detailed shopping lists. I bought almost everything from either them or Current Connected. Along with Will Prowse’s website and forum, DIY Solar, the electrical system was probably the easiest system to install and get working.

There are 800w of SunPower flexible solar panels on the roof:


View attachment 813102
In order to make servicing easier, the panels themselves are mounted on some track. I put small battens (visible as the purple center stripe) underneath the panels to help limit how much flapping they experience in the wind. There is now a length of aluminum angle at the leading edge of the roof to act as a deflector.

Doesn't the angle along the edge shade the solar panels?
 

andy_b

Well-known member
Furniture

I am no wood worker and attention to detail is not my strong suit. I went back and forth on how to build out the interior “stuff” like the seating, kitchen, etc. Thanks to @RAM5500 CAMPERTHING and @StenchRV for showcasing the use of 80/20. It made building the interior components so easy. Because I am not a Neanderthal, I chose to use metric 25 and 30 series. I also bought a metric tape measure and saved on a ton of mistakes. If I did it again, I would reconsider using 25 series, not because it isn’t strong enough, but because the fittings it uses are so small, they strip easily.

Anyhow, Amazon is again your friend to buy fittings, brackets, etc in bulk. 80/20 also have an Amazon store with various lengths of tubing. Not Prime eligible but still handy.


69723048093__6EC6B40D-BD91-4566-8158-05AB2C446303.jpeg
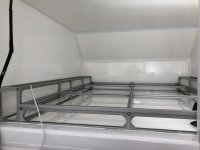
80/20 25 series bedframe and side cabinets

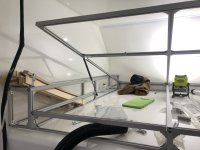
IMG_6647.jpeg
Lift mechanisms for the bed platform. There is approx 5” of clear vertical space underneath. You can see the IKEA bed slats we’re using for the mattress to sit on.

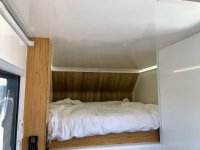
IMG_8818.jpeg
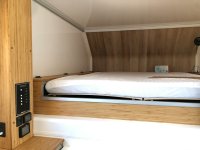
Completed bed. There is a 4” queen sized bed oriented North to South up there so no one has to crawl over another to get out.

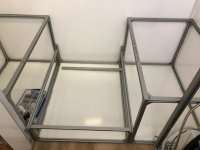
IMG_6707.jpeg
The beginnings of the dinette. The center section is a raised floor area that eventually becomes storage. There is an exterior door to the passenger side storage area (on the left here).

IMG_8821.jpeg
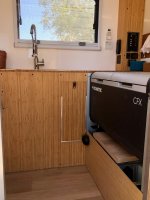
Completed kitchen. There is a step under fridge that pulls out. One stands on that to clamber over the fridge into the bed. Not super graceful but effective.

IMG_8820.jpeg
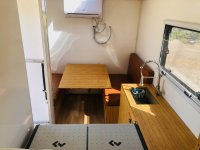
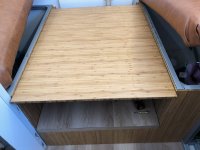
Looking aft towards the dinette. The table is a Lagun - much has been written about its wobbliness and all of it is true. Still, I needed a table that had the ability to swing around so here we are. The bamboo is finished with Osmo. This proved super easy to apply and maintain. It is a food safe oil based finish.

70888767742__E6EED6F0-5562-485E-ADEA-8008DD9679C9.jpeg
Tabletop in the down position - the seat backs cover this area to create a twin-sized bed.
 

andy_b

Well-known member
Misc stuff

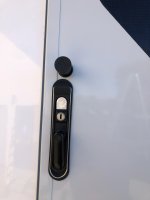
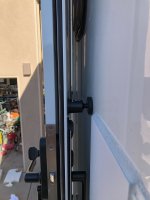
One thing I was particularly pleased about was my solution for holding the door open. Because the bathroom window is right behind the door, whatever we used needed to also have some stand off. I hate dumb stuff just being attached to the outside of the camper so the solution needed to be really low profile. It turns out the perfect solution was a magnetic tablet holder.

IMG_4964.jpeg
The tablet mount is the black circle above the lockset in the door. It is held on with VHB and Korapop.

IMG_4963.jpeg

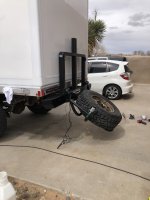
To carry our spare, I wanted to avoid complex mechanisms or elevated mounting positions. I also did not want to “waste” deck space on a spare tire carrier that still needed me to deadlift up and down a spare with every rotation/repair. Although the delay we experienced in the build was annoying, one small advantage was that I found a great local fabricator that built me this great fold down carrier.

IMG_7045.jpeg
Up position. Ignore the chase light - complicated solution that didn’t work.

IMG_6754.jpeg
Down position. The support needed to keep the spare off of the box is easier to see in this position.

IMG_9572.jpeg
I hate trying to level the camper with blocks or surrounding debris and I hate having the camper not be level. I found these airbags on some vanlifer site and they work great! I cut a doormat in half to act as protection against stuff on the ground. Each bag lifts approx 8”. I was concerned that there‘d be a lot of movement inside the camper once inflated but that has never been the case. They are expensive but very effective, easy to deploy, and easy to store.

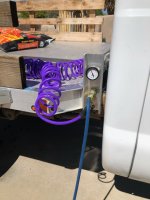
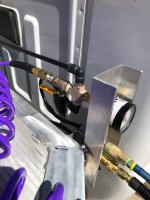
In order to inflate the bags and tires, I installed a dual ARB under the flatbed and plumbed air fittings to the front corners of the flatbed. The “welds” are ghastly but the pneumatic system works great.

IMG_4674.jpeg
The purple air line is in the compressor output port. The blue line is a 4 tire inflator setup. The Schraeder valve below the airline is the fill port for the rear air bags.

IMG_4675.jpeg
This photo shows how it all works. The yellow handle near the T-fitting controls the flow of air. If the airline is not installed, the system vents to the atmosphere and I can use the gauge to monitor air pressures as the tires deflate. With the airline attached, when the lever is opened, the compressor inflates the tires and I can use the same gauge to monitor inflation pressures. Works pretty great.
 
Last edited:

calameda

Member
Like that door magnet idea! much better than the slotted latch.

But especially like your spare carrier. Do you have more detailed photos? Did your fab shop do the bumper as well? Looks like they do nice work.

And do I see bikes mounted in some of your photos? How are they mounted?

Really nice work.
 

andy_b

Well-known member
Like that door magnet idea! much better than the slotted latch.

But especially like your spare carrier. Do you have more detailed photos? Did your fab shop do the bumper as well? Looks like they do nice work.

And do I see bikes mounted in some of your photos? How are they mounted?

Really nice work.

What details of the carrier would you like to see? The fab shop did build the bumper and carrier as a single unit. The bumper has an integrated winch mount - there is an 18k Superwinch under there. Inspiration for the carrier came from the Genright‘s swing down setup.

There is a receiver in the bumper that hold a 1Up bike rack. I had to use a double rack plus an add on to carry two bikes since one bike position is under the spare and therefore unusable.
 

calameda

Member
There is a receiver in the bumper that hold a 1Up bike rack. I had to use a double rack plus an add on to carry two bikes since one bike position is under the spare and therefore unusable.

OK, so just a hitch mount rack? I’m familiar with the 1Up racks, have one myself. Its just that the photos (which were from quite a distance, so couldn’t really tell) looked like the bikes were pretty elevated, more so than from a typical hitch mount. I guess not.

So where’s your fab guy? I’m looking for one right now.
 

simple

Adventurer
Do you know how much your camper weighs? My next build will most likely be very similar to what you have done but I think I'll add an extra 2' overhang off of the rear.
 

andy_b

Well-known member
Do you know how much your camper weighs? My next build will most likely be very similar to what you have done but I think I'll add an extra 2' overhang off of the rear.

Fully loaded with 3 people, 2 dogs, enough water and gear ~4,000lbs. Truck needs replacing. IDK how anyhow thinks this type of camper would work on a 350/3500 truck.
 

Forum statistics

Threads
188,184
Messages
2,903,526
Members
229,665
Latest member
SANelson
Top