"TrailTop" modular trailer topper building components

jscherb

Expedition Leader
Hey Brian,

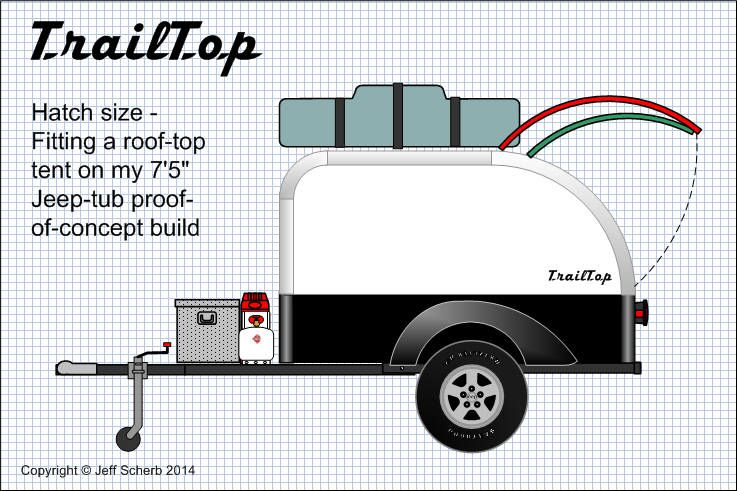
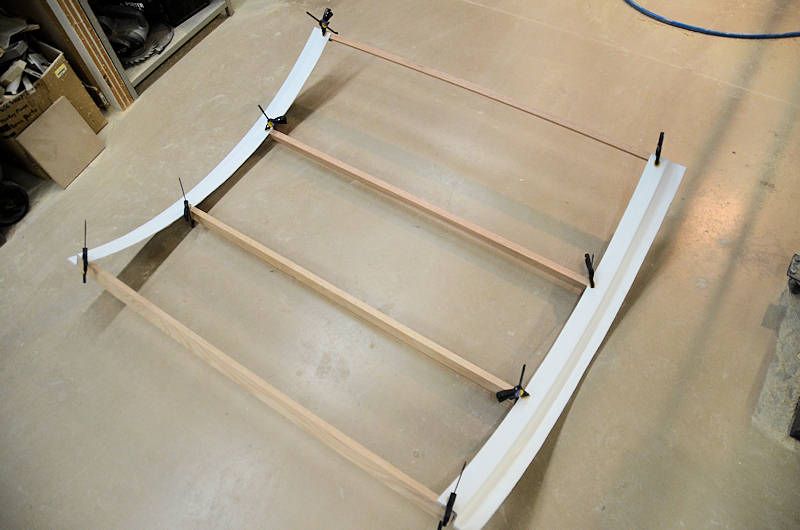
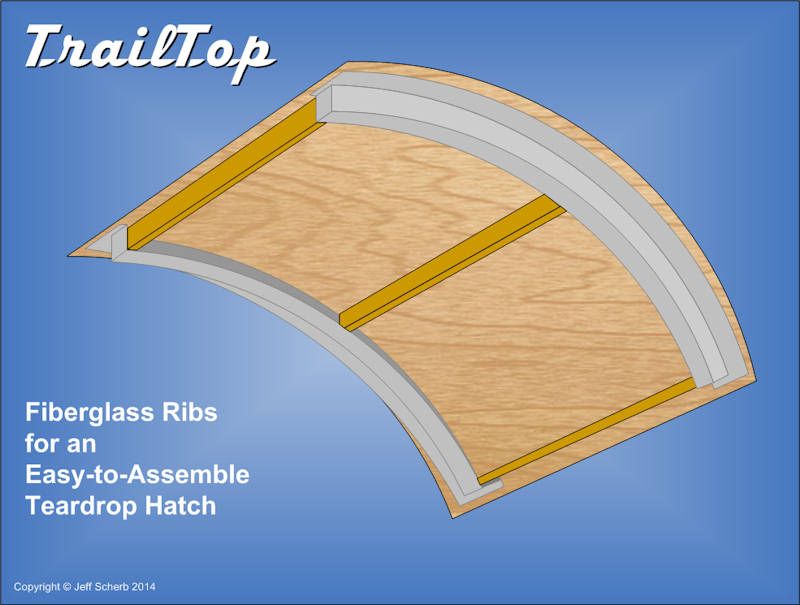
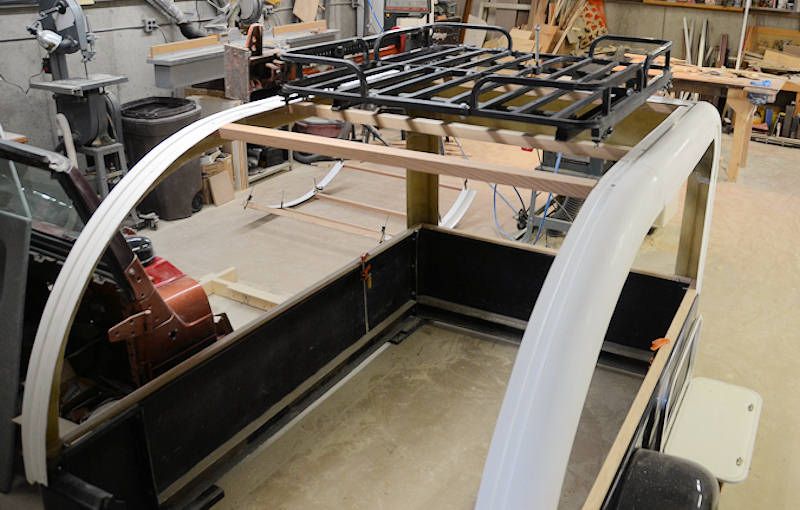
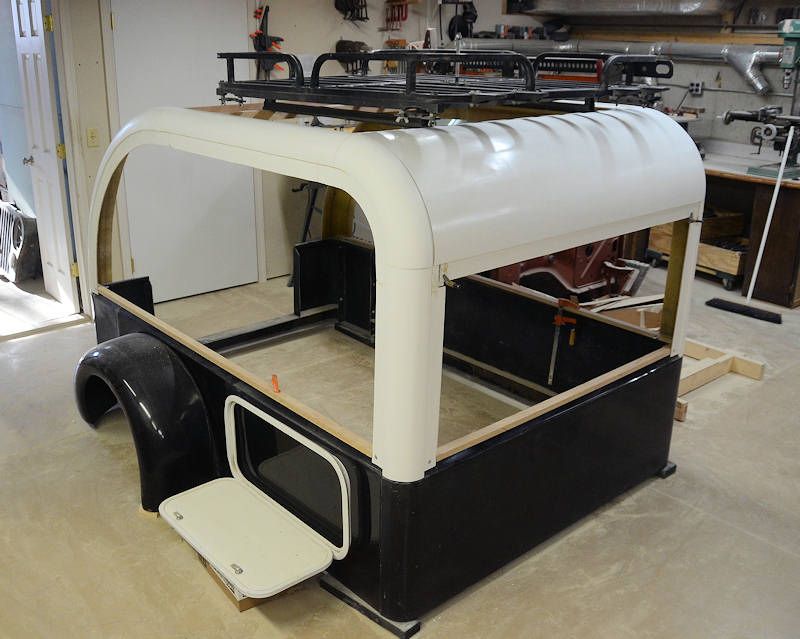
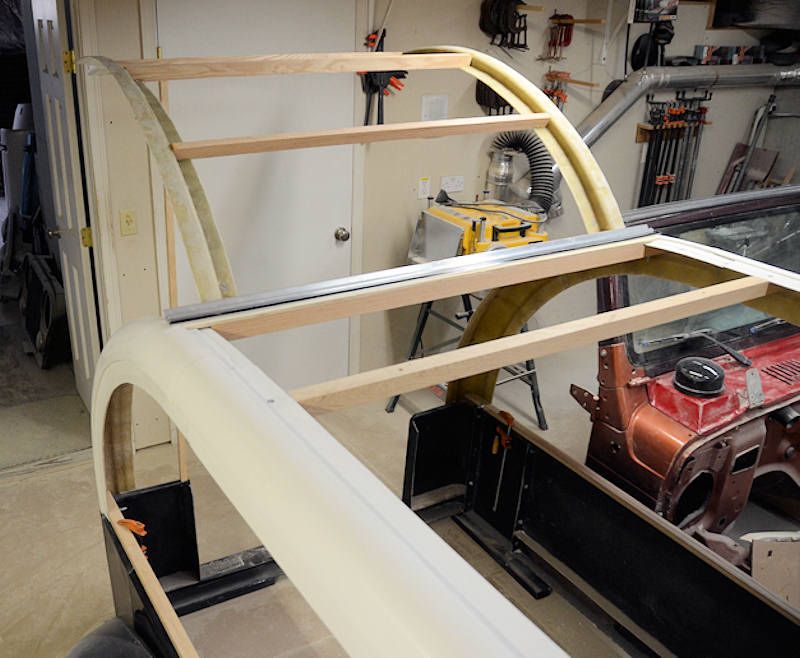
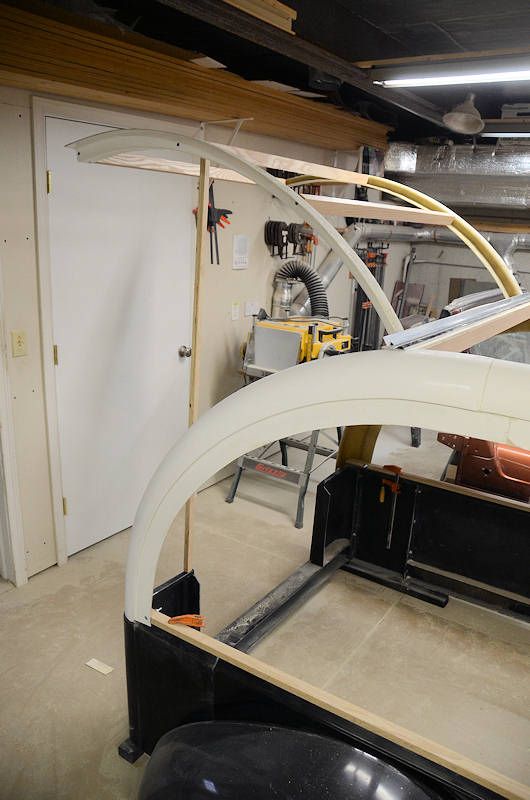
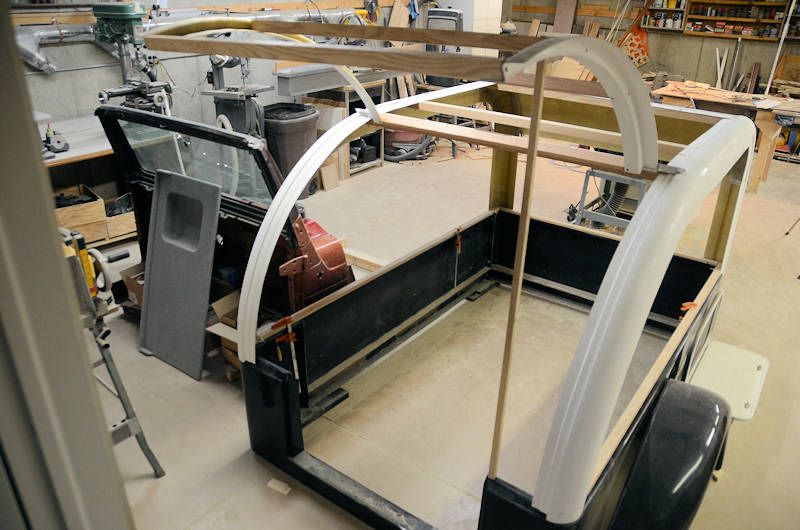
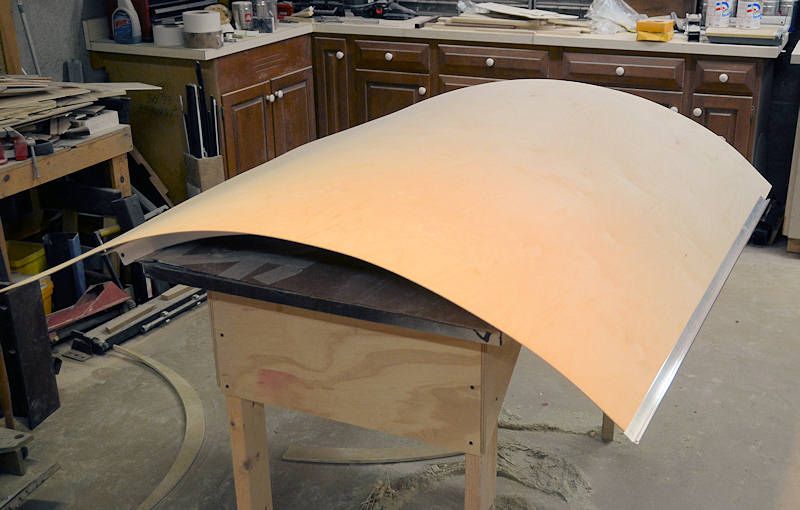
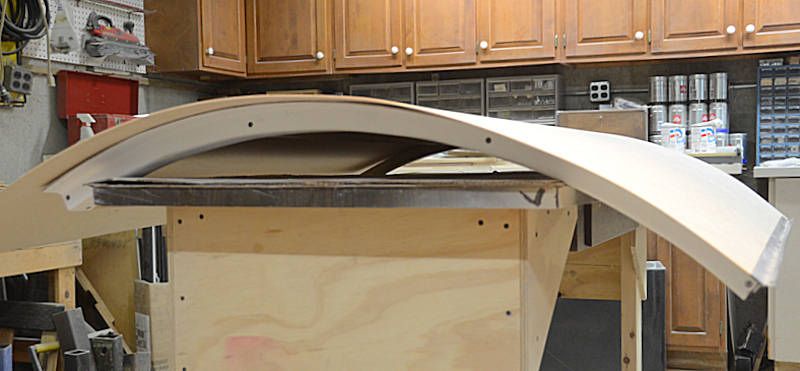
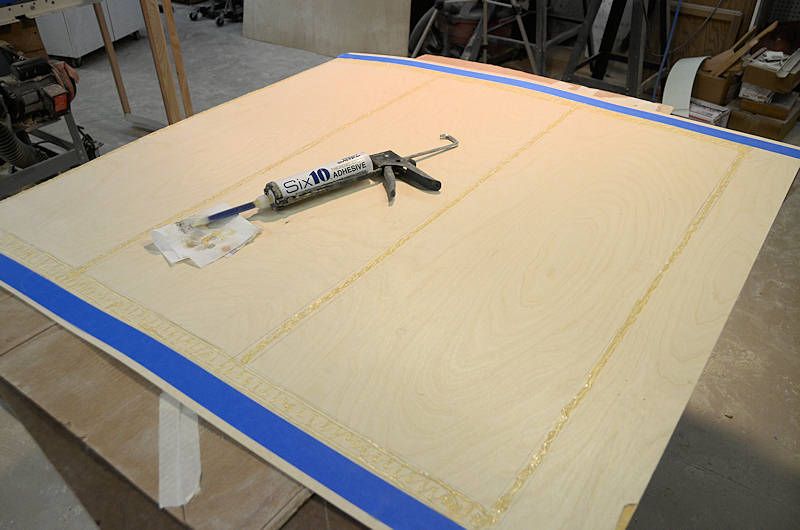
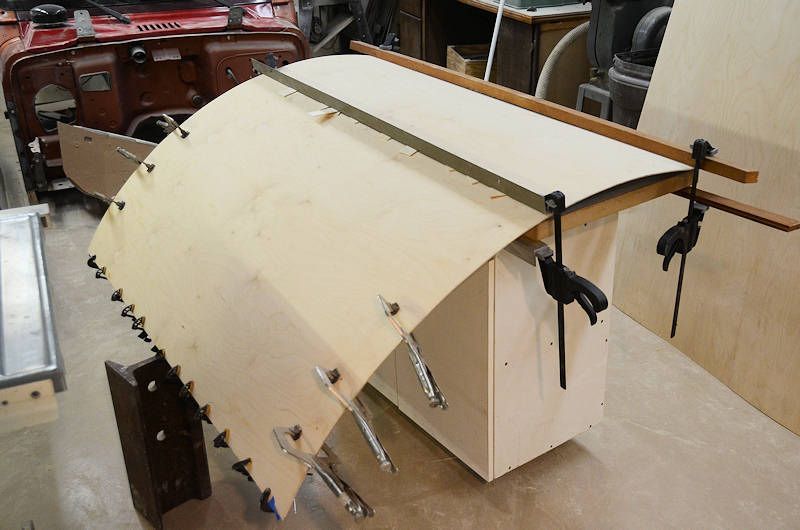
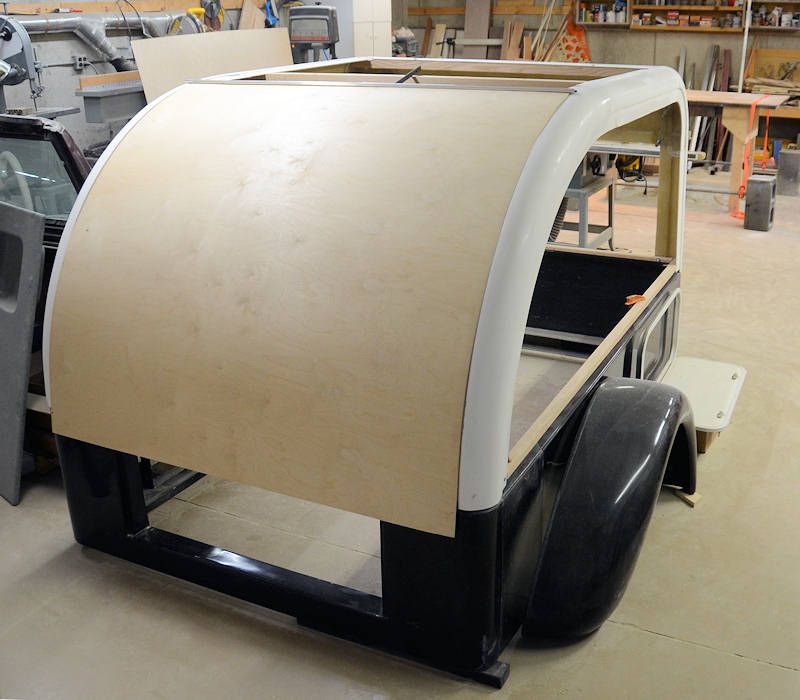
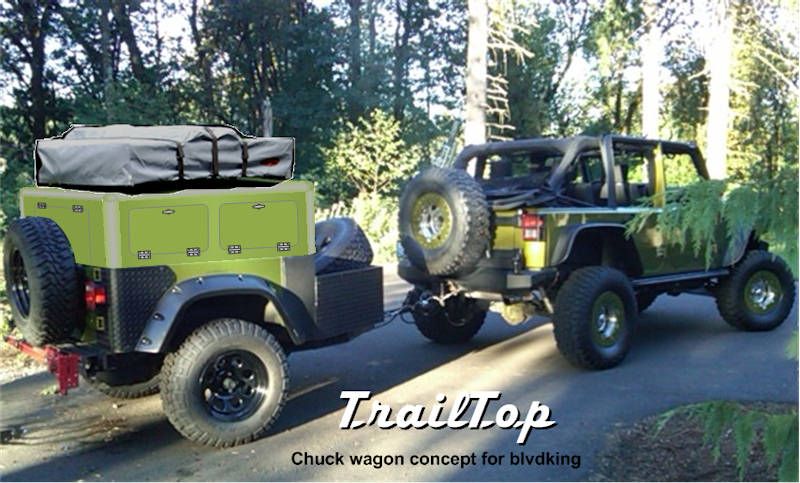
Got your email with the photos, thanks. Your trailer and rig are really cool... so I did a quick rendering of what a matched TrailTop chuck wagon/roof top tent platform might look like on it... I hope you like it :)

blvdking2_zpsc0b17a4c.jpg


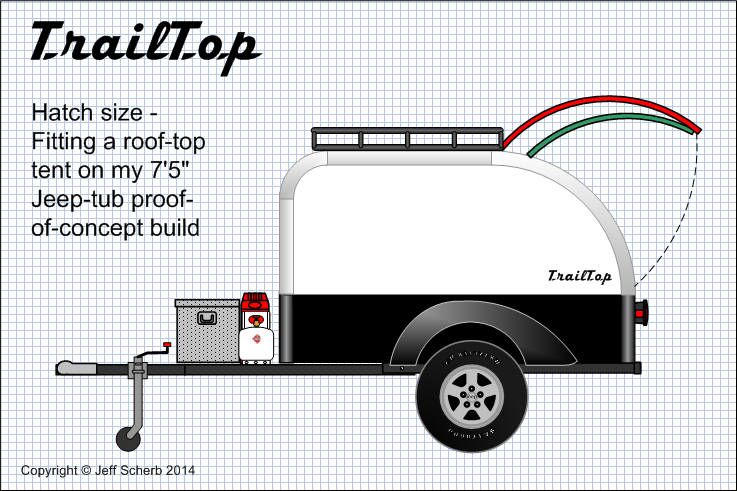
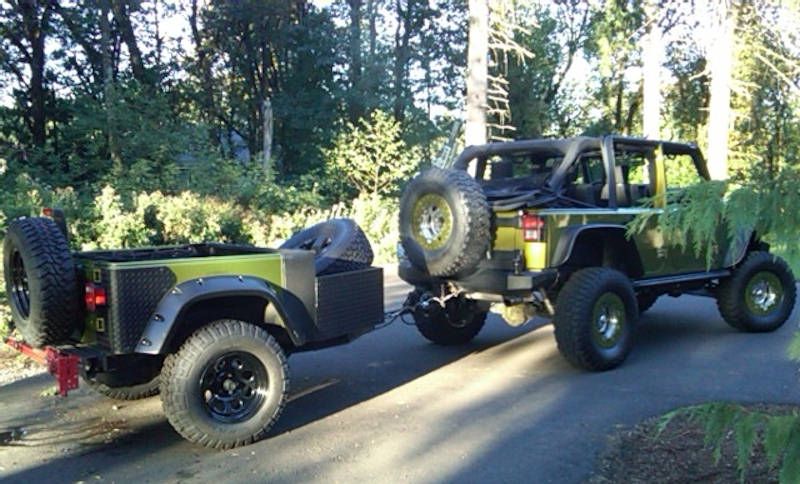
The original photo for comparison...

blvdking2a_zpsa8941073.jpg
 
Last edited:

jscherb

Expedition Leader
Today I'm getting ready to assemble the rear hatch, and since I also want to prove out supporting a tent on a TrailTop shell, I've had to make the hatch hinge line a little further towards the rear than making the hatch the maximum length the hatch ribs are designed for. The tub I'm building the proof-of-concept on is only 7' 5" long, so fitting a 58" long RTT and a 36" long hatch doesn't quite work. But the fiberglass hatch ribs are designed to be cut to length for the specific hatch opening, so no problem at all. In the drawing below, the red hatch would be the full 36" and the green hatch is how I'll be assembling this one:

HatchSize_zpse8f48438.jpg


BTW I also built my roof rack basket to mount on 32" centers to be compatible with the mounting of my roof top tent, so that will also right up...

HatchSizeRackBasket_zps251d063a.jpg


I got roof ribs mounted this afternoon, they're bolted through the fiberglass at each end. The first two ribs are for the tent/rack basket support, and the rear rib will support the hatch hinge.

RoofRibs1_zps2e0f9293.jpg


Next up: assembling the hatch and getting it hinged in place.
 

jscherb

Expedition Leader
I'm now starting to assemble the teardrop hatch. The hatch structure consists of two curved fiberglass ribs connected with 1x2 wood cross-ribs. This structure will then have plywood bent over it to complete the assembly.

If you've been following along with this project, you know that the teardrop hatch ribs were molded as one piece:

12RadiusAndRibMolded3_zps4a0ae654.jpg


The molded piece gets cut in half down the middle to result in two identical but mirror image left and right ribs as shown by the red dashed line in the photo above. I molded it this way because it's much more efficient to mold both ribs in one mold and it ensures consistency between the pair of ribs; it reduces the cost of molding two ribs, which is always important.

I cut the molded part into two ribs, and cut them to length. Here's a quick clamp-up showing how it will go together:

HatchAssy1_zps6e7d0b89.jpg


I've posted this drawing before, but here's how the whole hatch will go together. I put three cross-ribs in the drawing, but I'll use 4 for the actual assembly.

TrailTopHatch1_zps62f7731d.jpg


Tomorrow I plan to get the cross-ribs fitted and then I'll secure them to the curved ribs with screws and epoxy.
 

FELNTPSY

New member
New Brute

Wonder how it'd do as a topper for the new Brute DC? With aluminum sheets attached or something?

Like on this?

Brute Double Cab 002.jpg
 

jscherb

Expedition Leader
This morning I set up the mounting points for the roof top tent and rack basket. There will be blind nuts on the underside of the ribs so the basket and tent can mount from the top, without having to hold nuts inside the camper. Here are a few photos taken during the setup.

RackMount1_zps6d0a52b5.jpg


RackMount2_zps22c3e11e.jpg


RackMount3_zps6d85d270.jpg
 

jscherb

Expedition Leader
Here's the hatch frame assembled. Just with screws for the moment, I'll epoxy the joints after lunch.

HatchAssy2_zps552877ea.jpg


HatchAssy3_zpsbae7a1c3.jpg
 

jscherb

Expedition Leader
The hatch framework has now been assembled with screws and epoxy. I'll let it cure overnight for full strength.

HatchAssy4_zps6a01a654.jpg


Preliminary assembly was done with screws. After checking it for squareness, each rib was unscrewed/epoxied/rescrewed in turn. Then it went on the floor to ensure it stays flat, measurements were taken diagonally to ensure it was still square, and the cinder blocks were placed on it to make sure nothing moves while the epoxy cures.

The next step in the hatch construction is to get the hatch frame hinged to the camper shell. It's much easier to get the hinge set up when you're only dealing with hatch frame and not the entire completed hatch, so I'll do the hinge work before I put the skin on the hatch.

I will be using a Lil' Bear "Better Than Hurricane" hinge, because I'm told they're the best leakproof galley hinge around (http://www.lilbear.teardrops.net/images/better-hinge.jpg). In case you're not familiar with Hurricane-style hinges, here's a drawing showing how they work. The hinge line is sealed by the extrusion, so any water heading for the line is diverted past the sides of the opening by the vertical part of the extrusion.

HurricaneHinge2_zps300d2e82.jpg
 

jscherb

Expedition Leader
I've got the hatch frame hinged in place. The Lil' Bear hinge works very well for this application and was very easy to trim to length and install.

HatchAssy10_zps8c995c03.jpg


HatchAssy11_zps9d55b848.jpg


HatchAssy12_zps07f26f5e.jpg


HatchAssy13_zpsf7ae4718.jpg


Next up will be putting a plywood skin on the frame.
 

jscherb

Expedition Leader
I'm skinning the hatch with two layers of 1/8" Baltic birch plywood. This plywood bends very easily in one direction, and fairly easily in the other because it's 3-ply and the two outer plies run the same direction. Here's one layer draped over the hatch frame, gravity is the only force causing it to curve:

HatchSkin1_zps65f27a64.jpg


HatchSkin2_zps04ee2e3c.jpg


The first layer will be glued to the frame with epoxy. In this next photo I've traced the outline of the frame on the plywood and run beads of epoxy inside the outline. I'm using West System Six 10 epoxy, it fits in a standard caulk gun mixes in the nozzle so it's very easy to use.

HatchSkin5_zps3a4bfd92.jpg


And here's the first layer clamped in place:

HatchSkin6_zpse30f6257.jpg


Tomorrow when it's fully cured I'll test-fit it on the camper shell, and then I'll glue the second layer of plywood in place.
 

jscherb

Expedition Leader
A quick test fit of the hatch...

HatchSkin10_zps5d7903ae.jpg


I left the bottom long so I can trim it to the exact length once it's finished.

Keeping tabs on the project - doing a weight check. I'm holding the scale with one finger, hatch weighs in at about 15 lbs. with one layer of plywood. Second layer will add another 8 pounds or so. If you were building an ultralight trailer, seems like one layer of 1/8 plywood with a top layer of aluminum sheeting would be a good way to go.

HatchSkin11_zps4dd6c12b.jpg


I'll add a second layer of plywood this morning.
 

Forum statistics

Threads
186,813
Messages
2,889,576
Members
227,160
Latest member
roamingraven
Top