Iain_U1250
Explorer
A little bit of progress this week, but fairly frustrating as I find that i get to a point in each build that I have to stop and order, then wait for various parts.
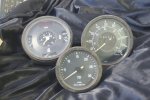
I started to do do some work in the dashboard and the interior of the truck. The first thing was to sort out the dash, so I fished out the gauge from storage and started to figure out the layout. Looking at the gauges, they looked terrible. No way I could put them back into a new dash, so I started to do some research and found a place in Brisbane that refurbishes instruments. I decided to take them over so they could have a look and let me know what they can do. They said they could fix up the needles and the bezels, and service the speedo and reset it back to zero. The also had a nice VDO boost gauge, and a voltmeter, so I decide to get them as well. They will take a few weeks to do it, so I'll have to wait for a while to get going on the dash again. This is the "before" photo.
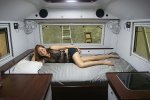
The good news is that the interior progressed a bit - but as usual, nowhere near as much as promised.
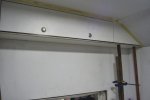
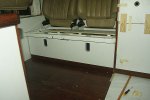
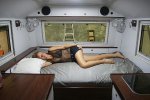
The front overhead locker was installed - and it looks pretty good. It provides some useful storage and neither Trish of I have been able to hit our heads or shoulders on it yet despite our best efforts .
.
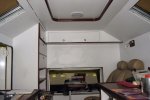
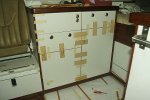
The covers for the drawers under the bed were also fitted. In order to line them up properly, they were glued together with all the gaps properly spaced out, then it was stuck onto the drawers with Sikaflex.
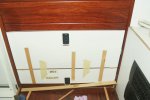
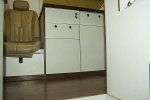
The covers stiffen up the drawer fronts a lot, I made them out of pretty light material, to keep the weight down and because they are to hold clothes and shoes. The end result was that the drawer front was pretty flexible, I reinforced the top edge with a folder channel, but it remained quite flexible. I also reinforce the area around the lock with some 1.2mm steel, as that area will take most of the load when driving. Now that the composite panel is glued on, they are very stiff. This is the end result with all the mouldings etc in place. The drawer runners are stiff enough so that even fully open, the drawer don't hit the side panel when you push them sideways, so it should be OK.
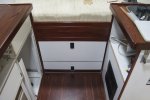
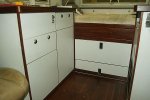
The toilet door was returned with the correct wood strip in place, I think it looks a lot better than just a plain white door, and should stand up to day to day use without loads of shoe marks. I'm still waiting for the inner ledge, so that we can fit the door catch and he rubber seal around the door. The smaller cupboard next to the toilet make s a good place for our second inverter - this one if the free replacment for the one that caught fire in the Land Rover. The technical report talks about a faulty capacitor with an "Impurity" whcih whist produced a lot of smoke. The report also said that the design is such that whilst the inverter may fail and prodcuce loads of smoke, they do not produce enough external heat to cause a fire, and are self extinguishing. Apparently there is an international standard for this and the 8Zed inverters comply with this standard. I upgraded to higher spec 2000w inverter for only a few more dollars more. I hope this one lasts longer than the first one, but I will have a shut off switch close at hand for this one - just in case.
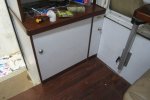
The next part of the build was really frustrating, time and time again I found I was not able to finish something because of a one or two little missing bits. I started to do the final plumbing of the air system. I am starting to find that there were a lot of things I started a while ago, but never got around to finishing them. There were also things I thought I had finished, but turns out that I was missing a part so moved onto to something else. The coupling on the engine block air compressor to the main air supply line was one of those things - I remember now that I needed a copper washer on the coupling, but did not have the right size, so just left it loose. I had made a temporary connection to my shop compressor and have been using that to test the rest of the system. I should have finished it when I had the cab tilted, as getting the pipes on which the cab down is not so easy, I even had to go and buy a 28mm spanner, as there was no space for my shift spanner. A simple job like doing up one connection ends up taking half a day in getting parts and tool. Next was to plumb in the check valves to connect the two compressors together, and then the pressure switches for the ARB compressor. As luck will have it, I am missing one piece and two sealing washers - and since it is all metric, I have to get them from interstate. Time to move onto the next task.
The rest of the week I spent sorting out the radiator, the intercooler and the turbo pipework. Ben has modified the intercooler to a 2.5" outlet, and I could now line up the turbo and all the associated pipework. The turbo has to be installed at 20-25 degree to the horizontal, so that it the water cooling would work through thermo-syphon effect after shut down
I was hoping to do the water piping inside the engine bay, but the hoses on the heater circuit are a weird size. The pipe on both the heater and the thermostat housing measure up at 18mm, so standard 3/4" hose is too big, even with a clamp on, I can get it to move. The next size down I had was 16mm, which is a very tight fit, so I decide to move onto other things until I get some of the right size hose (if it exists)
At least with the turbo all aligned, I can start work on the support for the intercooler. Before I can fix the intercooler in place, I have to fit the radiator to ensure everything will fit properly.
The first thing to do on the radiator was to fit the air conditioning condenser and the fan for the condenser. I had a 16" pusher fan that I planned to use, unfortunately the fan was too thick, so I had to order in another fan which as 25mm thinner. There was not much space between the grill and the radiator. The condenser is off a JCB tractor, and it is pretty close to the same size as the Unimog radiator. I hope it has enough capacity for the air conditioning. If not I will have to get something to run in parallel with this one, as there is very little space. The other alternative is to change the grill, but that would also mean changing the bullbar, and that's a lot of work I don't want to have to do. Running the two electric fans together produces quite lot of air flow. The puller fan is rated at 3250cfm and the pusher at 2720cfm, hopefully this will be enough or I'll be back to the drawing board again
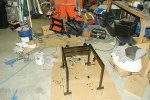
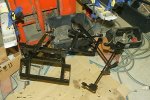
This is the "Mark 2" version of the fan and condenser support brackets. The cab can move relative to the chassis by around 50mm or so. The radiator is fixed to the chassis, so I have to allow for the relative movement. The first bracket would have hit the grill, and not have lasted very long. I have not finished the support, as I have to add some steel between the upper and lower brackets so that it is rigid and all the load is on the steel frame of the radiator, but I have run out of 10mm bar - so off to the steel shop.
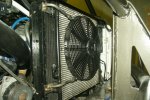
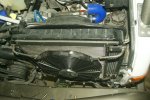
Here is the top view, The blue pipes behind is the intercooler piping., more on the fitting of that once I get the radiator all sorted out.
Apart from that, not much real progress, but hopefully things will accelerate from now.
I started to do do some work in the dashboard and the interior of the truck. The first thing was to sort out the dash, so I fished out the gauge from storage and started to figure out the layout. Looking at the gauges, they looked terrible. No way I could put them back into a new dash, so I started to do some research and found a place in Brisbane that refurbishes instruments. I decided to take them over so they could have a look and let me know what they can do. They said they could fix up the needles and the bezels, and service the speedo and reset it back to zero. The also had a nice VDO boost gauge, and a voltmeter, so I decide to get them as well. They will take a few weeks to do it, so I'll have to wait for a while to get going on the dash again. This is the "before" photo.

The good news is that the interior progressed a bit - but as usual, nowhere near as much as promised.

The front overhead locker was installed - and it looks pretty good. It provides some useful storage and neither Trish of I have been able to hit our heads or shoulders on it yet despite our best efforts

The covers for the drawers under the bed were also fitted. In order to line them up properly, they were glued together with all the gaps properly spaced out, then it was stuck onto the drawers with Sikaflex.

The covers stiffen up the drawer fronts a lot, I made them out of pretty light material, to keep the weight down and because they are to hold clothes and shoes. The end result was that the drawer front was pretty flexible, I reinforced the top edge with a folder channel, but it remained quite flexible. I also reinforce the area around the lock with some 1.2mm steel, as that area will take most of the load when driving. Now that the composite panel is glued on, they are very stiff. This is the end result with all the mouldings etc in place. The drawer runners are stiff enough so that even fully open, the drawer don't hit the side panel when you push them sideways, so it should be OK.

The toilet door was returned with the correct wood strip in place, I think it looks a lot better than just a plain white door, and should stand up to day to day use without loads of shoe marks. I'm still waiting for the inner ledge, so that we can fit the door catch and he rubber seal around the door. The smaller cupboard next to the toilet make s a good place for our second inverter - this one if the free replacment for the one that caught fire in the Land Rover. The technical report talks about a faulty capacitor with an "Impurity" whcih whist produced a lot of smoke. The report also said that the design is such that whilst the inverter may fail and prodcuce loads of smoke, they do not produce enough external heat to cause a fire, and are self extinguishing. Apparently there is an international standard for this and the 8Zed inverters comply with this standard. I upgraded to higher spec 2000w inverter for only a few more dollars more. I hope this one lasts longer than the first one, but I will have a shut off switch close at hand for this one - just in case.

The next part of the build was really frustrating, time and time again I found I was not able to finish something because of a one or two little missing bits. I started to do the final plumbing of the air system. I am starting to find that there were a lot of things I started a while ago, but never got around to finishing them. There were also things I thought I had finished, but turns out that I was missing a part so moved onto to something else. The coupling on the engine block air compressor to the main air supply line was one of those things - I remember now that I needed a copper washer on the coupling, but did not have the right size, so just left it loose. I had made a temporary connection to my shop compressor and have been using that to test the rest of the system. I should have finished it when I had the cab tilted, as getting the pipes on which the cab down is not so easy, I even had to go and buy a 28mm spanner, as there was no space for my shift spanner. A simple job like doing up one connection ends up taking half a day in getting parts and tool. Next was to plumb in the check valves to connect the two compressors together, and then the pressure switches for the ARB compressor. As luck will have it, I am missing one piece and two sealing washers - and since it is all metric, I have to get them from interstate. Time to move onto the next task.
The rest of the week I spent sorting out the radiator, the intercooler and the turbo pipework. Ben has modified the intercooler to a 2.5" outlet, and I could now line up the turbo and all the associated pipework. The turbo has to be installed at 20-25 degree to the horizontal, so that it the water cooling would work through thermo-syphon effect after shut down
I was hoping to do the water piping inside the engine bay, but the hoses on the heater circuit are a weird size. The pipe on both the heater and the thermostat housing measure up at 18mm, so standard 3/4" hose is too big, even with a clamp on, I can get it to move. The next size down I had was 16mm, which is a very tight fit, so I decide to move onto other things until I get some of the right size hose (if it exists)
At least with the turbo all aligned, I can start work on the support for the intercooler. Before I can fix the intercooler in place, I have to fit the radiator to ensure everything will fit properly.
The first thing to do on the radiator was to fit the air conditioning condenser and the fan for the condenser. I had a 16" pusher fan that I planned to use, unfortunately the fan was too thick, so I had to order in another fan which as 25mm thinner. There was not much space between the grill and the radiator. The condenser is off a JCB tractor, and it is pretty close to the same size as the Unimog radiator. I hope it has enough capacity for the air conditioning. If not I will have to get something to run in parallel with this one, as there is very little space. The other alternative is to change the grill, but that would also mean changing the bullbar, and that's a lot of work I don't want to have to do. Running the two electric fans together produces quite lot of air flow. The puller fan is rated at 3250cfm and the pusher at 2720cfm, hopefully this will be enough or I'll be back to the drawing board again
This is the "Mark 2" version of the fan and condenser support brackets. The cab can move relative to the chassis by around 50mm or so. The radiator is fixed to the chassis, so I have to allow for the relative movement. The first bracket would have hit the grill, and not have lasted very long. I have not finished the support, as I have to add some steel between the upper and lower brackets so that it is rigid and all the load is on the steel frame of the radiator, but I have run out of 10mm bar - so off to the steel shop.

Here is the top view, The blue pipes behind is the intercooler piping., more on the fitting of that once I get the radiator all sorted out.

Apart from that, not much real progress, but hopefully things will accelerate from now.

