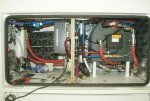
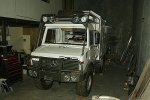
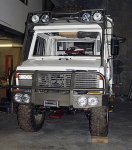
Time for another update. First off is the camper heating system. This has to have been one of the must frustrating parts of the build to date. It has taken an extraordinary amount of time, and I've done thing three or four time, and still not got it right. Finally I can say that I think it is in to stay. The diagram below shows the basis of the system. I explained how it works in the last blog post, so I won't go into to again. The main problem has been with the number of stainless steel fittings, and getting the joints to seal. I have had threads fail, "galling" is the technical term and stainless steel is very prone to galling. It occurs when you tighten up a joint with lubrication ( I can't lubricate the threads or the sealer won't stick) When you try to loosen it off again, the threads bind up and you can't get it undone. This is very frustrating when it is something I need to undo to get to be able to get the manifold out of the truck.
I decided to us the Loctite thread sealing system, this was recommended to me by the suppliers and other people on the net. It was definitely the wrong decision. Loctite will set up within a few seconds once the threads are tight, only problem for me is that I normally have to turn the joint to get it to line up, and in that few seconds it takes to check that it is properly aligned, the sealant has hardened. Now if you are a 1/4 of a turn out, and then tighten it up a bit more, the sealant then leaks. I found this out the hard way by getting everything installed, and then testing the system with air. About 10% of the joints leaked. So then I had to take it all apart again, and that when the sealant had done it's job and it was very difficult to undo. It would sometimes take me half and hour to get one fitting loosened, and all my strength just to turn it a tiny bit. It was so frustrating I did not take any photos, but did remember to take one of a leak in the return manifold in the boot when I was testing it. I pumped the whole system up to 4 bar, and sprayed soapy water on each joint. It formed a series of tiny bubbles as you can see below. These leaks are on a section where I used standard PTFE tape, which is pretty thin.
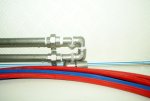
I changed over to PTFE tape, a heavy duty version I have been using on other parts of the camper water system with great success and no failures so far. In hindsight I should have just done that from the beginning. This time I tested each section before I put it in.
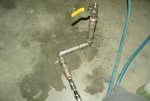
Finally, around 11:30pm on Thursday night I was able to say that the system should now not leak. I hope this is the case, I'll see once I get water in, it is air tight to 4 bar, and that is four times the pressure the radiator runs at.
In between the frustration of the water system, I decided to do a few jobs I had been putting off for a long time. First was the stay on the tool box compartment. With a bit of fiddling and some new brackets, I got the Jaguar XJ-S pneumatic boot stays I have had for years fitted. One is enough and whilst it took a two goes to get the right angle. length etc. It works and fits nicely. I have a spare stay as well.

I also fitted all the clamps and support for the brake lines and airlines on the axles and torque tubes, fitting the breather lines for the diff, the air e-brake actuators and various other things that can suck in water if they were used when we were parked up in a river or something. Rerouteing some of the lines led me to discover another problem. I have been using the ARB compressor to top up the air system to release the handbrake whenever I want to move the truck or just to check for any air leaks in the system. I decided to re-route one of the lines, and discovered the was a lot of water in it, and some of the steel fittings were starting to rust already and that was on the airline going straight into the Wabco dryer. This is not good, as it means that the the dryer will get used up quickly. The problem is the high humidity over hear, close to 70% some days. I looked in to various solutions and decided the best way to go was to install the "wet tank" before the dryer. Previously I had put this after the dryer, to catch anything that got through the dryer. I only did this because most of the info on the net and recommendations from a few other people is to have a wet tank just after the unloader valve. I spoke to Air Brake Systems who have been supplying all the parts for this build. They said it would be a good practice to install a small wet tank before the dryer, as this would greatly increase the life expectancy of the dryer, and prevent contamination of the desiccant with oil as well. So I decided to change the air supply system. It was a bit more difficult than just changing over a few air lines. A proper wet tank has be be vertical, so that it can do a good job in separating the water/oil out. The old way I had installed it in horizontally, as it was not expected to contain much anyway. This meant I had to reposition both the wet tank and the purge tank which I had mounted horizontal. Finding a new home for it proved fairly difficult. Eventually after much crawling around and hitting my head numerous time on various parts of the the chassis, I found a good spot, mounted on the rear plate, right at the back of the truck. It fits nicely, with all the required clearance for camper movement, suspension and frame movement. I had to jack the camper and axles up in various position to see how thing move, too a while but it was worth checking as it is surprising how much the rear sway bar pivots around from full droop to maximum compression, It only required a flat bracket with no welding for a change, just a bit of a bend. Drilling the holes in the rear plate was not so easy, but made possible at least by my right angle drill. The tanks is pretty tall with all the non-return valves up top, and the automatic drain valve below, but it fits nicely.
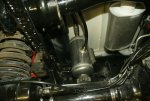
There was no space for the purge tank with the wet tank in this position, but I found a good spot for it under the front of the camper which solves another problem of the fuel filter being easily visible from casual passers-by. The original bolts were too high up to use, so I tapped in four 8mm threads into the support bracket, and fixed it to the underside of the camper through the checkerplate. Four stainless steel countersunk screws and it fits very nicely out of the way as well.
I have also been busy fitting up the fuel system. This took quite a bit of figuring as like all things on this truck it is pretty complicated. This is the system I have come up with.
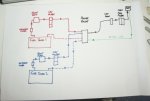
From the fuel tank, fuel is drawn up into a 100 micron washable filter. This filter is to protect the Facet pump. The Facet pump has two uses, first off to prime the system. This enable us to bleed out air should we every run a tank dry pretty easily. I have one on my Discovery Tdi and it makes changing filters or sorting problem like air leaks very simple. It will not be needed when the engine is running, as the lift pump is capable of drawing fuel out of the tank, but it will sure make it easier to prime the system. I had to get some pumps in from England, as the total lift require is around 60cm. The ones sold here can only lift around 30cm at best, I know because I have one and it struggled to prime itself out of a jerry can with only around 25cm of lift, taking about 10 minutes before it eventually started to flow. I got two of the Posiflow pumps that can lift 1.2m, so that should work OK I hope.
The CAV filter/water trap is next, these are cheap little filters that will keep the nasties out of the Pollak valve. It seems the main cause of failure of the Pollak valve is it jamming due to contamination and the plastic gears stripping. This should solve the problem without creating a fuel delivery problem which a smaller filter might. I bought a box of 10 CAV filters for $30, which is not bad for something I have been running on the Discovery for 2 years without needing to change the filter.
Next in line is the Pollak valve which switches fuel supply between the two tanks. It also switches the return line and the fuel sender unit lines. I may decide to fit another fuel gauge for the second tank, but it would only take a second or two to switch over the valve if I was unsure of how much fuel was in the second tank so I may not.
The second function of the Facet pump is to be able to transfer fuel from one tank to another. I have not shown it on the diagram, but it is a just a valve between the supply line of one tank and the return line of the other. Opening the valve with the pump on will draw fuel from the tank, through the filters and back to the other tank. This should enable us to clean out dirty/watery fuel should we be unlucky enough to get some. I still have to fit these ,just looking for some small valves.
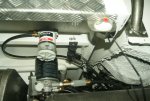
The photo below shows the set-up on the drivers side with showing the CAV filter and the Pollak valve. The mount on the valve was a bit weird, being at a strange angle. I decided to fit a support bracket to hold the fuel line and take all the weight off the Pollack valve. That should help it survive a bit longer.
I had to drill a hole in the fuel tank for a new supply line, Webasto do not recommend running of the vehicle supply line as even the tiniest of air leaks creates big problems with the stove or heater. I had to track down the Webasto fuel spikes, as my kit did not have any of them. Evenually I found two at my local Caravan service centre, they had loads of them as they come in all the other kits, and on caravans they run dedicated tanks. For $5 each I bought two, and then fitted them into the tanks. I drilled the 25mm hole in the tank, placing 20 of my little cobalt magnets around the hole to limit the amount of swarf getting in the tank. This worked very well and I got most of it with only a little bit dropping into the tank the rest I got with a magnet on a stick through the level sensor hole. Just in case I dropped in a couple of the magnets down into the tank, each about 1" from the suction rod to catch any metal bits left somewhere. I can pull them out using my magnet on a stick by taking out the level sensor if needs be, but it should help keep anything metal away from the intakes, either way, the filters will catch it before any damage is done. I also had to track down a 5mm brass T to run the stove and heater supplies off the one line - I thought it would be easy, but none of the fancy hydraulic hose shops I have used had any or could order them in. 6mm or 1/4" were easy, but that was too big for the Webasto lines and with nothing available on then net that I could find, I was going to go with a nylon T like those used on windscreen washers, and went off to the local Supercheap auto, an lo and behold, they had on a stand, one little 5mm brass T - just brilliant
Other things that have been done is the exhaust system for the Webasto 90ST diesel furnace. I will drill a hole into the side of the bash plate, and direct the hot exhaust inside. This will protect the exhaust from any direct water going up the pipe, and also provide heat to the engine sump as well. Might as well use the waste heat to provide some extra warmth.
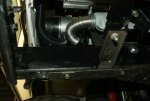
I also fitted the stainless steel PTFE hoses that run from the front to the back of the truck for the camper heating system. I sure pays to shop around, I go the 10m of hose for $270, and another $150 for the fittings and crimping. I was quotes $125 per meter to make up the hoses from Pirtek and even more from other places. Because of this I struggle for a week trying to get some solid stainless steel lines bent up and fitted, but it proved to be too difficult. I might have been possible with the camper off the truck, and the cab tilted , but I could not make the pipe fit. I scoured the internet, found a company call Pacific Hoseflex who sell the hose in bulk and asked them for a quote on supplying 10m of the braided hose.
The hose is very strong and very stiff. I had a 50/50 choice between which angle I wanted the hose tails relative to the one in the front to be as once they are crimped they don't move. I got one right, but was out by 180 degrees on the other one. A spare elbow later, and it was all sorted.
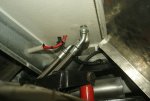
I also got the little electric booster pump. If it is marketed by Davies Craig, but it is actually a Bosch pump. it is tiny and doesn't need any brackets as it weighs less than the hose.
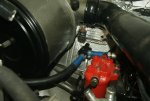
This is what the heating system looks like now. I have used a special hose supposedly good for everything from oil to transmission fluid to fuel at 300psi , so should last for a while in our heating system.
