Unimogadventures - Our build and travel thread

pairospam

Observer
I am hoping that not having started it for almost five years had not harmed anything.


That's what I feared.

Even if these things are pretty well done, especially the older and simpler ones, and you always hear that a friend of a friend crancked at the first attempt the old truck parked under the rain after twenty years, the engines are made for running as you well know.

I strongly recommend you to change the oil, make the engine start and, hopefully if it works okay, to make it run at idle and also at 1500-1800 RPM for some periods from time to time to make sure that the injection system and all the components get properly lubricated.

Don't know the quality of the diesel in Australia, but if it is not the optimal grade the risk for ruining the injection pump is quiet high.

I agree with you in so many aspects; doing this kind of stuff may be tedious, but getting it working is a great fun goal.

Cheers.


Pairoa
 

Iain_U1250

Explorer
Hi Pairoa, I have been kept turning the engine over by hand every month or so, and now us the starter motor to turn it over and get the oil to circulate. I put new oil in a month ago when I was testing the turbo oil restrictor. I will soon be charging up the fuel pump with diesel, and have added an additive to the fuel that help lubricate it, our diesel over here is ULSD - Ultra Low Sulphur stuff, pretty good quality, but needs an additive for our older engines as it is not so good at lubrication.

I was going put the radiator together this week, and start it up, but if I do that, it makes running the wiring harness to the back of the truck much more difficult, and I would probably have to take the radiator out again. So I will complete that section of the harness before I get the truck moving again.
 

whoshotjr

New member
That looks just like their version of the Loctite thread sealant that caused all the problems in the beginning. The problem with that type of sealant is that it sets up very quickly one you tighten up the joint hand tight, you have only a few seconds to do up the last turn or so before it sets, them when you want totweak it that extra bit to line it all up, you break the seal. It would work if you had the whole assembly out in the open, but I was trying to use on joints where I needed to make some minor alignment changes to get things to line up for the next assembly, and that's where I found the joints leaked. This meant disassembling the whole lot again.

This can indeed be an issue with this product, you do need to be able to align everything immediately as you have only a short window to work with.

The problem with PTFE tape is when you back if off it tends to not perform as you would expect it to. It may also create some problems longer term such as fittings moving and leaking.
 

whoshotjr

New member
Hi Pairoa, I have been kept turning the engine over by hand every month or so, and now us the starter motor to turn it over and get the oil to circulate. I put new oil in a month ago when I was testing the turbo oil restrictor. I will soon be charging up the fuel pump with diesel, and have added an additive to the fuel that help lubricate it, our diesel over here is ULSD - Ultra Low Sulphur stuff, pretty good quality, but needs an additive for our older engines as it is not so good at lubrication.

I was going put the radiator together this week, and start it up, but if I do that, it makes running the wiring harness to the back of the truck much more difficult, and I would probably have to take the radiator out again. So I will complete that section of the harness before I get the truck moving again.

Hi Iain,

I'd reckon the engine will be fine, the only concern I'd have is some of the seals in the fuel system may be something you want to keep an eye on. If there are any o-rings in the system these will likely be the first thing to have a problem, reason I know is I own a modern common rail 5 cyl Mercedes diesel engine and the o-rings in the fuel supply lines are a common cause of problems. Replace them with new Viton parts and all is good again, well usually it is.

Jason
 

Iain_U1250

Explorer
thanks for the advice, I'm not sure if there are any rubber seals or O-rings on the old Bosch injection pumps. I'll keep a look out for fuel leaks, should be able to tell once I connected up the Facet pumps, even 6 PSI should be enough to show up any leaks. The injection pump and injectors still have fuel in them, so hopefully nothing has grown in the fuel lines. It looks like the injectors and pump were overhauled before I bought the truck, so hopefully everything is still OK.
 

alan

Explorer
Hi Pairoa, I have been kept turning the engine over by hand every month or so, and now us the starter motor to turn it over and get the oil to circulate. I put new oil in a month ago when I was testing the turbo oil restrictor. I will soon be charging up the fuel pump with diesel, and have added an additive to the fuel that help lubricate it, our diesel over here is ULSD - Ultra Low Sulphur stuff, pretty good quality, but needs an additive for our older engines as it is not so good at lubrication.

I was going put the radiator together this week, and start it up, but if I do that, it makes running the wiring harness to the back of the truck much more difficult, and I would probably have to take the radiator out again. So I will complete that section of the harness before I get the truck moving again.
Hi Iain,
Our diesel in Australia is one of the worst in the world, we are forever repairing common rail diesels because of bad fuel, the only supplier i recommend to customers is BP diesel, most of the others use fuel from singapore and it's full of rubbish, we also fit a lot of 2 micro fuel filters which helps a lot.
 

Iain_U1250

Explorer
Hi ALn, funny that you should say that. In my Defender, I get a bad rattle noise when using fuel from both BP and Caltex here in Brisbane, some CEM CRD additive fixed the rattle. When traveling around Australia, we had no problems with fuel from north of WA or NT, both get their fuel from Singapore I think. There has been loads of discussion on the Benz world forum about ULSD, most of it is about the lack of lubrication the new fuels have, which is pretty bad for old engines like the mog, and I'm sure the new ones need lubrication as well. Not sure of your background, but I work in the oil and gas industry, and the refineries in Singapore are years ahead of the ones here in regard technology. The newest, "latest" one was built here in Australia was in 1965, and have been refurbed and upgraded and patched. We will be lucky to have an oil industry here in Australia in a few years, as most of the oil is imported anyway. My own opinion on the problems we have here in regards dirt and water is that the majority of servos are pretty old, turn over is pretty low for most stations, and the standard for dirt and water is 0.05%. All this combined means that for my 127litres of fuel in my Defender, they are allowed to put 67ml of water and junk in it.

The worst thing about fuel
 

whoshotjr

New member
thanks for the advice, I'm not sure if there are any rubber seals or O-rings on the old Bosch injection pumps. I'll keep a look out for fuel leaks, should be able to tell once I connected up the Facet pumps, even 6 PSI should be enough to show up any leaks. The injection pump and injectors still have fuel in them, so hopefully nothing has grown in the fuel lines. It looks like the injectors and pump were overhauled before I bought the truck, so hopefully everything is still OK.

Often you won't see any sign of leaking (oddly enough) unless you have a major failure somewhere. The common problem is the fuel lines or seals will keep fuel in but also let air in when the engine has shutdown. This usually results in air in the system or loss of prime on the fuel pump.

An electric fuel pump will mask this for a while until the leaks get really bad. If you have any starting problems check for air in the system first.

Jason
 

Iain_U1250

Explorer
Hi Jason, thanks for the advice. All the "soft" lines on the fuel system are new, and yesterday I finally received my Facet pumps from the UK. I plumbed them in and powered them up, and found quite a few leaks as the fuel found its way around the system. I had a few copper washers to replace, and one o-ring on the new CAV filters. It only pressurised the system a bit, as within a minute or two I had fuel running back into the tank from the return lines, but it sure highlighted the couple of dud copper washers which I must have mixed up with the new ones. When I got all the drips to stop, getting the air out again was a simple as just turning on the pump. I could watch on the glass bowl of the CAV filter and then on the lift pump as the air moved around, and in less than 30 seconds, I could hear the change in the flow back into the tank to a steady flow. I checked for air by cracking open the air bleeds on all three filters, and nothing but diesel came out.

I would recommend to anyone with an old fashion Bosch injection system to fit a small electric pump in-line for priming purposes, sure beats pumping by hand. I got the Facet 60302 Posi-Flow pump, one for each tank. Specs are: 1.2m minimum lift capability, 5-7 PSI and 32GPH. They also have a built in check valve to prevent the fuel flowing back down into the tank. If there is an air leak somewhere, fuel will have to go down the return line. I will fit a couple of T's and valve to connect the pressure line of one tank to the return line of the other tank, that way I can use the pumps to transfer fuel across is necessary, with all of it going through the 100micron filter and the CAV filters. Hopefully that should be able to clean out any water or nasties if I get a batch of bad fuel in one tank.

I'll let the fuel circulate for a few hours tomorrow, and have a look at what the 100micron filter has picked up if anything.
 

Iain_U1250

Explorer
Wiring

Nothing really that exciting to update. I am back at work on another contract, so progress has been slow, not much work done in the evenings due to getting home a bit late, but hopefully I should have things under control soon and will be able to spend a few evenings in from now on.

The saga continues with the interior fit out, and it looks like it might finally be coming to the end, in other words, all going well, the camper interior should be completed over the Easter weekend.

The main area I have been working on is the dash and the wiring. First off was to modify the dashboard. The orignal dash had the instruments almost hidden behind the steering wheel. I decided to fix this by extending the dash. It wa bit of cutting and re-welding, I have reshaped the dash.
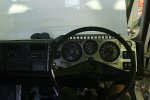
DSC05695.jpg

I have added a boost gauge and a voltmeter. The Carling Contura II switch panels on either side contain the controls for the front and rear winches on the right, and the headlights, spotlights and windscreen washer on the left. I have a few more to add, the front and rear lockers and battery isolation relay.
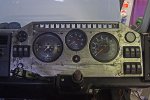
DSC05690.jpg

The wiring is pretty messy business. I am trying to re-use a lot of the original wiring where possible, but I have found that there has been a fair amount of corrosion in the wires, and have to cut back around 30-100mm before I find shiny copper again.
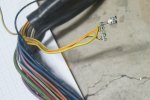
DSC05717.jpg

I have also replace the old fuse boxes. I have three in total, one under the bonnet near the radiator, one behind the glove compartment, next to the bulkhead connectors, and another in the overhead console. This is the one behind the glove compartment. I have a plastic backing board, so all the wires are fairly well protected. The HELLA fuse box holds the modern blade type fuses. I also have a few bus bars for common wiring. The Redarc unit next to the fuse box supplies the 24V power I need for the power windows, as I could not get 12V motors, I am sure they exist, but since the 24V convertor was cheaper than new motors, it was easy enough to fit. The wires will all be tied up neatly, once I have fitted all the wiring. There is a whole load of indicator lights from various sensors that need to be fitted. Things like the front and rear locker indicators, the 4wd indicator and the gear selector position. I am replacing each circuit one at a time, it is pretty time consuming, but also pretty satisfying, as each wire and circuit brings another part of the truck back to life.
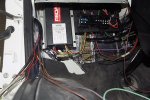
DSC05729.jpg

Everything runs off relays, so I have quite a few. The ones shown are the headlights - low and high beam, spotlights, pencil roof lights and spread beam roof lights, , the fog lights and finally the horns, which are very loud. There will be also two 70A relays for the electric fans. The main power supply to the relays is fuses with the big 50A blade fuses, as are the fans. Each circuit has its own fuse, which means there are plenty of fuses.
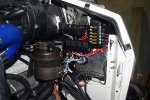
DSC05727.jpg


Wiring is a messy business, especially if you are trying to recover as much as possible from the original harness. There is substantially more wiring in my Mog than in the original, things like central locking, power windows and mirrors, electric seats, dual air con and various lights and sensors.
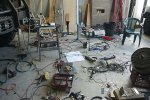
DSC05726.jpg

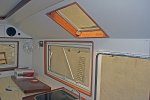
The interior has progressed, the window frames have been made, and they just need to be finished off and sanded, then off to the spray painter. Finally, after almost two years they will be glued in place to finish off the window.
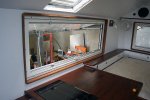
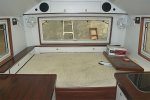
DSC05702.jpg


DSC05705.jpg

These are the frame around the skylights, they will be rounded off and some mosquito screens to keep the bugs out.
DSC05713.jpg

There are a whole load more trims that have been made, around the door frame, the seat and the crawl through. All of them are made, and ready to be sprayed. Hopefully, all will be finished by next weekend and I can fit them and finally declare the camper interior fit out complete.

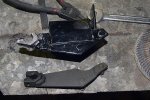
When I was adjusting the accelerator pedal, the lever broke, apparently it is fairly common, especially if the previous owners have welded the lever part. Unfortunately when I ordered the new part, they got it wrong, supplying the lever from a LHD, which is missing quite a bit, but I just spot welded the base onto the original part being careful to keep the heat down on the spline section. It works and I have a working accelerator pedal again.
DSC05699.jpg

Since the fuel supply is all fitted and the air bled out of it, I could probably start the truck, but I have not fitted the radiator or the rest of the cooling system. I will just have to be patient and once I have finished all the wiring, I'll fit the cooling system and start it up.
 

rocrunr

Adventurer
You seem to be making progress Ian. You must have more patience than I because the wiring would have me drove! Seems as thou you have it figured. Nice clean install as usual. When you get your camper done you are welcomed to start on mine! lol
 

Iain_U1250

Explorer
well done on the wiring that is a huge job...the end is near and the new travels are ahead

It is a pretty big job, not something I would recommend to someone who did not know much about auto electrics.

You seem to be making progress Ian. You must have more patience than I because the wiring would have me drove! Seems as thou you have it figured. Nice clean install as usual. When you get your camper done you are welcomed to start on mine! lol

Slow but sure progress, wiring is not hard to do, if you know how, but does require a lot of patience. I find it pretty rewarding though, as with each circuit completed, something else works :) As far as working on another camper, not for a long long time :)
 

Iain_U1250

Explorer
At last, the final bits of trim has started arriving. It was not everything that was promised, but it is pretty good start, and the quality is excellent. All going well, I will get the door panel, the shower grate and the final bits of missing trim next weekend.

DSC05731.jpg

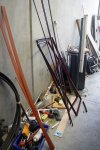
This is the rest of the pile of window frames, hatches and beading.

DSC05732.jpg

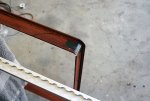
Everything is really well made, even the edges are reinforced with carbon fibre to stop them from cracking.

DSC05730.jpg

After a morning of putting them all in, this is what the end result is:

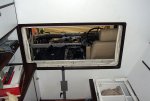
The frame around the crawl through

DSC05739.jpg

The attention to detail is great.

DSC05740.jpg

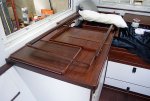
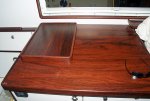
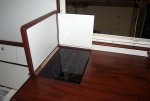
We needed something to protect anyone sitting in the seats next to the stove from the heat and splashes. I was going to go with a simple fold out cover, but after hearing stories about people dropping things on their ceramic stove and it breaking, we decided to make something that would protect the stove when not in use. The cover fold downs over the stove and provides some useful bench space.

DSC05743.jpg

When we use the stove, we fold it up, and this protects the flyscreen and window from the splashes and anyone in the seat. The material used is good for 150 Celcius, being a laminex/foam/wood composite. We will have a micro switch on the rear section ( where the tape is now) that will cut power to the stove, so it won't start unless the lid is up, and it has a catch to ensure we have to reach across to unlock it, so that should stop us from folding it down if it is hot.

DSC05742.jpg

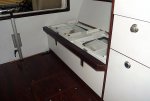
The front of the bench now has it's cover, much better than the ugly steel bar. Now we have to re-dye the leather seats and fit everything back.

DSC05747.jpg


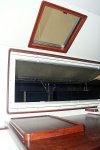
The window frames and the skylight frames look great. The mosquito screen are held on b powerful magnets, and you have to pull pretty hard to release them. They will also hold some silver foil insulation in if we want to stop the sun coming in through the skylights

DSC05741.jpg

And most important of all, Trish really likes the finish of the interior.

DSC05738.jpg
 
Last edited:

Forum statistics

Threads
188,184
Messages
2,903,527
Members
229,665
Latest member
SANelson

Members online

Top