Unimogadventures - Our build and travel thread

Iain_U1250

Explorer
I got myself and anemometer, just a cheap one off Amazon to do a few tests on airflow through the radiator.

I've got a 16" Bosch fan I had spare off an Audi S4, and it works quite well.


1699085585609.jpeg

I did a few tests yesterday, and some more scientific ones this morning.

1699086030123.jpeg


1699085183421.png

I copied a similar method as another Unimog owner did on a stock mechanical fan and bare radiator.

1699085817481.jpeg

The results are similar to what I got, and I have an a/c condenser and another fan in front of the radiator.

The airflow varies quite a bit across the radiator as you can see in the results.


I did the all the test with the bonnet up.
1699086101127.jpeg


I'll figure out the way to fix the anemometer to the radiator and connect it to my laptop, and go for a drive and see how much airflow comes through when I am driving. I might have to resort to using cable ties and strapping it to the grill.

1699086388260.jpeg
 

Iain_U1250

Explorer
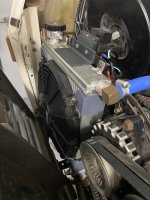
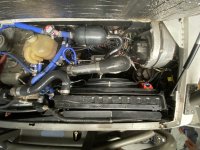
Another project done, I've fitted a new bigger water - air intercooler and heat exchanger, with a bigger fan as well. I found the old one was leaking after 70,000km /9 years, so decided it was worth fitting something a bit bigger, The old one developed a leak, and whilst the engine was running, the boosted air from the turbo would blow water out the system, but parked up, the water would leak out, but since the intercooler is lower than the intake, it ran back down into the turbo, not the engine.


This is the new setup


1714897713867.jpeg


1714897998175.jpegThe new heat exchanger, with a 11" SPAL

1714898286744.jpeg

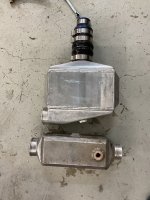
This is the new intercooler - it is twice the size of the old one.

It seems like I have some thing quite similar in size to the S600 / S65 OEM heat exchangers so on mine, with about one third of the power, so maybe it is a bit of overkill.

Intercooler size. The new one has 297 cu inch / 4866cc
Heat exchanger size - 12"x12"x2" / 305x305x50mm = 4651cc

Mercedes S600 Heat Exchanger 02-05 (536-hp, 5.5-liter twin-turbo V12 )
580x 265 = 1537 cm2 x 21mm = 3228 cc


Mercedes S65 Heat Exchanger 04-05 *630hp, 6.0-liter twin-turbo V12 )
580x 465 = 2697 cm2 x 21mm = 5664 cc


1714898434636.jpeg

The intercooler is not vertical, but tilted to that there is more space under the intercooler for the air coming through the radiator to escape out the bottom of the engine bay.

1714899021351.jpeg

I've made sure there is enough flex between the intercooler and the engine, with a double hump hose from the turbo to the intercooler, and a 3.25" to 3" 45 deg silicone elbow from inlet to the crossover pipe, then a 3" 90 degree elbow to the intercooler.

Initial test drives have shown it is has dropped the intake air temp from around 70-75C, to around 63-70C, with out running the electric fan. I'll set that to come on with the intake temp gets over 50C, and off again when it is 45C, and see if that makes a difference.

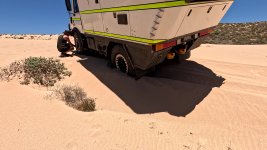
It has all taken a bit longer, I I bought a new toy to play with - our new beach van.

I started life as an airport taxi shuttle,

PXL_20240117_233214238.jpg

but is a bit different now.

2024-05-01 17.10.40.jpg
 

Iain_U1250

Explorer
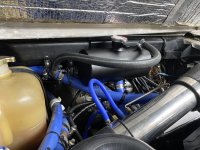
Pipework is all sorted , and it si more or less self bleeding, with the t-piece at the highest point on the hoses going to the intercooler. With this header tank, I have over 5 litres of water/coolant in the system. The last expansion tank I 3D printed didn't work, as it created air locks in the system. There should be no airlocks now, as long as the header tank is full. The tank is at the highest point I could make it under the bonnet as well.

2024-05-17 16.17.09.jpg
 

Iain_U1250

Explorer
We are getting ready to go on another trip across Australia. We have been making a few short videos on our YouTube of how we are getting ready for a 5 month trip.

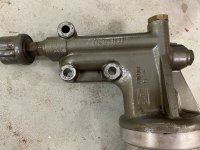
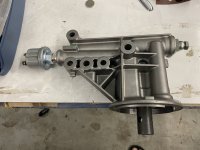
I've replaced the old oil filter housing with the new design, the old ones are prone to cracking leading to loss of oil pressure.
2024-08-29 17.42.47.jpg

The new one is reinforced
2024-08-26 16.41.34.jpg

I also fitted a combined oil pressure sensor / warning light, so that an LED on the dash lights up when oil pressure is low, rather than me having to notice the gauge.


I also made some protectors for the valve stems on the wheels - they are quite exposed and being brass, could snap off quite easily. This should help prevent that.


I've also refreshed my tyre repair kit, with some larger patches, replaced the out of date vulcanising cement,, and added an external sidewall repair kit. We only carry one spare tyre, so need something to get us out of the bush if we get a flat. The treads on the Michelin XZLs are so thick, I doubt anything will get through it, but the side walls above the ribbed section are pretty thin.


We will be carrying an extra 90lts in Jerry cans for one or two of the more remote section on the trip. Ours were looking a be tatty, so I decided to fix them up a bit.


2024-09-09 17.55.29.jpg

Over here, diesel is supposed to be a yellow can, so I added a the "DIESEL" to them after printing a stencil on my 3D printer.

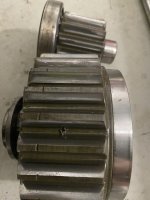
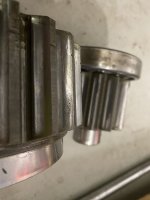
Last was changing the gears an seal on one of the portal axles. I had a slight leak, and I could have just replaced the seal, but I found a bit of shiny metal when I pulled the seal out - better safe than sorry I thought, turns out the gears were worn a bit. After checking the oil closely on the others, I'm happy enough that they are still good for this 15,000km trip.
2024-09-03 21.28.49.jpg

2024-09-03 21.28.58.jpg

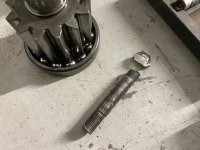
It only normally takes me around 4 hours to swap out a portal, but I ran into a problem with one of the bolts on the brake caliper, and ended up having to cut the head off with a Dremel. It had locked up solid in the portal housing. I had to take the portal off with the brake caliper still attached, and then was able to push the bolt out enough with quite a few solid hits with a hammer, to get enough to space to cut the head off. Then I was able to get it under the hydraulic press and push the bolt through. Not sure exactly what happened, but seems the bolt had distorted.

2024-09-03 21.24.53.jpg

I still have a couple more weeks to finish off the contract I am on, then we will hit the road and go from Byron Bay ( Most easterly point in Australia) to Steep Point ( Most westerly point) right across the middle.


Iain_U1250

Explorer
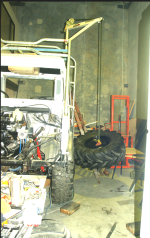
We have posted another video on our YouTube channel, this is a bit of an experiment, as this one is just the real-time footage of us driving up the Canning Stock route, not commentary or exciting bit, just what it is actually like driving across the desert. It is only 3 1/2 hour out of the 10 days we spent on the track, but it does give you a idea of what it is actually like.


Blowby

Active member
Excellent video, we are also in a situation where a crane like that would help and I was
not able to see the brand name that you are using.Any insight to what you are using and is it worth considering?Have been trying to find something similar but to no avail.
Thanks Roger
 

Iain_U1250

Explorer
We are finally off on our trip across Australia, and just published the first YouTube video, it is very hot out here this time, mid to high 40C, engine is doing fine, but taking it a bit easier on the portal axles and tyres this time, we have another 15,000km to go. The tyres got up to 68C on the tar road the other day.


Here are some photos from the first week.

Video Snapshot00075.jpgVideo Snapshot00076.jpg


Video Snapshot00078.jpg


Video Snapshot00079.jpg
 
Hello Iain. If you’re running XZLs, I think I mentioned a few years ago that a Michelin (military) tire engineer I met at a exhibition told me that Michelin military tires need to be kept <75C.
I keep track with the CTIS pressure display.
 

Forum statistics

Threads
187,897
Messages
2,899,711
Members
229,072
Latest member
fireofficer001
Top