what did you do to your trailer today?

Backroad Explorer

Adventurer
Found A New One

DSCF1346_zps2965e161.jpg

DSCF1351_zpsad2a583e.jpg
 
Last edited:

VanIsle_Greg

I think I need a bigger truck!
Some great work on this forum.
GregB the wheel assembly looks great.

Chase, Yes Silver with black wheels is the way to go on painting your trailer.
It will look good with the round holes on the trailer and TV wheels.
Matching trailers look awesome.......................Just look at GregB's combo!

Thanks Mark, yeah it turned out great with the matching Red. So did yours, and IIRC your trailer was one of 2 that convinced me to actually paint it to match the XJ. I managed to get the battery and most...ok some of the electrical work done last night. Nothing too crazy planned for Phase 1, battery, a few LED lights, an inverter (1000w) etc. Battery is mounted with a custom hold down and all the basics are done. All I need to locate is a 10g fuse inline? I already have fuses going to each circut but I would like to be able to fuse the main power as well.

20120919_223411_zps53b4e14b.jpg


20120919_223357_zps81c6f184.jpg


The black box is a project box from a local electronics store, I love those things. I mounted a switch on top of it and ran power to 2 x LED lights in the box itself, works great for seeing all your crap in there. I have also installed a battery cutoff switch to disable power (not pictured). It was midnight when I finished, so the finished pics are not getting taken until today.

These also showed up.

20120919_193023_zps933caa11.jpg


Scepter water jugs in Nato Blue.

:drool:

More tonight!
 
M101 3/4 Ton Expo Trailer Build

Front Panel Removed 3.jpgFront Mock Up 8.jpgFront Mock Up 2.jpgFront Mock Up 3.jpgFront Mock Up 4.jpgFront Mock Up 5.jpgFront Mock Up 7.jpgWell I decided that I was going to cut the front of the box as well. I wanted a flat storage area for fuel cans and a propane tank towards the front of the trailer, that old 60/40 weight distribution thing. I still have a lot more trimming to do but I want the welds to look good as well as hold. Cutting perfect lines on this material is very difficult with the tools I have. The vibrations make the blades on the sawzall wander all over the place and the cutoff wheel is no better. If I had the spare money I would buy a plasma cutter. This project has made me a believer in those things. I included some pictures of cutting the welds for the heck of it.

Once I get the front welded up I'm going to pull the tub off the frame so that it can be sandblasted. I'm not sure about all the overhanging metal yet. I am trying to decide if I want platforms or boxes there. I need to practice butt welding more before I can start that. Then this is the other idea I have. I have talked about removing the cross members from the tub and mounting the tub floor directly on the frame of the trailer. The problem with this is one, the bed liner or whatever it is on the bottom of the tube is very, very difficult to remove. I don't know if the sandblaster will get the liner off or not, plus I will need to add addition cross members to the trailer frame so the floor is supported which will add some weight back on the trailer. Here is an idea I have; everyone that reads this is encouraged to give me your opinions on this idea.

I thought about notching out the frame of the trailer so that the tubs cross members would fit in and then the floor would be directly on the frame. Doing it this way will eliminate the need for more frame crossmemnebrs. Well what do you think? Post your thoughts or opinions please.

Thanks

Robert Walker

Curring welds 2.jpgCutting Welds 1.jpgFront Mock Up 1.jpg

http://www.expeditionportal.com/forum/threads/83339-M101-3-4-Ton-Expedition-Trailer-Build
 

rarecj8

Observer
i like the crank up/down level jacks. looking for those locally. plan is to lop off the handle and weld on a large nut, then for deployment just use a cordless impact to run the jack. looking good. in other news, my 3 dog tent just arrived from australia and awaiting customs clearance. weeee!
 

VanIsle_Greg

I think I need a bigger truck!
I camped in it, well actually if you want to get specific, on it.

Mike (Wavebreaker) and I took our Jeeps and Trailers up to Lake Cowichan out to the northern tip and set up camp for a season ending trip. The first real camping for Mike in his recently completed (freakin awesome) trailer, and me in my "Phase 1 is complete the rest can wait" setup. We headed out in the sun on Saturday after kids skating and soccer... great trip but the gravel roads were nasty dry and dusty (still cant breathe right). Set up camp in short order and were basically one of 3 sites occupied in a 48 site location...ahhh peace and quiet.

Me

20120922_175832_zpsc68ffe61.jpg


Mike

20120923_174847_zps3cc312b2.jpg


Add for CVT?

20120923_141515_zps48eb3cf7.jpg


20120924_113432_zpsd896fcbf.jpg


20120924_113422_zps3afe20f6.jpg


Trip was great. A few things I need to do however. On board water with on demand hot (was soooo nice Mike had this setup). Kitchen setup on the trailer...table with a sink or tub and some counter space. Have a design in mind already... oh and a better cooler or a fridge.

Other than that...2 thumbs way up! CVT was amazingly comfy and roomy as all get out! Great tents.
 

VanIsle_Greg

I think I need a bigger truck!
One more thing we both need... MUD FLAPS. My Monstalined fenders stood up well, no damage at all. Mikes fenders however took a brutal beating on the gravel. I blame his BFG AT's mostly as my MT's hardly grabbed a rock all 50 or so KM of gravel, his on the other had...OMG, sandblasted his trailer. Good thing he added the Checker Plate to the front, that worked awesome.

Net up on the Jeep Project list, removable WIDE *** flaps for trailer protection in adverse conditions.
 

rarecj8

Observer
So the new RTT is soon to be here all t he way from Australia. Must fab a base for it to rest on-- want an enclosed lid but can't wait for local production. So far this what was done and big thanks to motorbreath for the help.

40' raw materials

IMG_5996.jpg


tie in support bushings--
IMG_5997.jpg


main side bar mock up

IMG_5998.jpg


burning wire!

IMG_6000.jpg


getting there

IMG_6002.jpg


getting closer

IMG_6009.jpg


end cap details

IMG_6011.jpg


almost there

IMG_6012.jpg
 
Last edited:

rarecj8

Observer
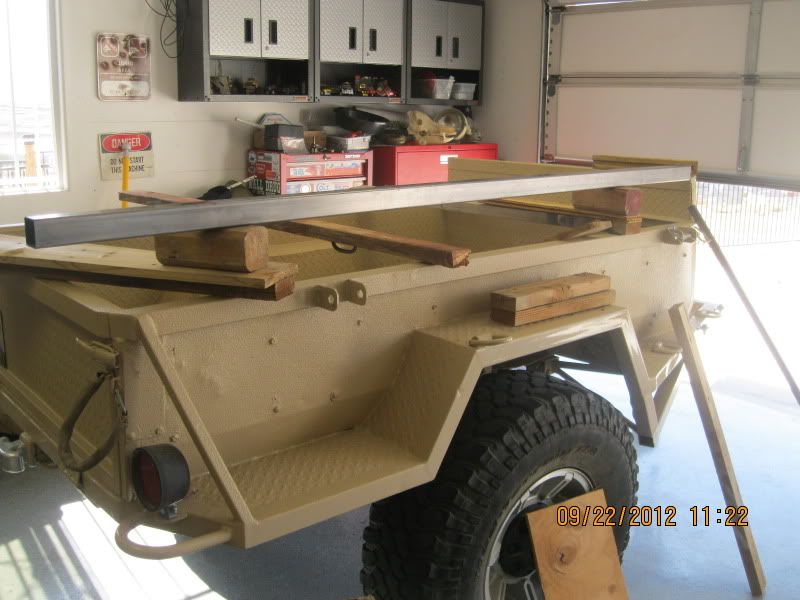
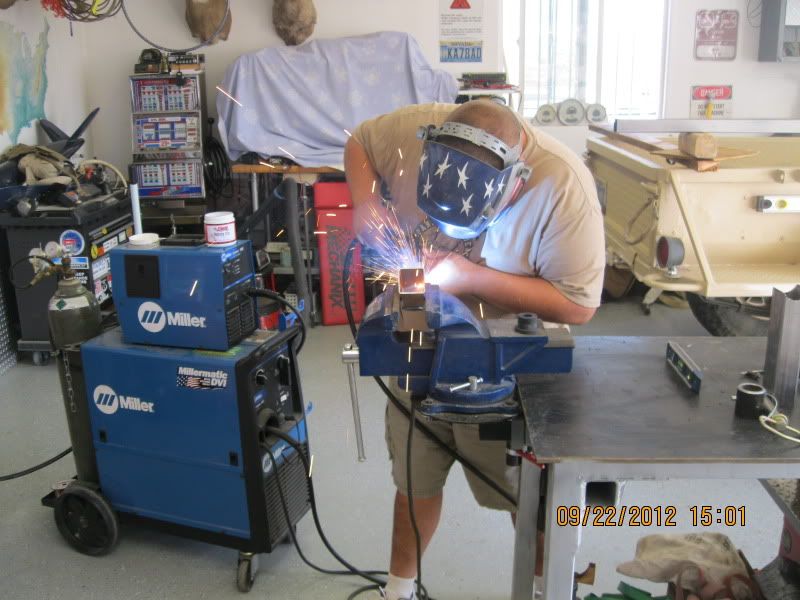
WOW... lots of cutting!

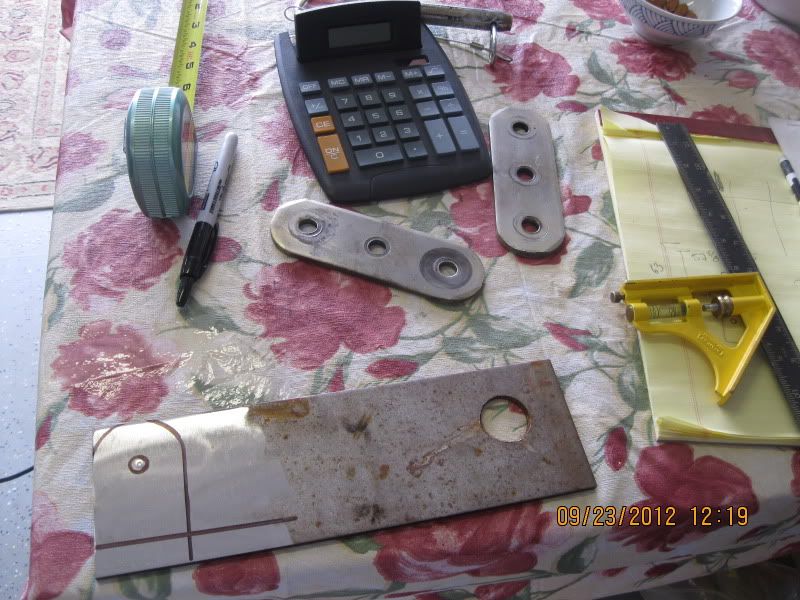
Me, I did some work on my trailers nose-wheel and rear stabilizer jacks. My buddy Mike had some big C channel and some plate scrap lying around, so we hatched a plan for my swivel wheel I picked up.

f3351c8c.jpg


a7298e61.jpg


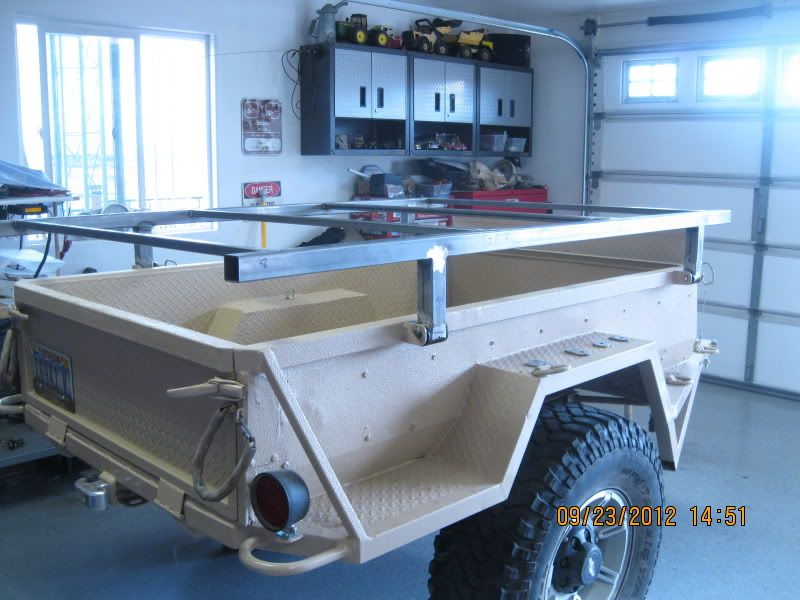
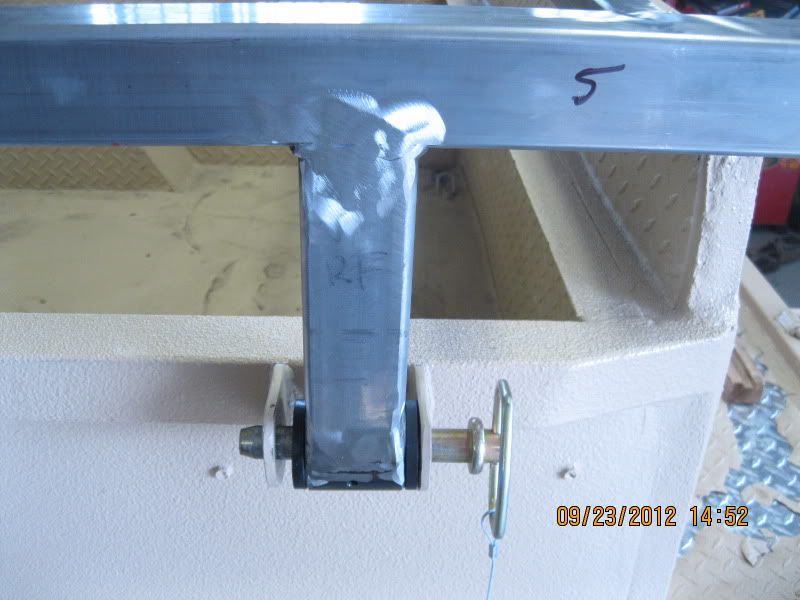
Bolts right on in place of the drop leg and the trailer sits level. Just need to paint it and finish it up tomorrow...ran out of light. I also worked on extending the drop down rear legs as well. Well actually Mike did most of the work... but I get to finish it up.

3fab0a0d.jpg


8979f26d.jpg


Just need to wrap these up and get them installed! I also picked up the rest of the wiring for my electrical system. Another 9 LED light for inside the tent, and a battery cut off switch etc. That comes next...but maybe not in time for the trip I am HOPING to take next weekend? Got to break it in some time right?


curious-- why not just cut and lengthen the inside piece that came w/ the jack? As opposed to all new insert?
 

Backroad Explorer

Adventurer
Spent the last 2 days Bleachin', Toss'n & getting rid of all the mouse "stuff" & hoards of alfalfa seeds.

DSCF1375.jpg

DSCF1376.jpg

DSCF1377-1.jpg

A little more Soap & HOT Water and the inside is done for now.

Then on to the outside, Canvas needs help but thats a winter project?


DSCF1353_zps25473a9d.jpg

DSCF1372.jpg

DSCF1373.jpg

DSCF1374.jpg
 

Mark Harley

Expedition Leader
Wear a resperator when cleaning!

Hantavirus is carried by rodents, especially deer mice. The virus is found in their urine and feces, but it does not make the animal sick.

It is believed that humans can get sick with this virus if they come in contact with contaminated dust from mice nests or droppings. You may come in contact with such dust when cleaning homes, sheds, or other enclosed areas that have been empty for a long time.


http://www.nlm.nih.gov/medlineplus/ency/article/001382.htm
 

VanIsle_Greg

I think I need a bigger truck!
curious-- why not just cut and lengthen the inside piece that came w/ the jack? As opposed to all new insert?

Basically that is exactly what I did. I didn't use the same stock as it was an oddball size and I didn't find any in my limited travels. All I did was insert the new steel tube into the old leg extension and drill and bolt. They are almost the same size tube, but the new steel is thicker. The old extension is the piece with all the holes.

Make sense?
 

Forum statistics

Threads
189,860
Messages
2,921,642
Members
233,030
Latest member
Houie
Top