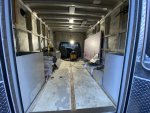
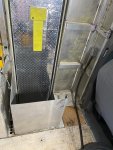
YAAC - Yet Another Ambulance Conversion

dtruzinski

4 Season Traveller
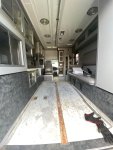
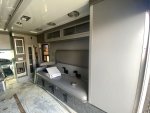
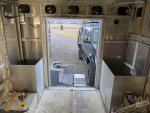
I recently acquired a 2003 E450 Ambulance with a 7.3L with 54k miles! The cloth OEM seats look new and the cab interior is like new as well. The undercarriage is rust-free and clean. I probably overpaid due to the Covid premium, but I got a great base rig. Oh yeah, it is 2wd...ugh. My conversion plans are evolving, but every scenario starts with a complete strip to the aluminum studs and removal of all electrical, a/c, and heating components in the box. My high-level design goal is to create a 4-Season, 4-person camper (I live in Montana and need to be able to camp and travel in the winter).
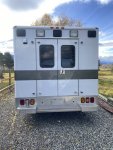
IMG_5209.jpegIMG_5208.jpeg

Some components and changes to meet the design goals include:
Open up the pass-thru
Add 2 seats with seat belts in the camper
Lagun dining/work table
LED lighting throughout
Hydronic heating (optional)
Webasto Diesel Heater (no propane)
Induction Cooktop built-in
Isotherm refrigerator/freezer (DC)
300 AH Battleborn Lithium battery bank
Minimum of 540w rooftop solar
All power components: charger/inverter, DC to DC charger, solar charge controller, etc will be Victron brand
Queen sized bed
Sleeping for two additional people
Thinsulate insulation throughout
air conditioner
4WD Conversion!!

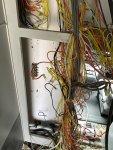
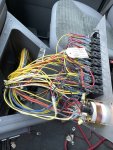
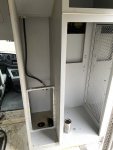
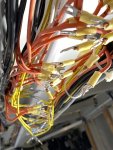
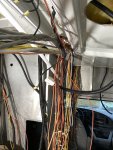
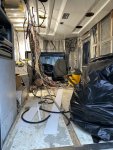
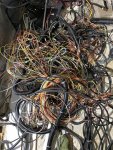
I started today on the electrical system removal. Many people have commented that this gets complicated on the Ambo builds. I think the complications occur when you try to use the existing systems (well I hope that is the case). There are a seemingly endless number of fuses, switches, circuit breakers, relays, and wires used in these ambulances. I am about 70% complete with the wiring removal and have only cut 6 wires. My plan is to reuse as much of the wiring as possible.

A few pics to kick off the thread and more next week.
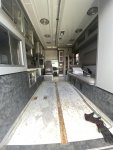
IMG_5210.jpegIMG_5217.jpegIMG_5222.jpegIMG_5224.jpeg
 

dtruzinski

4 Season Traveller
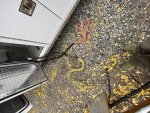
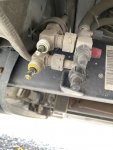
Well day two was limited to just a few hours, so I focussed on removing the built-in A/C and heater. This involves finding the A/C and heater lines under the driver's side and disconnecting them. Remove the protective caps on the engine side of the A/C lines and close the valves. Then separate the A/C lines heading to the rear compartment. Btw, freon is a poisonous gas and you should be very careful, especially if your valves leak when you are trying to close them (as was my case). The heater lines just need to be connected together to form return to the cooling system. I clamped them tight, cut them and then joined them together with an elbow. Next you have to remove all of the zip ties ( wow I have probably cut 300 zip ties in two days!) and clamps that guide the 2 A/C and 2 heater lines into the rear unit. Removing the actual unit was also less than fun, and I finally broke down and pulled out my sawzall!

IMG_5232.jpegIMG_5233.jpegIMG_5234.jpeg
 

dtruzinski

4 Season Traveller
Made a little progress yesterday and completely opened up the passenger side by removing the enclosure for the A/C and heater. I gained 36" of interior space and most importantly opened up the pass-through! Here are before and after pics. I am taking my time so I can reuse the baltic birch plywood. This coach builder used wood dowels every three inches.
View attachment 689566View attachment 689567
@iggi I have used foam board in previous builds and found it to work quite well. After researching some current build threads on YouTube (eg. Humble Road on Youtube) and reading articles like this one https://faroutride.com/insulation/ , I decided to use Thinsulate on this build
Now that I am making progress on the interior removal, I have exposed the beautiful shiny alum framing…it is begging for pink foam board 2” thick. I will probably go this route. Owens 1” polystyrene panels are rated at R5; a 2” panel will give me a robust R10. That insulation value would be hard to achieve with Thinsulate. I think the rectangular box of an ambo is better suited for foam board type insulation while the curvy van walls of the Sprinters benefit from the flexibility of Thinsulate.
 
Last edited:

iggi

Ian
Now that I am making progress on the interior removal, I have exposed the beautiful shiny alum framing…it is begging for pink foam board 2” thick. I will probably go this route. Owens 1” polystyrene panels are rated at R5; a 2” panel will give me a robust R10. That insulation value would be hard to achieve with Thinsulate. I think the rectangular box of an ambo is better suited for foam board type insulation while the curvy van walls of the Sprinters benefit from the flexibility of Thinsulate.

That was my thoughts. It's so easy to add foam board to an ambulance but you seemed pretty certain about the thinsulate.
Have you seen this insulation test? https://www.buildagreenrv.com/insulation-testing-for-van-conversions/
 

dtruzinski

4 Season Traveller
Well between work and fall photography in Yellowstone, I have only spent limited time on the stripping of the interior. I have removed all of the plywood cabinets and structures. Carefully preserving each piece as well as the hardware. The only things that remain are some wiring and the fiberglass ceiling. Soon I will have an awesome aluminum box to design into an RV.

I have been very impressed with the insulation and the mitigation thermal bridges in the original Ambo build. If you ever decide to gut an Ambo, be prepared to cut wire ties every 3". It is incredible how much wiring traverses that cabin. I nearly wept when I found a segment that was only wire tied in 6" segments! I am going to give Wheeled Coach a huge shout-out for built quality. This is an18 year old Ambo with everything in place as it was on day one.

Once I have the ceiling removed, I am going to get the Ambo weighed at a CAT scale to see how much that plywood and wiring actually weighed! My plan is to use 80/20 1.5" extruded aluminum framing and baltic birch plywood for cabinet/drawer faces. While the E450 has ample GVW, I am trying to keep the weight down.

Here are some progress pics
 

Attachments

  • IMG_5344.jpeg
    IMG_5344.jpeg
    152.1 KB · Views: 77
  • IMG_5345.jpeg
    IMG_5345.jpeg
    101.5 KB · Views: 75
  • IMG_5346.jpeg
    IMG_5346.jpeg
    106.6 KB · Views: 70
  • IMG_5347.jpeg
    IMG_5347.jpeg
    108.9 KB · Views: 69
  • IMG_5349.jpeg
    IMG_5349.jpeg
    125.5 KB · Views: 78
  • IMG_5350.jpeg
    IMG_5350.jpeg
    136.4 KB · Views: 83

dtruzinski

4 Season Traveller
@Bikersmurf today I removed the wires that ran through the ceiling. It took two hours, but I salvaged a ton of wire runs. While it looks rather daunting, a slow and steady pace that preserves the plywood, screws, wiring, etc will take ~20 hours to get to the alum frame throughout. Well maybe 22 hrs, with fiberglass ceiling removal. The pic below is just the wires that ran in the fiberglass ceiling channel!
IMG_5352.jpeg
 

Abitibi

Explorer
You're doing it right, gut it and start from scratch but take your time to plan everything ahead of time. No need to rush... I did much better planning on my 2nd one and I'm sure glad I took my time. Some call it procrastination, I call it proper planning ;)

As for insulation, 2"foam boards are great. The fit is near perfect and the R value is hard to beat.

Enjoy your build!
David

Sent from my SM-G973W using Tapatalk
 

dtruzinski

4 Season Traveller
I am in the final phases of getting to a bare-bones box. I spent nearly 12 hours tracing and removing the wires that ran from the cab (under the driver's seat into the engine compartment). Ignore my previous estimate, this is taking longer than I anticipated. So far I have only lost my high beams and brake lights...not bad given the amount of wire removal that has been done. My research indicates that both of those connections are located under the driver's side dash and will hopefully get to those tomorrow.

I have to get it weighed and get that info to @UjointoffroadCO. This brings me to my first major upgrade and that is the conversion to 4WD. I have chosen Ujoint Offroad CO to do the 4WD conversion and add a few extra features like S-POD, onboard air, and upgrade the rear differential to limited slip. There is no need to travel all the way to North Carolina to get "ujointed" thanks to Justin who has setup shop near Denver CO. Supply chain issues are creating long lead times on things like springs, so if you thinking about a big project...get started and be prepared to wait.

With the 4wd conversion process in the queue, I shifted to the acquisition of key systems and parts. I have literally been on a parts buying binge.

I contacted Battleborn Batteries (aka Dragonfly Energy) and Derrick helped me with the design and order of:
  • 4 - 100 Amp Hr Heated LiPo batteries,
  • 3000 W Victron Inverter Charger,
  • 2 Orion DC to DC chargers (I have 2 alternators and can charge 30 AMPs each with the Orions),
  • misc shunts, dongles to create the base power system.
If you are looking for some outstanding customer service and amazing products, contact Battleborn Batteries (ask for Derrick)

I have spec'd my solar system and I will be purchasing the 1460W solar system with 4 -365w panels and 2 Victron 100/50 MPPT Charge controllers from Arizona Wind and Sun (https://www.solar-electric.com/rvkit-019-1280w-12v.html). I am just waiting to see if they are going to have a Thanksgiving sale, before I make the purchase

I purchased an Isotherm Cruise 200 Inox refrigerator freezer (side by side, so cool) from mmarineonline.com. I have never worked with them before, but they seem to have their game together. Great communication and they txt me pics of the refrigerator on a pallet within 24 hrs of my order.

I have decided to use 80/20 Extruded aluminum (thanks to Humble Road on youtube for the inspiration). This stuff is not cheap, but it is going to make a really strong and light build. I placed a big order today with www.framingtech.com

Pics and hopefully a weight update soon!
 

dtruzinski

4 Season Traveller
TADA! I have finally removed the entire Ambo wiring system and restored everything to factory configurations with the exception of the high beams. I have not been able to find the splice they did for that and it's too damn cold here in MT for more outside work.

So I took it on a 1 hr drive to the nearest CAT scale today and boy was I surprised. Wheeled Coach's mfg tag shows the weight as 10,245 with 3805 payload capacity. Today stripped of the wiring, ceiling, and all to the wood-based interior products, it weighed in at 8620 lbs (3640 on the front and 4980 on the rear). My payload capacity is now 5430 lbs which means I removed 1625 lbs of Ambo-stuff!

So now to add back some weight....1174 of those lbs are already spoken for with the components I have either ordered or selected to date and the water (43 lbs hot water, 43 lbs toilet water, and 250 lbs freshwater). I just picked up 6 sheets of 2" pink foam board from Home Depot which will result in R10.

Should I spray some adhesive or just fit it tight and tape it?

Here are my progress pics


IMG_5464 (1).jpgIMG_5210 (1).jpgIMG_5467 (1).jpgIMG_5466 (1).jpgIMG_5211 (1).jpgIMG_5212 (1).jpg
 

dtruzinski

4 Season Traveller
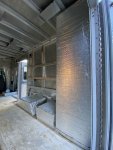
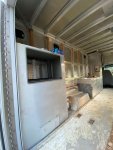
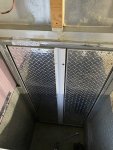
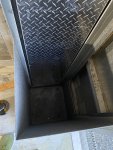
I have cut the aluminum storage bins to accommodate my design layout. Here are some pics after trimming the cabinets.

Two rear cabinets cut down...a queen bed frame will be built at that height. Notice that the exterior access to the lower section of the cabinet will be preserved.

Also ordered an Arctic Tern window for above the headboard of the bed...450mm x 900mm (18"x36")


IMG_5483.jpeg
IMG_5486.jpeg
IMG_5485.jpeg
 

Attachments

  • IMG_5487.jpeg
    IMG_5487.jpeg
    109.7 KB · Views: 31
  • IMG_5484.jpeg
    IMG_5484.jpeg
    130.6 KB · Views: 29

dtruzinski

4 Season Traveller
I am a Sketchup newbie...but below is my first draft of the layout. As you enter on the right, there are opposing seats with under seat storage. They are immediately behind the van cab. I am considering a lagun table (s) as that is a 48" gap between the seats. Entering and facing straight ahead, you are staring at an Isotherm Cruise 200 refer/freezer. To the left of the refrigerator is the only counter top showing, and it will have deep sink. Continuing to the left of that, you see the headboard of the bed...is shows like a cabinet, but will just be two shelves at the head of the bed where you can put phones, keys, pistols etc while you sleep...Above that will be the new window 18" h x 36" wide. The foot side of the bed will have a large storage box that will be 5' long and 18" tall and 24" deep. Immediately to the left of the door will be a two-burner induction cooktop.
YAAC v1.0.png
 
Last edited:

Forum statistics

Threads
188,395
Messages
2,904,133
Members
230,274
Latest member
mbauerus1
Top