Yes Another Ambulance Build

Hi there, long time user on the forum under a different username (dsmith01). I just picked up a 2003 E450 Wheeled Coach at auction a while back and figured its time to post some progress. The municipal auction was in KC and I'm located in Denver so had to figure out how to get the ambulance home. After one failed trip, that was nothing short of a disaster, with a trailer that was too short I finally got it unloaded into the driveway.

I have some big plans for this ambulance. Ujoint 4x4, raised roof and cabover sleeping loft to name a few. Here's the progress so far.
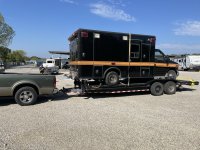
IMG_8425.JPEG

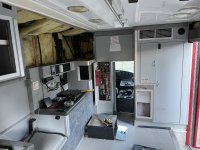
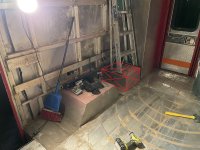
Next, I ripped out the interior and electrical.
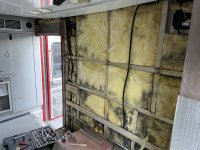
IMG_8434.JPEG

IMG_8433.JPEG

IMG_8443.JPEG

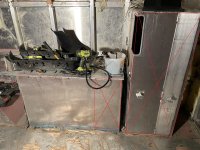
For the electrical, I traced every circuit back to the board. In the end I eliminated every circuit on the board and removed all of the legacy components in the box. While time consuming, it was a good learning experience and in the end I was able to fully understand how wheeled coach tied into the van.
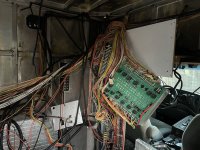
IMG_8446.JPEG

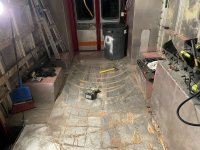
Here's the fully gutted ambulance.
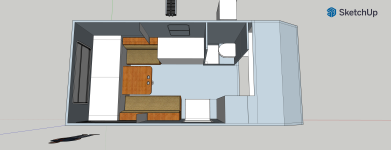
IMG_8528.JPEG

IMG_8537.JPEG
 
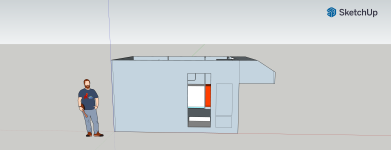
Took some measurements and started brainstorming layout. Here's an incomplete mockup. I'd like to raise the roof 10" and build a cabover sleeping loft for a full size bed. The main bed will be a elevator style queen size in the rear area above the garage.

Top.png

Side.png

So far, I'm thinking of using a 45gal wheel well tank for fresh water underneath the passenger side bench seat. I'll need to remove the top portion of the storage box behind the passenger side wheel well and there should be enough room to mount the water pump under the seat as well. Should still have 6in of storage under the bench cushion.

passenger storage removal.jpg

A 35gal gray water tank will go in the bottom of the outside storage cabinet next to the bathroom. The goal is to distribute the weight across the ambulance. A 10.5gal black water tank is integrated into the shower pan.

To build the bathroom, I'll need to remove the upper storage box behind the driver seat and a portion of the upper part of the cabinet where the gray water tank will be located.

driver storage removal.jpg

Not sure on window locations yet, pretty sure I want a large window in the rear but that will require chopping rear doors in half - still want access to the garage.
 
Slow progress but here are some updates.

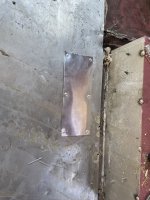
Got the rear floor scraped cleaned and mostly ready for flooring. Patched the old hvac hole. Just need to clean and reseal all the seams with sikaflex and the floor is ready for insulation.

3A0E3091-BE7C-4205-A28A-27AA1DEFA41E.jpeg

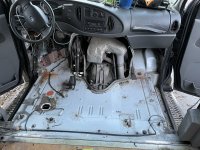
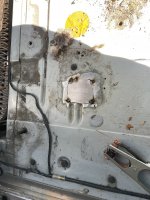
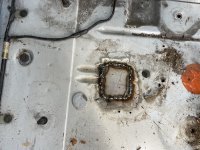
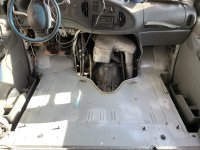
Then I moved onto the cab and patched the hole under the drivers seat. After that I cleaned up all the rust, hit the pitted sheet metal with some rust converter, then primed and painted the floor with some color match that didn’t quite color match. Oh well, it will be hidden.

B89468CB-34B4-4491-9E53-9D7D5CD5B4F4.jpeg
4F7D581C-9238-4BAB-B9F1-6AE09A472C84.jpeg
F1135098-8BB6-4C7B-9EC8-FE750F19CFBF.jpeg

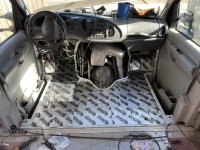
I hate noise and cold so insulating the cab is the next step. First, a layer of vibration deafening mat.

9CDD5D3D-941E-48E5-A272-1CB9E1170682.jpeg

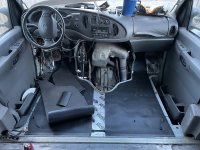
Then comes Siless Liner, combination closed cell foam and MLV. I’m taping off all the seams.

5512018A-2DE3-4C72-B9D9-483948CEEA7B.jpeg
 

RVflyfish

Fishing is life. The rest is details.
So the Kilmat is the vibration deafening mat? That’s butyl, right? Then the Siless 2 in 1 CCF and MLV?
 
Last edited:

Bikersmurf

Expedition Leader
Slow progress but here are some updates.

Got the rear floor scraped cleaned and mostly ready for flooring. Patched the old hvac hole. Just need to clean and reseal all the seams with sikaflex and the floor is ready for insulation.

View attachment 809249

Then I moved onto the cab and patched the hole under the drivers seat. After that I cleaned up all the rust, hit the pitted sheet metal with some rust converter, then primed and painted the floor with some color match that didn’t quite color match. Oh well, it will be hidden.

View attachment 809250
View attachment 809251
View attachment 809252

I hate noise and cold so insulating the cab is the next step. First, a layer of vibration deafening mat.

View attachment 809253

Then comes Siless Liner, combination closed cell foam and MLV. I’m taping off all the seams.

View attachment 809254
Ahh that reminds me that I discovered a new hole in the floorboards under the drivers heal. I'm hoping to leave it till spring when it's warmer and dryer.
 

iggi

Ian
makes a huge difference. I used to hit 95 db on hills and idled in the mid 70's. After a similar endeavour I now see high 70's on the hills, highway cruise in the mid 60's and idle at 55-60 dB.
 
So the Kilmat is the vibration deafening mat? That’s butyl, right? Then the Siless 2 in 1 CCF and MLV?
Yes, sound deadening (I misspelled). Pretty sure it is butyl. Correct again on the Siless mat. I have new carpet ready to go over the top of everything. Hope to wrap up the floor in the cab next week and start on the habitat.
 
makes a huge difference. I used to hit 95 db on hills and idled in the mid 70's. After a similar endeavour I now see high 70's on the hills, highway cruise in the mid 60's and idle at 55-60 dB.
That's promising. I hope it turns out that well.
 

86scotty

Cynic
It's a 7.3. You can tell by the back of the engine that it's a diesel and the year makes it a 7.3.

Nice find, and nice color for an Ambo. Do you plan to keep it that way?
 
It's a 7.3. You can tell by the back of the engine that it's a diesel and the year makes it a 7.3.

Nice find, and nice color for an Ambo. Do you plan to keep it that way?
Yes, 2003 with a 7.3. Its former life was a sheriffs office transport vehicle and they painted it black. I’m going to strip the decals and repaint. Current thought is probably a bluish gray with a strip of bed liner across the bottom 1-2ft of body. Paint will probably happen in the spring when it’s warm enough to work on the exterior.
 
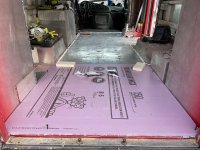
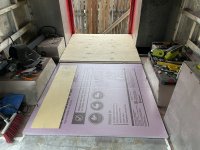
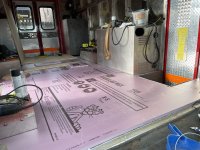
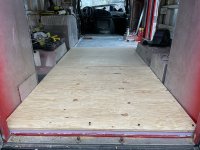
Got a few days off for Christmas and tried to finish up the floor. I wholly underestimated how much foam board adhesive I needed and ran out on Sunday.

All of the wood is cut and ready to be installed. I used a 1” lap joint on all the plywood seams. The foam seams don’t line up with the wood seams and I plan to tape all the foam before installing the plywood floor.

E62CDE2D-9C4B-4A22-9144-3AF4C48BC212.jpeg

F4661029-1C61-4D84-ABE7-2A5375A6F77A.jpeg
3AC5D6C3-250F-4848-BC28-7D7FD0AADC03.jpeg
E9EC5B86-9DEC-426F-8A46-625E01C4CDEA.jpeg
 

ITTOG

Well-known member
What kind of tape? Curious because I am using that foam on my build.

Sent from my Pixel 7 Pro using Tapatalk
 

Forum statistics

Threads
188,245
Messages
2,904,486
Members
229,805
Latest member
Chonker LMTV
Top