Yet Another Camper Homebuild Thread

tanuki.himself

Active member
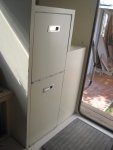
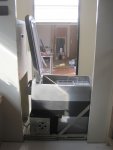
A little more progress in fitting the fridge and cool box sliders and box in

IMG_5393.JPG

The fridge will run as a fridge for short trips, or as a freezer for longer trips

IMG_5392.JPG

This cool box is about 20 years old so I will buy a nice shiny new one when we start camping properly

IMG_5391.JPG

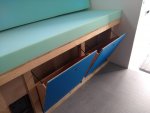
The cool box handle slots down into the drawer handle so as you open and close you are pulling directly on the cool box, but its also easy to lift out and carry outside once we are set up - we plan to do most cooking outdoors to minimise smells and steam/grease inside, so having the cool food and condiments nearby makes more sense. The boxing in is spare fibreglass/foam so should help the insulation further, and i may line it with mylar film/space blanket as well to keep things as cool as possible. We will rely on defrosting food or ice packs from the freezer to keep it cool, and/or I may invest in a counter top ice maker to run off the daytime solar through an inverter so we can also have iced drinks and use it in a swamp cooler and radiant cooling panel.

IMG_5378.JPG

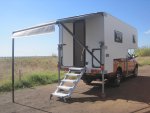
We took the rig down to a local beachside car park to try out the steps and the awning that we imported from the US (at a ridiculous expense) as my build space is on a slope and doesn't have the space to put the awning out.

IMG_5387.JPG

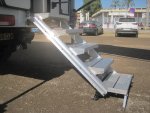
I've had to take a maximalist approach to steps as my wife is the most unstable person in the world. There is nothing she cannot fall down, off, over or trip up on, including her own feet. Anything she needs to climb up and down needs to be like a normal staircase, wide, stable and with good grip. She was also concerned about stepping over a lip in the doorway into the camper so asked for a top step level with the interior floor level.

The best solution i could find for treads was to cannibalise some decorators' step up platforms - I wasn't able to find just the tread profile for sale anywhere, and alternatives like decking profiles worked out just as expensive and were not supported right at the front edge. Sides are in 3.2mm (1/8 inch) 6082 aluminium which may be a bit OTT and heavy, but they are stable and don't show any flex when jumping up and down in the middle.

When the camper is off the truck it will sit on some small trestles 200mm high, so we will need a single step to get in and out. I have used the cut down legs and hinges from one of the platforms as a basis for that, and put some extended bolts in the rear hinges that the 4 step section slots onto. the top of that then clips onto the back of the truck - its a bit tight at the moment using off the shelf stainless hidden headboard/picture hooks and some scrap aluminium angle, but once I'm happy that I've finalised the design I'll make something easier and stronger in stainless .....

The steps themselves fold flat for storage and can strap up under the rear overhang so I don't have to lift them in and out of the camper each time. It also forms a little storage area on top that I can use for awkward weatherproof things like extra awning poles, waste water hose etc.

IMG_5389.JPG

The straps make it easier to lift the steps into position but I'll probably also put a couple of long studding retainers there as well to keep everything tight and stop the steps swaying side to side on the straps.

IMG_5390.JPG

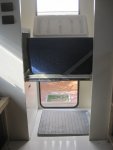
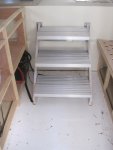
I duplicated the same arrangement inside for access to the bed - having managed to tuck the battery away off the floor area we decided that any type of permanent step arrangement would get in the way of using the full kitchen counter and seating. And when we are not in bed it can live outside where folded flat it can clip on one side of the overhang and act as a cook table for the gas hob and propane BBQ - I'll need to make some sturdy legs for the other end but I'm hoping I can also use those to turn the 4 outside steps into a step ladder if I ever need to reach anything elsewhere on the camper

Both sets of steps are at the moment way too heavy so I may have to swiss cheese them with a hole saw, and once she has got used to them maybe I'll try the wife on using the 3 steps outside and stepping over the door lip, which would allow me to reduce the weight of the 4 step section by an instant 25%
 

Dusty-NZ

Observer
Interesting build , you've done so much work with excellent progress . (I'm fascinated with how many joints you have in the plumbing system :) )

I have noticed with my camper , a significant improvement in on road stability after I added "AIRTABS" , you may find it interesting to research them .


tanuki.himself

Active member
Interesting build , you've done so much work with excellent progress . (I'm fascinated with how many joints you have in the plumbing system :) )

I have noticed with my camper , a significant improvement in on road stability after I added "AIRTABS" , you may find it interesting to research them .

i've seen the aerodynamic shrouds on the back of a lot of trucks and know its supposed to save fuel, but i didnt think about stability. I could claim to be be part way there with the slope at the back of the roof, but in reality that is to protect the awning from sun damage while rolled up.....i've not seen the airtabs but they look like they would be easy to fit

plumbing got a bit more complicated putting in the heater radiator and recirculation pump, but its still pretty simple, just concentrated in a small area. And if the radiator idea doesnt work over time (limescale buildup, etc, its easy enough to remove and replace those pipes. All the pipe runs are as short as possible and only have joints where i can get to them.....
 

tanuki.himself

Active member
1.2 tonnes = 2,400lbs. How is the payload so high? My US spec Tacoma is only rated at 1,100lbs. I would love a 2,4000lb. payload, it would open up options for so many campers.
actually 2640lbs. And i've just paid to have it up-plated to 1500kg/3300lbs with the airbag suspension. I believe from articles i have read it is mostly down to suspension differences between North America and the rest of the world - you guys are alleged to prefer a softer ride and more luxurious interiors as you use pickups as everyday vehicles, whereas traditionally Europe and Australia use them as primarily work vehicles, although that is becoming much more blurred nowadays. Personally I think there is also an element of manufacturers wanting to push you guys towards the larger, more expensive F-series/RAM/Tundra/Titan models....we don't get that size of pickup over here so they are not poaching from that market by making the smaller models more capable
 

NorthernWoodsman

Adventurer/tinkerer
actually 2640lbs. And i've just paid to have it up-plated to 1500kg/3300lbs with the airbag suspension. I believe from articles i have read it is mostly down to suspension differences between North America and the rest of the world - you guys are alleged to prefer a softer ride and more luxurious interiors as you use pickups as everyday vehicles, whereas traditionally Europe and Australia use them as primarily work vehicles, although that is becoming much more blurred nowadays. Personally I think there is also an element of manufacturers wanting to push you guys towards the larger, more expensive F-series/RAM/Tundra/Titan models....we don't get that size of pickup over here so they are not poaching from that market by making the smaller models more capable

The big three definitely want to push people into the bigger trucks, but Ford and Chevy both have mid-size trucks now available, but neither with the payload of your truck. However, I did just look and the Ranger is rated between 1600-2100lbs. approx. I kinda wish I'd waited and bought one over my Tacoma (rated between 1100-1600lbs. payload). Thats insane that the Ranger payload starts where the Tacoma stops.

I don't want to hijack your thread here, but I would like to know how adding airbags increases your payload by 660lbs.? I thought they helped with added weight, but didn't actually increase payload. Also, is your higher payload just due to frame design/construction, rear axle, springs, and shocks? Just wonder what is different that allows you to have 1540 additional lbs. of payload.
 

tanuki.himself

Active member
The big three definitely want to push people into the bigger trucks, but Ford and Chevy both have mid-size trucks now available, but neither with the payload of your truck. However, I did just look and the Ranger is rated between 1600-2100lbs. approx. I kinda wish I'd waited and bought one over my Tacoma (rated between 1100-1600lbs. payload). Thats insane that the Ranger payload starts where the Tacoma stops.

I don't want to hijack your thread here, but I would like to know how adding airbags increases your payload by 660lbs.? I thought they helped with added weight, but didn't actually increase payload. Also, is your higher payload just due to frame design/construction, rear axle, springs, and shocks? Just wonder what is different that allows you to have 1540 additional lbs. of payload.
no problem - i only post here to share my experiences (good or bad) that others may learn from....


IMG_20201126_112718354.jpg

The new uprated plate arrived yesterday, along with a basic certificate with a reference number. I've then had to modify the weight on the vehicle registration document and send that and the certificate to the UK vehicle licensing agency (DMV equivalent) - they told me the official request has to come from the registered keeper of the vehicle. Reading between the lines of the web site of the company providing the service, I think they have independently tested aspects of the factory build, suspension and braking capabilities of a number of common vehicles and they then provide those results and calculations along with details of the specific airbag system to the DVLA so that when my application arrives they can cross reference my vehicle and certificate details to what the company has supplied them and they should then issue me a new vehicle registration document with the uprated weight. I know that the company does also offer a braking calculation service, but i think that may be aimed more at motorhome manufacturers rather than individuals. They don't share any of those calculations publicly so I guess they are proprietary/commercial property. And besides, my maths was never good enough to cope with the calculus needed for dynamic systems - I studied civil and structural engineering as buildings don't generally move around enough to need it.

It looks like i also got an upgrade in towing capacity from 6000kg to 6770kg. The company did offer a 7000kg towing capability upgrade but that would have needed an uprated tow bar to be fitted and i don't need that capability or expense at this stage. In years to come I may swap the camper for a fifth wheel that would need the extra capability, but i don't need to make that choice or modification yet.

I think Toyota have always lagged behind Ford and Nissan on weight limits. I was touring Oz in 2012 when this generation of Ranger was designed and launched there, and speaking with dealers they had told me that Ford had definitely aimed to have the largest payload in class to capture the lucrative mining market, and it worked - at the time there was a year long waiting list for a new Ranger as the mining industry had bought up the whole production. Oz also has a long history of suspension upgrade components for the off-road market, so I suspect the chassis, axle and braking systems on the Ranger were designed to be more capable with a view to that customer base too, so the up-plating process is just unlocking that inherent capability rather than overstressing those components. But that is just my guess....
 

tanuki.himself

Active member
Some kitchen progress.....

IMG_20201126_122912928.jpg

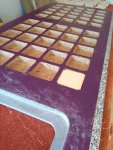
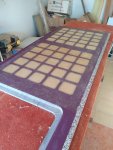
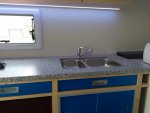
We wanted a double sink but with the delays in manufacturing and delivery that seem to be plaguing the European camping market at the moment (had to wait ages for windows and other parts) the only one I was able to find was an old stock under-mount. It was a bargain at 35 euros, but is designed to fit under a solid laminate worktop and I couldn't find one of those locally without spending silly money at a custom kitchen fitters, so I had to adapt and use a 30mm thick pressed chipboard one from a DIY barn

IMG_20201112_123954813.jpg

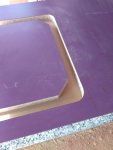
I routed out a recess from the underside to leave just the surface 1.5mm that i hope is proper laminate - I did test a spare piece with water and it didn't appear to soak any in - and then filled it to a depth of 12mm with CSM fibreglass and coloured resin that I happened to have. While the resin was still green i then routed this back to give a smooth surface and edge, and cut out the centre. The sink was pre-drilled for screws so I very carefully drilled and tapped for 10mm m5 stainless bolts, and used lots of silicon which hopefully will both seal and glue the sink in place.

IMG_20201118_125132931.jpg

Given the thickness of the chipboard I spent 2 days routing out voids in the underside that I then back filled with a layer of CSM and some remaining 25mm PU foam I had and then another layer of CSM over the whole underside. If I had been able to buy a sheet of 25mm Nidacore i might have tried removing a lot more of the chipboard and just left the surface laminate and front edge, but I'm not able to source that locally. I figure i removed about 40% of the overall countertop weight - not as much as I would have liked but probably ended up about the same weight as a 12.5mm solid laminate top.

IMG_20201119_113325242.jpg

I left the sink edge square so that i can cut down a couple of bamboo/plastic chopping boards to act as insert covers to give more workspace


IMG_20201126_122846156.jpg

I figured sliding cupboard doors would be easier to fit and lighter weight than hinged wood frames. I was going to use a double layer of 4mm coroplast/correx to fit the 8mm aluminium channels but we found an alternative 3mm PVC sheet that had better colour saturation and finish, so ended up with a sandwich of that backed by a layer of coroplast. And the wife likes the finish so I also covered drawers and other panels with it to match

IMG_20201126_122816147.jpg

I made a set of tip boxes to fit under the sofa and kitchen cupboards where the shell steps in to fit in the tub and around the wheelarches - it seemed the best way to use the space and gives us somewhere to store bottles, tins, jars and other heavy items and keep the CoG low.

I would have liked to build the wood frames in oak but wasn't able to buy any locally, and a planned visit back to the UK where I know where I could have bought either wood or decent construction veneer didn't happen due to quarantine restrictions, so for now its basic pine and i will revisit it when I can buy better materials
 

Attachments

  • IMG_20201121_173833942.jpg
    IMG_20201121_173833942.jpg
    1.6 MB · Views: 12

tanuki.himself

Active member
a few finishing touches

IMG_5454.JPG

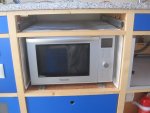
combination microwave/grill/convection oven for when we will be on mains power

IMG_5455.JPG

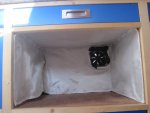
the space is lined with a fibreglass fire blanket and there is a high volume 12v PC fan at the back to pull hot air out. At the moment its on a manual switch but it will be fitted with a 40c thermal switch so that it comes on automatically when it arrives in the post. With the oven running on it highest temperature i was only getting temps of 25c above the fire blanket, so hopefully no more insulation is needed


IMG_5439.JPG

IMG_5440.JPG

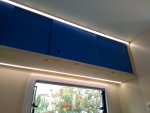
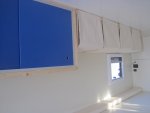
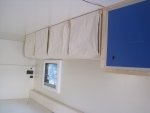
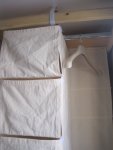
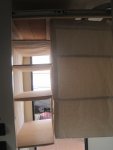
I opted for soft fabric storage above each side of the bed so that it won't hurt too much if you suddenly sit bolt upright in the middle of the night as my wife does every few months with cramp - she really must learnt to take more water with it

IMG_5441.JPG
IMG_5445.JPG

IMG_5444.JPG

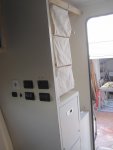
i used the same soft format for some storage in the rear area above the fridge/coolbox/gas locker to give me some flexibility for the space - if i need more hanging wardrobe space i can remove and fold up the storage. Its not ideal to have weight so high and at the back of the camper, so i'll have to be selective with what we store there

IMG_5442.JPG

IMG_5443.JPG

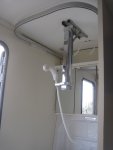
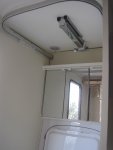
pull down shower head rail is based on some stainless steel window hinges, and brings the shower head out past the toilet/basin so it is properly over the shower tray
 

tanuki.himself

Active member
IMG_20210208_122534828.jpg
IMG_20210306_171142158.jpg

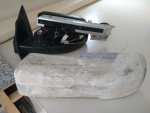
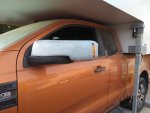
I started with some aftermarket extendible towing mirrors but they proved to be too big and i couldn't cludge them to fit well - the camper is only just over 7' wide so it will fit in a shipping container, but the mirrors were designed for seeing behind a 8' + trailer. So i got a couple of extra motors and fabricated some aluminium arms to clamp on in place of the default shrouds. The motors are hooked into the original mirror electrics on a 4 pole 2 way switch so i can choose to adjust the extension mirrors from the standard dashboard switch, and they also work with the power fold function.

I'm not particularly happy with the finish on the new shrouds, but before i spend any more time and money remaking them i want to make sure the mirrors are useable and don't vibrate too much at motorway speeds - otherwise it might be a back to the drawing board.

And that is it finished - for now. The camper has everything we need in it, so now we need to test it all out in some travels when we are finally allowed to go anywhere and decide if anything needs reinforcing or rethinking. There are also some finishes i want to make - veneering the woodwork, full length keder rails for side awnings - when i can get to pick the parts up, there are some parts that i may remake in stainless steel when i can get hold of the right gauge metal. And i might get a cheap 3d printer to play around with next winter - even if its only used to make better moulds to remake the mirror shrouds in fibreglass.
 

AeroNautiCal

Explorer
Your build is outstanding in every respect and it's nice to see it's taking place in Europe.

Speaking of which, perhaps also post about it on the European Demountable Pickup Campers website.

truck-campers.uk

Thank you for sharing your superb build and adding to the Make Your Own Gear (MYOG) knowledge base.
 
Impressive all around! Well thought-out and resourceful building/construction methods. Did you ever get to the weighbridge? Also have you had a chance to cross up the suspension? I'm very curious how the pultruded fg subframe handles twist.
 

s.e.charles

Well-known member
i must echo the above observations; kudos for such a thoughtful & workmanlike execution.

Q: what adhesive did you use to bond the pvc cabinet fronts to the wood substrate?

thanks
 

Forum statistics

Threads
188,177
Messages
2,903,380
Members
229,665
Latest member
SANelson
Top