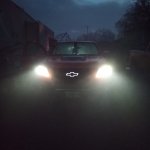
Yetti's 19 ZR2 ( Zelda)

Pacific Northwest yetti

Expedition Medic
* Yes my gas cap is open. I had just done a trail run*

I think the 33"s, ( I already have the TriFecta tune to dial in the size) We will see if I end up needing to re gear.
one of these days tint
And I need to wire the trigger for the LED'S to the high beams. As they are currently individually switched
And thats probably it.
 
Last edited:

Pacific Northwest yetti

Expedition Medic
1St causality. Not paying attention, I backed up against a large hole and with the snow/and ice buildup. It pinned the mudflap against the tire. Tore off a muflap. They are beefier than I expected. And not a GM part. Some new body clips and the fender trim was back on. Now I just have to find the mounting clamps, as the riv nuts are buggered. No worries though.

IMG_20240106_125800_399.jpgIMG_20240121_104430_088.jpg


two fake hips;)
Could be worse! haha. Did they at least install some with grease zerks? If you haven’t Clicked through my “ Explorations” Thread, you may enjoy it. Excuse the typos, I am slowly going back through it and trying to fix them.
 

Pacific Northwest yetti

Expedition Medic
A few weekend back , prior to my time in Bellingham. I fixed that rear mudflap. I do like them, they are kind of heavy, thick and well built. Gator Back/the Mfgr was 75$ usd/ per bracket. So I politely declined, and self tappers it was. I need to follow up and add some washers. But its working for now.
 

Pacific Northwest yetti

Expedition Medic
I was recently asked about the BesTop Supertop. Their answer to a Soft topper, (Which is a specific brand)

I have had it on the truck for the majority of my time with the truck. I got in on sale from the bestop website it was $700 and free shipping. They are listed at $1k now +/-.
Mine came with a tinted vinyl window front and rear. And solid panels for the side. You can purchase windows for either side as well.

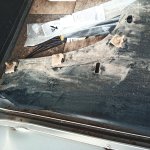
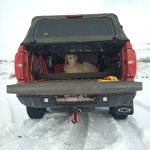
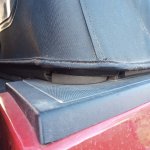
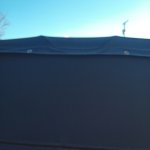
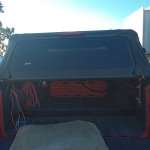
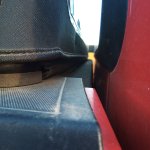
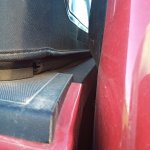
I like it, the dog likes it. I don’t hesitate to put stuff back there regardless of the weather. I go through car washes with it on. It is not completely waterproof; in the images you can see some gaps around the front bed corners. I could seal them with RTV. But the dog seems to like the air flow and smells. I would not hesitate to sleep in the back in a rain storm.


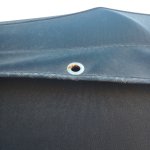
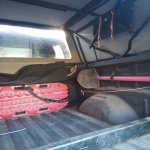
IMG_20240305_163707_525.jpgIMG_20240305_163718_144.jpgIMG_20240305_163724_358.jpgIMG_20240305_163729_994.jpgIMG_20240305_163737_888.jpg

You can see the holes in the front corners from here.
IMG_20240305_163746_371.jpg

I also ended up pulling the stall mat I had in the back. With the topper it just traps dirt and dog hair. It may go back in this summer to protect the dog from the hot bed floor if I need to do so.
IMG_20240305_163749_438.jpg

This front section, just has a rubber flap. I also placed some cheap stick on weather stripping along it. It has trouble sticking to the bed liner.
IMG_20240305_164640_701.jpgIMG_20240305_164646_274.jpg
As designed they want you to unzip the sides and store everything in that flap you see in the front. I added the cheap grommets and paracord/clips so I can just roll the sides up and clip them. Works great, I drove with it like that from Reno to Hermiston about 10 hrs. And no issues. As you can see the grommets are rusting.

The Velcro and zippers are holding up well.

And the entire thing folds up and forward if you want access to the entire bed, for example to put a pallet in. I will see if I have any pictures of it like that. If you have any questions, please send em my way.
 

Buddha.

Finally in expo white.
* Yes my gas cap is open. I had just done a trail run*

I think the 33"s, ( I already have the TriFecta tune to dial in the size) We will see if I end up needing to re gear.
one of these days tint
And I need to wire the trigger for the LED'S to the high beams. As they are currently individually switched
And thats probably it.
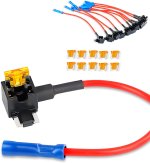
On a few different trucks I've used these "tap a fuse" to trigger the auxiliary lights' relay. I like that it doesn't require modifying factory wiring. You just have to go through your fuse box with a test light and see which fuse goes hot when your highbeams are on.

There are several styles, the last one I did on my '15 chevy took a weird three prong fuse so make sure you know which one to get..
The best part of doing it this way is you don't have to run any wiring through your firewall.

tapa.jpg
 

Pacific Northwest yetti

Expedition Medic
On a few different trucks I've used these "tap a fuse" to trigger the auxiliary lights' relay. I like that it doesn't require modifying factory wiring. You just have to go through your fuse box with a test light and see which fuse goes hot when your highbeams are on.

There are several styles, the last one I did on my '15 chevy took a weird three prong fuse so make sure you know which one to get..
The best part of doing it this way is you don't have to run any wiring through your firewall
Thanks, yes the fuse taps work great!

I have used them in the past, as the trigger line for the switch/ and or relay based on how the lights were designed/power requirements. That way they could be triggered into the high beams. But each set, also had an in line switch. Since I Generally* not a huge fan of the LED bars, as I want to aim my lights to work with the headlights and not just throw light downrange.

Usually two long range in the middle, (Like my full size) and two flood pattern at an angle. For example, maybe I am on a windy mountain pass, and I only want the angled lights on with the high beams to illuminate the sides of the road in front. But the long range wash everything out with not much road ahead.

Or two lane with houses/farms on the sides of the road. Where the angled mounted lights would shine into people windows. But the long range work on the road ahead.

For the ZR2, the low hidden bar was the easiest quick mount. It’s so low though, that it could be better. As you use a lot of light right in front of the truck on the ground. Sometime this year, bumper or not: I’ll probably pull the lower bar and hood lights to redesign the system like above.

I guess I just like options, and not always all or nothing. This is the first truck, I used a 6 gang switch panel, with the control box under the hood. Instead of building my own wire harnesses. Which has worked well. I just need to try and open it up, to power the trigger line/ or + for the switch from a fuse tap. I am just not sure how easy it will be once I take the control box apart.

And the good thing with a lot of the LED’s the power draw is low enough you don’t need relays like we used too when running the massive HID bulbs, like on my old-school KC Daylighters.

I did notice this truck has a few, weird, 3 prong fuses. I don’t love that; they are kind of tricky to find.

MisterNoisy,

That it was! Thanks, I tried to answer the questions I had before I bought it. I thought a lot about putting a decked system in as well. But, my massive dog wouild not fit back there with it.

In a long bed, that and a decked system. Would be an easy, quick, and great bomber camping set up.
 

Pacific Northwest yetti

Expedition Medic
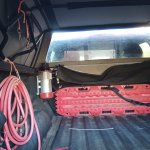
Looking at the pictures above, I see the air compressor has gotten unplugged. I don’t love those spade connectors. I wonder if they have the tiny screw holes in the middle.
When I bought that compressor, I could have had it clocked anyway I wanted. However, the mounting plan changed after I started messing with it.
I’ll have to find a better solution.
The weekend was rainy, so I ended up not rolling the top up and forward for the pictures.
 

Pacific Northwest yetti

Expedition Medic
We had a beautiful 73f day. So i took the time to fold the top forward and hose out the bed as the heat from the sun makes the material easier to deal with. I could of folded it flatter had i zipped the windows out. Instead of just folding them on top.

69b72c866189df779e56f1b99135abff.jpg


Each side, has this little latch that flips over a bolt to lock in the closed...bed covered posistion.
3fe6ef6892c657ba787540754dd8b9f9.jpg

The little flaps, are what besttop has to hold any rolled up material. They were trying to pull buttons out, so I went with adding the grommets and clips.
ff8bf832cacd99e7d43a2e2bd1f644e3.jpg


The bottoms have a plastic fold/that clips into the rail you see here.
60a4a70bf7891419291ee1b1cd97316a.jpg


ecc7de8b711f36160dd129ae1f823709.jpg


right before I folded it up.
755721ef3d8de091d7f88932b4c4f999.jpg
580108c9fda6da5e8651c2d498350c97.jpg
'


I also added the zipper pulls.

Sent from my Titan using Tapatalk
 
Last edited:

Forum statistics

Threads
188,337
Messages
2,905,697
Members
229,959
Latest member
bdpkauai

Members online

Top