"Yoshi" - 2005 Limited Build & Adventure Thread

ChrisCosta416

Well-known member
"They're cool arms but my springs don't contact the UCAs ".... yet

Haha, I mean they are stronger than stock arms but I never heard of any breaking so I guess its just cool factor.... unless you buy some King or Koni RAID 90 shocks ;)
 

Bmitchmontero

New member
6/9/19: Got Yoshi back from Ernest with an expensive bill because he took care of a lot of stuff. Mostly, preventative 170,000 mile, "well, while we're there we might as well..." sort of stuff:

  • Valve Cover Gaskets - OEM
  • Spark Plugs, Wires, and Tube Seals, Coil On Plug Boots - Denso, Denso, Fel-Pro, NGK
  • Plenum Gaskets - OEM
  • Coolant Crossover Pipe O-rings - OEM
  • 1 Rear Cam Seal - OEM
  • Butterfly Valve Deleted
  • Motor Mounts - OEM
  • All Front Diff Bushings - OEM
  • 2 Rear (rearmost) Diff Bushings - OEM
  • Diffs Reinstalled with 4.90 Gears and Rear Harrop Locker with Valvoline Full Synthetic 75w90 Gear Oil (Gonna run this cheap stuff for 1,000 miles then dump it and put in AMSOIL Severe Gear).
  • Front CVs refreshed with new boots and grease - Beck & Arnley
  • 1 Rear Axle Flange replaced with updated OEM unit.

Ok, so if you read that maintenance laundry list that there might be some things you're wondering, like:

What's the deal with the Butterfly delete, Why only 1 rear cam seal, Why didn't you replace all 4 rear diff bushings, and why did you only replace 1 rear axle stub/companion flange? Good questions - let's go through them one at a time:

1. Butterfly Valves DELETED

During disassembly for spark plug and coolant crossover pipe o-ring replacement I inspected Yoshi's surge tank and unfortunately it wasn't in the best shape.

In case you're not familiar with the Butterfly Issue that plagues these 3.8L motors - basically it's a variable intake system that gives you short intake runners for more torque at low speeds and then open to convert to long runners for better cruising. But the assembly, known by Mitsu as the "surge tank" is problematic in many ways:

  1. The front o-ring seal goes bad over time and creates a vacuum leak.
  2. The rod holding the 6 butterfly valves in the plenum is supported by plastic bushings that wear out and allow play in the rod.
  3. This play / vibration eventually loosens the screws that are holding the butterfly valves on to the rod loose. The screws get ingested by the engine and usually don't result in any real damage since they are made of very soft metal but the big butterfly valves will definitely mess things up if they make it down all the way through the intake into the combustion chamber.
  4. The screws cannot be welded to the rod because then you'll probably melt the plastic bushings next to them. Replacement bushings cannot be purchased separately (there's a guy in Russia who makes replacement ones but no one in the USA to date has actually installed a set of his) so you have to buy the whole surge tank assembly from Mitsu which costs around $700.
As I had previously found out a few months back, the front o-ring had gone hard and brittle and was letting air through. I had planned on hopefully just replacing this o-ring, adding some loctite to the butterfly screws and calling it good but the internal plastic bushings inside the surge tank that hold up the rod in between each chamber were very loose and allowing a good amount of wobble in the rod. And even though I could still do my best to loctite the screws in to keep them from being ingested by the engine one day, I was worried that the bushings themselves would soon disintegrate and fall into the combustion chambers and they are made of a very very hard plastic that is actually probably harder than the soft metal the butterfly screws are made of.

Having already spent a pretty penny on this rig in just a few months I decided to opt out of the $700 replacement surge tank and simply delete the entire butterfly variable runner assembly entirely.

Here's a quick video that a fellow Monty owner made explaining the delete:
Here's the view from the engine bay of where the rod comes out and meets the actuator and was leaking (confirmed via smoke test but not bad enough yet to throw a CEL):

View attachment 524593

Here's what the front bushing looks like with the sealing o-ring that was letting air through:

View attachment 524592


The Surge Tank:

View attachment 524594

Very worn busing:

View attachment 524595


Not so bad bushing, though still had some play in it:

View attachment 524596


Unlike in the video linked above, I decided to remove everything, rod and all because I didn't want the bushings getting eaten by the engine and I had the vacuum leak at the front o-ring/bushing to fix as well. So I removed the rod and all the bushings inside with the valves and screws. Most of my screws were tight, 3 were too tight that they stripped when trying to remove them and I had to use vice grips to get them out (they were all the ones closest to the either the first or last bushings), but a few of the screws towards the middle of the rod were only finger tight.

So that left me with a big hole about the size of a nickle at the front of the surge tank. After much searching and thinking of what to plug it with I found aluminum discs that are the exact size and thickness for the job. They fit into the hole perfectly and with some red high temp RTV + the factory bracket made for a great seal:

View attachment 524597


On the back side, there is a brass cap, kind of like a mini freeze plug, that seals the last bushing in place. Just for some free extra insurance I jb welded another aluminum disc over this end:

View attachment 524598
View attachment 524599


So here is a photo I found from another Monty owner of everything that was removed. The only difference is I still have the little white accumulator plastic jar and bracket on my manifold but the vac line from the solenoid that uses it and is next to it in the engine bay is capped off. No CELs as a result because the only thing that I know of that triggers a CEL with this assembly is a vacuum leak.

View attachment 524600


So final thoughts on the butterfly delete - I read everything I could find on this topic and spoke with many of you that have done this and answers to the question of "How badly did it affect performance?" varied wildly. Most people said they couldn't even tell the difference pre and post delete. But then there were a few that said the difference was significant and a good amount said that it was minor.

Well, after all of this engine maintenance I can confidently say: The difference is definitely noticeable in low speed, high torque, getting off the line driving. I don't know how much torque was lost but there is definitely a loss of acceleration from a stop. Even with the new 4.90 gears I think the car is slower than before until about 30-40mph where it all equalizes and I guess the butterflies would have opened up anyways. Someone with a 6G75 in a Mitsu sedan had posted some math saying the loss of torque would be really significant, like 20% if I remember correctly, and now I wouldn't think he's that far off. Now, I don't think I lost 20% of my acceleration because the 4.90s are helping, so I'll guesstimate 10%. Another unusual thing is that the engine sounds louder in a hollow sort of way in 1st and 2nd gear when accelerating. It's hard to describe but it doesn't sound as grunty. Kind of like a lesser version of when you push on the gas but forget you're in neutral- "all that and you didn't even go anywhere".

I didn't really have much of a choice to do the delete as I was kind of in between a rock and hard place as far as decisions go: loose rod/worn bushings/vac leak vs $700 fix on an already expensive build that I haven't really even gotten to enjoy yet.

My plan is to run it as is and then buy a new surge tank either when the build is farther along and needing fewer mods or when more engine work is being done (like maybe during timing belt job at 190k.
Did you have dimensions of the block off plate you used? Trying to have the disc before disassembly! Thank you?
 

SONICMASD

Adventurer
12/7/19: For those paying super close attention to this thread, you might remember that I bought an old stock / open box, but never used, Superwinch 12.5SR Winch about a year ago when I first started building this rig. It sat in the garage waiting to be installed but it had a side mounted control box and the ARB Montero bumper has a centrally located cut out for the control box. I thought about making a bracket for it so it could side in the center but the control box was an unusual shape, and honestly, I didn't put too many calories into thinking about a solution and just ended up selling it this past September.

Another reason why the Superwinch sat for so long without getting installed was because the ARB bumper that came with Yoshi was not something I felt comfortable winching with. Somehow when it was purchased new, it arrived with only half of the mounting brackets. Unable to track down the rest of the parts from ARB, the original owner gave up and sold it to Toasty who whipped up some brackets so it would mount up. However, these brackets simply pinched the bumper onto the frame horns and without the additional 4 ARB side brackets, I decided this bumper was fine for trail use and deflecting deer but not something I'd take a chance winching off of for fear of deforming the frame horn ends or pulling the whole bumper off.

Solution: I worked with ARB tech support and Wil at Sierra Expeditions to track down a new, complete, mounting kit. Unfortunately, just the brackets I needed were not sold separately, even after ARB reached out to their home Australia offices to try and get some for me.

As a bonus, the mount kit came with a bunch of other parts that my bumper was missing that I hadn't really even thought of like indicator lights, winch hole cover plate, high strength hardware, and rubber bumper pads. The ARB part number for this mounting kit is 6171798SP and goes to their bumper part number 3434060. You won't find it online, it's a special order item only.

They actually make 2 different Gen3 Montero bumpers and have two different mounting kits as a result. I think my bumper and mounting kit are an older design because the bumper itself is Charcoal grey instead of Black and the brackets are shaped differently than ones guys have been getting when ordering new ARB bumpers in the past couple years. I don't think this matters at all but just something worth mentioning in case you're wondering why my bumper and hardware might look a little different than yours.

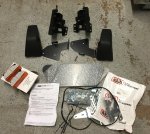
Here is what the complete bumper mounting kit looks like:
IMG_7873e.jpg

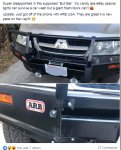
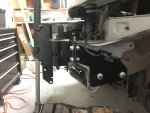
Here is a photo from someone else's bumper installation I snagged off the FB group. As you can see there are side supports bolting laterally through the frame horns:


21751626_10155507318535731_6130166278063308208_n.jpg


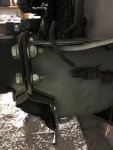
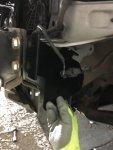
And here is what my bumper mounting situation looked like, it was just held on by a backing plate to pinch around the frame horn's flared sheet metal ends:

IMG_7874.JPG


These should be on the outside, and two more similar brackets go on the inside:

IMG_7875.JPG


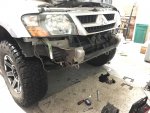
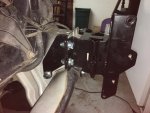
Removing the bumper was straight forward and easy. Unbolt the 6 bolts holding the bumper to the bumper mounts, unbutton the fronts of the fender splash shields and tuck the shields back a little, remove bumper, remove the washer fluid reservoir, then remove the 8 bolts holding on the bumper mounts:

IMG_7876.JPG

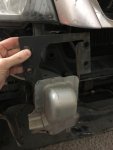
Here are the backing plates / pinch mounts Toasty made. They look a little crude but damn I was impressed with how solid the bumper was on there. I have offroaded a bunch of times with it and stood on the bumper many times when doing maintenenace and it never wiggled:


IMG_7877.JPG


With disassembly complete in under an hour I was feeling pretty good about myself and the job ahead. I studied the ARB mounting parts, had a good idea or what needed to be done, and felt confident as I went to bed that night. I was in for a rude awakening as this project quickly became a nightmare at every turn...so you have that story to look forward to in the coming days :)
 

SONICMASD

Adventurer
Happy New Year! I've got a toddler nowadays so no more going out and partying on NYE. So might as well get crazy and type up another chapter of the Yoshi saga. Thanks to all of you for reading and helping me with my build this year, here's to a lot more tech, wheelin, and fun stuff in 2020.

Onward!

12/9/19: ARB bumper mount installation time! Man was this install a nightmare. It's hard for me to put into words how bad of a process/product ARB managed to put together but I'll do my best.

1. INSTALLATION MANUAL

First and foremost, the directions that come with the mounting kit are terrible. Although they were written by a native English speaker, which is a big plus in the world of directions, they're still abysmally bad. Several steps are not even mentioned in the directions, things are just assumed or completely ignored. The photos are grainy, dark, and too few in number to be much of any use. Also, the instructions include a parts list, but no drawings/photos of the parts for reference so it's a lot harder than it should be to figure out what parts are what and how many you should have. And then when the parts are referenced in the directions, they're referenced incorrectly or by name only, not number...not that it would matter much given that all the hardware just comes in one big bag rather than being segregated by part number.

Example #1: "With assistance hold the impact absorber into position and place the smaller (inboard) chassis bracket into position as shown."

Well the thing is, the "as shown" photo is from far away and doesn't give you the detail you need. You can put the impact absorber into position in a lot of different ways. There's about 1cm of variance depending on how high you want to mount them, I decided to mount them all the way down, resting fully on the frame horns. Is this correct? I dunno, makes sense to me but it would be better if the directions specified what "into position" means exactly.

Example #2: "Using the M10 hardware supplied assemble finger tight only at this stage"

"M10 hardware" could refer to many different parts in the hardware kit and it's actually an incorrect statement altogether because you're supposed to use flat washers and lock washers along with the M10x30mm bolts that they're referring to, but on the parts list both washers are listed as M12. So you find yourself wondering, wait do I use the M12 washers listed on the first page, or am I missing M10 washers since the directions say M10 and not M12, etc?

Example #3: There are literally zero torque specs listed in the entire manual. We're talking about a 100lb bumper, attached to a sheet metal monoque body, that is going to hold a winch capable of moving at least 3 metric tons, held on by a few bolts and the directions just simply say "tighten all the bolts" . What?!

I of course torqued them all to numbers I was comfortable with but it's a bit of a tight rope to walk because too much torque and you could deform the sheet metal body, too little and then the bumper may not be secure.

---------
I spent a ton of time reading and rereading each step, checking the parts list, staring at the crappy photos before proceeding but still managed to make a big mistake. I didn't use lock washers when I installed the first lateral support mount because of the vagueness of the directions and this mistake easily added like 3 hours to the install time because I had not used lock washers on bolts that are designed to never be removed. They are inside the frame horns, you cannot access them once installed so have fun trying to remove them if you ever need to.


2. DESIGN / PROCESS

The 2nd problem with the bumper installation was that the installation is actually impossible to do as directed. It's just a bad process. With some small tweaks it would work, but as is, it's super frustrating. There were several times when I was like "well, that's not gonna happen." The worst offender are the 3 "cage nuts" that you need to insert through 2 preexisting holes in each frame horn. Basically, you load a cage nut into an arm, insert it through the hole in the frame, up to where you drilled your holes, and hold it there as you feed a bolt through it. Problem is it is physically impossible for more than one of these arms to go through the hole in the frame so you can't torque anything properly or test fit the position. You have to install one all the way, break off the arm so you insert the following one, and hope you got it correct because as I mentioned earlier, the cage nuts are now deep inside your frame and impossible to remove without cutting off the bolt heads.

I noticed a photo of a newer ARB Bumper and the cage nut arms were a different shape. So maybe ARB has already corrected this impossible aspect of the product...which I'm not sure how it made it into existence to begin with.

There are also other things in the design that bugged me. Like having to mount the winch feet forward. I get it, it's stronger/better for the winch but then you have to clock the winch. Not a big deal normally but in my case as we'll see later it was.

Another really important thing to point out: The bumper is designed for a Roller Fairlead only. You cannot use a Hawse Fairlead without coming up with a solution because the holes where the Hawse Fairlead would mount are too low and there would be like 1/4" of sharp bumper metal sticking up inside the lip of the Hawse where your synthetic rope would rub and get cut over time. Again, I get it. At the time this bumper was designed, no one was really using Hawse Fairleads so I can't fault ARB too much. But it's 2019 (for another hour and a half ;-) ) and they haven't updated the design to make it Hawse compatible or at the very least added a blurb to the directions about this.

I'll address fixes/solutions to all of these things in the next posts covering winch installation.


3. QUALITY / VALUE

For a bumper that costs over $1,200 they sure did skimp on a lot. ARB has a mixed reputation, mostly favorable though, in terms of quality and after going through this process it totally reaffirmed my decision to get a Harrop eLocker over an ARB air locker. In addition to the thousands of air leak horror stories that influenced me initially, now I'm of the mindset that if they can't handle making a folded steel bumper, no way in hell am I trusting something as complex as a differential locker to them.

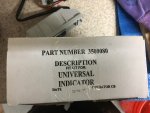
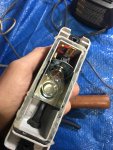
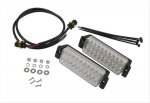
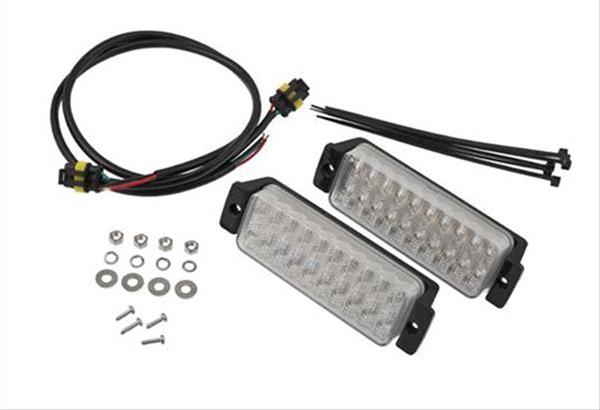
Exhibit A: Indicator Lights. If you do some Googling, you'll find nothing but bad reviews on the indicator lights that come with ARB bumpers. These universal units are soooo cheap. Pretty much everyone complains eventually that they are not water tight and that over time they stop working/rust out. I preemptively used a bead of silicone to seal mine up tighter, hoping this well extend the life some.

Universally Bad regardless of vehicle application:
IMG_7890es.jpg

Silicone bead for additional water protection:
IMG_7983.JPG

But wait there's more. The lights come with Scotch lock type wire connectors but they're way too big. It's a universal kit used on lots of ARB bumpers, but Mitsubishi used like the thinnest gauge wire on the planet going to the indicator bulbs so no way are these Scotch Locks gonna hold that wire, they might even cut it in half if you try because it's so thin so you'll need to find another solution.

Also, my kit was missing a part. 1 tiny black plastic mounting nut used to attach the lights to the bumper. So that delayed installation by a few days. I called ARB (they're known for having great customer service and I am happy to say that held true for me as well) and they actually sent replacement pieces to me within 2 days but then when I opened up the envelope the pieces they sent me were totally different so once again, I had to find another solution.


Needed the Black nut, got sent the White one which didn't even fit through the mounting hole in the metal bumper:
IMG_7985es.jpg

Continuing on with quality - a fellow Monty owner just posted on FB last month that a car wash ripped off his bumper pads! During install, I too noticed that these seemed a little flimsy and was scared of ruining them by simply tightening the mounting bolts too tight. Luckily, ARB's customer service came through and sent him new ones, hopefully they sent the correct ones ;-)
IMG_8154b.jpg
 
Last edited:

SONICMASD

Adventurer
Bumper Install Continued

More Installation Pics:


Finally done after like 10 hours/multiple days. Driver side, Outside view:
IMG_7891.JPG

Driver side, Inside view:
IMG_7893.JPG

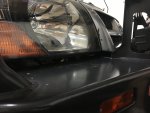
Once you do eventually go to mount your bumper onto the mounts, there is a ton of adjust-ability built into the design. During the install, I measured each mount with a level before drilling/tightening down, and I checked again by putting a 6' level across both mounts before finally putting the bumper on them. But the thing is, there is so much adjustability that even if your mounts are not perfectly level, you should be able to correct for this when tightening down the bumper to mount bolts. There of course is no mention of this in the instructions so you're going to have to decide how big of a gap you want between your bumper and the body. If you put it in the lowest position there is a really big gap, like at least 1-1.5 inches. Or you could put your bumper up all the way and have no gap between it and the body (I would not recommend this as you want some room for flex/impact isolation in my opinion). This buiilt-in adjustability is ultimately a good thing of course, but since it's not mentioned in the instructions it had me stressing - wondering if I messed up during the mount install and put them too low - totally unnecessary stress that was eventually resolved a few days later when I put the bumper onto the mounts.

Bumper resting on mounts in the lowest position, big gap:
IMG_8137.JPG


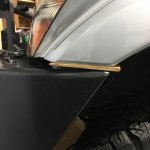
I used wooden door shims to give me the exact gap between bumper and body that I wanted and to ensure the gaps on both sides were equal:

IMG_8149.JPG

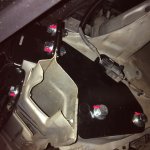
After final installation, all bolts marked with Cross Check Torque Seal for easy inspection in the future:
IMG_8154.JPG


The Bottom Line

Very disappointed with the ARB Bumper experience, I give it a 5/10. Having spoken to several other Montero guys that have purchased and installed it, most had less than good things to say about the install as well.

It's a pretty good looking bumper and although it kills your approach angle, once you manage to mount it up it should do the job just fine and I do love that it has hoops (even if they are inexplicably millimeters too small to be able to remove your headlight through them). But the terrible installation process and other aspects detailed in this post really soured me on the product and the ARB brand further. Unfortunately, it's the only off the shelf option for our Gen3s and if I could go back in time, I'd definitely give the custom fab bumper option more consideration knowing what I know now.

The funny thing is, going into the installation the part I was most worried about was the drilling of 8 holes into the frame to attach the mounts. Looking back, literally every other part of the install was so much worse than that, that the drilling turned out to be one of the easiest parts.

And if you're thinking (as I was too just a few weeks back) "An advantage is that ARB bumpers are crash tested and airbag system compatible" - Again, having gone through this process and product extensively now - Yeah, I wouldn't put much stock in that from a safety perspective having seen how they do things. Much like my diff locker statement, you think the same guys that made this many mistakes on a bumper, nailed it on something infinitely more complex as an airbag system crash test? My guess is the crash test claim they're making is implied universally. They probably did one test with like an early Land Cruiser bumper and then just used a similar mounting concept for every bumper/vehicle thereafter and called it good. Who knows if they've actually tested this bumper in a crash with the Gen3 Montero airbag system or if those tests were even done to USA standards or are just applicable in Australia.

The bumper mounts do have folded joints in the them and are actually referred to as "impact absorber assemblies" in the manual and maybe they do really work/help in a crash? Maybe from an insurance liability question it would come in handy being able to claim that your aftermarket bumper was still airbag system compatible? But safety-wise over a custom fabbed bumper, let's just say I'm now skeptical.

I'm a product designer myself and have personally taken almost 300 items from idea, through each step in the design and manufacturing process, to physical reality on store shelves - so I get it. You can't get everything right. But this bumper has been out for almost 20 years so they've had time to fix things, and honestly, many of the faults are simply inexcusable. For example, adding torque specs to the directions costs nothing and is a straight up safety issue.


Winch installation will be done in the next post, which will help tie this post together because you need to mount the winch into the bumper before putting the bumper back on the vehicle. You cannot mount the winch in the bumper without taking the bumper off the car. Stay tuned cuz the winch install goes off the rails and takes waaaaay too long as well :)
 

offthepath

Adventurer
Thanks for the write up. My ARB bumper should be here next week. Quick question, I use to have a hidden winch mount. I’ve cut most of it out in anticipation of the bumper arriving, but there are still metal plates welded to the top of the frame horns. Will I need to remove these to install the ARB brackets? Based on your pictures there is nothing that attaches to the top of the horns, but I’m not sure if you need the holes to access bolts etc.

Thanks!
 

ChrisCosta416

Well-known member
Great write-up on the ARB Bumper! That thing was such a pain to install, but man it does look good. I do agree with all your points! Looking forward to the winch install!
 

SONICMASD

Adventurer
Thanks for the write up. My ARB bumper should be here next week. Quick question, I use to have a hidden winch mount. I’ve cut most of it out in anticipation of the bumper arriving, but there are still metal plates welded to the top of the frame horns. Will I need to remove these to install the ARB brackets? Based on your pictures there is nothing that attaches to the top of the horns, but I’m not sure if you need the holes to access bolts etc.

Thanks!

I think you'll be fine as you are correct there is nothing that mounts on top of the frame horns. Some of the side brackets do stick up a little higher than the top of the horns so you might have some more grinding to do on your old winch mount but it doesn't sound like it will be a deal breaker because none of the holes at the top of the frame horn are needed for the ARB bumper install.
 

offthepath

Adventurer
I think you'll be fine as you are correct there is nothing that mounts on top of the frame horns. Some of the side brackets do stick up a little higher than the top of the horns so you might have some more grinding to do on your old winch mount but it doesn't sound like it will be a deal breaker because none of the holes at the top of the frame horn are needed for the ARB bumper install.
Thanks for the info!
 

SONICMASD

Adventurer
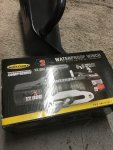
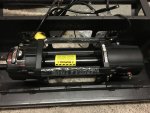
12/11/19: Cyber Monday is one of my favorite days of the year and this year I got Yoshi's winch off Amazon. I decided to go with the Smittybilt X2O Comp 12,000lb with Synthetic Rope.

The reasons I went with the Smittybilt:
  • Value - Great price for the power, features, and warranty
  • US Company - Yes, all the gear is made in China but the company itself is in California. I feel better about this than buying from a 100% fly by night China winch maker on eBay. Smittybilt has been doing the whole US company outsourcing mfg to China for like 30 years so my thinking is they probably have it down pretty well but just in case they mess up, there is a US company to stand behind the product.
  • Warranty - Lifetime Mechanical, 5 year Electrical
  • Testimonials - Not only great reviews on Amazon but our own PA_JERO has been running them for years and has been very happy with his Smittybilt winches. Toasty let me know this and also that he has seen PA_JERO's winches go well beyond the duty cycle and just keep pulling.
The Montero's max weight is around 6,000lbs, so 1.5x safety factor = 9k winch should be fine. I went with a 12k for a few reasons:
  • I've never been stuck before, but have recovered plenty of ppl and sometimes that means pulling out a big truck.
  • You only get a winch's max pull strength on the final wrap of rope. Given that you need to keep 10 wraps of rope minimum on a synthetic winch, you're never going to get the rated pull weight out of it (not counting snatch blocks of course and even then it's debatable).
  • The 10k version was actually $20 more expensive on Cyber Monday, go figure.
  • I like all of my offroad stuff to be overbuilt and far away from WLL.
  • The 10k version weighs exactly the same as the 12k version.
  • Honestly, I would have preferred a 15k winch because what if I need to winch when towing a 4,000lb trailer and my total pull weight is more like 10,000lbs plus resistance of being stuck? But the 15k version is only available with a steel cable and I wanted to keep weight down and didn't want the added cost of switching out the cable for synthetic given this unlikely scenario. And besides, with a snatch block as 12k winch will probably move the rig + trailer if it's not too buried in sticky mud or deep snow.

IMG_7932.JPG


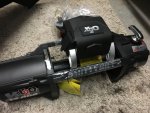
Unboxed:
IMG_7935es.jpg

Wired or Wireless Water-resistant Remote:
IMG_7934.JPG


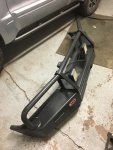
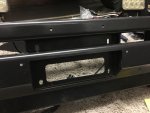
Bumper anxiously awaiting its winch (you can see the center cut out for the winch's control box):
IMG_7895.JPG


OK, shortly after this unboxing is where I stopped being impressed by the winch. From here on out it was all downhill and only negatives. Let's begin:

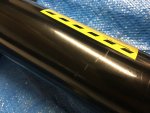
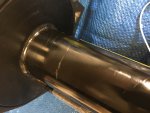
Snag #1. Upon initial inspection, I noticed the drum had scratch marks all over it. I know these marks are tiny but Synthetic rope is VERY prone to fraying and will catch on even the smallest burrs, even on a microscopic level it will damage the rope over time. These scratches/defects in the finish were tactile even with my finger nail so no way was I going to install my rope over them as is. An extra fine sanding sponge smoothed them out easily.

IMG_7980.JPG


IMG_7982es.jpg


Snag #2. Remember I sold my Superwinch Talon 12.5SR because it had a side mounted control box and the ARB bumper prefers a center mounted control box? That was one reason, another was I wanted a warranty. Well, warranty aside, serious brain fart on my end because ARB bumpers require you to clock the winch 90 degrees to it doesn't matter where the control box is meant to mount on the winch because it's not going to be able to mount there anymore after you clock it. This is not Smittybilt's fault obviously since the vast majority of people mount their winch feet down without needing to clock it but I'm just listing it here because it would be another set back/pain in the ass. We'll talk more about this later.

Here is the winch sitting straight out of the box in the ARB bumper, but as you can see, the bumper is facing down on its face so the winch is actually mounted "feet forward". The winch will work fine in this position as-is but as you can see, the clutch handle would not be accessible from the top holes in the bumper. So you need to rotate the clutch end of the winch with the handle, "clock it", 90 degrees so that it faces up and matches the hole in the top of the ARB bumper.

I decided to hold off on clocking the winch's clutch until I had everything I needed to complete the install and moved onto Snag #3.

IMG_7938es.jpg

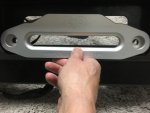
Snag #3. I had been warned about this prior to ordering the winch so no surprises here but it is still a negative that must be listed. The ARB bumper is designed for a Roller Fairlead, if you're going to use a Hawse Fairlead, like comes with every synthetic rope winch nowadays, you're going to run into a problem.

If you simply installed the Smittybilt Hawse Fairlead into position the inside lip of the ARB bumper would sit higher than the bottom opening in the fairlead. This bumper lip is thin, sharp, and would destroy your line in no time:

IMG_7940.JPG

IMG_7941.JPG

IMG_7943.JPG
 
Last edited:

Forum statistics

Threads
188,177
Messages
2,903,356
Members
229,665
Latest member
SANelson
Top