ChrisCosta416
Well-known member
WOHOOOOOOO, nice man! You know what you need know? My custom gen3 control arms! ?
WOHOOOOOOO, nice man! You know what you need know? My custom gen3 control arms! ?
6/9/19: Got Yoshi back from Ernest with an expensive bill because he took care of a lot of stuff. Mostly, preventative 170,000 mile, "well, while we're there we might as well..." sort of stuff:
- Valve Cover Gaskets - OEM
- Spark Plugs, Wires, and Tube Seals, Coil On Plug Boots - Denso, Denso, Fel-Pro, NGK
- Plenum Gaskets - OEM
- Coolant Crossover Pipe O-rings - OEM
- 1 Rear Cam Seal - OEM
- Butterfly Valve Deleted
- Motor Mounts - OEM
- All Front Diff Bushings - OEM
- 2 Rear (rearmost) Diff Bushings - OEM
- Diffs Reinstalled with 4.90 Gears and Rear Harrop Locker with Valvoline Full Synthetic 75w90 Gear Oil (Gonna run this cheap stuff for 1,000 miles then dump it and put in AMSOIL Severe Gear).
- Front CVs refreshed with new boots and grease - Beck & Arnley
- 1 Rear Axle Flange replaced with updated OEM unit.
Ok, so if you read that maintenance laundry list that there might be some things you're wondering, like:
What's the deal with the Butterfly delete, Why only 1 rear cam seal, Why didn't you replace all 4 rear diff bushings, and why did you only replace 1 rear axle stub/companion flange? Good questions - let's go through them one at a time:
1. Butterfly Valves DELETED
During disassembly for spark plug and coolant crossover pipe o-ring replacement I inspected Yoshi's surge tank and unfortunately it wasn't in the best shape.
In case you're not familiar with the Butterfly Issue that plagues these 3.8L motors - basically it's a variable intake system that gives you short intake runners for more torque at low speeds and then open to convert to long runners for better cruising. But the assembly, known by Mitsu as the "surge tank" is problematic in many ways:
As I had previously found out a few months back, the front o-ring had gone hard and brittle and was letting air through. I had planned on hopefully just replacing this o-ring, adding some loctite to the butterfly screws and calling it good but the internal plastic bushings inside the surge tank that hold up the rod in between each chamber were very loose and allowing a good amount of wobble in the rod. And even though I could still do my best to loctite the screws in to keep them from being ingested by the engine one day, I was worried that the bushings themselves would soon disintegrate and fall into the combustion chambers and they are made of a very very hard plastic that is actually probably harder than the soft metal the butterfly screws are made of.
- The front o-ring seal goes bad over time and creates a vacuum leak.
- The rod holding the 6 butterfly valves in the plenum is supported by plastic bushings that wear out and allow play in the rod.
- This play / vibration eventually loosens the screws that are holding the butterfly valves on to the rod loose. The screws get ingested by the engine and usually don't result in any real damage since they are made of very soft metal but the big butterfly valves will definitely mess things up if they make it down all the way through the intake into the combustion chamber.
- The screws cannot be welded to the rod because then you'll probably melt the plastic bushings next to them. Replacement bushings cannot be purchased separately (there's a guy in Russia who makes replacement ones but no one in the USA to date has actually installed a set of his) so you have to buy the whole surge tank assembly from Mitsu which costs around $700.
Having already spent a pretty penny on this rig in just a few months I decided to opt out of the $700 replacement surge tank and simply delete the entire butterfly variable runner assembly entirely.
Here's a quick video that a fellow Monty owner made explaining the delete:
Here's the view from the engine bay of where the rod comes out and meets the actuator and was leaking (confirmed via smoke test but not bad enough yet to throw a CEL):
View attachment 524593
Here's what the front bushing looks like with the sealing o-ring that was letting air through:
View attachment 524592
The Surge Tank:
View attachment 524594
Very worn busing:
View attachment 524595
Not so bad bushing, though still had some play in it:
View attachment 524596
Unlike in the video linked above, I decided to remove everything, rod and all because I didn't want the bushings getting eaten by the engine and I had the vacuum leak at the front o-ring/bushing to fix as well. So I removed the rod and all the bushings inside with the valves and screws. Most of my screws were tight, 3 were too tight that they stripped when trying to remove them and I had to use vice grips to get them out (they were all the ones closest to the either the first or last bushings), but a few of the screws towards the middle of the rod were only finger tight.
So that left me with a big hole about the size of a nickle at the front of the surge tank. After much searching and thinking of what to plug it with I found aluminum discs that are the exact size and thickness for the job. They fit into the hole perfectly and with some red high temp RTV + the factory bracket made for a great seal:
View attachment 524597
On the back side, there is a brass cap, kind of like a mini freeze plug, that seals the last bushing in place. Just for some free extra insurance I jb welded another aluminum disc over this end:
View attachment 524598
View attachment 524599
So here is a photo I found from another Monty owner of everything that was removed. The only difference is I still have the little white accumulator plastic jar and bracket on my manifold but the vac line from the solenoid that uses it and is next to it in the engine bay is capped off. No CELs as a result because the only thing that I know of that triggers a CEL with this assembly is a vacuum leak.
View attachment 524600
So final thoughts on the butterfly delete - I read everything I could find on this topic and spoke with many of you that have done this and answers to the question of "How badly did it affect performance?" varied wildly. Most people said they couldn't even tell the difference pre and post delete. But then there were a few that said the difference was significant and a good amount said that it was minor.
Well, after all of this engine maintenance I can confidently say: The difference is definitely noticeable in low speed, high torque, getting off the line driving. I don't know how much torque was lost but there is definitely a loss of acceleration from a stop. Even with the new 4.90 gears I think the car is slower than before until about 30-40mph where it all equalizes and I guess the butterflies would have opened up anyways. Someone with a 6G75 in a Mitsu sedan had posted some math saying the loss of torque would be really significant, like 20% if I remember correctly, and now I wouldn't think he's that far off. Now, I don't think I lost 20% of my acceleration because the 4.90s are helping, so I'll guesstimate 10%. Another unusual thing is that the engine sounds louder in a hollow sort of way in 1st and 2nd gear when accelerating. It's hard to describe but it doesn't sound as grunty. Kind of like a lesser version of when you push on the gas but forget you're in neutral- "all that and you didn't even go anywhere".
I didn't really have much of a choice to do the delete as I was kind of in between a rock and hard place as far as decisions go: loose rod/worn bushings/vac leak vs $700 fix on an already expensive build that I haven't really even gotten to enjoy yet.
My plan is to run it as is and then buy a new surge tank either when the build is farther along and needing fewer mods or when more engine work is being done (like maybe during timing belt job at 190k.
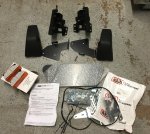

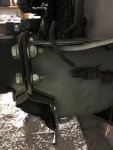
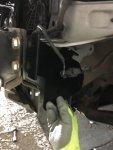
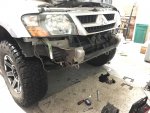
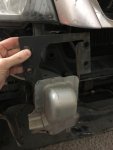

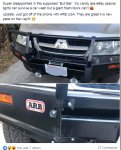
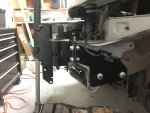
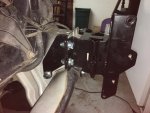
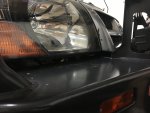
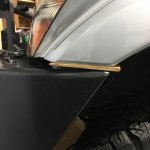
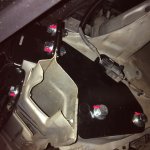
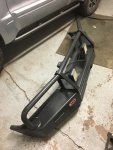
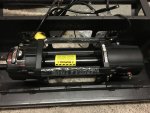
Thanks for the write up. My ARB bumper should be here next week. Quick question, I use to have a hidden winch mount. I’ve cut most of it out in anticipation of the bumper arriving, but there are still metal plates welded to the top of the frame horns. Will I need to remove these to install the ARB brackets? Based on your pictures there is nothing that attaches to the top of the horns, but I’m not sure if you need the holes to access bolts etc.
Thanks!
Thanks for the info!I think you'll be fine as you are correct there is nothing that mounts on top of the frame horns. Some of the side brackets do stick up a little higher than the top of the horns so you might have some more grinding to do on your old winch mount but it doesn't sound like it will be a deal breaker because none of the holes at the top of the frame horn are needed for the ARB bumper install.
