AmboLander

FDM2012

Adventurer
So, my neighbor heard me making some noise this morning, and came over to investigate. After seeing holes in my hood,
he said "Man, things are starting to get serious!". Of course, the "SERIOUS" began in West Virginia when it almost gave up
on me, only 75 miles into my trip home to Tampa.....

Anyways, hood vents complete.

Several of you have already done vents, and the rest are genius enough (like me) to see how I did it,
so I will spare my keyboard the frustration of spelling it all out.


View attachment 357466
Getting motivated....
IMG_20160706_224811.jpg
Cutting down to size
IMG_20160723_113811.jpg
I actually taped the template to the underside first for fitment, and then drilled some alignment holes.
then I laid laid it on top, stuck some bolts through, and traced it with a Sharpie.
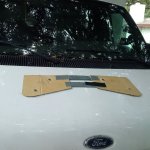
IMG_20160723_125812.jpg
Put some tape down, so as not to scratch the paint. And naturally, a fan is always the most important
tool this time of year in SW Florida...
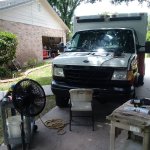
IMG_20160723_131359.jpg
My little jigsaw cut the fiberglass like butter.
IMG_20160723_133522.jpg
Voila!
IMG_20160723_160533.jpg
Button head cap screws and serrated flange nuts to hold them down. (I also applied 1'' border of
single side adhesive insulation strip to the vents before mounting) And, since the lower panel
of the hood has contours and whatnot, I used a hole saw with a long guide bit to cut it out of the way,
so that all bolts have nuts on them. My neighbor said to don't worry about the 14 nuts and just put some
goo on them. And yes, he was sober......Still a good dude, though.


IMG_20160723_145021.jpg


IMG_20160723_152016.jpg

View attachment 357465
IMG_20160723_160459.jpg
IMG_20160723_152008.jpg


I went for a good drive afterwards, and the air coming out is minimal, but Again, my theory is that
all the little things add up, and sooner or later, my compartment temp will hopefully come down a few degrees......

And on top of that, I like the look.
 
Last edited:

FDM2012

Adventurer
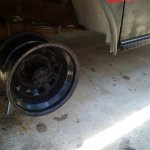
Today, I did the rear brakes and did some test fitting for my rims. I am pretty satisfied with the 2'' offset and how the 35's will fit,
but man, those rotors sure are exposed. Any major issue that you guys can think of regarding this? Other than it maybe slamming
down on a rock or something?

From my best measurements, after I have my front DRW hubs machined, it looks like the rear WMS will be about 4'' wider than
the front. Roughly 72'' and 68''.

As far as the fender openings, I have a plan..... No worries.

IMG_20160727_165757.jpg

IMG_20160727_170357.jpg

IMG_20160727_170406.jpg

This is about where they will sit in the front:
IMG_20160725_174437.jpg

Machine work is to just machine down the existing mounting flange, and facing off the
new mounting surface to a clean 90 degree angle.

P10100102.jpg

Hoping to do all of this, along with the Agile RIP kit, in the next couple of months. Tires = $1200,
and RIP and 10 leaf springs another $1500-ish....

And maybe Sulastic shackles, but not for sure yet. I will see how the RIP does first. I have seen all
excellent reviews on Agile's work, so hopefully my kidneys won't need the Sulastic.

In the meantime, I am going to Jerry-Rig a window unit into the box, just so I can start doing some Demo and
exploratory surgery on some of the electrical and decide how I want to do my battery bank and solar set up.
And sink, and stove, and heater, and air compressor, and water system, and ventilation, and seats, etc, etc.....

Fortunately, I will be scavenging loads of that stuff from the boat you see in the background in some of my pics.
Then, to the landfill it goes!


And my turbo blanket:
IMG_20160726_110318.jpg
 
Last edited:

IdaSHO

IDACAMPER
Personally, I LOVE having the EBPV

I live in cold country, and use the truck/camper even more in the winter than in the summer, so quick warm ups are nice.

Ive also got mine wired as a cheap exhaust brake.

Even rolling at 10,000lbs or so, we rarely have to use the brakes on long down grades.


The only reason Id ever consider a delete is if I was going for big power.

Stock injectors + downpipe + intake + chip is plenty good enough for me.

We have plenty of power, and it still knocks down 15-17MPG loaded with the camper.
 

FDM2012

Adventurer
Dang it, now you have me thinking of buying this exhaust brake controller:

http://www.spdiesel.com/


I haven't really researched these types of brakes yet, but I think there is a concern with the
torque converter lock up and cruise control being harmful in some way?
 

IdaSHO

IDACAMPER
Doubt it.

Mine with the older E40D auto trans never has any issues.

And mine doesnt use a controller of any kind, its nothing more than a toggle switch on the dash, wired to the EBPV solenoid.
 

gtbensley

Explorer
Doubt it.

Mine with the older E40D auto trans never has any issues.

And mine doesnt use a controller of any kind, its nothing more than a toggle switch on the dash, wired to the EBPV solenoid.

Can you explain how you have this wired up? I would love to do it with mine.
 

rlrenz

Explorer
I just found your thread - welcome to the Ambulance Collector's Society.

You're doing it right - get the mechanical portion figured out and working correctly before you tackle the interior - besides, it gives you time to figure out what to do with the interior.
 

rlrenz

Explorer
Oooooo, we want more info on the barrel locks! Our rig has cores with 3 different keys. I followed the forum link, but it looks like I was supposed to find Post #69 and there weren't that many in the thread. So, I'm missing good info! Where did you get the cores you used?

Thanks!

Ross and Kara

Ross, the locks on a Medic Master ambulance are made by the Tri-Mark Company. They also make locks for many of the RVs that are out there. You can buy new cylinders at Select Tech (http://www.fixmyambulance.com/category-s/1877.htm). Not as fancy, and not as secure, as going with an Ace tubular lock, but less likely to get jammed with dirt.

Your present keys should have an ID number on them (ambulances seem to only select from a few different keys) - pick the most common on your buggy as your new standard, then order replacements for the oddballs.

Tri-Mark lock cyl.JPG
 

rossvtaylor

Adventurer
Thanks, Bob - good info. The barrel locks were a bit too spendy to justify replacing all the locks. These look like a better option, as I think we only have two oddballs. Thanks for the tip. And... I like that... Ambulance Collector's Society!
 

IdaSHO

IDACAMPER
Can you explain how you have this wired up? I would love to do it with mine.

Mine is super simple.

The harness going to the EBPV solenoid has just two wires, one ground, and one hot lead (hot when commanded by ECU)

Snip the hot lead, tape off the truck side, and wire your switch to the EBPV solenoid side.

Then run a hot lead to your switch, and your done.


Doing this allows you to have complete control over the valve.
 

rlrenz

Explorer
The Select Tech number includes the lock keying - for instance, the photo I used was for a core keyed TM-202. It seems there are only 5-6 keys used on ambulances. I replaced all of my exterior lock cores, probably since the VFD that owned it never used the door locks. It takes a little fiddling on some of them, but not too bad a project. You have to remove the door interior panels, which means about 20+ 10-32 screws have to come out. Be careful - those are all self-tapping 10-32's, and they often strip the hole when you take them out. If the hole isn't too bad, you can use a regular 10-32 pan head machine screw to replace them. There will be a blue tint on the screws when you remove them - that's from the Loctite that was used by Medic Master. Nothing fancy - it's the low strength version, the stuff they used to call "screw-lock". Each screw also has a small nylon washer on it as well.

If a hole was stripped, I used either a press-nut, or a Riv-Nut, to repair the threads.

I bought 10-32 screws and nylon washers by the hundred from McMaster.

A Chicago Ace tubular/barrel lock is wide open to rain and dust, while a straight bladed lock can have an internal guard to help keep garbage out of the lock, so if you decide to go with a tubular lock, plan on having a can of WD40 available to wash out the dust.
 

Bikersmurf

Expedition Leader
EEK... WD40 works well to displace water, but it gums up locks. Use a spray lube, white grease, powdered graphite, etc. in locks WD40 will lead to more problems than it'll save.
 

patoz

Expedition Leader
EEK... WD40 works well to displace water, but it gums up locks. Use a spray lube, white grease, powdered graphite, etc. in locks WD40 will lead to more problems than it'll save.

I use Fluid Film on everything. Living on the Gulf Coast, this is all the boat mechanics use, and it's the best thing I have ever used too. It's widely used in the aviation industry also.

Naval Aviation Depot in Pensacola Florida conducted a process improvement study in October 1991, comparing FLUID FILM to the required preservatives being used. In addition, further testing was conducted on FLUID FILM for its corrosion protection capabilities in an outside environment:

FLUID FILM was found to provide superior protection in salt water environments, and in testing conducted to direct exposure to the outside environment, FLUID FILM was found to provide "outstanding results." Further statements made about FLUID FILM included "FLUID FILM provides superior corrosion protection plus a more environmentally safe work place. The use of this preservative will help to remove another ozone depleting substance from the system."

FLUID FILM products are solvent free and consist of an all natural lanolin base, which contain less than 1% VOC in their bulk form.

Remaining solvent free since the original formulation in 1943, the FLUID FILM product line is made of the highest quality corrosion preventives and lubricants available on the market today.
It is fantastic for locks, hinges, battery terminals and other electrical connectors, etc. It does not evaporate like WD-40 and a lot of other spray lubricants do, and this fact alone makes it a perfect choice for locks that are exposed to the elements. As far as dust sticking to it I can't really say, but I use it on my truck locks and have never noticed any problems with them.

Fluid Film Rust and Corrosion Protection Aerosol Can 11.75 Oz
https://www.amazon.com/Fluid-Film-Corrosion-Protection-Aerosol/dp/B00PWZ0XNM
 

gtbensley

Explorer
Mine is super simple.

The harness going to the EBPV solenoid has just two wires, one ground, and one hot lead (hot when commanded by ECU)

Snip the hot lead, tape off the truck side, and wire your switch to the EBPV solenoid side.

Then run a hot lead to your switch, and your done.


Doing this allows you to have complete control over the valve.

Thanks! Easy enough and I think I might do that for my next project.
 

IdaSHO

IDACAMPER
Its certainly well worth it.

6 feet of wire, a toggle switch, and some connectors is all it takes. :sombrero:
 

Forum statistics

Threads
188,275
Messages
2,904,783
Members
229,805
Latest member
Chonker LMTV
Top