'10 Tundra CrewMax

cwvandy

Adventurer
Fabulous Build

zidaro
I have been following your build thread for over a year. It has been a great source of information and inspiration for my Tundra build (see: http://www.expeditionportal.com/forum/threads/136352-Custom-Tundra-Bed-Storage-Phase-1 ). Really nice work.

Next step for me is also gears and traction fix. Not sure why Toyota would provide at least partial traction solution for Tacoma but not Tundra. In any event, it should be a noticeable upgrade. I will be anxious to hear how yours goes. How did you land on the gearing numbers you selected??

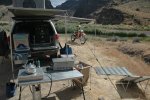
PS: where is the surf break in the photo of your rig with board on roof? I am tiring of freezing my a## off on the Oregon coast and ready for a warm water trip.
 

Attachments

  • DSC_0157.jpg
    DSC_0157.jpg
    593.8 KB · Views: 84
  • DSC_0154.jpg
    DSC_0154.jpg
    575 KB · Views: 82

zidaro

Explorer
IMG_1470_zps8b7c65b3.jpg


Pt. Mugu State Beach campground South of Ventura Naval Base. No cold water :sunny:

Bring that KTM dual down and lets give you a grand tour of death valley dual sport style! I have a nice Honda 450x plated

IMG_2413_zpsa876db7b.jpg


I will certainly be posting the removal and install of third member housings and then a few shots of performance fun to be had.

Gearing choice is easy. I have the 4.30 stock tow package gearing. The next and only size avail. is 4.88 by Nitro. Nitro gears even come Heat Treated. We used to have to send off our Precision and Yukon gear sets for HT, not any more.
There are plenty of gear ratio calculators out there, the 4.88 will return my odometer to accurate, put my transmission back to OEM shift rpm range, and give me the torque i would like to have with the 35" tires that seem to fit best with the Tundra
 

cwvandy

Adventurer
Hey, thanks for the info. I wrote to the guys where you got your parts and asked for some prices. Still going back and forth between locker and LS for rear. LS sounds like a good way to save some $ and would meet most of my needs
And thanks for identifying the warm water location. I lived in Ventura for 3+ years when I worked at Patagonia. Miss the water there big time.
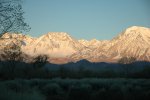
I may take you up on the Death Valley invite. I have taken one of my rigs to Death Valley every March/April for the past 7 years, but never taken a bike. Never know if we are going to get 80 degrees or snow, especially when we come in from the north. We usually stop in Bishop area on the way down. Took the photo last year near Bishop...now my screen saver. The grading of Saline Valley road sure made the trip easier last year.
Look forward to seeing how your upgrade goes. Good luck!
 

Attachments

  • DSC_0145.jpg
    DSC_0145.jpg
    540.6 KB · Views: 44

zidaro

Explorer
Hey, thanks for the info. I wrote to the guys where you got your parts and asked for some prices. Still going back and forth between locker and LS for rear. LS sounds like a good way to save some $ and would meet most of my needs
And thanks for identifying the warm water location. I lived in Ventura for 3+ years when I worked at Patagonia. Miss the water there big time.
I may take you up on the Death Valley invite. I have taken one of my rigs to Death Valley every March/April for the past 7 years, but never taken a bike. Never know if we are going to get 80 degrees or snow, especially when we come in from the north. We usually stop in Bishop area on the way down. Took the photo last year near Bishop...now my screen saver. The grading of Saline Valley road sure made the trip easier last year.
Look forward to seeing how your upgrade goes. Good luck!

That is a view i know very well.

Nice, inform Carl at Just Differentials that your coming off my (Aaron's) expo tundra Thread- may be worth a bit of a discount??
Limited slip will pay off on an every drive basis if your in snow country, locker is only great when off-road. Tough call, but i wanted a traction advantage in snow and ice (and sand/dirt) all the time to stop the traction Nanny from kicking in. Front locker should pull me thru most anything with a bit of help from the LS in front.

My Wife worked at Patagonia for a bit. her and Chouinard started the WaterGirl line ~2000. We lived upper Ojai. Then decided Mammoth and E.Sierras was more important than a respectable income :)
 
Last edited:

zidaro

Explorer
2nd Gen. TUNDRA 2007+ rear 10.5 Differential Removal

In my quest to change gear ratios and add traction devices to the Tundra I searched the web for a simple how to with pics. Its always nice to see a simple step process with pics to follow along and know that I'm not the only one having ever done something. Well, i couldn't find anything on the 2nd gen. Tundra rear axle disassembly.
Not a complicated process, but still nice to see it done.
So, here it is. Not perfect, or highly detailed. But simple enough to follow along when your doing yours.
Tools are no different than the standard Toyota metric set. 12mm, 14mm, 17mm, 19mm sockets and wrenches.

Start by setting the truck rear on jacks securely.

IMG_2932_zpsd74a12ac.jpg


And yes, thats ice. Never fun wrenching with ice under you :Wow1:

remove the wheels and admire your suspension a bit. I actually removed my and sent them off for a rebuild while my truck is out of service. Long overdue after 4 years of some good use.

IMG_2933_zpsb9f4b7c1.jpg


drain the oil. 22mm i think.

IMG_2931_zps184f8809.jpg


Remove the driveshaft at the rear diff.

IMG_2934_zps8d3c969a.jpg


I like to strap it up outta the way

IMG_2935_zpsa191389b.jpg


more to follow after dinner
 

bkg

Explorer
I'm very excited to hear how you like the gears.

Small observation (frustration with Toyota)... I'm guessing that you have just the jack stands in front of the rear axle, correct? Noticed the gap between bed and cab is greater at top of bed than bottom. Frame on my 08,11 drove me nuts. My 1st Gen is same design, overall, but seems somewhat stiffer.
 

zidaro

Explorer
You need some daystar cradles

True story. sort of.
Been running this setup for over 4 years and it has been trouble free. and i beat on it and live where there is weather, snow, ice, mud, gravel(pumice) and rocks. No HuntingtonBch. :) Issues i see being a problem with the cradle- i.e. buildup in the cradle of said obstacles and it affecting how the bag contacts, deflecting it would be bad.
It also had JUST hit the market when i added bags to my truck
These bags extend to 13" and have an internal bumpstop at 2.5", which is nice cuz i don't have to worry about over compression.
The travel, set up as is, is 3"less than my suspension at full droop. They actually match the travel of my ICON VS RR rear shocks perfectly. But when i added the ICON spring pack i modded it and added a leaf from an old National race pack i had AND added longer shackles, thus extending my full droop travel 3" beyond what ICON had intended.
My rear shocks are being rebuilt by ICON as i type this. They will be returned modded to allow for full droop on my suspension.
Then i will have to extend my brake lines and change my airbag setup to allow for the full travel of the suspension. Not sure if Cradles will be my choice though.
Pics to come later :coffee drink: for another day.

hows your little storm trooper holding up? nice build


I'm very excited to hear how you like the gears.

Small observation (frustration with Toyota)... I'm guessing that you have just the jack stands in front of the rear axle, correct? Noticed the gap between bed and cab is greater at top of bed than bottom. Frame on my 08,11 drove me nuts. My 1st Gen is same design, overall, but seems somewhat stiffer.

jacks in front of rear axle, sitting on the sliders.
The Tundra frame does flex, no doubt. :) Its a full C-channel from the engine mounts back and that has always disturbed me somewhere in the back of my mind.
My experiences though, have shown me that the flex is not a big deal. Unless you commute on those gawdawful sectioned concrete highways down south and have to deal with bed hop! Shoot me now. (the ICONS did help with that)
I have a couple buddies with different brand trucks that drive similar to me, both of their trucks have nice creases at the cab back where the bed has contacted the cab- NOT COOL! My bed has never hit the cab- jumping it empty or while carrying an overcapacity slide-in camper along hundreds of miles of rough trails/roads.
so, i stopped thinking about it.

The gearing and traction devices however---- can't wait!!!!!!!!!!!!!!!!!
tired of having Nannies over my shoulder (and under my feet) every time I'm behind the wheel. Cant drift around a corner on the throttle, can't drive up an icy drive, can't crawl over a small (or large) ledge- without a nanny interfering :violent-smiley-031:
 

zidaro

Explorer
and on with the rear disassemble:

you'll notice, if you've worked Toyotas in the past. The rear is essentially no different than any other Toy rear axle. although the 10.5 third is one heavy ******** when you drop it into your lap. be ready.

Semi float inner axle removal:
I like to NOT detach the brake lines, thus negating the brake bleeding step. My preference is to only pull the semi float axle assembly out of the housing just far enough to disengage the splines of the axle shaft from the Third member, allowing the Third to be removed. If you don't bash your inner axles around on the outer axle housing seal when working, everything just slips out and then slips back in- no issues.

remove both ebrake cable brackets- 1 from frame, 1 on axle housing

IMG_2937_zps11a8ff6a.jpg


remove all the hard brake line retainers from the housing, all the way to the soft lines.

IMG_2938_zps2169e537.jpg


disconnect the traction control connector. It has a cover on it with 3 clasps, remove it first, then disconnect the wire connector.

IMG_2941_zps1b1b4702.jpg


IMG_2942_zps558e0aa3.jpg


losen the 4 nuts holding SemiFloat inner axle assembly to axle housing. I like to leave one nut on but backed all the way out, then give the assembly a tug outward to dislodge it from its seal. the nut keeps you and everything from flying across your driveway.

IMG_2943_zps44d4db71.jpg


IMG_2944_zps8f950385.jpg


Assembly sits nicely without falling out. To remove the third you will have to pull it out another inch or two past this pic. It will take ALL the slack in the lines, the only harm that could occur is if you kink your brake lines. Just go slow and hand "straighten" the small bends in the hardline and it will work. During reassembly you just rebind the lines so they don't contact the housing.

IMG_2945_zps88f02618.jpg


on to the third member housing :)

loosen and remove all nuts. I like to leave one upper nut on, backed out all the way. This allows breaking of the seal without that HEAVY third dropping on your toes or worse, your lap. 12mm not the old school 10.

IMG_2946_zps1ca1d813.jpg


IMG_2947_zps1d036f13.jpg


at this point it is as simple as removing the last nut and wiggling the third out. I drop them into my lap -slowly.


Front to come!!! thats the hard one.
 

uscg2008

Explorer
Hey I don't live in Huntington beach I'm just from there. I live in Kodiak, Alaska right now? Thanks it's doing ok I need to replace my carrier bearing. Just little maintenance to do, I have 86k so it's time to do it.
 

zidaro

Explorer
yep

and a rear auburn pro LS, front ARB :wings:

rear is already in, gonna play with my airbag setup tomorrow and then get rollin on the front install. finally getting some weather in the eastern sierras and it is inconveniently cooler and wetter :)
 

zidaro

Explorer
So,
after removing my rear third member, i sent it off to be built. Im smart enough to know my limitations mechanically.
Im sure i could built a third member after buying all the correct tools for the job, and studying up on it- but let the pros do what they do best.
I chose www.justdifferentials.com for a couple reasons.
They have a great reputation for building long lasting thirds
They manufacture the 4.88 gears for the Tundra, and their gears are factory HeatTreated. Their gear sets are known for durability, strength, precision.
they have done most of the new 10.5 Toyota thirds
Their pricing is great and they get the product done quickly. (I know this now)
Carl was a pleasure to work with and he spent an ungodly amount of time answering my questions and handling my flip-flops

4.88 gears and a solid pinion spacer. YAY!!!!

IMG_3002_zps2a64e813.jpg


Cute little Auburn Pro Limited Slip tucked in there

IMG_3003_zpsc9592d30.jpg


Tight, even mesh. Good gears installed correctly are stronger, last longer, and don't howl
Im sure i could have done as well ;)

IMG_3004_zps9831f321.jpg


Housing all cleaned and RTV Grey applied instead of the little paper gasket. This is one heavy third!!

IMG_3005_zpsd154cb84.jpg


Breather swapped out for a barbed end. Now i can get that vent up inside the fender out of drownings way.

IMG_3007_zpscdcdc402.jpg


all pretty and back in its home.

IMG_3008_zpsf79c37b2.jpg
 

Forum statistics

Threads
188,253
Messages
2,904,528
Members
229,805
Latest member
Chonker LMTV
Top