Reading the
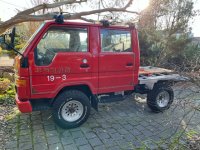
current thread on cabover vs. longnose platforms got me thinking about my build. I'm not going to continue the argument here, but I can say one of my motiviations for getting the Hiace is that it didn't look like everything else out there. It's not a Tacoma, it's not a Fuso, it's not a Kei truck. It's a little different, but still durable and maintainable. My build is working on small and light. The goal is to carry a queen size mattress to strange places and still have a warm dry place to cook dinner. I don't have "Buy a rig" money, but I have time and a willingness to fail a few times before I get it right. Part of having this truck really is about building it out. I've been enjoying learning to weld aluminum, making decisions in the design, correcting decisions in the design, and turning semi-value raw material into worthless scrap along the way.
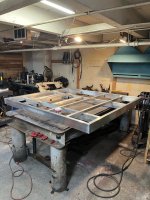
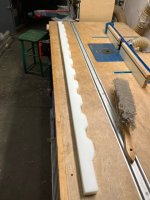
I managed to finish the bed (it's upside down on the bench here). Not shown is the small cutaway in the side rail for the fenders. I had a plan to use a portaband to make a long cut, but I learned that they are designed to cut through, not along. I ended up finishing the 20" rip cut by hand using a hack saw. If this were a steel frame, it would have been easy work with a cutting wheel.
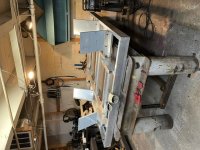
and get it mounted.
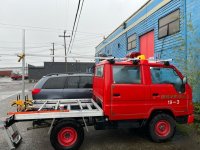
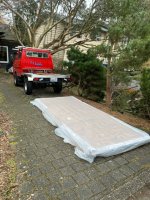
You can start to see the layout. Queen size bed over the cab, a little less than 6' of length behind the cab, and the camper is the width of the truck ~ 66". It's not much space for two people, but my previous life as an alpine climber got me used to "2 man tents" on the sides of mountains, so this will be luxurious. In this photo I was using stock pieces to check alignment of things, making sure my designed measurements matched the actuals.
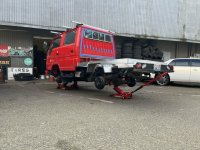
When I first test fit the bed, I couldn't get a bolt in the aftmost holes. I got worried that I screwed something up. Once I put the 1" poly spacers under all corners, not just the back, the bolts slid right in. The tolerances were tight enough on the hole pattern that 1" over 6' created too much of a mismatch to get a 10mm bolt through. Events like this make me think I'm good at this sort of thing.
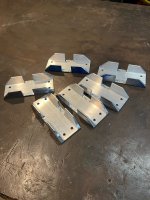
Putting the bed together made me realize I needed some jigs. It would be nice to have a fixture table, and while I have plans to drill my current table, I haven't worked up the gumption to spend 8+ hours with a mag drill turning my table into swiss cheese, so I made some jigs out of plywood.
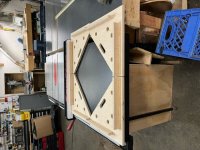
Simple construction, glued and screwed. Added a coat of high-temp primer to reduce burning when in use. Not as accurate as a $3k Fireball tool fixture table, but they are pretty damn good.
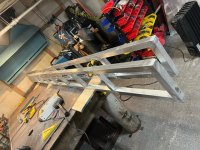
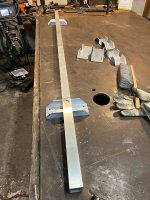
Used the plywood jigs to make a ladder section that extends from the back of the camper all the way to the front of the overhang. The ladder is a holdover from when I had a cantilevered overhang. Now that it will be supported on the cab with the rails shown in a previous post it's a little overkill, but I've got the material, so why not? Each one is 12' long.
Large structures are hard.
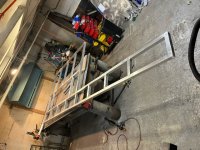
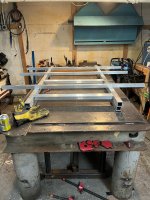
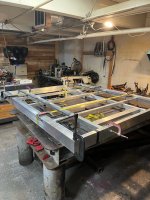
This is one full side of the camper. It's all 1.5" x .125" aluminum square tube, full dims are 12' x 5'. I spent sunday morning carefully reviewing my drawings and making a few adjustments before I cut material for both sides. I knew getting both sides done in a day was optimistic. My plan was to weld the lower section together as an assemblage, then to weld it to the existing ladder section. the first part went well, using the jigs and measuring corners to verify square. Welding the ladder to the lower was tricky. Well, set up was tricky.
As you can see, a good portion of the side is off my table. there is about 20" of clearance between the end of the frame and a table just off camera. I managed to get everything squared up and aligned using ~ 20 clamps. I welded two sides of the join and noticed that the ladder and the lower were not in plane. ********. Cutting aluminum isn't like cutting steel. If this were steel, I'd just grab the angle grinder, load a cutoff wheel, and chop it off (this is a good reason to build a steel frame if you can). Instead, I had to grind down the welds using a rounded flap disk, then use a file to clear the corner before switching to a hack saw to cut the welded areas. It's a pain in the ass, really. I added a beefy piece of c-channel to the clamp up, ensuring planarity between the pieces and re-aligned everything. Welding went well and now I have one side done.
Next step is to see if I can pilot the side down the long hall from my fab shop to the outer door of the building. If I can get it out on it's side, I can get the assembled camper out, and will finish it all in the shop. If I can't. I'll have to make individual pieces to later weld in-situ on the truck.
Seems like I may have a box on my truck by late spring...
