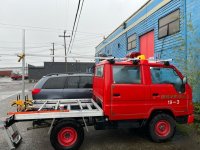
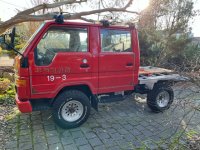
1993 HiAce Firetruck Build Thread

Fenderfour

Active member
I think so. It's an interesting idea, but my truck is at the shop getting new gears. I know a few folks that have these trucks and most are interested in regearing them. I'll pass the idea along.
 

Fenderfour

Active member
New gears are installed. I also added a Detroit True Trac limited slip in the rear.

The truck can go 60mph at ~2800 RPM, which is great. The downside is the 2.4 liter NA diesel runs out of power going up hills, and requires a downshift to 4th gear. 4th gear feels just like 5th did pre-gear change.

Folks want to know about fuel mileage differences pre and post gearing. This is tough to estimate because of how diesel engines work. You can dump as much fuel as you want, and it will burn away into black smoke. So if you are a heavy-footed driver, there will be no difference. If you drive more carefully, there will be a difference. I haven’t been tracking fuel consumption, so I don’t have data.

In the city the truck feels so much better. Previously, driving 30-35 mph was odd, it required a lot of shifting between 3rd and 4th. Now the truck rides confidently in 3rd. Overall, the gearing just feels right, and driving is more intuitive.

I would recommend that anyone considering regearing one of these trucks research getting a junkyard rear 3rd member as AlloChris mentions above. The whole unit will bolt up to the driveline, and the axles will fit, since they all had 27 splines back then. It would save quite a bit of money. Either a V6 or 4 Cylinder toyota 8" housing will bolt right on. Some years of the 4Runner had a factory E-locker with the same housing. You could regear and add a locker for not much money.

I'm not sure what's next for the truck. I've been reading about adding a Ford E/F series tank in place of the spare tire to increase range, as the current tank is around 15 gallons. This seems like a really good option since a new E/F series tank is under $200, and any aftermarket aux fuel tank is $1500+. The tanks come in a range of sizes from about 17 gallons to 38 gallons.

I'm also considering working an Arduino project to get some compact gauges added to the truck. I currently have an Autometer diesel tach, will need to add an aux fuel level, exhaust gas temp, diff temp, transmission temp, etc... adding all of those analog gauges will take up a bunch of space. Using a small OLED or LCD screen will be neater.

And of course there is the camper itself. I need to make some new models for FEA and run some fatigue scenarios to see how it shakes out.
 
Just get a second marine or rv tank and a transfer pump setup. No need to have an oem style fuel tank if you leave the stock one in place.
 

Fenderfour

Active member
Just get a second marine or rv tank and a transfer pump setup. No need to have an oem style fuel tank if you leave the stock one in place.

That's essentially what I'm doing, just getting an inexpensive ($170 new) E/F series tank to do it. They fit between the rails and have a good sending unit. All I need is a filler and an external pump to transfer gas.

Link to Pirate 4x4 Thread

Link to example tank on Amazon
 

Fenderfour

Active member
Short update with frame dimensions for truck bed mounting locations. All dims in millimeters, as I'm trying to keep everything metric to be consistent with OEM build
 

Attachments

  • BedMountingDims.png
    BedMountingDims.png
    1 MB · Views: 35

allochris

Adventurer
Hi
Short update with frame dimensions for truck bed mounting locations. All dims in millimeters, as I'm trying to keep everything metric to be consistent with OEM build
Hi! Would you be able to post pictures of your stock rear and front ring & pinion gear as well as the carrier. Want to count teeths and opinion, as well as external ribs on the 3rds housing. Thx!
 

Fenderfour

Active member
Hi

Hi! Would you be able to post pictures of your stock rear and front ring & pinion gear as well as the carrier. Want to count teeths and opinion, as well as external ribs on the 3rds housing. Thx!
I've got it all packed up, crated, and buried in the shed currently. I can provide some info from the sales slip.

the front diff worked fine with standard Toyota 7.5" IFS gears. No problems there. The rear diff was a sort of a standard 8" (non-turbo). The external housing was a little different, and I would assume the carrier was also a little different, but I don't have specifics. I know that I needed to get a new rear housing. The carrier I had stock was replaced by an Eaton TruTrac. All of this was a normal installation on the existing axle shafts and housing. The shop said it would be easy to buy an old 4runner diff and swap parts in, including the carrier and housing. The V6/turbo/supra housing would fit up fine with a US market carrier.

Parts List:
Rear:
Eaton TrueTrac Toyota 8", V6 rear, 30 spline PN 913A610
8" Toyota Drop Out Case PN YPDOT8
Toyota 8" 4.10 Ratio 4Cyl Ring and Pinion, 27 Spline PN T8-410
Early 8" Pinion Kit PN PKT8-A
RPS V6 Carrier to 4Cyl Housing Bearing PN 32010x

Front:
Toyota 7.5" IFS 1990 & up with 50mm Carrier Bearing master overhaul kit PN 35-2042L
Toyota 7.5" 4.10 Ring & Pinion PN T7.4-4.11-NG
Seal PN 710419
Pinion Seal trail safe PN 301090-1-Kit
 

Fenderfour

Active member
a bit of progress on the camper structure:

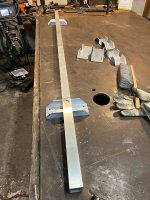
created roof rack rails that have purchased brackets that ride on the rain gutters.
image4(5).jpeg

I don't have a picture of the final welded bits, but they look like this:
image5(4).jpeg

The plan is to have the camper hard-mounted to the cab to manage the load of the bed overhang and to simplify design. Both the cab and the camper will ride on rubber bushings. I know folks will come out to say something about frame flex and such, it's almost a given around here. I wasn't able to get this very short wheel base to flex at all. It's a fully boxed frame and there is only about 30" from the rear of the cab to the center of the rear wheel. This truck isn't a unimog, heck it's not even as long as a Tacoma.

I also got going on the floor of the camper.

image3(8).jpeg

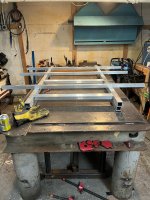
It's a simple flatbed design, the lowest square tubes are bolted to the frame by way of bushings. They also provide a bit of space to clear a frame member over the rear wheels. The lower cross pieces were welded in-situ on the truck to ensure alignment before they were brought into the shop for additional build. I could probably cut them out and save a couple of pounds.

Getting things all clamped, and square, and flat, and aligned is always a giant pain in the butt, even with a decent table.
image1(12).jpeg

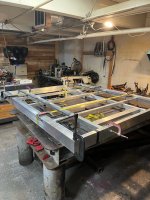
almost done, waiting on some 6061 angle to add floor board supports on the ends. The sub-floor will sit on those square bars in the middle. I will add some foam insulation board between the square bars and some kind of protective layer below that.

image0(16).jpeg

My welds range from "decent" to "Hammered dog crap". Outside corners on aluminum tube are especially hard to get penetration without blowing through the material.

I'm using a Miller Multimatic 215 with a spoolgun.
 

Fenderfour

Active member
Reading the current thread on cabover vs. longnose platforms got me thinking about my build. I'm not going to continue the argument here, but I can say one of my motiviations for getting the Hiace is that it didn't look like everything else out there. It's not a Tacoma, it's not a Fuso, it's not a Kei truck. It's a little different, but still durable and maintainable. My build is working on small and light. The goal is to carry a queen size mattress to strange places and still have a warm dry place to cook dinner. I don't have "Buy a rig" money, but I have time and a willingness to fail a few times before I get it right. Part of having this truck really is about building it out. I've been enjoying learning to weld aluminum, making decisions in the design, correcting decisions in the design, and turning semi-value raw material into worthless scrap along the way.

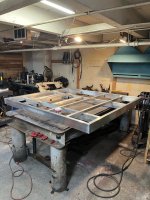
I managed to finish the bed (it's upside down on the bench here). Not shown is the small cutaway in the side rail for the fenders. I had a plan to use a portaband to make a long cut, but I learned that they are designed to cut through, not along. I ended up finishing the 20" rip cut by hand using a hack saw. If this were a steel frame, it would have been easy work with a cutting wheel.
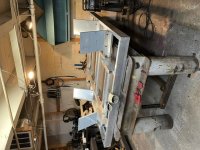
bed on table.jpg

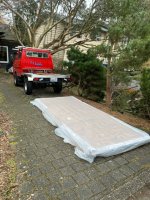
and get it mounted.
Bed On truck.jpg

You can start to see the layout. Queen size bed over the cab, a little less than 6' of length behind the cab, and the camper is the width of the truck ~ 66". It's not much space for two people, but my previous life as an alpine climber got me used to "2 man tents" on the sides of mountains, so this will be luxurious. In this photo I was using stock pieces to check alignment of things, making sure my designed measurements matched the actuals.

When I first test fit the bed, I couldn't get a bolt in the aftmost holes. I got worried that I screwed something up. Once I put the 1" poly spacers under all corners, not just the back, the bolts slid right in. The tolerances were tight enough on the hole pattern that 1" over 6' created too much of a mismatch to get a 10mm bolt through. Events like this make me think I'm good at this sort of thing.

Putting the bed together made me realize I needed some jigs. It would be nice to have a fixture table, and while I have plans to drill my current table, I haven't worked up the gumption to spend 8+ hours with a mag drill turning my table into swiss cheese, so I made some jigs out of plywood.
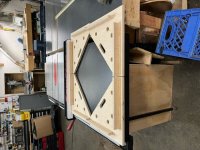
jigs.jpg

Simple construction, glued and screwed. Added a coat of high-temp primer to reduce burning when in use. Not as accurate as a $3k Fireball tool fixture table, but they are pretty damn good.
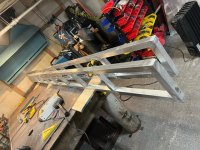
side ladder frames.jpg

Used the plywood jigs to make a ladder section that extends from the back of the camper all the way to the front of the overhang. The ladder is a holdover from when I had a cantilevered overhang. Now that it will be supported on the cab with the rails shown in a previous post it's a little overkill, but I've got the material, so why not? Each one is 12' long.

Large structures are hard.
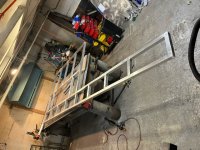
Full Side Frame.jpg

This is one full side of the camper. It's all 1.5" x .125" aluminum square tube, full dims are 12' x 5'. I spent sunday morning carefully reviewing my drawings and making a few adjustments before I cut material for both sides. I knew getting both sides done in a day was optimistic. My plan was to weld the lower section together as an assemblage, then to weld it to the existing ladder section. the first part went well, using the jigs and measuring corners to verify square. Welding the ladder to the lower was tricky. Well, set up was tricky.

As you can see, a good portion of the side is off my table. there is about 20" of clearance between the end of the frame and a table just off camera. I managed to get everything squared up and aligned using ~ 20 clamps. I welded two sides of the join and noticed that the ladder and the lower were not in plane. ********. Cutting aluminum isn't like cutting steel. If this were steel, I'd just grab the angle grinder, load a cutoff wheel, and chop it off (this is a good reason to build a steel frame if you can). Instead, I had to grind down the welds using a rounded flap disk, then use a file to clear the corner before switching to a hack saw to cut the welded areas. It's a pain in the ass, really. I added a beefy piece of c-channel to the clamp up, ensuring planarity between the pieces and re-aligned everything. Welding went well and now I have one side done.

Next step is to see if I can pilot the side down the long hall from my fab shop to the outer door of the building. If I can get it out on it's side, I can get the assembled camper out, and will finish it all in the shop. If I can't. I'll have to make individual pieces to later weld in-situ on the truck.

Seems like I may have a box on my truck by late spring...
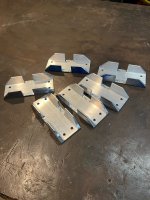
 

nyyankees588

Active member
Very cool - love the updates and excited to see it come along! As somebody with minimal metal working experience... your struggles with aluminum seem very challenging.
 

Fenderfour

Active member
It seems like a big part of modern overlanding is spending money to make the coolest looking rig, the most luxurious, the -istiest ride we can. I'm going a little differently. Building a rig on a JDM platform is plenty expensive for me, so I'm cutting costs where I can. I've had my eye on a set of 15" aluminum wheels that will save ~10 lbs at each corner. They are very modestly priced at $170 per wheel, but that's $700 I can spend on better materials, so I've put it off. I just happened to be browsing marketplace and someone nearby had a used set of the same wheels for $100. Sure, they are a little dinged and need a polish & seal, but at $100, they can't be beat.

image0(17).jpeg

I didn't check before getting them installed, but I think my old rims were 0 or +8 offset. I think these are -38mm offset, so they stick out a little. I like the wider stance. I do need to trim that forward step a little. The tires rub a bit.

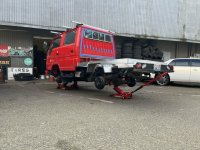
Also, the shop I had install them used an ummm... interesting method to jack up the truck...

image1(13).jpeg

A tripod is stable, right?
 

rruff

Explorer
It seems like a big part of modern overlanding is spending money to make the coolest looking rig, the most luxurious, the -istiest ride we can.
This site trends in that direction, but you are definitely not alone...

Love your rig!
 

Fenderfour

Active member
I keep chipping away at this thing.
The 5' x 12' ACM panels arrived from Grimco Yesterday. These will allow me to skin the sides without seams. More expensive, but worth the peace of mind.
image0(18).jpeg

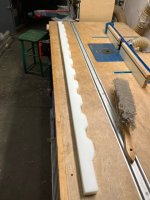
I've been working on the pass through flange for the truck. I've made this one out of 1" think HDPE. I had to scribe the rib pattern from the back of the cab onto a piece of MDF, then I cut it out, did some adjustment on a spindle sander to make sure it fit. Once the pattern was good, I used double-back tape to attach it to the stock and used my helical pattern bit in the router table to cut the part.

image1(14).jpeg

the funny thing is, I'm thinking about abandoning this and just welding some steel to the cut opening after I mount the camper. It will allow me to position the material exactly to mate to the camper. ********. I dunno.

I haven't posted a sketch in a while. I thought I would use CAD for all of this. turns out CAD was great to do some structural analysis, but completely unnecessary for fab work. I've been using visio to sketch things out, then adding dims to the sketches as I sort out interfaces.

Latest Sketch.jpg
The top is still in flux. I acquired some great 1/8" aluminum diamond plate corners. They are a flat face, a 45 degree face, and a 90 degree face. I plan to use them to overlap the top material to the sides of the roof. The lower flange will hang below the mating surface for the popup to keep water and dust from being pushed in while the top is closed and I'm driving. I've been looking at some previous popup build here. This seems like a real problem.

The goal by the NWOR this year is a box and a top, and probably some way to secure boxes in the back. A propex heater is definitely in the plan, as well as a counter/workspace for cooking. I will probably just use my JetBoil Genesis stove for cooking. No idea what the long term power system will be. For the short term it's a small power bank from Bluetti, because that's what I have.
 

Fenderfour

Active member
My last post on scribing the ribs got me thinking: so many folks think "If I had a welder and a shop, I could build that". I would say you can, and you will fail a bunch of times. I'm over here using 20+ years experience making everything fromm jewelry to cabinetry and even large scale art to figure this out. I'm faced with big challenges every time I engage with this thing. I have a raft of tools and tricks and 25 years in engineering. This stuff is hard. Be ready to fail. Be ready to buy more material after you mess it up. Be ready to change the design as the things you thought would work don't and have to be modified.

Fundamentally, engineering is balancing compromises to arrive at a system that fulfills enough requirements to still be useful.
 

rruff

Explorer
Fundamentally, engineering is balancing compromises to arrive at a system that fulfills enough requirements to still be useful.
Cheap (and easy), light, strong, durable, well insulated, convenient, serviceable, etc...

Much of it is an experiment and test, with you as the guinea pig.
 

Forum statistics

Threads
188,154
Messages
2,902,874
Members
229,582
Latest member
JSKepler
Top