National Luna Dual Battery System
National Luna Dual Battery System
Battery Tray
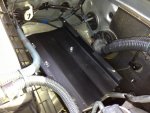
Our next step in the truck build is the installation of a dual battery system. National Luna is our choice. It is very simple to install, is automated, and provides monitoring and contact control inside the cab of our 4Runner. The trick of the install was the mounting of the second battery. In the 2013 model, there is a large space behind the air intake on the passenger side. There were a couple wiring harness items that we could easily move aside, leaving us plenty of room for a battery. The main obstacle was that this area had the slope of the rear of the wheel well, and a couple OEM threaded studs to contend with. We used the mounting locations to our advantage by fabricating a bracket to mount to these. We added a spacer block under the interior end of the bracket to help support the weight of the battery. Here are a couple photos.
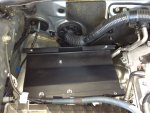
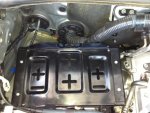
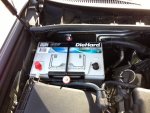
Next we mounted a battery tray to the bracket. It is a Group 31 sized tray, though we didn't install that big a battery. More on that in a minute. Here is the tray in place, and the battery.
 Battery Choice
There are plenty of batteries to choose from out there. The goal with a secondary battery is to store as large an amp hour rating as you can in the space you have. The higher the amp hour rating, the longer your system can go without requiring a charge. Another factor to consider is charge rate, or how long it takes a battery to recoup their discharge. And then, of course, is price. Always a factor. We chose to use the Sears Die Hard Platimum Series battery in a Group 65 size. The Platinum series is made for Sears by Odyssey, so we know it is made well. It is warrantied by Sears, so available most anywhere if there is an issue. It carries a very high amp hour rating for it's size, and recharges quickly. Perfect for our use. We chose the Group 65 size because it offered 75 amp hours for a little bit larger frame than the Group 34. 50% more capacity, actually. And it fit in our location very well. The Group 31 would have fit, but I was quite concerned with the weight of that size battery. It was considerably more than the Group 65. I think we struck the right balance between size/capacity/weight.
National Luna Intelligent Solenoid
We mounted the National Luna Intelligent Solenoid (IS) to a steel bracket we fabricated, then mounted the bracket in a nice clear location on the driver's side fender wall using a couple existing threaded holes. We wired the IS according the National Luna's recommendations, connecting positives first, negatives second, and the 12 gauge control wire last. Connecting the control wire got us the requisite single flash from the IS circuit board light, and we knew we were good to go. Next to the IS, we installed a 6 circuit Blue Sea fuse block. It too was mounted to a steel bracket and then mounted to the driver's side fender well. The fuse block how allows us to properly manage the secondary battery by circuiting each draw individually. Our first circuit - Fridge outlet. More on that soon.

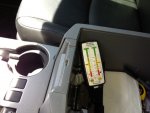 National Luna Dual Battery Controller
The final piece of the puzzle is to attach the National Luna Dual Battery Controller (DBC). We ran the control cable through the firewall, and routed it through the center console. A small hole was created to access the center console, and the DBC was connected. The vast majority of the time, I don't watch the battery charging. It is automated and out of mind. So storing this monitor in the center console makes sense to me. If you want to see the battery levels more often, there is nothing wrong with mounting the controller to your dash in some fashion.
The Intelligent Solenoid is the brains to the whole system. It monitors the charge level in each battery as well as the available current going through the system. Once it senses more than 13.1V, it activates a 5 minute timer leaving the main battery as the only battery charging for the first 5 minutes the vehicle is running. This is to recoup the charge in the main battery from the discharge of starting the vehicle. One that 5 minutes in up, the IS closes the contact in the attached solenoid putting the main and secondary batteries in parallel and the vehicle charges both batteries. Once the IS senses the voltage between the 2 batteries is below 12.7V, it opens the solenoid contact, isolating the batteries again. Sensing lower than 12.7V can happen either when the truck is turned off, or after the combined voltage of the two batteries reduces to lower than 12.7V. Sometimes with new batteries they keep a charge higher than 12.7V for a while. But once use of either battery draws them down, they isolate. Once isolated, you can draw on the secondary battery without worry of draining your main starting battery. This is a very nice set up when running a myriad of extra electrical products, namely fridges, lights, electronic chargers, etc.
The Dual Battery Controller (DBC) is connected to the IS and monitors the battery levels for you. It displays this on the face, in both voltage and percentage scales. You also have the manual control of the solenoid connection. This is very important. It allows you the ability to connect the batteries together for winching when the vehicle is off, or jump starting your own vehicle when the main battery is low. There are high and low voltage alarms as well.
All in all, I am very happy with the install. The battery is secure, the wiring is clean, the locations for mounting required no drilling at all, and we now have a live circuit management center under the hood. All monitoring is available from the cab. It is a tried and true system.
Cheers,
