You are using an out of date browser. It may not display this or other websites correctly.
You should upgrade or use an alternative browser.
You should upgrade or use an alternative browser.
2013 Toyota 4Runner, Equipt Edition Build
- Thread starter Equipt
- Start date
Equipt
Supporting Sponsor Presenting Sponsor of Overland
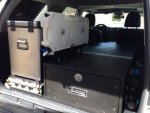
ARB Compressor
ARB Compressor
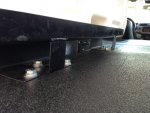
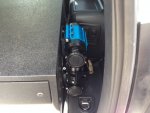
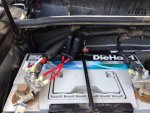
Well, now that Overland Expo is complete, the next big push is the preparation for the solo trek to Alaska in a couple weeks. It's time to finally get the projects on the board in the truck. The biggest hurdles have been electrical. I installed the switches in the center dash, and life/work got in the way. I have been too busy to get anything accomplished, and now my back is to the wall. One of the biggies was to add a compressor to the truck. On board air is very nice to have and a real boost to self containment and safety. I picked up one of the ARB CKMTP12 twin cylinder compressors for the truck. I think it is the best compromise of size and output on the market today. I had run out of room under the hood, and don't feel comfortable with this unit under the truck, so my best option was in the back.
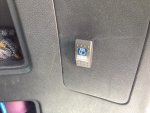
I mounted it to the side of my drawer system, and angled the line take off toward the rear. It is mounted below the plane of the drawer and is well protected in this otherwise crap catcher space. I took the electrical straight from the battery instead of through my unswitched fuse block, to take advantage of the oversized inline fuses the compressor came with. A simple switch was installed in the removable taillight panel. In case the compressor is uninstalled at some future date, the panel can easily be replaced and no one would know the difference. Electrical was run through the firewall and along the chase the Toyota used for their wire harness. I am getting really fast at removing all the panels in the truck for this stuff. Hopefully I won't have to for a while now. The compressor works great! Good clearance for ventilation, and since I am only using it for tires I feel fine without a spare tank. All in all, I am very happy with how it turned out.


washington taco
Explorer
Paul when will you be leaving for Alaska? Will you be stopping by the Washington Overland Rally in Plain WA?
Inukshuk
Guide
ARB CompressorI picked up one of the ARB CKMTP12 twin cylinder compressors for the truck. I think it is the best compromise of size and output on the market today. ... I mounted it to the side of my drawer system, and angled the line take off toward the rear. It is mounted below the plane of the drawer and is well protected in this otherwise crap catcher space. I took the electrical straight from the battery instead of through my unswitched fuse block, to take advantage of the oversized inline fuses the compressor came with. A simple switch was installed in the removable taillight panel. In case the compressor is uninstalled at some future date, the panel can easily be replaced and no one would know the difference. Electrical was run through the firewall and along the chase the Toyota used for their wire harness. I am getting really fast at removing all the panels in the truck for this stuff. Hopefully I won't have to for a while now. The compressor works great! Good clearance for ventilation, and since I am only using it for tires I feel fine without a spare tank. All in all, I am very happy with how it turned out.
Paul,
I installed mine almost identically. I used a spare dash slot and defog switch for the power relay and ran a fused 2GA from the battery to just before the compressor (so I have almost zero voltage drop, but the 10GA harness is surely adequate), where i also used the ARB fuses by shortening the harness. As a bonus, the "angled the line take off toward the rear" which I also did (with 1/4 NPT since I mounted mine further forward) helps dissipate heat. By the time 4 tires are filled, the output is rather warm.
Its a fast little compressor. Fairly quiet too.
Equipt
Supporting Sponsor Presenting Sponsor of Overland
Paul when will you be leaving for Alaska? Will you be stopping by the Washington Overland Rally in Plain WA?
I plan to head north around June 13th if I can, bagging national parks through AZ, UT, WY & MT. Then through British Columbia, Yukon Territory and AK. The goal is to check off Dead Horse AK and be back in Fairbanks in time to pick up my wife on June 27th. So that means I will not be in a spot to attend the rally. Sorry about that. Mario from AT Overland will be there, and the Equipt Chaser will be on display too. I'll be there in spirit.
Cheers,
Equipt
Supporting Sponsor Presenting Sponsor of Overland
csclifford
Outside of Comfort
Just read through the entire thread. Some really great write-ups of everything you have done so far. I can say that I've learned a lot.
Thanks!
Thanks!
Inukshuk
Guide
Water Solution Re-Install
I re-installed the rear roto-pak water solution on top of the composite drawer. This time I mounted it directly to the the surface of the drawer instead of on top of the tie-down rail. Six opposing 3/8" bolts hold it rock solid. No wobble at all this time.
Cheers,
I'm going to copy that idea. It works well with my existing setup on so many levels. I have been meaning to get a few rotopax for a while. Thanks Paul!
Equipt
Supporting Sponsor Presenting Sponsor of Overland
Looking good.
Any plans to re-gear?
Nope. No need. I am running the 285s right now and haven't seen that big a reduction in performance to warrant the change. I re-geared the 100 Series when I jumped to 315s on it. It helped the lower end, but hampered the higher end and growled at me at any speed. The vast majority of my travel is highway and gravel/graded road. The 4Runner gets over the ground just fine as it sits, and I'd rather not ******** with something that isn't broke. It's just one more step away from how the truck was engineered, and one closer to issues.
Now adding a TRD Supercharger. That's a whole other subject. Wish they would get that out soon.
Cheers,
Equipt
Supporting Sponsor Presenting Sponsor of Overland
Auxiliary Electrical Installation, 1
Auxiliary Electrical Installation, 1
In previous posts I have mentioned pending electrical updates for the 4Runner. It's been a long time coming, but I have made some significant strides in that direction this past week. The project was complex, and honestly has been the most time consuming endeavor on the vehicle so far. The goal was to supplement the vehicle's electrical system with a switched fuse/relay distribution panel to run accessories I did not want live all the time. I had previously installed a Blue Sea fuse block for live stuff, like the fridge. This was a different animal, for running various lighting and accessories in the dash. Here is the list of items I had in mind.
Components
6 switch panel in center console
Wilson mobile amplifier
Icom 2 Meter HAM
Baja Designs Fuego HIDs
Baja Designs LED Light Bar
Baja Designs Rear LEDs
ARB Twin Cylinder Compressor
USB ports in center console
In-tent LED lighting
Plan
Here is the schematic that I put together for the project.
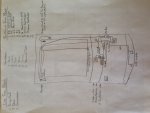
With blueprint in hand, installation of all the components was next. Lights on the bumper and LED bar mounted under the front of the rack. Switches were carved into place, 2 meter was temporarily hooked to live circuit, mobile amp and antenna temped in, and compressor finally mounted. Rear LEDs and in-tent lighting in place. Now the fun part. Management and distribution.
Management
I looked at the various options out there for electrical distribution and management. The sPod system is the one that seems to rise above it all. They hadn't put together a 5th Gen 4Runner set yet, and the universal application was very tempting. I could easily have worked here. But as I mentioned early on, my goal is to know more about the vehicle and the systems I am putting in it. So I opted for another route and went with the Bussman Mini Fuse/Relay block and learned how to wire it myself. I hadn't done much with relays before, so this would expand my understanding. This fuse relay block is very nice. 10 fuses and 5 relays in a very compact size. 5 of the fuse locations would run the 5 relays, controlled by 5 of the center console switches (6th switch is spare).
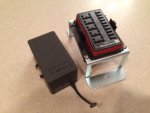

I installed the block under the hood, driver side, behind the OEM fuse panel and just below the Intelligent Solenoid and live fuse panel. There are a series of OEM threaded mounting points there, so I fabricated a small plate to mount in place and provide sufficient room for the relay/fuse block and continuous duty relay (more on that in a minute). I had to relocate one OEM electrical termination to the plate as well.
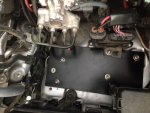
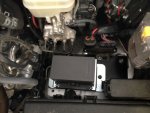
OK, so now the management is ready. The relay/fuse block is in place and the switches are too. Time for distribution.
Auxiliary Electrical Installation, 1
In previous posts I have mentioned pending electrical updates for the 4Runner. It's been a long time coming, but I have made some significant strides in that direction this past week. The project was complex, and honestly has been the most time consuming endeavor on the vehicle so far. The goal was to supplement the vehicle's electrical system with a switched fuse/relay distribution panel to run accessories I did not want live all the time. I had previously installed a Blue Sea fuse block for live stuff, like the fridge. This was a different animal, for running various lighting and accessories in the dash. Here is the list of items I had in mind.
Components
6 switch panel in center console
Wilson mobile amplifier
Icom 2 Meter HAM
Baja Designs Fuego HIDs
Baja Designs LED Light Bar
Baja Designs Rear LEDs
ARB Twin Cylinder Compressor
USB ports in center console
In-tent LED lighting
Plan
Here is the schematic that I put together for the project.

With blueprint in hand, installation of all the components was next. Lights on the bumper and LED bar mounted under the front of the rack. Switches were carved into place, 2 meter was temporarily hooked to live circuit, mobile amp and antenna temped in, and compressor finally mounted. Rear LEDs and in-tent lighting in place. Now the fun part. Management and distribution.
Management
I looked at the various options out there for electrical distribution and management. The sPod system is the one that seems to rise above it all. They hadn't put together a 5th Gen 4Runner set yet, and the universal application was very tempting. I could easily have worked here. But as I mentioned early on, my goal is to know more about the vehicle and the systems I am putting in it. So I opted for another route and went with the Bussman Mini Fuse/Relay block and learned how to wire it myself. I hadn't done much with relays before, so this would expand my understanding. This fuse relay block is very nice. 10 fuses and 5 relays in a very compact size. 5 of the fuse locations would run the 5 relays, controlled by 5 of the center console switches (6th switch is spare).


I installed the block under the hood, driver side, behind the OEM fuse panel and just below the Intelligent Solenoid and live fuse panel. There are a series of OEM threaded mounting points there, so I fabricated a small plate to mount in place and provide sufficient room for the relay/fuse block and continuous duty relay (more on that in a minute). I had to relocate one OEM electrical termination to the plate as well.


OK, so now the management is ready. The relay/fuse block is in place and the switches are too. Time for distribution.
Equipt
Supporting Sponsor Presenting Sponsor of Overland
Auxiliary Electrical Installation, 2
Auxiliary Electrical Installation, 2
Distribution
Running wires throughout the truck is a creative process. Finding the right path is key. I chose to run all the electrical internally, going through the firewall and channeling the wiring to the center console and to the rear of the vehicle. There are a couple opportunities to get through the firewall without creating new holes. I ran several lines through the existing gasket on the drivers side, the lines for the compressor through an existing gasket on passenger side, but the majority of the lines I went through a rubber firewall plug that I cored out and made a grommet out of it. Switch legs and center console power all went through it. Between the live and switched power lines to the center console, the switch legs, seat heater power, roof rack power and compressor, I guess I had 18-20 wires passing through the firewall. Equivalent to the diameter of your index finger. We also had line voltage to the panel, and power to the front lights.
The unique thing about this relay/fuse block is that it is switched power from the auxiliary battery. What I did is ran the line side power to a continuous duty relay, very similar in design to the solenoid used in the National Luna Intelligent Solenoid. It has a power in tap, a power out tap, and taps for switch voltage and ground. A #10 comes from the aux battery to line in, and a #10 from line out to the relay/fuse block. A ground wire for the switch is grounded to the vehicle. The last wire is the switch voltage. When energized, it closed the relay to supply power to the switched fuse/relay block. I hooked this to a circuit that is only on when the car is on.
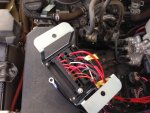
Wiring up the relay/fuse block wasn't as bad as it looks. I learned all about weather pak electrical termination too. Once you know what wire goes where, it's pretty straight forward. Power from fuse to relay power in, line from switch, and power out to accessory. The relays are grounded in the block. Feed power to the switch, switch feeds relay, relay feeds accessory higher amperage as needed. Plug and play. Here is what the fuse/relay block ended up looking like.

Center Console
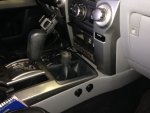
I ran a live circuit and a switched circuit to the center console. The live circuit was there to provide power to (2) dual USB ports that I installed on the center console passenger side. We are always running out of these, so we're covered now. I also now have power there for other future components. The switched circuit was there to supply power to the mobile/data amp, the 2 meter radio, and the the switch panel. In preparing for the electrical installation, I needed an elegant solution for inline distribution of power. A way to take one circuit to a location and split it among several duties. Butt splices and termination caps are not as clean as I wanted. I sourced a cool little gizmo made by Wago. It is a re-usable compression wire terminal, rated for 12-300V, and comes in 2 to 5 wire configurations. I bought my 3 conductor terminals through Amazon. Very handy. So I could bring one line in, feed a second one and an accessory, and feed two more accessories with the second one. And I can open them up and interchange wiring as necessary. Perfect solution for vehicle wiring.

Rear of Vehicle
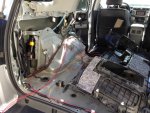
Power to the rear of the vehicle included 2 switched circuits for the roof, a live circuit to the roof, ground to the roof, power to compressor, and power to compressor switch. Several lines were run down each side of the vehicle in the OEM harness chase under the doorwell covers and through the rear side panels. Roof and live circuits on driver side and compressor circuits on passenger side. The first couple times you remove these panels, it takes some time. But after a half dozen times it is pretty quick. You learn where the fasteners are. I ended up running the lines for the compressor straight off the aux battery. The required (2) 40A fuses, and those are larger than the panels can manage. (2) more 40A lines were needed for the live and switched fuse panels.
Roof Rack Electrical
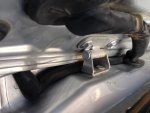
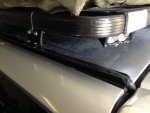
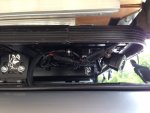
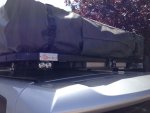
The biggest challenge in the distribution of power in the vehicle is getting power to the roof rack. We needed switched power for the LED Light bar on front, switched power for the rear LEDs, and a live circuit for in-tent LED lighting, and a ground for it all. Four wires to the roof. I looked at several options. I am opposed to drilling unnecessary holes in the roof. Against it, at most any cost. Non-reversible. The windshield offers a small recess on the sides that could work. It did in the 100 Series, but it is quite small and really messes with windshield replacement. The best alternative that I could come up with is to take the power up through the rear hatch chase and navigate it to the roof rack channel. I routed the wiring up through the liner and poked it out a hole I made in the hatch harness chase. I ran the wires through a weather strip bulb with adhesive on one side, transferring to wire loom once on the roof, and sealed the connection with heat shrink. The wire loom recesses in the roof rack rail very well. I brought it up to the rack, and distributed the power 3 ways through weather pack connectors. From here I routed each circuit in loom to each needed location. Is it a perfect installation? Maybe. I think that over time the weather strip may give way, and I will need to come up with a better option. But for now, I will use it and see.
Roof Rack Lights
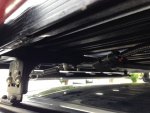
Now I have a switched circuit to the front LED Bar, a switched circuit to the rear LEDs, and a live circuit going up into the roof top tent for lighting there as well. I channeled the loom through the bottom of the rack, between the top slats and the cross braces, and secured the connections to the bottom of the rack as well.
Conclusion
The addition of the electrical distribution and management was well worth it. It has provided the solutions that were right for my application, and it has created the foundation for future use. I have 6 live and 2 switched circuits in reserve, as well as 3 switches ready to go. Opting for the Bussman fuse/relay block was a good call for me. All in, I spent about $100 on components on it, and I learned a great deal. I really took the time on this system to ensure it was good enough for the long term. And I am satisfied with the outcome. I hope this helps some of you contemplating the same issues. Let me know if I can offer any suggestions along the way. Been there, done this.
Cheers,
Auxiliary Electrical Installation, 2
Distribution
Running wires throughout the truck is a creative process. Finding the right path is key. I chose to run all the electrical internally, going through the firewall and channeling the wiring to the center console and to the rear of the vehicle. There are a couple opportunities to get through the firewall without creating new holes. I ran several lines through the existing gasket on the drivers side, the lines for the compressor through an existing gasket on passenger side, but the majority of the lines I went through a rubber firewall plug that I cored out and made a grommet out of it. Switch legs and center console power all went through it. Between the live and switched power lines to the center console, the switch legs, seat heater power, roof rack power and compressor, I guess I had 18-20 wires passing through the firewall. Equivalent to the diameter of your index finger. We also had line voltage to the panel, and power to the front lights.
The unique thing about this relay/fuse block is that it is switched power from the auxiliary battery. What I did is ran the line side power to a continuous duty relay, very similar in design to the solenoid used in the National Luna Intelligent Solenoid. It has a power in tap, a power out tap, and taps for switch voltage and ground. A #10 comes from the aux battery to line in, and a #10 from line out to the relay/fuse block. A ground wire for the switch is grounded to the vehicle. The last wire is the switch voltage. When energized, it closed the relay to supply power to the switched fuse/relay block. I hooked this to a circuit that is only on when the car is on.
Wiring up the relay/fuse block wasn't as bad as it looks. I learned all about weather pak electrical termination too. Once you know what wire goes where, it's pretty straight forward. Power from fuse to relay power in, line from switch, and power out to accessory. The relays are grounded in the block. Feed power to the switch, switch feeds relay, relay feeds accessory higher amperage as needed. Plug and play. Here is what the fuse/relay block ended up looking like.


Center Console
I ran a live circuit and a switched circuit to the center console. The live circuit was there to provide power to (2) dual USB ports that I installed on the center console passenger side. We are always running out of these, so we're covered now. I also now have power there for other future components. The switched circuit was there to supply power to the mobile/data amp, the 2 meter radio, and the the switch panel. In preparing for the electrical installation, I needed an elegant solution for inline distribution of power. A way to take one circuit to a location and split it among several duties. Butt splices and termination caps are not as clean as I wanted. I sourced a cool little gizmo made by Wago. It is a re-usable compression wire terminal, rated for 12-300V, and comes in 2 to 5 wire configurations. I bought my 3 conductor terminals through Amazon. Very handy. So I could bring one line in, feed a second one and an accessory, and feed two more accessories with the second one. And I can open them up and interchange wiring as necessary. Perfect solution for vehicle wiring.


Rear of Vehicle
Power to the rear of the vehicle included 2 switched circuits for the roof, a live circuit to the roof, ground to the roof, power to compressor, and power to compressor switch. Several lines were run down each side of the vehicle in the OEM harness chase under the doorwell covers and through the rear side panels. Roof and live circuits on driver side and compressor circuits on passenger side. The first couple times you remove these panels, it takes some time. But after a half dozen times it is pretty quick. You learn where the fasteners are. I ended up running the lines for the compressor straight off the aux battery. The required (2) 40A fuses, and those are larger than the panels can manage. (2) more 40A lines were needed for the live and switched fuse panels.

Roof Rack Electrical
The biggest challenge in the distribution of power in the vehicle is getting power to the roof rack. We needed switched power for the LED Light bar on front, switched power for the rear LEDs, and a live circuit for in-tent LED lighting, and a ground for it all. Four wires to the roof. I looked at several options. I am opposed to drilling unnecessary holes in the roof. Against it, at most any cost. Non-reversible. The windshield offers a small recess on the sides that could work. It did in the 100 Series, but it is quite small and really messes with windshield replacement. The best alternative that I could come up with is to take the power up through the rear hatch chase and navigate it to the roof rack channel. I routed the wiring up through the liner and poked it out a hole I made in the hatch harness chase. I ran the wires through a weather strip bulb with adhesive on one side, transferring to wire loom once on the roof, and sealed the connection with heat shrink. The wire loom recesses in the roof rack rail very well. I brought it up to the rack, and distributed the power 3 ways through weather pack connectors. From here I routed each circuit in loom to each needed location. Is it a perfect installation? Maybe. I think that over time the weather strip may give way, and I will need to come up with a better option. But for now, I will use it and see.


Roof Rack Lights
Now I have a switched circuit to the front LED Bar, a switched circuit to the rear LEDs, and a live circuit going up into the roof top tent for lighting there as well. I channeled the loom through the bottom of the rack, between the top slats and the cross braces, and secured the connections to the bottom of the rack as well.


Conclusion
The addition of the electrical distribution and management was well worth it. It has provided the solutions that were right for my application, and it has created the foundation for future use. I have 6 live and 2 switched circuits in reserve, as well as 3 switches ready to go. Opting for the Bussman fuse/relay block was a good call for me. All in, I spent about $100 on components on it, and I learned a great deal. I really took the time on this system to ensure it was good enough for the long term. And I am satisfied with the outcome. I hope this helps some of you contemplating the same issues. Let me know if I can offer any suggestions along the way. Been there, done this.
Cheers,
Last edited:
SDDiver5
Expedition Leader
Awesome write up! Thanks, Paul.
Electircal wiring is my weakest point so I will def be referencing this at some point.
I was told once that it's not good for any accessories if you run power wires down the car and have them bunched together because it can cause some interference. Is there any validity to that statement?
Electircal wiring is my weakest point so I will def be referencing this at some point.
I was told once that it's not good for any accessories if you run power wires down the car and have them bunched together because it can cause some interference. Is there any validity to that statement?
Similar threads
- Replies
- 1
- Views
- 758
- Replies
- 9
- Views
- 3K
- Replies
- 3
- Views
- 1K
- Replies
- 0
- Views
- 646

